Clean installation of sierra. APFS does not work with Fusion Drive or regular drives. Backing Up Data Using Time Machine
OS on personal computers created for Windows systems, is always associated with numerous difficulties and nuances. This operation requires certain technical knowledge of the installer, however, in most cases, this process ends unsuccessfully. How to protect yourself from such a failure, and what you need to take into account, we will discuss in this review.
So, if you are one of those who nevertheless decided to install a completely new macOS operating system, known as Sierra, on your PC, from Apple, then we recommend that you first pay attention to the products of the tonymacx86 programming laboratory. It was they who created utilities capable of porting Apple’s proprietary OS to “traditional” personal computers designed for Microsoft systems. The universal installation utility UniBeast will allow you to install without any difficulties macOS Sierra to your home or work Windows PC.
Using the instructions below, consisting of a series of sequential steps, you will be able to independently install macOS Sierra on personal computer in the easiest way for you.
Things to consider:
- A macOS Sierra OS image burned to disk.
- The most latest version the UniBeast utility, as well as its auxiliary version – MultiBeast.
- USB flash drive, minimum 8 GB.
- Desktop PC or laptop with computing processor from the company (only!) Intel.
Step-by-step description of installing macOS Sierra on a Windows PC:

Step 1: First of all, download the disk image future system macOS Sierra. It can be found on trackers or in the official App Store.
Step 3: Download setup files image macOS disk and the UniBeast program, then create the image bootable flash drive. This is what you need to create using the downloaded UniBeast program. Launch the program for Mac.
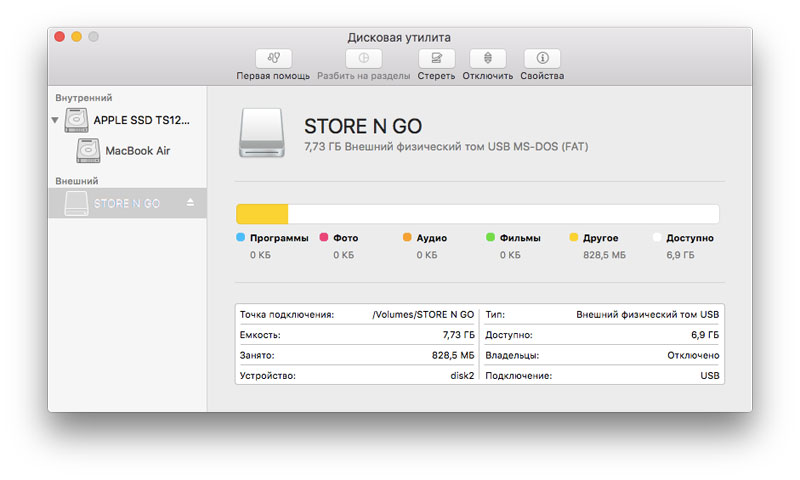
Step 4: In the left panel, select the required USB drive and click Erase. This button is located on the top panel. The bootable USB flash drive with which we are working must be renamed SierraInstaller (any name in Latin will do, as long as it does not contain spaces). You also need to make sure that the correct file format was selected, namely OS X Extended (journaled). Click on Erase again.

Step 5: We launch UniBeast again, which we downloaded in the second step. We skip the first menus, click Continue and agree, where you need to select Agree. In the Destination Select menu, select a working USB drive and click Continue.

Sometimes the program produces an error at this stage. Therefore, make sure that the executive file is named exactly “Install macOS Sierra” (was downloaded in step 1), has already been moved to program folder(directory).
Step 6: In the Select OS Installation menu, check whether Sierra is selected in the settings and then click on continue.
Step 7: The Bootloader Configuration menu follows. In case you have an older processor system (Socket 1156), select the boot type Legacy USB Support. Click Continue.

Step 8: You don't have to go to the Graphics Configuration menu, as it is optional. Optionally, you can select acceptable graphics for better performance.
Step 9: Enter New Password admin (if necessary) and finally click Install. Now it all depends on the PC performance as well as the USB data transfer speed. On average, this takes up to half an hour.

Step 10: Next, we launch another program that needs to be downloaded. It is called MultiBeast for Sierra (on the website of the same manufacturer UniBeast). Then we move the downloaded MultiBeast program to the USB drive used for the image.
Step 11: After this, installing the “Apple” OS will be very similar to installing a traditional “window” operating system. We connect the drive with the macOS image to the USB port of the PC and launch step-by-step installation systems. First, go to the BIOS and select the appropriate drive.
Step 12: Reboot the computer again after exiting the BIOS. When start screen download, select the Boot Mac OS option.
Step 13: Also in the menu of this screen, select our flash drive and click Enter key, to continue. Using the macOS installer, format the disk. Next, in the menu bar at the top, go to the Utilities section and here select the Disk Utility sub-item.
- Select the disk on the left. Click Erase.
- Toggle the Partition Scheme checkbox and click OK.
- Rename the disk to Macintosh HD, select OS X Extended again.
- Confirm specified changes by clicking on erase using the Erase command.

Step 14: When all installation processes are complete, close the Disk Utility menu and return to the installer. Here we specify Macintosh HD so that we can then install Sierra. We carry out standard procedure for installing the operating system.

Step 15: Once the installation is complete, the computer will automatically restart. When it turns on, open boot menu.
Step 16: Select the USB partition and also Sierra and complete the macOS Sierra installation process.
Step 17: On last step, you should see the desktop of the newly installed macOS Sierra. Using the same MultiBeast utility we install everything necessary drivers for Wi-Fi, audio, graphics, etc.

That's all! Now you are the user of an excellent and efficient hackintosh, with which you can work on a project of any complexity, or simply use this OS as something familiar, with which you will be comfortable working for many years.
Which, according to Cupertino, thanks to new technologies makes Mac computers more reliable, functional and faster. A little later the first one was released macOS beta High Sierra, and today we will tell you how to create your own Bootable USB drive to install this operating system on your Mac.
To do a so-called "clean" installation, you first need to create boot disk, which can be used as a USB disk. This will allow you to install macOS High Sierra on multiple computers. In addition, you must have access to an image of the new desktop operating system. If you don't have paid account developer, you can wait until the public beta version of macOS High Sierra becomes available or download its image from third-party resources.
Read the instructions to the very end before you begin the process of creating a USB drive with macOS High Sierra and its subsequent installation.
Requirements:
1. Computer *
running OS X 10.7 Lion or higher.
2. macOS High Sierra installer downloaded to your computer.
3. USB disk with a capacity of at least 8 GB.
* Your computer must be compatible with macOS High Sierra - Mac compatibility list.
How to Create a Bootable USB Drive with macOS High Sierra
1. Download the macOS High Sierra installer. By default, the distribution is named Install macOS 10.13 Beta. You can rename it, but to avoid confusion, we recommend leaving this name. Make sure that the Install macOS 10.13 Beta file is located in the Applications folder (this is where all programs from your Mac are downloaded App Store). If it is located elsewhere on your computer, move it to this folder.
2. Connect the USB drive to your Mac. If it's not already formatted, run Disk Utility ( “Programs” → “Utilities” → “Disk Utility”) and format it by selecting "GUID Partition Scheme" and "Mac OS Extended (Journaled)". This process will erase all data from the USB drive.

3. You can choose any name as the name of the USB drive. convenient name, for example, "USB". First make sure that there are no other drives with the same name connected to your computer.
4. Launch "Terminal" ( “Programs” → “Utilities” → “Terminal”) and enter the following command * :
sudo /Applications/Install\ macOS\ 10.13\ Beta.app/Contents/Resources/createinstallmedia --volume /Volumes/USB --applicationpath /Applications/Install\ macOS\ 10.13\ Beta.app --nointeraction
Once done, press Enter to move Install macOS 10.13 Beta to the USB drive and make it bootable.
* If you renamed the macOS High Sierra installer distribution or USB drive, edit the command to include your names. If the macOS High Sierra installer was not in your Applications folder, edit the command to its current location.

5. Enter your password (it does not appear on the screen) and press Enter.

This will begin the process of creating a bootable USB drive with macOS High Sierra. During the entire process, the USB drive will not be visible on the desktop. The process of creating a bootable USB disk will be accompanied in the Terminal window with the following text:
Erasing Disk: 0%... 10%... 20%... 30%...100%...
Copying installer files to disk…
Copy complete.
Making disk bootable...
Copying boot files...
Copy complete.
Done.
Once the files have been copied, your USB drive will appear on your desktop again and Terminal will tell you that the process is complete.
6. That's all! The bootable USB drive with macOS High Sierra has been created, you can close Terminal.
How to Install macOS High Sierra on Mac from a Bootable USB Drive
1. Connect your macOS High Sierra USB drive to your Mac.
2. Press and hold on the keyboard Alt key(Option, ⌥) and restart your Mac. If your Mac was turned off, simply turn it on.
3. In the window that appears, select the bootable USB drive with macOS High Sierra as the boot drive. After this, the macOS High Sierra installation window will appear on the screen.

4. Click “Install” and wait for macOS High Sierra to install.
******************************************
Subscribe to our Telegram channel to stay up to date with the latest latest news and rumors from Apple world and other largest IT companies in the world!
To subscribe to the Newapples channel on Telegram, follow this link from any device on which this messenger is installed and click on the “Join” button at the bottom of the screen.
Sooner or later the day comes when you need to reinstall operating system Mac OS on PC MacBook. This task- no more difficult than reinstalling Windows. This is what we will talk about.
operating system on MacBook
Reasons for reinstalling the operating room Mac systems The OS on a Mac computer is:
- Damage or wear of the built-in storage device (HDD);
- selling or donating a MacBook to another person;
- "moving" to another MacBook (more new model, but with preservation previous version MacOS systems);
- data transfer to Apple gadgets or to another computer.
What happens when reinstalling MacOS:
- “from scratch”, including formatting the built-in disk;
- reinstallation “on top”, preserving personal data and applications (macOS update).
For example, using the MacAppStore you can update the version of OS X Lion and OS X Mountain Lion to the newer OS X Mavericks.
Procedure for sale or transfer Mac computer another user next. It deserves special mention.
- Backup personal data from a MacBook to a separate storage device or cloud service.
- Shutdown special services and functionality that controls copying and transferring data.
- Erase all personal information from disk.
Attention! Before you start reinstalling MacOS on your MacBook PC, take the trouble to save all your data on external media!
This will be discussed first.
Backing Up Data Using Time Machine
The Time Machine application is designed to backup personal files from a MacBook and restore them back to it. But it requires external USB drives (HDD, SDD drives) formatted in MacOS Extended or Xsan - FAT/NTFS file systems designed for Windows and Android are not supported. If the disk was previously formatted in FAT/NTFS formats, the MacBook will not accept it if you refuse to reformat it “for yourself.” The Time Machine application is launched from system settings MacOS in apple menu
. When you connect an external hard drive, a corresponding notification will appear. Do you really want to destroy all data recorded on this drive
in a different format?

If the external drive has already been formatted, the Time Machine application will give the go-ahead for its use. Confirm your request.
Do you really want to copy your data to this drive?

Interestingly, backups in the Time Machine program are fully automated - the backup copy is “refreshed” hourly, and their storage is organized, so you won’t get lost in them. In addition, copying is also possible to Apple server(like iCloud) and in storage local network, supporting Apple File Protocol. All this often helps, if you need to reinstall MacOS, to avoid losing precious working time.
After copying all your data, you can start reinstalling MacOS.
Reinstalling MacOS on Mac
There are several ways to reinstall the MacOS operating system on a MacBook: “clean” installation from a flash drive, installation “over” the previous version (updating from MacAppStore) and MacOS recovery from backup.
How to reinstall Mac OS from an installation flash drive
The preliminary steps are as follows.
- Download installation image Mac OS X operating system from the store Mac App Store or from third party sites.
- When downloading is complete, click right click mouse over the downloaded file and select “Show package contents”.
- Go to the /Contents/SharedSupport/ folder, copy the InstallESD.dmg file to safe place on the disk and mount it on your MacOS desktop.
We will need the Disk Utility application included with MacOS. Next steps these are.

Disk Utility will create an installation flash drive in automatic mode, and she performs this operation quite reliably. When copying is complete, Disk Utility will notify you.
Congratulations! Installation MacOS flash drive created! You can restart your MacBook. Preparing to install MacOS is as follows.

All! MacOS installation has started. The MacOS operating system will install automatically - this will take 30-100 minutes, depending on the performance of your MacBook. After it, your PC will be immediately ready for use.
How to install the system without formatting the internal drive
Installing MacOS without erasing the disk means downloading and installing MacOS updates directly from the MacAppStore. Installation flash drive not needed here. This reminds iOS update on smartphones and tablets over the air. This method is good for those who once bought a MacBook - and are not going to change it, but, on the contrary, will work on it for many years, because MacBook computers, like Apple iDevice gadgets, are of very high quality, reliable and convenient.
Before updating, check if your MacBook meets the hardware requirements new version MacOS - otherwise it will slow down.
Not every previous version of MacOS can be updated to the desired version. So, if your MacBook is running macOS Snow Leopard (10.6.8) and your MacBook will run macOS Sierra, first upgrade to macOS X El Capitan.
The version of MacOS Sierra is taken as an example. Other copies are searched for and “installed” in exactly the same way. Your actions are as follows.

If you have OS X El Capitan 10.11.5 (or more recent), the macOS Sierra version downloads silently. You will then be prompted to install this version.

Click on the install button
During the installation of MacOS, the PC restarts several times. If this version does not suit you (the performance of the MacBook has dropped), “roll back” to the previous one (for example, OS X El Capitan), with which the PC performance was very satisfactory.
Restoring MacOS from a backup
For example, we take a “rollback” from MacOS Sierra (10.12) back to OS X El Capitan (10.11) or OS X Yosemite (10.10). Let's say there are backups made in Time app Machine before installing MacOS Sierra.
Important! You can only restore a MacOS system from a backup to the same MacBook. Trying to transfer your copy of MacOS with data to another PC in this way is useless. Use other methods.
- Connect an external drive to your MacBook and save existing files in Time Machine, naming the new copy MacOS Sierra.
- Open your previous copy of OS X Yosemite with Time Machine on a different drive after connecting it to your MacBook.
- Restart your MacBook while holding down Command+R on your keyboard. The familiar MacOS recovery menu will open.
- From the OS X Utilities menu, select Restore from Backup copies of Time Machine".
- Once in the “Recover from Time Machine” recovery window, click on “Continue”, and then specify the source - the disk with the OS X El Capitan “backup”.
- The saved copy should be: In the case of OS X El Capitan, the MacOS version should be 10.11.x. Click the Continue button. Specify installation disk to restore from a copy, click on “Restore”.
Ready! The OS X El Capitan version will be reinstalled.
Transferring a copy of the operating system and your data to another MacBook
Go to Programs/Utilities and open Migration Assistant. The structure of your files and folders will be preserved.

Click to continue
When running, the application requires closing all other running programs.
If both computers are working, but you still want to duplicate your version of MacOS and all data on the second computer, connect the computers to each other using network cable LAN, wireless Wi-Fi networks. Connecting directly using a Thunderbolt or FireWire cable will require running your previous Mac in backup mode, making the Assistant experience a little more complicated. However, both methods work well. You can connect an external disk with a backup copy to the new PC instead of the previous PC - in this case, the operation of the Assistant on the new PC will not change significantly.
So, the procedure is as follows. Taken as an example normal mode operation of the previous PC with Assistant.

All! The copy session has started. This can take anywhere from 30 minutes to two hours, depending on the amount of data and the performance of both Macs.
Problems encountered when reinstalling MacOS
Problems when updating or “rolling back” may be as follows.
- No recent backups. You once disabled backup yourself. Copy your files now to avoid losing them by starting the process manually. Enable backup.
- Error during the next backup or when restoring personal data from previous copy. External drive, which has been recorded so far, is unsuitable for further use. Contact an Apple service center or certified computer repair shop to restore your data. This procedure is not free.
- Error on next MacOS update. Your Mac PC may no longer be supported. This happens once every few years. You will continue to use the current version of MacOS until you replace your Apple PC.
- The computer began to work noticeably slower than before the update. Minimum system requirements next new version equal or exceeded specifications your PC. “Roll back” to any of the previous ones MacOS versions. Typically, Apple tries to prevent this from happening - it simply stops supporting older computers, just like installing iOS version 10.x is no longer possible.
- Your PC after several active years suddenly began to freeze despite the fact that you did not update MacOS. Maybe it's time to replace the internal HDD/SSD drive? Try to backup your important data before replacing internal disk- while something is still being read from it.
- It is impossible to “roll back” to one of the previous ones installed versions MacOS. The “rollback” must be done gradually. If there are no previous backups, download a new “image” and “rollback” first to this version, and then repeat the “rollback” to an even higher one earlier version MacOS.
Video on the topic
Reinstalling MacOS - "on top" or "from scratch" - is not difficult. It is only important to secure your data. This real way extend the life of your beloved MacBook for another number of years. You will succeed!
Dark theme dynamic wallpaper, the new Mac App Store and a bunch of other improvements are worth upgrading to macOS Mojave. Moreover, the update is free.
If the computer is not older than 2012 with tens of free gigabytes on the disk, then there should be no problems. But it’s better to prepare your Mac in advance for the update: make a backup copy, check the disk for errors, and clean your computer of software junk.
Which Macs support macOS Mojave
The main requirement for macOS Mojave is graphics system supporting Apple's Metal technology. All devices released after 2012 fit this criterion.
- iMac, 2012+;
- iMac Pro;
- MacBook 12;
- MacBook Pro, 2012+;
- MacBook Air, 2012+;
- Mac Mini, 2012+;
- Mac Pro, 2013+.
 The year of manufacture can be viewed in the About This Mac window through the Apple menu
 Make a backup
This way you will protect yourself from accidental deletion. necessary information. And also protect yourself from possible failures when migrating to the new AFPS file system. This file system is required for Mojave and the conversion will occur during the upgrade.
Simple and free way make a backup copy.
Cleaning your computer with CleanMyMac X
CleanMyMac X - universal utility to clean and maintain your Mac.
To prepare to upgrade to macOS Mojave, do the following:
1. Remove debris using the " Smart Scan" The program will remove unnecessary language packs, logs, temporary files, leftovers remote applications and other garbage. It will also check your computer for malware and keyloggers. This is especially true for those who do not hesitate to install hacked applications.
 Smart Scan will remove small debris. Suitable for weekly cleaning
 2. Now scan your Mac with the “Service Junk” module, then click on the “Details” button. In the list that appears, CleanMyMac will show application installation files in .dmg format. Remove everything you no longer need.
 CleanMyMacX will find and help you remove unused application installers
 3. Go to the “Uninstaller” section and mark the removal of programs that you do not need. For this, the “Unused” tab is useful, where you can find a list of applications that you have not launched for a long time.
 CleanMyMac knows which apps you haven't used in a while and will suggest you remove them
 4. In the Update Manager section, I recommend updating programs downloaded bypassing the Mac App Store. Many available updates they just add compatibility with macOS Mojave.
 Through the "Updates" menu you can quickly update software downloaded to Bypass App Store
 5. In the “Optimization” section, you can check the list of applications in startup and remove unnecessary ones from there. This will free up space in your menu bar and your Mac will boot up faster.
If there are many applications in startup, the menu bar will swell to obscene sizes. CleanMyMac can help you remove unnecessary applications from startup
 6. In the Maintenance section, check your drive for errors, run the built-in macOS maintenance scripts, and rebuild the launch services databases.
To do this, select the following:
- Execute maintenance scripts;
- Rebuilding the launch services database;
- Correct access rights.
 Be sure to check the disk for errors so that you can update to file system AFPS went smoothly
 Use DaisyDisk to Delete Large Files
DaisyDisk visualizes the contents of your disk in the form of a chart and allows you to see exactly what is taking up a lot of space on your system.
Despite the overall stability and reliability of macOS, the system is still gradually becoming cluttered temporary files and loses in speed and performance. To avoid such side effects, when large-scale update it's better to use " clean install» - reinstalling the system from scratch. We tell you how to do this.
The first thing to do before updating your Mac is full backup data. Of course, you can get by by simply uploading important documents to iCloud or an alternative cloud storage, but an additional backup never hurt anyone. And remember that copies of old systems work with new ones, but there is no backward compatibility.
We in the editorial office use almost all of them for backups. external drives- on one of these you can store several “saves” at once, and it’s easy to record new ones. Just open the pre-installed Time Machine utility. It is automatically activated when a new one is connected hard drive(however, this is possible).

After successful creation backup copy, you can get down to business. First of all, you should make sure that your computer supports the new operating system - macOS Sierra has significantly narrowed the number of supported devices.
Full list:
- MacBook (Late 2009 and newer)
- iMac (Late 2009 and newer)
- MacBook Air (2010 and newer)
- MacBook Pro (2010 and newer)
- Mac Mini (2010 and newer)
- Mac Pro (2010 and newer)
Then make sure that new system you really need it right now - the first versions are poorly optimized and may conflict with some applications or separate functions. well and full list We have listed the innovations.
Now, the most important stage, on which the success of the entire event depends - the creation of a bootable flash drive. It is most convenient to use a USB drive with a capacity of at least 8 GB. It will have to be formatted, so you shouldn’t count on data safety. If everything is ready, download the macOS Sierra image to your Mac.
Creating a bootable USB flash drive
1. Connect the USB flash drive and launch Disk Utility .
2. In the application, select the connected USB drive and go to the “Disk Partition” tab

3. In the “Partition Scheme” item, select “Section 1” and specify a name. It’s better not to make things up too much and make it understandable.
4. In the list of formats, select Mac OS Extended (journaled).
5. Click the “Options” button, select GUID and click “OK”

6. Click on the “Apply” button. This completes the installation of the image on the flash drive.
Now you need to arm yourself with the Terminal utility
1. Launch the program, enter sudo and don't forget to put a space
2. Right-click on the macOS Sierra image file and select “Show package contents.” Find the file in the window that opens createinstallmedia and drag it into the Terminal window.
4. Dial a command --applicationpath, put a space, drag the image with macOS Sierra into the Terminal window.
5. Press Enter. To confirm the action you need to use the Y button
Now you will have to wait quite a bit - the creation procedure takes quite a long time, on average from 10 to 30 minutes.
Second way
You can simplify the process a little - for quick creation there are such boot disks third party program DiskMaker X. It allows you to bypass all the difficulties with console commands in the terminal and is available for download on the official website.

After installing it you need to select the required version system (Sierra is already supported) and find the downloaded installation image, confirm formatting of the flash drive, give the program administrator rights and wait for the disk to be created.
Installation
The final stage of updating your computer. It’s quite simple to do - just turn off the Mac and turn it on while holding down the ALT (Option) button, after connecting the prepared disk. Instead of the start screen, you will see the boot menu. To initiate clean boot it is necessary to format the drive on which the system is currently located. Go to Disk Utility and erase data from the disk allocated for current version macOS.

Then return to the start menu and select the "Install OS X" option. The system itself will determine the available boot images- all that remains is to confirm your choice and wait. On average, a clean installation can take up to an hour.


