What program should I use to make the memo? Bright visual accent. Title page development
Practical work"Creating a booklet in Word program»
Goal of the work. Familiarization with the methods of creating booklets and acquiring practical skills in creating booklets in Microsoft Word. Strengthen your skills in working with text editor tools.
Booklet - printed products for advertising or informational purposes, which are a paper sheet made by double-sided printing and having several folds.
In this case, it is most often divided into three columns of equal size, which can be filled in on both sides of the sheet.
As a rule, one extreme column is reserved for the design of the booklet cover.
Booklet in Microsoft program Word can be created in two ways:
1 way:
Open MS Word. On the tabFile in select team Create.
In the search box for templates from
Internet enter the word “Booklet"
. Select from the proposed preparations"Booklet in 2 folds."
Change the information located in " Information block» to the necessary one. Insert the required illustrations into the “graphic blocks”.
Method 2:
Open MS Word. On the tab "Page layout" in a button group "Page settings" choose " Orientation/Landscape.” On the tab "Page layout" in a button group "Page settings" choose " Fields/Custom Fields" . . In the dialog box that appears"Page settings" set the margins to 1 cm. On the tab"Page layout" in a button group "Page settings" choose "Columns/Three".
Requirements for the booklet when creating it:
1.Use no more than three font sizes for your booklet (Century, Georgia, Palatino)
2. Don't fill up a small space with huge headings.
3. Be consistent in your use of fonts and styles for headings, body text, and subheadings.
4. Line spacing Body text should never be smaller than the font size, or larger than twice the font size.
5. Break up lists with bullets.
6. Keep paragraphs as short as possible.
7. Minimize usage capital letters, italics, and bold.
8. Use colors to draw attention to certain layout points.
9. Don't overcrowd the pages.
Practical part
1.Open the programMSWord
2. Download the layout template.
3. Leave one page of the layout, and clear the second page of the proposed blocks.
4. Place the cursor at the beginning of the second sheet and create a page break (tabPage layout /team Breaks / in the submenu that opens, selectCurrent page)
5. Divide the second sheet into three columns
6. Using Internet materials, think through and create a unique booklet about the dangers of smoking “Smoky Motherhood” or “NO to Drugs!!!”
7. When performing work, comply with the requirements for the booklet when creating it.
How to change the background of a booklet?
How to group objects in a publication?
How to add text to a Shape?
How to change the direction of text in the “Information block” of a template?
How to create a bulleted list?
Booklet - convenient format placement useful information. This:
- advertising;
- a brief introduction to the work material;
- basic recommendations for resolving health issues, organizing repairs, etc.
The booklet is made on good paper with attractive colors. It takes up little space. A prospectus (brochure) is made by analogy with a booklet and contains basic information with the provision of contacts for complete familiarization and clarification of details.
Methods for making booklets
Advice! Before you begin, you need to imagine that the booklet is information that is placed on an A4 sheet. It has an internal and external side. On the inside is information, on the outside is the cover. The A4 sheet is divided into three parts and then folded. Realizing this makes it easier to start creating a booklet.
Microsoft Word 2003, 2007, 2010, 2013 provides a booklet making tool. Depending on the version, there are features of this procedure.
But each of them provides two ways:
- make a booklet yourself;
- use ready-made templates.
Word 2003 using a template
This will open a window in which you need to enter given text and, using the tips, create the booklet you need. You can use the default style provided or select other styles. After entering the information on one and the other side of the booklet, all that remains is to print and fold the sheet into three.
Word 2007, 2010 using a template
In these versions, the procedure differs in that in the menu “File” → “Create” we select “Booklet” and from the offered set of booklets we use the one that suits our requirements more closely. We enter the information and print. It's simple.
Step-by-step instruction
This procedure may cause difficulties in terms of correct placement information. A little spatial imagination will eliminate difficulties. The rest of the procedure is as follows:

The page is now divided into three parts.
We contribute necessary information. First page:
- first column - title image, logo, title, etc.;
- the second and third columns are text containing content about the product or service;
Second page:
- first column - contact details (phones, faxes, email addresses and web page addresses (when folded, this is the last column of the prospectus);
- the second column is filled with a picture or a general background color.
For aesthetics and attractiveness, both pages are filled with a background image. We also recommend that you familiarize yourself with Word capabilities on writing text vertically.
Important! Position background picture you should select "behind text".
The next step is sending the prospectus for printing. Print settings vary depending on the brand and model of your printer. For single-sided printing, you will have to turn the page manually.
Important! When double-sided, you need to set the binding correctly - “Turn the pages relative to the short edge.”
Various types of printed products remain very popular nowadays, including in business. Corporate notebooks, calendars, business cards, as well as leaflets and other types of printing allow you to attract clients and strengthen team cohesion.
One of the most common and important for successful marketing of printed products is advertising or information booklet or brochure.
Classic version of the booklet - standard sheet A4 format, accordion-folded across the width with two folds. Thus, three column fields are created inside and outside the template, which can be filled with any content (text, diagrams, illustrations, tables, etc.). Most often, one of the outermost columns acts as a cover or title page.
At the same time, other forms of product execution are also advisable. For example, it may look like a sheet folded in half, or more complex system with three and even four bends. It all depends on the desire of the designer and the volume, as well as the specifics of the data that is supposed to be placed in the booklet. The A4 format is not always optimal, so each time it is worth choosing according to your needs.
Below we will look at how to make a traditional booklet with two folds and, accordingly, six columns for information, one of which will serve as a cover.
The main features of any brochure are convenience and simplicity. You can create a booklet yourself; you don’t have to contact a printing house for this. To do this, it is enough to have the most regular computer with office Microsoft editor Office Word .
In this article we will not dwell in detail on how to use text editor, and we recommend that anyone who has questions during the execution of the algorithm described below should further familiarize themselves with the functionality different versions Microsoft Word (2003, 2007, 2010, 2013, 2016).
Step by step creation
It should be immediately emphasized here that most booklets are created using landscape orientation sheet, so it’s logical to immediately set the appropriate setting in Word.
- It is necessary to pay attention to the templates built into Word. To do this, you will need to execute the sequence of commands: File-Create-Brochures-Booklets. Sometimes you have to find the appropriate category through a search. Microsoft Office offers several standard templates for brochure design, from which it is easy to choose the right one. In the future, based on a standard template, it is easy to create an individual booklet by entering the data prepared in advance.
- You can initially choose to create your own booklet model. Since the booklet requires double-sided printing, you will need to create a Word document from two sheets. Next, each sheet will need to be divided into three columns (with dividers for ease of further page folding) or created in Word table with three columns. Note that the separator will not be visible until all columns are filled. Before entering basic information, it is recommended to fill in all lines with hyphens. Enter key.
- You will definitely have to decide on the fields. In this sense, it is important that the selected template looks organic on the sheet and at the same time allows you to place all the provided data. You can also add a border to the page if necessary.

Filling out the template
As preliminary preparation you need to clearly understand the place of the cover ( title page) booklet and its last page. In the case of an A4 booklet that has two folds, the cover will be the rightmost column of the conventional front side of the sheet, and the last page will be the rightmost column of the back side of the sheet. That is, the first page of the booklet is placed clearly on the spread of the cover. In this case, the column that is located to the left of the cover in the template will ultimately be back booklet.
It is better to make notes about which column is which in the template in advance.
Depending on the challenges , the booklet can be given a colored background or a background image can be placed behind the text. This will allow you to create a certain style. The main thing is that the image does not interfere with the perception of the main content, so it is better to make the colors translucent.
Title page development
Here it is customary to place information about the ownership and focus of the booklet. Most often this is the name of the advertised company, event or event to which the brochure is dedicated. Besides, often placed on the cover following types data:
- logo;
- date and place;
- image corresponding to the main content;
- short introductory text.
On title page logical to use beautiful fonts and a drop cap.

Back padding
Here you can simply place one block of common content or make this part different from the rest of the document. In the second case, it is indicated the following information:
- contact details and communication forms;
- gratitude;
- operating mode;
- photo selection.
Main part
A classic is the insertion of text, images and other forms of data presentation. We recommend using the design features of Microsoft Word: WordArt objects, built-in shapes, quick blocks, drop caps, etc.
Text and pictures must be inserted at the same time, since each new inserted element sequentially shifts the contents of the columns.
Upon completion of work ready-made template can be saved in DOC format, but it's better to convert to PDF format or JPEG, since it is in this form that it can be printed in the required quantity at the printing house. In some cases, printing is perfect on a standard printer using plain, color or photo paper.

When choosing a printer option and printing yourself, you will have to deal with the issue of turning the sheet over for correct double-sided printing. In addition, you need to specify the binding in the settings: turn the sheet over the short edge, not the long edge.
Video
In this video you will learn how to make your own brochure in Microsoft Word.
Didn't get an answer to your question? Suggest a topic to the authors.
A booklet is a convenient format for posting useful information. This:
- advertising;
- a brief introduction to the work material;
- basic recommendations for resolving health issues, organizing repairs, etc.
The booklet is made on good paper with attractive colors. It takes up little space. A prospectus (brochure) is made by analogy with a booklet and contains basic information with the provision of contacts for complete familiarization and clarification of details.
Methods for making booklets
Advice! Before you begin, you need to imagine that the booklet is information that is placed on an A4 sheet. It has an internal and external side. On the inside is information, on the outside is the cover. The A4 sheet is divided into three parts and then folded. Realizing this makes it easier to start creating a booklet.
Microsoft Word 2003, 2007, 2010, 2013 provides a booklet making tool. Depending on the version, there are features of this procedure.
But each of them provides two ways:
- make a booklet yourself;
- use ready-made templates.
Word 2003 using a template
This will open a window in which you need to enter the specified text and, using the prompts, create the booklet you need. You can use the default style provided or select other styles. After entering the information on one and the other side of the booklet, all that remains is to print and fold the sheet into three.
Word 2007, 2010 using a template
In these versions, the procedure differs in that in the menu “File” → “Create” we select “Booklet” and from the offered set of booklets we use the one that suits our requirements more closely. We enter the information and print. It's simple.
Step-by-step instruction
This procedure may cause difficulties in terms of correct placement of information. A little spatial imagination will eliminate difficulties. The rest of the procedure is as follows:
The page is now divided into three parts.
We enter the required information. First page:
- first column - title image, logo, title, etc.;
- the second and third columns are text containing content about the product or service;
Second page:
- the first column - contact information (telephones, faxes, email addresses and web page addresses (when folded, this is the last column of the prospectus);
- the second column is filled with a picture or a general background color.
For aesthetics and attractiveness, both pages are filled with a background image. We also recommend that you familiarize yourself with the capabilities of Word.
Important! The position of the background image should be “behind the text”.
The next step is sending the prospectus for printing. Print settings vary depending on the brand and model of your printer. For single-sided printing, you will have to turn the page manually.
Important! When double-sided, you need to set the binding correctly - “Turn the pages relative to the short edge.”
If you have any questions about Microsoft products, . We will try to help.
Many organizations and firms use promotional materials such as business cards, calendars, flyers and brochures to attract customers. But a special place in this list printing products occupied by booklets. Booklets contain just enough advertising material to tell a detailed story about the company’s services or products without boring the client, and they are also compact in size and easy to distribute. That’s how I’d like to talk about how to create it in this article.
As a rule, you can create a booklet from an A4 sheet by folding it across (along the short side) twice with an accordion. At the same time, it is divided into three columns of equal size, which can be filled with advertising material on both sides of the sheet. As a rule, one extreme column is reserved for the design of the booklet cover.
Of course, if you work in -e, you can use standard templates that it offers Microsoft company. They are available when selecting a command Create – Brochures – Booklets. In the folder that opens there will be several blanks that can be taken as a basis. I also once tried to contact them, but then I realized that it was easier and faster for me to create my own version than to edit someone else’s.
By the way, the booklet is different from the booklet. They come in different varieties, and not just blue and red. 🙂 Depending on the amount of material to be placed and the illustrations, the booklet can be made with 2 or 3 folds. The first one, of course, will have wider pages and it will be more convenient to place them on them. text information. They differ only in the number of pages and have the same creation technology. Therefore, let's focus on three-page booklets with 2 page folds, and look at how to create a booklet using their example.
Let's create our own booklet, the way we want it, and at the same time we'll look at some of the nuances of working in the Word editor. As an example, I will choose a company that offers smart electricity meters to residents and organizations. Let's say she wants to advertise them by releasing a booklet and distributing it to potential clients.
I think it’s better to look at this process step by step:
To make it more attractive and easier to fold, you can display vertical dividers between the columns. Team Page Layout – Column ( from the region Page Setup) – Three Page Layout – Column ( from the region Page Options) – Other Columns and in the window that opens, check the box for the option Delimiter.
For further work You need to understand one nuance: the text flows through the columns like water in communicating vessels. Therefore, it is convenient to fill the columns with both text and drawings (or photographs).
The next nuance is to decide where the title and last page booklet. Well, with the first one it’s more or less clear right away - this is the first column, but the last one is also located in the first column, but reverse side leaf. IN Word document– this is the first column of the second sheet.
4. We start creating a booklet from the title page (this is the first column). On it we have the following information:
— at the top you can indicate the company logo
- below you can place a thematic drawing,
— in capital letters Heading text in the center.
— introductory text revealing the topic of information. For added beauty, you can insert a “letter letter” into the text.
5. The booklet will be brighter if you immediately work out the background image (some abstract figure or lines), which will set the mood of your booklet. It is very convenient to place it behind the text.
It should be remembered that colors must be selected so that the text remains readable. Light colors with a certain percentage of transparency are best suited.
I ended up with this general design for the title side of the booklet:

How to insert and align pictures, I think, is not worth telling in this article, but the procedure for creating a background picture can be described. I made it myself Word editor 2010 in this order:
— First I turned to the menu Insert to the area Figures, where I selected a rectangle for insertion.

In this case, the cursor will take the form of a cross, which you can use to “aim” and draw a rectangle from the left margin of the sheet to the right.
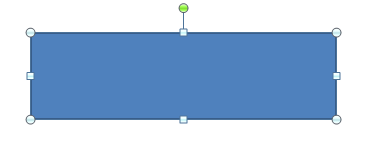
— After the blank figure is drawn, go to the point Format, where in the region Inserting shapes where through the button Change figure activate mode Start changing nodes.
— Click the mouse on the upper left vertex of the rectangle. This will display markers (white squares) of auxiliary lines, with which you can bend the sides.

— Since we will bend the upper horizontal line, we grab the marker placed on it and move it down, bending the line.

— Then click on the upper right vertex.

— Grab the marker and move it up. We get a wavy top line.

— To set two shimmer colors for a shape, I used the fill tool: by clicking on the shape, call up the tab Format on the menu ribbon, go to the area Shape styles. There we activate the command Shape Fill – Gradient – Other gradient fills . In the window that opens, you can configure the overflow fill by specifying Color For Gradient points on the color distribution strip and adjusting Transparency.

After the figure is prepared, place it on the sheet, indicating the position Behind the text. If you want two waves, as in my example, then you need to copy our figure and paste the copy at the top of the sheet, first turning it over. Perhaps the general design is complete.
Now all that remains is to enter information about the advertised products into the booklet and design the last page. We fill out pages 2 and 3 first. So one side is done.

Now we create the last page, indicating the company address on it, Contact phone numbers, website address and Mailbox. Then we fill pages 3 and 4 with content.

Here, in fact, the booklet was created. It can be saved as PDF file or images and put them into circulation. I think it turned out well.


