How to reduce the size of a photo on your computer. How to change the resolution of a photo: methods and instructions. How to reduce the size of a photo using Paint
Instructions
Resizing photos is easy. It is only important to choose your own, in which it is most convenient to work. Most affordable option to resize images - use standard office software Microsoft application Office Picture Manager. To do this, open the folder with the desired photo, hover the cursor over it, right-click and in the drop-down window select the “Open with...” option and check the pop-up panel on the right Microsoft Office Picture Manager. When your image opens in the application, top panel find the tools and click the “Change Pictures” button. After that, in the window that opens on the right, select “Resize”. Then give the image required parameters. For convenience, you can use ready-made options. Select "Standard width and height" and specify right size photo. Or set a custom width and height.
To resize a photo, you can use another program that is available on every computer with the Windows operating system installed - Paint. Open the image using Paint, select the “Drawing” menu on the toolbar, and then select the “Attributes” option in the drop-down window. After which a new window will appear on the program desktop, in which the image dimensions will be indicated. Here you can set your parameters. In this case, do not forget to select the appropriate unit of measurement: inches, cm, points. Or simply drag the boundary change handles. Then save the result. Please note that this will change not only the image size, but also the photo itself: after all, you will crop parts of it.
If you have Photoshop installed on your computer, open the image you need to process using this program. Then, on the toolbar, click the Image button and select Resize Image. Set the required width and height, check the box next to “Maintain proportions” and save the finished result using the “Save As” functions in the “File” menu.
Also try special online services. For example, the Resize Now website is perfect for this purpose. Working with this service is very simple: select an image, indicate the required size. For convenience, it is suggested to use ready-made options: small (640 pixels), medium (800 pixels), large (1024 pixels) or specify arbitrary data. If you're using Easy Mode, you'll simply resize the image. If you select the advanced processing mode digital photo, you can additionally specify the picture quality and use the “Improve sharpness” and “Grayscale” options. Then click the “Resize” button, after which you can download the processed photo in the size you specify by clicking the link with the name of the picture to the right of the image. After 15 minutes, the processed photo will be automatically deleted from the site.
Another good site for resizing photos is Resizepiconline. Here you also need to first upload a photo, maybe several. Then, move the slider on the “Width” and “Height” rulers to specify the output size. Here, without losing image quality, you can change the picture format from JPG to PNG and vice versa. Then all you have to do is click the “Resize” button and save the finished result after processing the photo.
The Photofacefun online service works somewhat differently. To work with it, go to the resource website, upload a photo by clicking the appropriate button, and specify the desired image size in the special fields. Download in a few seconds finished photo by clicking the "Download" button. You can also save the result by right-clicking on the processed image and selecting the “Save image as” option. On the same site you can apply filters to photos, apply frames, insert a face, use a photo editor and necessary tools(crop photos, shrink, covers, avatars, wallpapers).
Sources:
- Resize Now
- Photofacefun
- Resizepiconline
Tip 2: How to reduce the size of a photo without losing its quality
When processing photographs on a computer, for example, preparing them for posting on a website, the user often has to decide on their size. This reduces the quality of the photo, but this reduction can be made as minimal as possible.

They asked me one very interesting question, which actually prompted me to write this very article, which you, yes, you are reading right now.
The question was how to resize a photo.jpg and other formats on a computer. It would seem, is this really a problem with an asterisk? There would be almighty Photoshop on PC, and similar problems, as if it never happened. But the whole difficulty is that, alas, only a few have managed to become gods of Photoshop, and not everyone wants to overload their favorite laptop with such heavy software either. What to do then? How? Solve the problem, of course, in other ways, because they -that's enough! Let's check?
Method number 1: how to resize a photo in paint
Having read the title of the first subtitle, someone will ask in surprise whether we are now talking about the standard Paint program built into Windows? Yes, yes, exactly about that one, and in principle there is nothing to be surprised here. This simple, but not “empty” program has plenty of advantages. If you wish, you can format screenshots according to all parameters, add text to the picture, change the background on your avatar, and even select a different file format if necessary. Do you want to know how to change the size of a photo or the resolution of a picture in Paint?
Well, then, first of all, let’s launch this program on our computer. Some people don’t remember, you can find it in the “All Programs” section of the “Start” menu, in the “Standard” folder:

After launching the program, find the “Paint” button in the window that opens, click on it, and then select the “Open” tab in the menu that appears in order to add a photo that we have to edit:

In principle, you can achieve the same result even easier: find a picture on your computer that needs editing, right-click on it, and then select “Open with...” and Paint in the menu that appears:

One way or another, after the photo opens in Paint, we will need to decide on the editing option, based, in fact, on our goal.
Option #1: Crop the picture to your liking
If we don’t need any special image format, for example, 5x5, 3x4, etc., but just want to crop the photo, then without this tricky way not enough. True, in this case it is important for us that the edited image is completely visible in Paint. If this is not the case, then after opening the photo in the program, first we will need to reduce its scale by clicking the “-” button once or twice in the lower right corner, otherwise there will be no problems later

Now having the “full picture” in front of us, click on the “Select” button on the top panel of the program and use the mouse to select the area we need in the photo. This, in fact, will become our new image:


After that, press one by one:
- Ctrl+C (copy the selected fragment);
- Ctrl+A (select the entire photo on the screen);
- Del (clear the screen);
- Ctrl+V (paste the copied image).

Not the best option, Yes? But that's it for now! To remove unnecessary white stripes, press the small square that outlines work area, and pull it towards the main part of the photo in order to “align the image”:

We save the resulting photo like this: press the Paint button, click “Save As”, and then after selecting one of the proposed formats, click “Save”:


However, it is worth adding that with using Paint you can safely get rid of background on the picture. The editing principle is almost the same. The only thing is that when choosing a fragment selection mode, you will need to instead standard method select the “Custom area” option. You can find it in the list of settings under the “Select” button, which opens by clicking on the icon in the form of a small black triangle:

The main thing is not to forget that we need to outline the entire outline of the object that we want to see in ready-made version!
Option No. 2: Select specific parameters for the photo
In case we need to get an image with some certain parameters in width and height, to edit a photo you can use Paint’s built-in “Resize” function:
With its help, in particular, you can set parameters for the image in percentage and pixel ratio, with or without maintaining proportions, and change the horizontal or vertical tilt angle if necessary. In this case, you can change the size not only of the entire photo, but also of its individual part. In the latter case, however, you will initially need to select such a fragment using the already familiar “Select” button:

It’s easy to see that by its nature, the “Resize” function in Paint is nothing more than a ready-made answer to the question of how to change the resolution of a photo on a computer without extra effort. Well, judge for yourself! It is enough to simply set a certain number of pixels in width and height to reduce or, conversely, increase the resolution of the photo. The scheme is still the same: the more pixels, the higher the resolution and, accordingly, better quality Images.
Option #3: How to resize a photo in paint
When wondering how to resize a photo without losing quality, you should pay attention to this provided Paint feature, like choosing a new image format when saving to a PC. What's the matter? And the fact is that different formats"weigh" differently. In particular, the same image with dimensions of 2560×1600 pixels will “weigh” with almost the same quality in the format:
- JPG – 1.95 MB;
- PNG – 9.33 MB;
- TIFF – 10.8 MB;
- BMP – 11.7 MB.

In principle, this question of how to resize a photo without losing quality could be closed, if not for one “but”. Actually, what should we do if the 1.95 MB option does not suit us? Let's say the site has a 500 KB limit when uploading an avatar. So what to do then? You can’t run away with a complaint to the site moderator, right? Of course not! In this case, you will have to experiment with a function such as “image compression”.
It is good because it makes it possible to easily reduce the “weight” of a photograph. True, there is back side medals. The fact is that images are “compressed” by reducing the number of pixels, which means that ultimately the photo will decrease in size in width and height. However, there seems to be no other way out. At the same time, you can use this function without an Internet connection: you just need to run it on your computer standard utility"Picture Manager" supplied with Microsoft Office.
Method No. 2: Use the “Picture Manager” If available
How to “compress” a photo using the “Picture Manager”? First, let’s open it in this program using the method already familiar to us from working with Paint: 
Did you manage? Then find the “Drawing” tab in the “Picture Manager”, open it and select the “Compress Drawings” item: 
After that, in the menu on the right, select the appropriate photo compression option. In particular, depending on the purpose of using such a photo, the program provides compression options for documents, web pages or Email. For comparison: 
It’s easy to see that the higher the compression level, the lower the “weight” and resolution of the photo. However, you can choose intermediate options. To do this, go again to the “Drawing” section, but this time click on another item – “Resize”. Here, in the menu on the right, set the “standard...” option, and then select the appropriate option for the image size: 
Here, as in the case of Paint, you can also set an arbitrary width and height of the image or specify them percentage. However, we are again invited to work with pixels. The question arises, how then to get a photograph, for example, with parameters of 3x4 cm? There are several options: either calculate the size manually, or use special online editors. In the first case, you will have to act like this:
- select the printer resolution (300, 600 or 1200 DPI). We are interested in 1200 DPI because it provides best quality printing;
- Calculate the dimensions of the photo in inches. Considering that our photograph is 3x4 cm in size, we first divide 3 and then 4 by 2.541. We get the photo format - 1.181 × 1.547 inches;
- Convert the image size to pixels. To do this, multiply the resulting photo dimensions in inches by the printer resolution. In our case, 1.181*1200; 1.54*1200. As a result, we get the photo parameters – 1417 × 1856 pixels.
Do you think it's difficult? Then it's time to talk about the advantages of online photo editors!
Method number 3: how to resize several photos at once online
It should be noted that today there are dozens of a wide variety of online services designed for photo editing, including changing the size of a photo online. In this review, we will consider only those that simultaneously meet three parameters, namely: free, easy to use and effective.
Looking for the best way To learn how to resize several photos at once, you can’t help but look at resizepiconline.com. Judge for yourself: the entire setup procedure fits into 4 simple steps:

The only thing is that with the help of this site there is no way to cope with how to increase the size of a photo on a computer. But is this a problem on the Internet?
You can also reduce or, conversely, increase the size of images using the site inettools.net. The scheme of action is quite simple. First, upload the photo to the site using a standard uploader:


As a result of such simple actions, a link to the photo and a miracle “Download” button appear in front of us, which we just have to click to download the edited photo to the computer:

That's the whole principle of working with this online service!
croper.ru
At the same time, when editing photos, one cannot help but pay attention to an online service such as croper.ru. What's good about it? Probably because, unlike the above-mentioned sites, this web editor also has uncanny versatility. Judge for yourself: with this online Photoshop you can not only reduce the size of a photo, but also crop the image, rotate and flip it vertically or horizontally, add effects, frames, and even combine several photos into one.
At the same time, the principle of work on croper.ru is not particularly original. To get started, you will need to download the file, and only then select the desired photo editing option in the “Operations” section. In this case, we are actually interested in how to change the size of the photo. Let's stop there:

So, to reduce the size of a photo on croper.ru, after selecting the appropriate editor option, all you need to do is use the lever to set the parameters we need and click the “Apply” button:

However, you can access the new image different ways, namely:
- by automatically placing it in your profile, on the wall or in an album on the VKontakte website;
- by saving the photo in your computer memory or on a photo hosting site;
- copying the link to the new photo:

Simple, fast and convenient! Is not it?
As for resizenow.com, this site is also not particularly unique. To increase/reduce the size of a photo, again you need to first download the photo, and then select either simple or advanced editing mode.
In a simple way, just click on the appropriate option for “compressing” the photo and click “Resize” for the settings to take effect. The advanced version provides for changing the photo by the number of pixels and image quality, and also has built-in options for improving sharpness and adding shades of gray:

At the same time, in order to download the finished editing result, you just need to press one single button. However, it is worth considering that the image will be available for downloading on a PC only for 15 minutes, then it will be automatically deleted from the site.
How to increase photo size to 200 kb for government services online
For government services, you need a specific photo size, namely 200 kilobytes, how can you do this online? Now we’ll tell you too!


In this window, simply move the slider to the right to increase the size, and you can also change the format of the photo - this will also increase its size:

That's all, I hope the article was useful to you!
Hello to all site readers! Surely every blogger has encountered this situation: my picture doesn’t fit! Yes, yes, everyone had it. Often, the illustration that we want to insert for some reason does not fit on the resource or takes up too much space.
Therefore, you have to resort to various kinds of assistant programs in order to correct this situation.
Today we will talk about how to make a picture smaller.
What is it for?
For those lucky ones who have never had such trouble, I’ll tell you why it’s necessary to change the size in the first place. Since even if you have not encountered such situations, no one can guarantee that this will not happen in the future.
- The most the main problem large-sized illustrations - they get in the way fast loading site. Statistics show that on average a person is willing to wait up to 4 seconds for a resource to load. Then he begins to feel irritated. And you must agree that this feeling is completely unnecessary for your readers, who intended to open your super post with pleasant anticipation. From long loading time article, the impression from reading the information may not be so joyful. As a result, you can simply lose readers, no matter how informative and interesting your content is.
- Problem loading an image to send via or add to a post. After all, different sites have their own characteristics for posting photos or pictures. Often, if you are shooting on good camera, then the weight of the photo can reach large sizes(10 MB), which for some resources is simply not an affordable luxury.
So what to do in such situations?
Ways to reduce images
There are many ways and tips to reduce an image without harming its quality. There are both online options, and accessible to those who have problems with the Internet. Let's look at each one.
1. Website resizepiconline.com - good method change photo resolution.
Click “Upload image” - a window for uploading any photo from your computer will open. Select the image you want to reduce and upload.

Then we will have a window where you can change the selected illustration according to the following parameters: width, quality, format.

After you adjust the picture, click on “Resize”.

Quite a lot of sites work on this principle, there are both free and paid ones, it’s up to you to choose.
2. Paint program. Another method that almost everyone can use. The exception is those who use apple products and linux.
How to change an image using this program? Right click click on the picture and select “Open with” - “Paint”.

Now in the main menu, click on the “Change size” button and a window with parameters for changing will open.

Set the required size (the picture will be reduced to this resolution).

Enter this data in the “horizontal” and “vertical” fields and click “OK”:
3. Adobe program Photoshop.
Go to the program and open the desired illustration.
Next, select the “Image” - “Image Size” button. 
In the window that opens top margin set the resolution of the illustration to the size you need.

Below, check the boxes as indicated on the screenshot so that the photo scale changes in proportion to the effects and the quality does not deteriorate.

After making all changes, click “Ok”.

4. Microsoft program Word.
To do this, you need to move the required drawing into the document.
Next, select “File” - “Information” - “Options” - “Advanced” 
In the window that opens, in the “Output Quality” field, select required amount pixels.

That's all - the resolution has been reduced!
Like this in simple ways You can change the weight of images so that your website or blog loads quickly and correctly! Use the ones that are most convenient for you.
See you again!
Ekaterina Kalmykova
Sometimes it happens that you need to resize an image. The reason for this could be many factors. Firstly, than higher resolution photos, the larger their size, and such files can be problematic to store on the device. Secondly, if you need to upload a photo via the Internet, problems may arise, because some file hosting services have a maximum permissible photo size limit.
That’s why in this article we’ll talk about how to change the resolution of a photo. This may come in handy when working on a computer, so let's get started.
What is permission
First of all, let's understand what permission is. And the term is basically simple: resolution is the number of pixels vertically and horizontally in an image.
As you know, the more pixels a photo has, the larger its size. However, nowadays there are an innumerable number of programs that can reduce an image, thereby reducing its size without losing quality. Well, now let's talk in more detail about how to change the resolution of a photo.
I would also like to say that if the number of pixels is reduced relative to the original value, the photo will not lose quality, but if the same value is increased, the difference will become noticeable.
Method No. 1. Paint
Everyone is probably familiar with the Paint program. But despite its small number of functions, it can help in changing the resolution of a photo.
So, let's say you have a photo with a resolution of 3,000 by 4,000, and you want to reduce that number by half. To do this, open Paint. You can use the search by calling it using Win keys+ Q. There we immediately click on “File” and select “Open”. In the explorer that appears, indicate the path to required photo and click “Open”.
You now have your photo in front of you. To change its resolution, click “Resize”. This button is located on the top panel next to “Select”.
Now a small window has opened, in which you first need to select in what quantities the size will be changed. There are two options to choose from: pixels and percentages. Let's choose the first one. Now you need to check the “Maintain proportions” checkbox, this will prevent the photo from becoming narrowed or flattened.
Now you can start resizing. Since we initially wanted to reduce the photo by half, we entered the value 2,000 in the “Horizontal” field. You probably noticed that the “Vertical” field filled in by itself, this is due to the fact that the “Keep proportions” checkbox is checked "

Now click OK and we can safely save the photo in a new size: “File - Save”.
This was the first way to change the resolution of a photo - in Paint, now let's move on to the second.
Method number 2. Adobe PhotoShop
Now we move from small to large, more precisely from Paint to PhotoShop. Of course, these are two but they are nothing alike, however this approach will not be radically different from the previous one.
So, let's start figuring out how to change the resolution of a photo in PhotoShop program. First you need to open it. Immediately after that, click "File" and then "Open" and navigate to your photo.
Now click on the “Image” item on the same toolbar. In the list, select the line “Image size...”. Or you can just press the combination Alt keys+ Ctrl + I.
In the window that appears, immediately check the box next to “Keep proportions.” And in the “Dimension” column, select “Pix.” from the drop-down list. Now feel free to resize the photo.

Now you know how to change the resolution of a photo without losing quality using PhotoShop.
Conclusion
As you may have noticed, you don't need to know much to change a photo. Anyone can perform the above manipulations, and in the end you will get what you want: the photo will change, but the quality will remain the same, and the file size will be noticeably reduced. We hope the article gave you the answer to the question of how to change the resolution of a photo.
Sometimes you need to reduce the size of photos to send by email or upload to a dating site or your favorite social network.
The fact is that modern cameras take photographs in high resolution, which is of course very cool, but at the same time such photos also have an impressive size. Up to several tens of megabytes.
Of course, on websites such a large photo will take a very long time to open, and those who have a slow Internet connection may not even wait for it to load entirely.
What to do then? It's simple, we can make the photo smaller or compress it. However, this will not be noticeable on the website - the photo will still be just as natural.
There are many programs for reducing the size of pictures and photos, and there are also sites that allow you to do this online.
In this article we Let's look at a few programs first and then provide a link to site that will reduce the image to online mode .
We use the standard Paint program
The Paint program is available by default in operating system Windows 7 and other versions. In order not to search for it for a long time, you just need to click on the “Start” icon and enter “Paint” in the search bar:
The program we are interested in will be in the list of found ones. Let's launch it.

There will be an icon in the form of a document on the left.

When you click on it, a menu drops down from which we select “Open”.

We find a photo on the computer that we will reduce.

Then in the program menu, click on the words “Image” and “Resize”

Switch the button to “Pixels” and enter the number you need. Please note that if the “Maintain proportions” checkbox is checked, then when you enter a horizontal value, the vertical value will automatically change.
If you want your own value both here and there, then uncheck the box, but then the image will be distorted: stretched or compressed (if it is not proportional).


Minus Paint programs The point is that we cannot influence the compression force. Therefore we will consider very similar program Paint.NET.
Resize and compress the image using Paint.NET
Paint.NET provides us with ability to influence compression force and the size of the output photo. Therefore, we recommend using it.
This program is also usually already installed on the computer. Try pressing start again and entering Paint.NET.
If found, run it, if not, then follow this link http://paintnet.ru/download/ it can be downloaded. The program is free. Install it and run it.
Just like in the program described above, open the file on your computer, and then go to the “Image” > “Resize” menu, or the keyboard shortcut Ctrl + R.

We also set the parameters we need.


Free SmallFoto batch image processing program
This program is very easy to use, with free license, and allows you not only to reduce and compress images, but also to put a watermark on top, process and rename several pictures at once, i.e. supported batch processing- whole folders.
Appearance of the SmallFoto program:

Select "Source"- a folder on the computer with your original images(the folder can contain any number of pictures or photos);
Also select the “recipient folder” where the thumbnail copies will be saved. You can create it in advance.
Select the size, format and quality you need by clicking on the appropriate buttons and pressing “Start”. That is, everything is very simple. The same photos will appear in your “Recipient Folder”, just in the new size you wanted.
Reduce photo size online
Nowadays, there are many sites where you can go, upload a photo and get a small copy of it.
This means that you don’t even have to launch any programs to resize the photo. Of course, on online sites there are much fewer options than the programs provide, but if it’s important for you to quickly reduce the width and length of something, then why not use them.
This opportunity will not be provided by the website www.avazun.ru, but here is the exact link of the tool http://www.avazun.ru/tools/razmer/

Click and select a photo on your computer. After downloading, a window will appear with the ability to set the dimensions, and a download button.
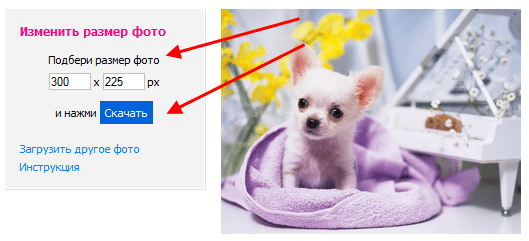
Download the resulting image to your computer.


