Word training program for beginners - tutorial. Video lessons Microsoft Word for Beginners from Andrey Sukhovoy
This program is used a large number of of people. Andrey Sukhov decided to record a series of educational video lessons for novice users “ Microsoft Word for Beginners” and invite you to familiarize yourself with the basics of this program.
Lesson 1. Video review of the appearance of the Word program window
In the first lesson I will talk about the interface of the Word program, that is, about its main elements. Then we will learn how to enter text and perform simple manipulations with it:
Lesson 2. How to properly format text in Word
Word allows you to format text. Formatting is changing the appearance of text, i.e. changing the font, style, color, alignment, etc.
Word's formatting tools are quite varied and allow you to format text according to your wishes and tastes.
Continuing the topic of working in Word program, I want to talk about the main formatting tools of this program.
Lesson 3. How to create a numbered or bulleted list in Word
Continuing the series of video lessons dedicated to the Microsoft Word program, I present the next lesson.
This video tutorial is dedicated to the topic of creating bulleted and numbered lists in Word. In this tutorial you will learn how to create a numbered, labeled or multilevel list by pressing one button in the program, as well as how to work with these lists - adding new items or changing the nesting level of an item in a multi-level list.
At the end of the video tutorial, I will show you how easy it is to create a red line in a paragraph of text.
Lesson 4. How to insert and edit images in Word
In the fourth video lesson dedicated to text editor Microsoft Word, I'll talk about inserting images into a document.
In this video tutorial, I will show you how you can insert any pre-prepared images and photographs into a text document, how you can easily and quickly resize an image, apply various artistic effects to photographs, or crop an image as you wish directly in Word.
At the end of the video tutorial, I will show how you can get complete statistics on the created text document, i.e. how you can quickly get information about the number of words or characters in the text.
Lesson 5. How to create a table in a Word document
In the fifth video tutorial, dedicated to the Microsoft Word program, I will talk about inserting tables into a text document.
In this video tutorial, I will show how you can insert tables with an arbitrary number of rows and columns, add or delete rows anywhere in the table, and also how to merge or split table cells as needed.
We'll also look at the process of inserting text into table cells and formatting text in a simple table.
Lesson 6. How to write a statement using Word
IN Everyday life We periodically have to write various statements, reports, reports and other similar documents.
Of course, you can write such documents manually, or you can type the application on a computer, for example, in Microsoft Word, in a matter of minutes.
This is exactly what will be discussed in the video tutorial:
Lesson 7. How to create an ad using Word
Using the Word program, you can create any text documents, sometimes even not quite ordinary ones.
So, if you need to create a simple advertisement for the sale-purchase-rent-lease of something, then you can create it in a matter of minutes in Word, and then print it in the required quantity.
Watch the video on how to do this:
We are studying the most popular text editor, Microsoft Word. In this material you will learn how to create new document, enter, edit and format text, create lists, apply styles and much more.
With this article we are opening a whole series of training materials with which you will learn how to create high-quality text documents in the most popular app in this area - Microsoft Word (Word). The presentation here will be in a rather primitive language, which may at first scare away readers who are already partially familiar with this editor. But, believe me, you will most likely find useful information in this series.
Microsoft Word is a text editor (processor) used to create professionally designed documents. Title Word, was not chosen by chance, because translated from English it means “Word”.
Thanks to the fact that Word combines the most modern means text formatting, it can be used to easily create documents of any complexity and organize them. In addition, with powerful editing and modification tools, this application provides a convenient environment for collaboration several users on one document.
In the first part of the Word tutorial series, you will learn how to create a new document, enter and edit text, and get acquainted with some basic types of formatting. Here we will begin our acquaintance with the newfangled ribbon interface of the editor. We'll also look at creating bulleted and untagged lists, changing document fields, and much more.
PROGRAM WINDOW
At opening Word the program window displays its two main parts: the ribbon located at the top (highlighted in red in the figure below) and an empty document that occupies almost the entire program window.
The Ribbon includes a set of buttons and commands that can be used to perform various actions on a document and its content (for example, changing the size of text or printing it). The document window itself looks like a normal one White list paper and is intended for entering all kinds of test information.
There is also a menu above the ribbon on the left quick launch, in the middle is the name of the document, and in the right top corner There are buttons for minimizing, resizing and closing the program window.
In the document that opens, in the upper left corner of the page you will see a cursor, that is, a small blinking vertical line. This feature indicates that, starting from this place, the characters you entered will appear.
ENTERING AND EDITING TEXT
After opening the program, simply start typing and the letters, words and sentences you entered will begin to appear on the document page. In order to start printing on the same page, but on a line below, you must click Enter key(Enter). The number of times you press Enter will correspond to the number of lines skipped. As you enter text, the cursor gradually moves to the right. Once you reach the end of the line, simply continue typing letters. The characters and insertion point will automatically move to the next line.
If you need to start new paragraph, to do this, press the Enter key. As a result, the cursor will automatically appear at the beginning new line. If you need to make the spacing between paragraphs a little larger, press the Enter key again before starting to enter a new paragraph.
If you need to correct an error in typed text, just place the cursor to the right of the unnecessary letter and press the Backspace key. In this case, the cursor will delete the character to the left of it. If you need to erase an entire word, press the indicated key as many times as possible until the word disappears. There is another option for deleting an error: place the cursor at the beginning of the word, that is, to the left of it and click required amount times the Del key.
Practice your text entry and editing skills by typing a few random paragraphs, or type the version we suggested.
.jpg)
ERROR CORRECTION
When entering text Word editor warns of grammatical or spelling errors by highlighting them with a wavy green or red line. A green underline indicates that grammar needs to be checked, and a red underline indicates possible spelling mistakes or that the word (for example, a proper name or geographical names) are not recognized, that is, they are not in the Word editor dictionary.
What to do with such underscores? To do this, you need to move the mouse cursor over the underlined word and press the right button. As a result, a small window will appear with suggested correction options. Select the required word and click on it with the left mouse button. The word will be replaced and the underline will be removed. If the word is not recognized, Word will not offer any options. Please note that if these underlines are not corrected, they will not appear on the printed pages of the document.
Similar actions can be done with green underlines. But keep in mind that Word is good at recognizing spelling errors, most of which are quite easy to correct and find on your own. grammatical errors and errors of word usage are much more difficult. If you think you're right and Word gives you the wrong options, simply skip the correction by choosing the appropriate option from the click menu right button mouse and the underline will be removed.
If you don't feel comfortable paying attention to each underline, you can ignore them while typing, and once you're done typing, check the spelling and grammar of the entire document at once. To do this, open the tab Review at the top of the ribbon and select Spelling in Group Spelling.
If working with the tape still raises questions for you, return to this point later, as a description of working with it will be given below.
HIGHLIGHTING FRAGMENTS OF TEXT
In order to perform any actions with text in a document, you need to select it, and then apply the desired command to the selected area. To highlight a whole word or a preposition, it is enough to make double click mouse, after which the selected area will be highlighted in blue.
To select an arbitrary piece of text, you can use two methods. In the first case, place the blinking cursor at the beginning of the fragment that you want to select. Then click Shift key and, without releasing it, click at the end of the desired fragment. After this, the desired text will be highlighted with a blue background to indicate that it is selected. Click anywhere in the document to deselect.
In the second case, also set the blinking cursor to the beginning of the fragment, but this time hold down left button mouse and move its pointer to the end of the desired fragment. After reaching desired result, the button must be released.
If you need to select several fragments in different parts text, use Ctrl key. Select the first section of text in any way, then press Ctrl and, without releasing it, select the next section, after which you can release the key. If you need to select another fragment, press the Ctrl key again and continue.
TEXT FORMATTING
To draw attention to important information For example, you can make text bold, italic, or underlined. But these are minor things. You can change its size, style, color, background and apply animation elements to it. And even this is not the entire list of capabilities that Word provides to users when working with text.
Now is the time to remember the ribbon (ribbon interface), which was discussed at the very beginning of the article, and find out how you can use it.
There are several tabs at the top of the working window. Each of them contains specific set actions. We need to select the second tab - home(if it is not selected, you need to left-click on it).
Each tab contains several groups with commands that combine several elements. On the tab home find the group Font(the names of the groups are on the bottom line of the feed). This group contains several commands and buttons that allow you to make various changes to the text.
In our case, select an arbitrary section of text or an entire word, then click on the corresponding buttons in the above-mentioned group to change its style.
.png)
As can be seen from the figure, after pressing the button Bold, the selected text has changed its style. Now let's make it more slanted and underlined by clicking on the buttons Italics And Stressed.
In this case, the underline can be either ordinary solid or wavy, dotted, double, etc. Use the triangle button on the right to see the full list of possible options.
.png)
From our example you can see that you can apply several types of formatting to one selection.
As you may have already noticed, the group Font contains quite a lot of different useful buttons, making it possible to change the font type and color, its size, strike out the font or convert it to superscript and subscripts, add animation or background. Select a piece of text and try to apply all these formatting options to it yourself by clicking on the appropriate buttons.
STYLES
The method of making changes discussed in the previous section is convenient only if you need to change the format of just a few characters, words or sentences. To apply several types of formatting to the entire document at once styles.
Different kinds of styles are available on the tab home in Group Styles. It is enough to select a style to automatically change the font, text size, attributes and paragraph formatting. For example, you can change the font style, make the text larger, and add bold formatting at the same time.
.png)
As you can see from the picture, after selecting a style called Heading 1, our first paragraph was transformed into a heading (the font size increased, its color and thickness changed).
To experiment, on the tab home in Group Styles Hover your mouse over the different styles one by one. This way, you can see the changes that will happen to the document after you want to apply any option. To finally apply the selected style, simply click on it with the left mouse button. To view other styles, you can open the collection by clicking the button in the lower right corner of the arrow block Other.
CREATING LISTS
If you need to create a list in a document, you can also do this on the tab home in Group Paragraph(which is to the right of the group Font).
Let's practice. First of all, separate the text that will be converted into a list into different paragraphs using the Enter key. At the same time, these can be either individual words or entire sentences.
In our example, we decided to format the last paragraph as a list.
.png)
Now select the text you want to convert into a list. In the Paragraph group, click the button Markers. The text will be converted to bulleted list. Without deselecting the list, press the button Numbering to create a numbered list.
.png)
.png)
PAGE FIELDS
Page margins are empty space along its edges. By default, the margin widths at the top, bottom, left and right of the page are 2 cm, 2 cm, 3 cm and 1.5 cm respectively. This is the most common margin width and is often used for most documents. But if you need fields of a different size, you need to know how to change them. Other margin sizes may be useful, for example, when creating short letters, recipes, invitations, or poems.
The ribbon is also used to change the size of the fields. Only this time use the tab Page layout. You must first click on it to select it, and then in the group Page settings select item Fields. Images (icons) of fields and their sizes will appear in front of you.

The first value of the list is a field Normal, which is active in this moment. To create narrower margins, you must click the button Narrow. If you want to make the left and right margins much wider, click Wide. When you select a margin type, it will automatically be applied to the entire document.

When you select fields, the background color of their icons will change. When you press the button again fields, Thanks to this change in background color, you can determine what size margins are set.
WINDOWBACKSTAGE
In order not to lose the changes made in your work, you need to save them, and the sooner you do this, the better. To do this, open the very first tab on the ribbon File. A large window called Backstage will appear in which you can make various operations, for example, save, open, print documents, and so on.
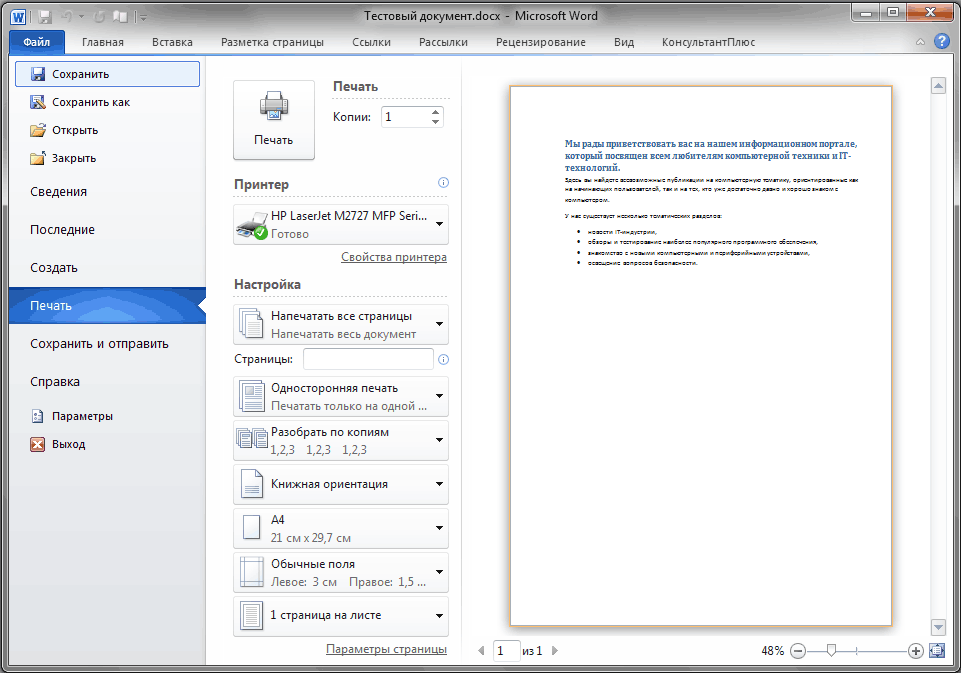
In the left area of the window that appears, select Save. A new window will appear smaller size. In this window you need to indicate where on the computer you want to save the document, as well as what name it will have. After saving the document, continue working by saving it periodically. It is also very convenient to save a document at any time by pressing the Ctrl+S key combination.
If the document is ready to be printed, open the tab again File. In the left area of the menu that opens, select the command Seal. A large window will appear in which you need to click on the line Seal. Of course, a printing device - a printer or MFP - must first be connected to the computer. As in many other cases, you can print a document using hot keys - in this case, the key combination is Ctrl + P.
After work on the text document is completed and the document is saved, close the file. To do this, open the tab File and in the left area click Close.
To find a document after you've closed it, view the list Latest documents . Click a document in the list and it will open.
To finish working in Word in the tab File select a team Exit at the very bottom of the menu or just click on the cross in the upper right corner of the program window.
CONCLUSION
With this, let me finish the first part of the training materials dedicated to the most popular text Microsoft editor Word.
To consolidate the acquired skills, be sure to practice your acquired knowledge by typing several short texts yourself and applying various formatting elements in them.
In the next part we will learn how to cut and paste pieces of text, change line spacing, do alignment, use formatting marks and much more.
Read also:
2.1.1.1. Getting started with Microsoft Office Word 2007
Word 2007 is the most popular application program. This program is designed to create and process text documents. User Interface Word 2007 differs from Word interfaces 97 - 2003. The Word 2007 environment can be found on the page.
The foundation of the Word 2007 environment is visual aids(commands in the form of buttons, fields for entering information or menus) located on Lente. These tools are designed to manage the content of a document during its creation and processing. The Word 2007 environment is designed taking into account all stages of the document creation process: text entry, editing, formatting, and so on, which ensures efficient work with the application. The ribbon consists of tabs containing the following controls: user interface as groups and teams.
It should be noted that the Ribbon consists of 9 standard built-in tabs. The spines of these tabs are displayed in the Word 2007 application window: Home, Insert, Page Layout, Links, Mailings, Review, View, Developer and Add-in. By default, only 7 built-in tabs open. Additionally, you can activate the built-in Developer tab. To do this, click on the "Panel Settings" button quick access" located to the right of the panel.
In the menu that opens, select "Other commands", the "Default for template" window will open, in which, by clicking on the Basic command, you can check the box: Show the "Developer" tab on the ribbon. Another tab "Add-on" appears on the ribbon only after loading the add-on previous versions Word.
In addition, Word 2007 uses contextual groups of tabs that appear on the Ribbon when working with a certain object in a document, for example, when working with pictures, tables, etc.
You can also add your own (custom) tab with a group of commands to the ribbon, or create your own tabbed ribbon. This requires knowledge of the basics of the language. VBA programming and XML markup.
You can launch the Word 2007 application in one of the following ways:
- Click on the Start button and select Microsoft command from the main menu Office Word 2007;
- click on the icon Microsoft Office Word 2007 located on the Quick Launch panel;
- double click on the shortcut Microsoft applications Office Word 2007 on the desktop.
In addition, you can launch Word 2007 by opening one of the Word 2007 documents (files).
When you start Word 2007, an application window opens (Fig. 2.1.1.1), in the document window (in the editing window) of which an empty Document 1 is displayed. By default, the application opens on the Home tab, which displays all the required tools for entering text or inserting text from the clipboard, editing and formatting it.
If you open several documents in Word 2007, each document opens in its own window. The transition between windows is carried out using soft keys on the taskbar or using the "Go to another window" command on the View tab.
Rice. 2.1.1.1
Blank Document 1 (Fig. 2.1.1.1) is based on the global (general) template Normal (Normal.dotm), a template without content, i.e. on a blank template. A template is a model or sample for creating a new document. IN Word templates are used to store information about document formatting.
By default, all documents in Word are created based on the Normal template (Normal.dotm). An integral part templates are styles. Style as a template element is intended for the external design of a document and its paragraphs.
The Normal.dotm template defines the basic structure of the document and contains the document settings, and the text is entered in the Normal style (Express style), in which the basic paragraph formatting parameters are set: font - (Calibri - default) + Body text, character alignment - Left edge, line spacing - multiplier 1.15 in., spacing After paragraph - 10 pt., Prohibition of hanging lines.
Express styles are sets various options formatting that appears as thumbnails in the Quick Styles gallery. When you hover your mouse over a Quick Style thumbnail, you can see how the text selection or paragraph where your cursor is positioned will take on the formatting you select.
To create a document you can use following types templates:
- Empty and last;
- Installed templates;
- My templates;
- From an existing document;
- Microsoft Office Online (templates from the Internet).
To create a document based on a template, click on the "Office" button and select the Create command. A dialog box will open (Fig. 2.1.1.2), in which you need to select the required template and click on the Create button.

Rice. 2.1.1.2
In Word 2007, you can create custom templates that are displayed in the "Create" dialog box on the "My Templates" tab.
The Word package is designed for creating and editing various kinds of documents, including reports, letters, stickers, etc. In addition to working with text, the package has quite simple remedies working with figures and tables. In addition, this package allows you to use data from other applications such as Excel, Access, Internet Explorer, Outlook, etc.
There are currently several versions of this package. The most famous are Word 6.0, Word 7.0 (Microsoft Office 97), Word 8.0 (Microsoft Office 2000), Word XP (Microsoft Office XP), Word 2003, Word 2007 and Word 2010. There were also various packages for working in the system DOS, but the work in them is almost the same. In this book we will consider Word version 2000 for Windows; in the future, instead of Word 2000, we will simply write Word. Note that Word 2000, Word XP and Word 2003 are quite close to each other. You can verify this by looking at the differences between Word 2000 and Word XP, which we will show later in this article. Next Word version 2007 is very different from more earlier versions, since the modes are mixed up compared to older versions. Next version- Word 2010 (Microsoft Office 2010 package). It is planned to write these two versions over time and post them on this site as separate pages.
To work with some features of the package, additional programs may be required, for example, to work with inserting mathematical formulas, Microsoft Equation Editor is required, so this package must be installed on your computer. The Word package allows you to use quite a lot of files of various formats, but not all. To increase the number of formats, you need to expand the package with additional converter programs.
In the first part of the section, we will look at the basic operations of the package using examples - how to call text file on the screen for work, how to create/edit a document and save it in a file, etc. The second part contains basic commands package, and the third briefly describes the modes top menu. The best way mastering the package is practical work, when the user first gets acquainted with the basic operating modes of the package, and then tries other modes on his own, using the reference part of the book. Therefore, it is recommended to first create a document, print it and save it, then call it up, edit and save it, that is, try the basic operations of working with the package, and then begin to get acquainted with other capabilities of the package. The following chapters will help you with this, which briefly describe the main actions that can be performed with a document.
First steps in Word
Starting the program
To enter the Word editor, you can use the mode: Start →Programs→ Microsoft Word with the icon shown on the left, move the mouse cursor to it and click the left mouse button. Another way to launch the editor is to find this icon on the table, if it is displayed on it, move the mouse cursor and double-click the mouse. Sometimes it is useful to set the package to start automatically when you turn on the computer. To do this, use the mode: Start → Settings → Taskbar and Start Menu→Menu setup →
When working with a document, it is recommended to use the save mode more often (File → Save), especially when you are dealing with a complex document containing a lot of graphics, so that if the power suddenly turns off or the program crashes, the latest changes are saved.
Main components of the package main windowThe appearance of the main window varies and depends on the user settings. Let's look at the most common appearance package in fig. below.

The package window consists of:
- top line or a title line that contains the name of the program (Document 6) currently running. There are window buttons along the edges, on the left - to call up a submenu for working with this task, and on the right - to open windows;
Strings main menu with the names of mode groups, to the right of which there are three buttons for working with the document;
Two lines with pictograms(standard and formatting), either of which represents the text modes described below;
- main window with the text of the document where the work takes place;
- vertical line scrollbar or scrollbar(to the right of the main window), which allows you to view those parts of the document that do not fit on the screen at the top and bottom;
- scale rulers indicating the document size vertically and horizontally;
- horizontal line or scroll bars(below the main window), which allows you to view those parts of the document that do not fit on the screen on the left and right;
- status line or status bars, where the current state of the editor is displayed.
In addition, in the main field there is a cursor in the form of a vertical line for entering text, a mouse cursor in the form of an arrow, and the end of the file in the form of a horizontal line.
Now you can work with the document. If you need to correct existing text, you must first call it from the file. To do this, you need to know the file name and the directory where it is located. How to download document text is described below.
If you have just started working with the program or have recently sat down at the computer, you can type small text several times, at least a few characters, and try to save them, then open this file, make new additions and print the resulting text.
Creating a document, typing text, and printing a document
Let's say you need to create a short letter and print it. Click on the open document button, which is located at the top left of the screen. To do this, move the mouse cursor, which looks like an arrow (), to this icon so that the point is inside the icon, and press and then release the left mouse button. The main document window will become white, in it, a vertical dash will blink at the top left, which indicates the keyboard cursor, that is, indicates the place where the symbols entered from the keyboard, that is, letters, will be located.
To get acquainted with the package for the first time, we will enter a few characters from the keyboard, for example, “Checking document printing.” In order to enter a capital letter “P”, you need to press the “ Shift" and, without releasing it, press the letter "p", enter the remaining characters without pressing " Shift" After entering this text, press the " Enter", and the cursor will move to the line below.
To print, you need to click on the button, which is also located on the top left (). If the printer is connected to a computer, a page will be displayed on which the text you have typed will appear.
 When finished, you can use the File → Close mode, which closes the document. To do this, move the mouse cursor to the name File, then click on the left mouse button and quickly release it. From now on we will call this action “click”. So, click on the title “File”. After this, a menu with modes called File will appear on the screen, which is shown on the right. It contains several lines, each of which indicates a mode. We are interested in the “Close” mode. The panels in Word 2000 display only the basic modes. In order to display the rest, you need to click on the down arrow (), as a result the window shown on the left will appear. Click on the name “Close” with the mouse, as we did with the name File.
 Since text has been typed in the document, the following request will appear on the screen: “ Save changes to Document6? In this case, the document name (Document6) is taken by default, since we have not yet specified a different name. After initial installation The package file name will be “Document1”, then “Document2” and so on. They will be located in the default directory for the package.
You can click on the “Yes” button, and a document called “Document6” will appear on your hard drive and the typed text will be saved in it. If you click on the “No” button, you will exit the adjustment mode of this document, the text will not be saved and the file will not be created. This mode is used when the typed text will no longer be used. When you click on the “Cancel” button, you will again switch to the mode of working with this document, and the file is not written to disk.
Create a document, print and save under a new name
Suppose you need to create a document, which is shown in the figure on the right.
To do this, first create a document by clicking on the open document button, then enter the text of the application, and then proceed to formatting the document.
After entering the text “Manager of Ozon LLC” you need to press the key Enter. Here and below, the name of the key is in italics (italics) without quotation marks. After entering the second line, we will also use the key Enter and press it again to separate the header of the letter from its name. Next, enter the text “Application” and press the key again several times Enter. This way we will type the text of the entire document.
When typing text, you can mistakenly press the wrong key. To delete the character you just entered, you need to press the key Backspace, which deletes the character to the left of the cursor position (vertical flashing line). If you have entered several incorrect characters, then you can press this key several times, or you can press it and hold it until all unnecessary characters are deleted. After entering the text, it will look like the figure on the left.
The text doesn't look very nice because there is no formatting applied to it. First, let's increase the font size by selecting it using the mode Edit →Select All. Hereinafter, we will understand this action as follows: first, click on the name Edit in top line modes, then in the menu that appears – Select all. The text characters after this operation will be displayed on the screen in white and the background in black. Next, place the mouse cursor on the downward-facing arrow in the font size setting mode (). After clicking on it, a board will appear below, in which there are numbers corresponding to the font size. If there isn't the right size font (in our case - 13), then enter it from the keyboard and press the key Enter.
 The next step is to align the text. To do this, place the cursor on the top line of text and click on the button align text to the right border (), do the same for the second and last line. Now place the cursor on the word “Statement” and click on the centering button (), select the main text of the statement, click on the text alignment button (). Without deselecting the main text, let's set an indent. To do this we use the mode: Format →Paragraph... →Indents and spacing →first line:(indentation) and to: (0.9). This means that in the Format menu you need to select the Paragraph... mode in the menu that appears, then a window will appear in which you specify the tab Indents and spacing. In the window that appears, you need to select the mode indentation in the field the first line: and on the right in the field on: set the value to 0.9. This can be done in two ways: 1. place the cursor in the field at:, for which move the mouse cursor there and click the left mouse button, then enter the desired value from the keyboard, or 2. click on the up or down arrows to the right of the field until the desired value appears meaning.
At the end of the adjustment, select the text “Statement”, for which we place the cursor to the left of the “Z” symbol, click on the left mouse button, and, without releasing it, move to the end of the word ( to the right of the symbol“I”), then release the left mouse button. Next, click on the bold button (). The text is ready for printing; you can print the document by clicking on the corresponding button ().
At the end of the work, we will save the document in a file, for which we will use the mode: File →Save As. In the window that appears, in the File name: field there is a name that the program takes from the first line of the document, and it is highlighted and you can leave it, or, if you want to name the document something else, enter it from the keyboard, then click on the button Save . This will complete the work with the document. To remove it from the screen, you need to use the mode File → Close.
Correction and saving in another file
 Let's assume that you need to rewrite the application, indicating a different name of the organization. To do this, first call the file using the File → Open mode, the window view of which is shown in the figure on the left.
The main window of the mode contains the names of the files in the directory. To select the desired file, move the cursor to its name and left-click, after which the file name will appear in the File name: field. Now you need to click on the Open button and then you can start editing the document. You can open the file by double-clicking the mouse, that is, moving the mouse cursor to the name the desired file and double-click and release the left mouse button. This action is called double click mouse on the selected file name.
After opening the document, you need to place the cursor in front of the text “LLC” and click the mouse, that is, press and release the left mouse button. To delete text to the right of the cursor, use the key Del. Click it and wait until the name text disappears, after which you can enter a new organization name.
When finished, you can save the document in the same file using the following mode: File →Save and File →Close, or just one mode File →Close, but a window will appear on the screen asking whether you need to exit the mode, as indicated above. If you need to save a document in another file so that the original document also remains, then use the


