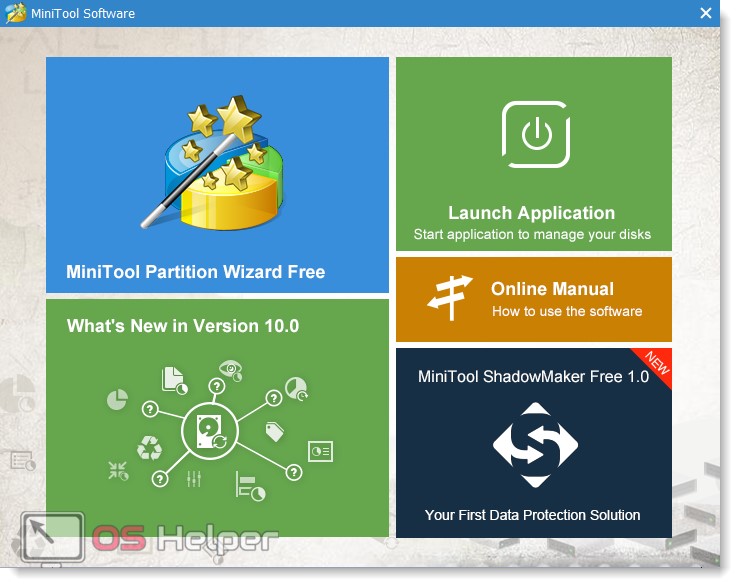
I can't merge hard drive partitions. Merging partitions using AOMEI Partition Assistant. Working with Acronis Director
Please note that when merging, data from the second partition will be completely deleted (photos, videos, documents, programs). Copy them to a removable USB storage device or to the cloud so as not to lose.
After that:
- Launch the Run system utility using search by keyword or by simultaneously pressing Win keys dows +R on your keyboard. It can also be launched through the “Standard” menu.

- Next, you need to open the classic application and enter the command “diskmgmt.msc” in the empty column, as shown in the screenshot. Then click “OK”.

- The Disk Management utility will launch. With her help they will unite HDD partitions or SSD. In the first column you can see a list of available volumes. The type is indicated opposite file system(NTFS, FAT32), status, capacity and free space (in GB, MB or percentage).

- In our example, we will merge the “New Volume W” with the “C” drive. Please note that merging multiple sections is done one at a time, that is, “C” with “D”, but not with “W” or “E”. If they are not nearby, the system will not allow you to do this. If you do not want to delete data from the volume that you plan to merge with the main one, then make sure that you copy it. After that, click on the section you want to remove right click mouse and select “Delete volume” in the context menu that appears.

- A notification will appear asking you to cancel the procedure if you have not yet created backup copies from the selected partition. Click "Yes" to continue.

- After this, the section will disappear from the list, and the message “Not distributed” will appear at the bottom of the program.

- Right-click on the disk you want to expand and select “Expand Volume” from the context menu.

Attention! If the “Extend volume” button is not active, then most likely you are trying to merge partitions that are not “consecutive”. For example, if between them there is another busy (or vice versa free) disk space. You can only merge volumes that are in close proximity.
- The Volume Expansion Wizard opens. Select logical or local disk, due to which you want to increase the space and click “Next”. If only one is available, it will be marked automatically.

- Confirm your selection and click Finish to complete the process.
After this, the remaining partitions will appear in the list. You can close the utility and continue using your computer. If you wish, here you can create new volume, delete it, hide the disk.

The computer will automatically flag any changes. Therefore, in case of problems, you can do full recovery systems. In this case, user data will not be affected. However, if you deleted them when merging, you cannot get them back.
Through third party software
If you don't want to use Microsoft's built-in tools, you can merge drives using third-party software. Many of them are available for free download and allow:
- save data from partitions automatically;
- Merge disks and partitions that are out of order.
What's happened dynamic disk? This is a technology that allows you to share physical media into several volumes and sections. They can be created, deleted, expanded (at the expense of others).
The application is available for free download from the developer's official website. It is entirely in Russian, so you don’t have to download the localization language separately. Launch the downloaded program distribution and follow the wizard's instructions during installation. After this, launch the program.
The operating procedure on a PC will be as follows:
- Right-click on the disk (if it is not hidden) that you want to add to the main one. In the context menu that appears, select “Delete partition”. In our example, this is the “G” drive.

- A notification will appear warning you that the information will be completely deleted. Agree to move on to the next step. To do this, we recommend selecting the first item and clicking “OK”. For more detailed information Click on the “Help” button.

- The “G” drive will disappear from the list and “Unallocated Space” will appear in its place. We will “add” it to the main section “C”.

- To do this, right-click on “C” and select “Merge Partitions” from the context menu.

- The Merge Wizard will open. From the list, select the section that you want to add to the main one. Then click “OK”.

- Click on the icon that looks like big green"Apply" checkbox on the toolbar to connect "C" and "G".

The selected sections will be merged into one; no other changes need to be made. In a similar way, you can combine several partitions at once, which have the word “unallocated” written next to the space. To do this, they do not have to be in close proximity to each other, as required system utility from Microsoft.
A broken disk can be divided into partitions and merged into one unlimited amount once. Please note that data loss in this case is inevitable. Therefore, do not forget to make backup copies or use third-party software.
The program is fully compatible with OS Windows 10 (home, premium or other version) and is available for free download from the official website. Please note that it does not support the Russian language, so you will have to work with English interface. After installation, run the following actions on PC:
- Launch the program and select MiniTool Partition Wizard. The program for working with disks will open.
- Right-click on the main section to which you want to add another. Select "Merge" from the context menu that appears.

- A new window will open, select “Disk 1” and partition “C”. When you're ready, click Next.

- The program will prompt you to come up with a name for the folder into which all information from current section on the main one. Here, in the upper part, mark the section through which you want to increase the main one (in our case it is “C”). Click Finish. You can add multiple disks here if you wish.

- The “Merge Partition” window will close. In the application itself, click on the blue “Apply” checkmark to start merging.

Please note that the process may take from a few minutes to hours. Exact time will depend on the size of the partition, the presence of files that will be copied to the main disk. They will remain in the root directory with the name you specified.
Unlike Aomei, MiniTool Partition allows you to immediately make backup copy all data stored on the partition. This is convenient if you do not want to save information manually (for example, if it is too large). But in this case, the operation will take much longer.
To speed up the merging process and Reserve copy, delete extra files yourself or move at least part of it to removable media or to the cloud.
Conclusion
Now you know how to merge drives in Windows 10 using standard means systems or third party software. But keep in mind that it will not be possible to carry out the operation without data loss. Therefore, be sure to save all important information from the disk whose space you want to add to the main one. Because it will not be possible to restore them later.
If you plan to combine several sections, we recommend using the free software. Additionally, it allows you to copy files to new section, so you don't have to do it manually.
Video
Below you can watch a video on the topic of combining disks on Windows 10.
Every PC owner knows that there is never too much space on the HDD. What should I do if there is not enough of it on one of the sections? You don’t have to immediately run to the store to buy a new HDD. Let's look at how to combine sections of hard disk using regular funds Windows or using special software.
Why is this necessary?
There is an opinion that the HDD should be divided into two sections. One contains the OS, the other is for storing data. This will allow you to reinstall the system and necessary information will be untouched on another HDD. This is convenient, but does not mean that this is the only way to do it.
If the HDD is divided into two parts, increase one partition at the expense of the other. This is relevant if there is not enough space for software in the volume where the OS is located, or there is no space on the disk with information. How to do it? To do this, it is not necessary to seek help from specialists. Everything can be configured yourself.
What to do before deleting
Before you start merging, take care of data security. Editing a section will remove information from it. Therefore, create a backup copy and save it to a flash drive or in the cloud. Use , Dropbox, or external hard disk.
Merge in windows 10
We use the built-in tools of the system:

Sometimes it is not possible to merge partitions using the Disk Management utility. The Extend Volume links or other features may not be active. This happens due to setting a limit group policies, or the OS version does not support setting up HDD partitions.
How to solve this problem? Using utilities from third party manufacturers. The use of such software will be necessary if you need to save information from partitions, but cannot transfer or copy it. Let's look at the best programs.
Acronis Disk Director
The official website of the developers is located at: acronis.com/ru-ru/personal/disk-manager.
The main program window contains all the information about the computer's HDD.
To merge, select the section that you will not use and click on “Merge”. In the new program window, configure the settings.
Select the volume that will become the main one and add other objects to it one by one. When all the settings have been made, click the “Run” button, it will become active.
How to merge with Aomei
Download the program from: disk-partition.com/free-partition-manager.html. The developers' website is not in Russian, but the utility supports it. Works with windows 7 and windows xp. To download click on green button“Download Freeware”, then “Local Download”. The download will start automatically. The program is completely free. Next we launch installation file programs. Its installation is simple and will not cause difficulties even for novice users.
A program window will open.
To merge, we perform the following sequence of actions:

The merger will occur without data loss. In my case they will be saved in the “D-drive” folder.
If one of the partitions is system, a reboot is needed, which takes longer than usual. Therefore, if you are working on a laptop, make sure it is plugged in.
Conclusion
When you need to merge partitions, and there is no important data on the HDD, use the tools offered by the system. If the information is important, I recommend using Acronis Disk Director. The Aomei program is also good free solution. Please note that if the attached disk has a second OS installed, it will not work after merging.
Computers and laptops are often sold with several partitions on the HDD, this is enough standard situation. This was done because it is convenient for most users reinstalling Windows in a special partition without losing data on other disks. For others it is difficult to how to merge partitions hard drive , so as not to be scattered across several volumes, but to store everything in one place.

Why merge sections?
Merge hard partitions Windows disk 7 was indeed somewhat difficult, because further operation carried the risk of losing all data when replacing the system. Together with Windows release 10 and its factory reset function, similar complexity was eliminated. Today you can easily roll back your system without losing data, even if the disk is not partitioned.
Manufacturers divide the disk into 2 or more sections for ease of use, as if dividing them by purpose. It is much easier not to divide into volumes, but simply create characteristic folders within the section.

The most pressing reason for connection is the lack of free space on system disk. Then you should think about expanding its contents with another disk. There is only one problem - when transferring space, data is lost from the disk you want to attach. This rule only applies to connections using regular Windows tools, exists Alternative option. Perhaps the user shared the disk for no reason or the need for it simply disappeared.
It is important to know that consolidation implies the presence of one HDD. If you want to combine the two different hard drives, then this procedure will not work. Another action is required, which is performed at level zero, creating a pool hard drives, execution with using storage spaces and other options. We will not consider it in detail because this procedure does not provide significant benefits, but it often cuts off half of the space, blocks autoloading and has other similar side effects.
How to merge hard drive partitions in Windows?
Merging Windows 10 or Windows 7 hard drive partitions is quite easy. All versions of the system have a Disk Management tool, which is great for various manipulations with the HDD. To combine, one disk with the system and another with data are mainly used.
It is important that when merging volumes, information from one of the partitions will be lost, namely the one that will be moved. Therefore, you first need to remove data from the partition, transferring it to a second disk, if there is space. Otherwise, you can move the information to the cloud or flash drive.
- Click Start and “Control Panel”;
- Next, select the “Administration” tile;

- Go to “Computer Management”;

- In the menu on the left, select “Disk Management”;
- Determine the letter of the volume that we will delete and RMB on it, click “Delete volume”. Everything that was in the partition was moved to unallocated space, now you just need to add it;

- PCM by target disk to enlarge and select “Expand Volume”;

- Specify quantity permanent memory, attached to the section.
This procedure will allow you to combine 2 or more logical drives. To make one partition out of 3 parts, you will have to delete all other volumes, the freed memory will be transferred to unused memory.
Hard drive partition management software AOMEI Partition Assistant
Program for high-quality, fast and full transfer memory eliminates the possibility of data loss. There is not always a need to combine disks; mainly the question arises of expanding a partition, usually a system one, at the expense of another. It is not at all necessary to delete the volume for this.
AOMEI Partition Assistant allows you to separate out the amount of memory you need and move it to another location. The application does not require payment. Before using the program, it is better to create a backup, although the application is generally safe, user error is possible.
- Download the utility https://www.aomeitech.com/download.html;
- Install and then launch the application;
- In the window, select the disk from which you want to separate the part, right-click on it and “Resize partition”;
- A window will appear with a draggable slider, you need to move it to required amount memory. Important! For further transfer, you need to move the strip on the left so that empty space formed before the occupied;

- RMB on the disk that you need to expand and go to its settings;
- Stretch the slider to the size that was just released;

- After all the steps, click on “Apply”.
The program has a deferred system for executing actions, so before clicking on “Apply” no changes occur and you can perform many manipulations. If necessary, it’s really easy to delete a partition and attach the space to another.
There are other disk managers that allow you to combine partitions on disks, but they are functionally similar to the options already discussed.
Thanks to simple steps, you can create one from any number of partitions, provided they are located within the same media. Particular care should be taken not to remove required disk, since the user often gets confused about the letters of the sections.
If you still have questions on the topic “How to merge hard drive partitions?”, you can ask them in the comments
if(function_exists("the_ratings")) ( the_ratings(); ) ?>
In this short article I step by step I'll tell you with pictures, how to combine hard drive partitions on Windows 10 into one volume. It is not difficult to find programs on the Internet that can do this. However, in my opinion, there is no need to use often dubious third party programs when in the operating room itself Windows system 10 has a built-in ability to combine hard disk partitions. That is, we will consider how to combine HDD built-in tools of Windows 10 itself.
This method is suitable not only for Windows 10, but also for “seven” and “eight”.
Step 1. Open the built-in Disk Management utility
In order to combine hard disk partitions into one, first you need to open the built-in Disk Management utility.
You can launch it in a new way, which appeared in the “top ten” - click right key on the Start menu and select "Disk Management". (if the utility has started, go straight to step 2 - ↓ down through two pictures)
For more earlier versions In Windows, we look for this tool through search or Control Panel. To do this, type “Control Panel” (Figure 1), and then open it with a mouse click (Figure 2).
In the window that opens, select and click on the “System and Security” item.
A new window opens. In it we go down and in the “Administration” item, click on the sub-item “Creating and formatting a hard drive”.

We are presented with the Disk Management utility itself.
Step 2: Delete volume and partition to merge with another partition in Windows 10
Now we need to select the partition that we are going to join to another partition. In my case, this is partition F. Right-click on it and select “Delete Volume”.

Click “yes”.

We now have 50 gigabytes of free space. But they cannot yet be added to another section. Now you need to delete the partition on these 50 GB. Just like on previous step, right-click on the already freed partition space and select “Delete partition”.

The appearance of 50 GB with the inscription “Unallocated” tells us that now we can add this free and unallocated space to any other partition of our hard drive.
Step 3: Add free unallocated space to an existing hard drive partition

I will add them to partition D. To do this, right-click on the corresponding partition and select “Extend volume”.

The Volume Extension Wizard starts. Click “Next”.

To transfer all the free space to the partition we have chosen, simply click “Next”.
If you want part of the space to go to one partition (for example, C), and part to another (for example, D), then here you can choose how much free space you will add to a specific hard drive partition in your Windows 10 OS

Click “Finish”.

The last picture shows that the 50 GB partition F that originally existed for me has disappeared. 50 appeared instead additional gigabytes free space on drive D.

P.S.: In some rather rare cases, the Disk Management utility built into the OS may not allow you to merge some partitions of one hard drive. I realized this after reading the comments below. It looks like Microsoft is playing it safe here. It was to solve this and other problems with managing hard drive space that I began to look for another option that would allow me to manage hard drive in Windows 10 using third-party, but extremely safe and free developments. For those who have encountered such problems, I wrote an article “
Let's take a closer look at how to combine hard drive partitions.
Content:If your PC has too many unused partitions and you want to remove them, use following instructions from the article.
Preparing to delete a disk volume
Before you merge multiple volumes, there are steps you can take to help preserve your files.
Any editing of a partition in Windows leads to permanent deletion files and folders in this volume.
In most of them you can use up to 20 GB of space for free (, DropBox, and others).
Merging partitions in Windows 7
In Windows 7, users can merge disk partitions without booting additional programs to your computer. All required settings can be changed as follows:
- Go to the Start menu and open the Run window. IN Home Edition this key may be missing. In this case, just press Win + R to call the desired window or edit appearance Start menu in home screen settings;
- In the window that appears, type diskmgmt.msc - a command to open the computer's disk management window. Confirm the action by clicking on "OK".

Fig.2 - command entry
- The following window will open. At the bottom of the window all connected to the system is tough disks and their conditional division. Each division section is a separate volume. It is designated by a letter and has its own file system type and space;

Rice. 3 – display sections in settings
- You need to select the section that you want to delete (merge with the main volume of drive C). Then right-click on it and click on “Delete Volume”. Next a window will appear with system message that all data on the volume will be deleted and you will not be able to restore it. Confirm uninstallation. Essentially, you're not deleting anything, just erasing the section. All space goes to drive C;

Rice. 4 – volume deletion
After deleting one volume, you can do the same with the rest, thus creating free partitions. “Empty Volume” will appear in place of the previous object.
Don't forget to attach it to the correct section. Click on the section into which all objects will be combined and in the context menu click on “Extend volume”.
In the window that opens, select an available empty partition and add it to the main one. Continue this action until there is no unreserved part of the hard drive left on the computer.

Rice. 5 – volume extension in Windows 7
After completing the procedure, you must restart Windows operation, otherwise further work may lead to errors and data deletion.
Instructions for Windows 10
The instructions described in this section of the article are suitable for both Windows versions 8. You can merge partitions using built-in OS tools.
As in the previous description of the settings, we will need the utility "Disk Management". Follow the instructions:
- Go to the search box and enter the word "Management". The desired option will appear in the results. And also, you can press the key combination Win and X to bring up the menu quick access. It contains a link to access "Disk Management";

Fig. 6 – hard drive settings window in Windows 10
- Decide which sections you no longer use. For better orientation, they are indicated by letters that correspond to the names of the drives in the window "This computer";
- If you only want to keep one volume, choose which volume you will attach the rest of the items to;
- Then right-click on the object that you want to delete. And uninstall it;

Fig. 7 - deleting a partition in Windows 10
- Confirm the action, agreeing to data loss;
- Remove partition space;

Fig. 8 - freeing up space
- Now you will see that the section has become empty, but its division remains. Since it is no longer used in the system, its name and other attributes are removed. The object can be combined with the main disk;
- As a result of correctly performing all the actions, you will see that the following message appears in place of the disk section: "Not distributed". Now you can start merging the sections.
Click on the main section - in most cases this is drive C. In the menu, select volume expansion.

Rice. 9 – element connection
The Settings Wizard window will open. With it, you can easily divide free space or combine it into one system media information.

Fig. 10 - merging sections


