How to create a second apple id on ipad
Every buyer of an Apple device, be it an iPhone or an iPad, can register their account, which is called Apple ID.
The need to delete an account iPad recording rarely occurs.
Sometimes users who are disappointed in the device do this, others delete the entry because they want to free up the address Email. In general, this procedure is not at all necessary, even if the owner of the tablet has refused to use Apple devices. You can change your email address through settings.
Instructions for changing your account
It is also quite common for users to want to change their iPad account for their own reasons. This procedure is quite simple:
- You should open the Settings window.
- Then select the “store” tab (appstore).
- Select an account available to the user Apple number ID.
After this, the new account will be replaced, provided there are available Apple IDs. Otherwise, in the same window you can create a new one and additional funds this is not required, you just need to have own iOS devices.
You can do the same operation through iTunes app. To do this you need to select iTunes Store, click on your email (the address is in top corner on right). Unfortunately, the record is not always changed due to unknown deficiencies in the software.
2 ways to delete your Apple ID account
If for some reason the user wants to delete the current account Apple entry, then he will need two known methods removal. In the first case, you can change all the data on the page for managing your Apple ID to arbitrary ones. This way, the recording will not be completely deleted, but any connection with the user’s identity and device will be lost.
To remove the ID completely from the iPad, you can contact support for help. You can change or delete your account both from the iPad itself and from a personal computer. In both cases, you will need an Internet connection.
In order to change (delete) your account, you need to perform several sequential actions:
- On your computer or smartphone/tablet you need to go to iTunes.
- Using your password and login you need to log into your account.
- By going to your account settings and selecting in the expanded context menu you need to select the “Account” tab.
- The window that opens will give you the opportunity to change all your personal data.
To unlink your account from your current email address, you will need to create a new unclaimed email. This step is required because you can change the attached mailing address on a non-existent one is impossible.
At the same time, you can delete your account through your management page. Apple profile ID by following this link http://appleid.apple.com/ru/. Here you will also have to enter your username and password. The deletion algorithm on iOS is generally almost identical to that described above - in the profile management page you can also carry out the necessary manipulations with the settings connecting the profile with the user and his device.
Features of deleting a profile via support:
- all filled-in data must be in English;
- You can only use the email address assigned to your profile;
- in the “Subject” column there is no need to describe the reasons why the profile is being deleted, it is enough to express your desire;
- The reason can be indicated in the “Comment” field.
Not all owners Apple devices own English language sufficiently, however, as practice shows, a translation made using Google Translator is quite sufficient.
Of course, there will be spelling and semantic errors in it, but the support service will understand the meaning. And although the appeal itself is not difficult, especially for experienced user. It may take several days before a response is received, and it may also be negative. A link will be sent to your email, following which the user will be able to permanently delete their profile.
Create an account on iPad: instructions
Many users have serious doubts about whether they even need this Apple ID. It should be borne in mind that without an account, we will not be able to synchronize with iCloud, purchase content and programs in the Apple store, or download software that is offered for free.
To create an Apple ID, we need a computer with online access, valid e-mail and iTunes, updated to latest version(by the way, this is not at all necessary, but is highly recommended). Open the iTunes application and go directly to the Apple store menu. Now let's try to log in. A window will appear where you will need to select “Create an Apple ID”. Click the “Continue” button and then read the terms and conditions user agreement and accept them. Now let's move on to filling out your personal information. The process is quite boring, but not difficult - especially since you will only need to provide all this information once.
How to create an account on iPad? Fortunately, this can be done without a computer. To create an ID directly from your iOS tablet, you can use the settings. From there we go to the “iTunes Store” menu. App Store». Next step– select the option to create a new identifier. We indicate your country and confirm that we agree with all the conditions. Next, we fill in all the data necessary for registration - similar to how we would do it from a computer. Instead, you can create an Apple ID using app Store (look for it on the tablet’s desktop).
Create an account on iPad bypassing a bank card
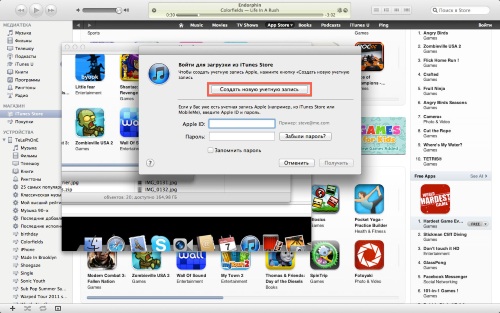
Essentially, the registration process is not too different from everything described above. However, there is a significant difference: the essence is that the identifier begins to be created when downloading from the store of any free software, and this is the only way to bypass subsequent binding to payment card. Eg, Mac users It is suggested to open iTunes and go to the store (top right). We need an "App Store" and "Top Free Apps" section. We select any application at our own discretion and press the button free download(“Free”). Now let's move on to creation of Apple ID. We begin to enter our data. When going to the indication payment information and payment method (“payment method”) select “None”, that is, “None”. All that remains is to select the option to create an identifier. Similar actions You can do this on the iOS tablet itself.
When you become the owner of a gadget Apple you can't do without Apple iD. An ID must be created in order to be able to use Apple services. For example, AppStore or iCloud. It's easy and convenient when with just one personal number, you can use all services.
How to create an Apple iD account on iPad
This entry allows you to protect iPods and iPhones from theft. Using this account, you can block a lost device remotely via an Internet connection and send a message to the screen with your contact information. This way, the finder can return the tablet to you. Before you create new entry You need to have an internet connection to your tablet and have a working email address. Next follow the instructions:
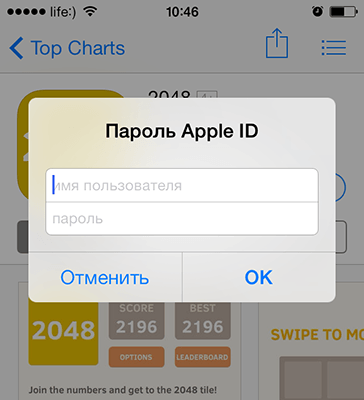
1Open the AppStore. In the search, write the name of the application you want to download. It must be from the free category, otherwise apple id will be paid. Click on “free” and then install it.
2A window appears on the screen to log in to your account. Since you don’t have one yet, click “create”. Choose from the list provided the desired country and continue.
3The window that appears displays a document about the terms of service. Read the information and click “accept”. This will confirm your agreement to the terms.
4A document form will open for you. Here you can fill in the fields with your personal data. This information will help you if you have problems logging into your account. Proceed to the next step by clicking “next”.
5Give answers to three questions, it’s good if you write them down and keep them in a secluded place. In case your memory fails you. The program will direct you to fill out the required fields, so don’t worry that you might miss something.
6The next attachment will display the payment form. You need to check the box next to “no”.
7Provide your personal information and proceed to the next step. A confirmation message will appear. Here you need to click on the “ready” button.
8To the one you specified email address You will receive a registration letter. In it you need to follow the link. When you switch, you will need to provide your assigned Apple ID and secret code.
9After successful confirmation, “Email address confirmed” should be displayed.
You can create a new ID via iTunes program on personal computer. To do this you need:
- Upgrade to new version program and run it on your computer or laptop. In the menu bar of the program window, click on the “account” tab. In the expanded list, click “login”. In the window that appears, click “create” new Apple ID".
- Read the terms and privacy policy. After agreeing to the terms, fill out the fields of the form. This information will be used to assist you if you encounter problems logging into your account. Email address will be used as an identifier.
- Fill out the sheet with secret questions and remember the answers. Better write it down. Proceed to the next step.
- Please indicate the form of payment.
- Check your emails. In the letter from Apple, follow the link according to the instructions. Confirm your email. You can use the Apple ID you create to sign in to Apple services.


