What index should be entered in the app store. Creating an account in the App Store from an iPad without a credit card
In the previous article, I described registering with iTunes directly from the iPhone. Today we'll figure out how to create account from PC. Let me remind you that iTunes is the main program for iPhone owners, iPod and iPad, to download music, videos, applications, and synchronize the contents of your device with your computer. All operations with applications and music are easier to perform in iTunes. First, you download the content to your computer, and then, with one click, install it on your iPhone.
On Apple computers iTunes is included pre-installed. To install it on a PC from other manufacturers, you will need to go to the Apple website (http://www.apple.com/itunes/download/) and download iTunes for your operating system. If you would like to receive notifications about updates, special offers from iTunes, as well as news and the latest information about products and services from Apple, leave yours and check the appropriate boxes (not a required action).
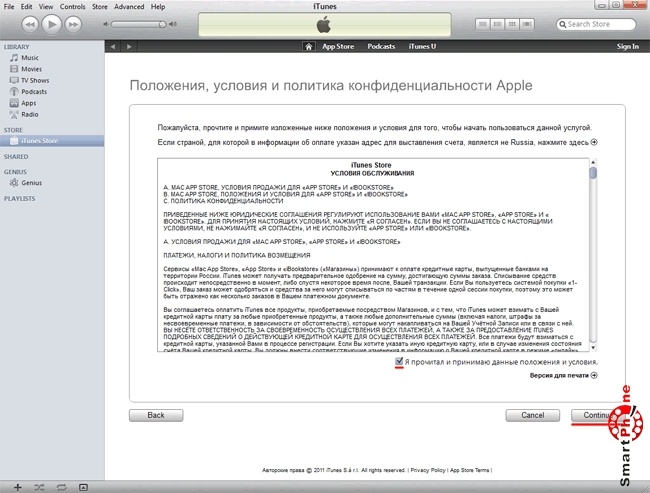
After installation, launch iTunes and go to the list of countries available for registration. On this moment, Ukraine is not on the list. By default, it's USA, but we'll choose Russia. I will explain the difference in registration between Russia and the USA below.
![]()
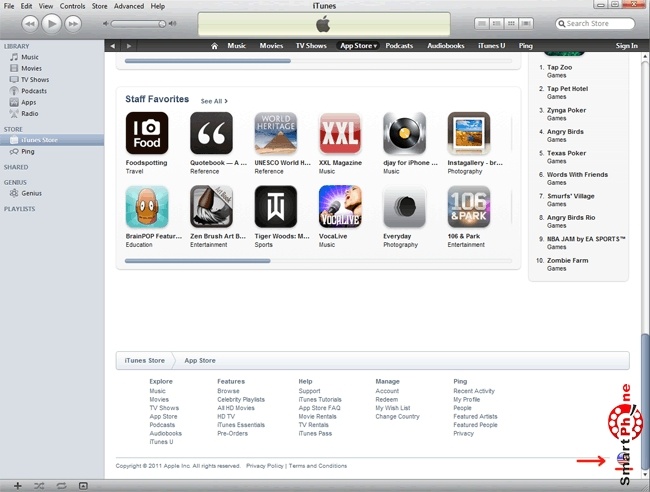
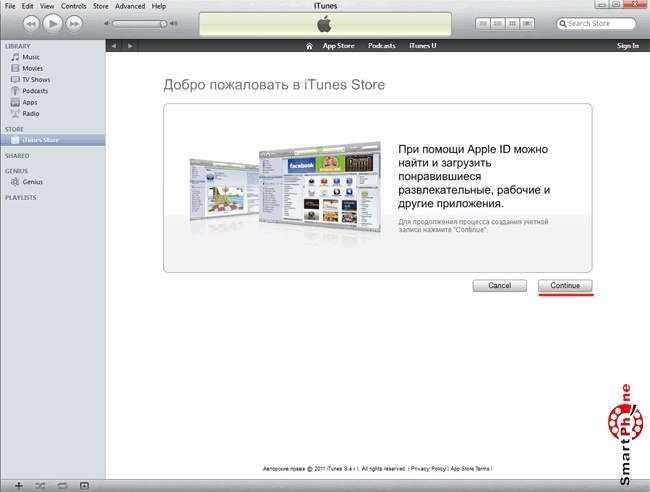
After selecting the country, go to the “ App Store" and select the first demon paid application. If you select a paid application, you will not be able to select registration without entering credit/payment card information.
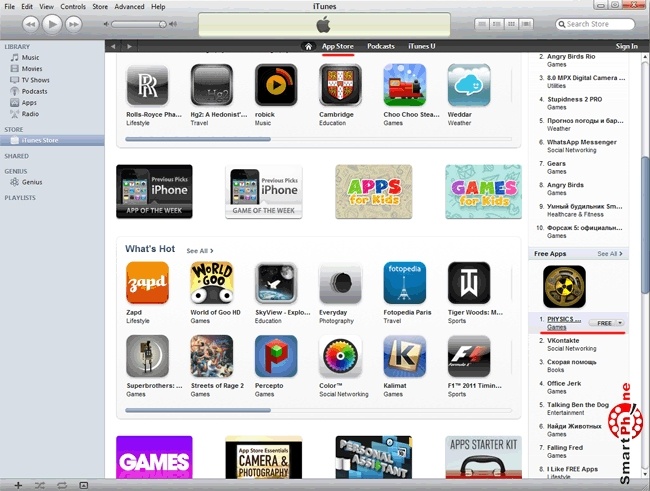
Click on the Free App button.
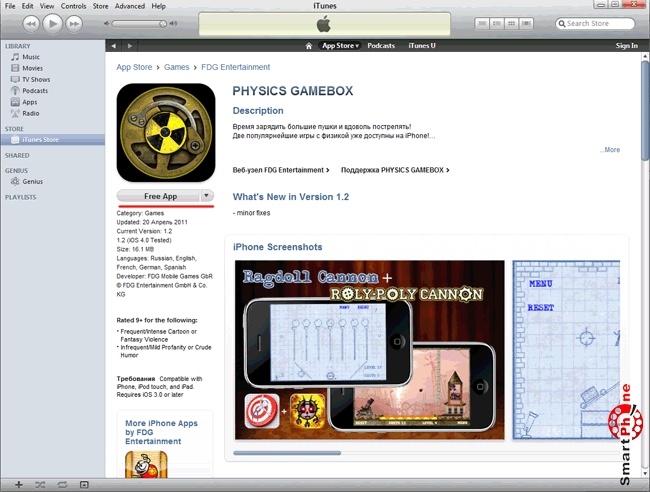
You will be prompted to sign in to an existing account or create a new one. We choose to create a new one.
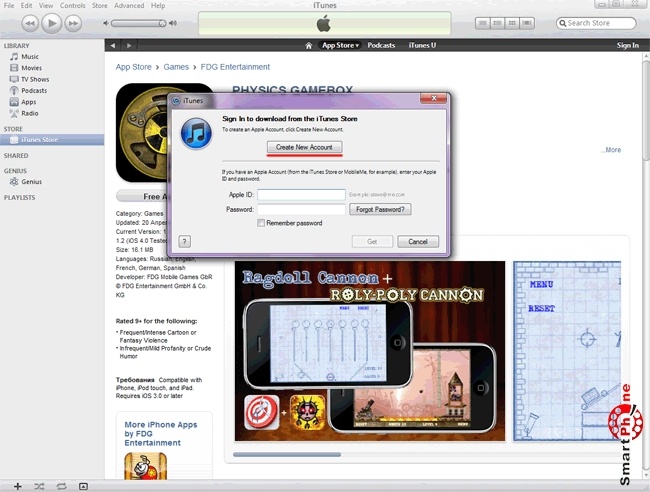
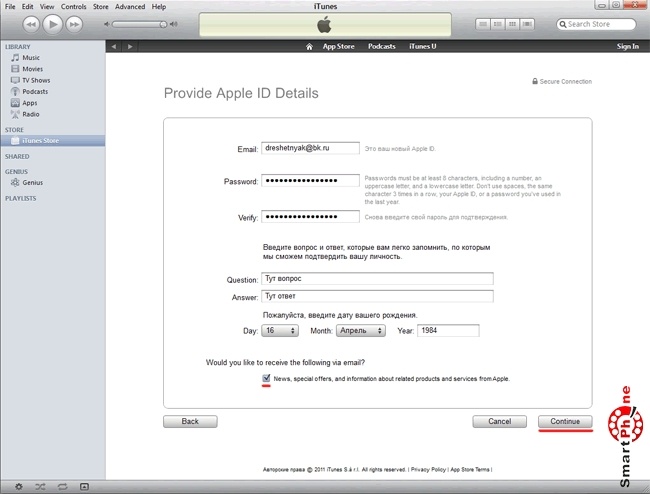
Next you need to enter the address Email, which will become your login in iTunes (Apple ID). When entering your password, remember that it must consist of capital letters and lowercase letters, numbers and be at least 8 characters and do not contain spaces. If you want to receive news and offers from Apple, check the box.
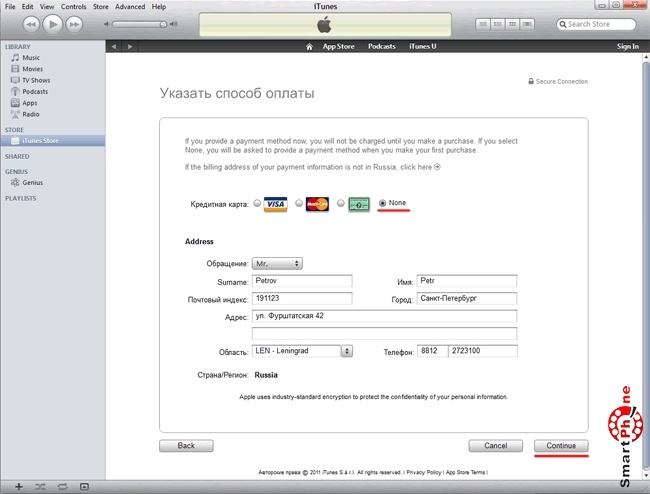
From the list of payment methods, select “None”. The difference between registration in the USA and Russia is only in the data you fill in with the zip code, address, region and phone number. You can enter the proposed data, or use the search on maps and copy information about any other company. The first and last name does not matter, but the rest of the information must be real.
Postal code: 191123
City: St. Petersburg
Address: st. Furshtatskaya, 42
Region: LEN - Leningrad
Phone: 8-812-2723100
On specified email You will receive an email to confirm your account registration.
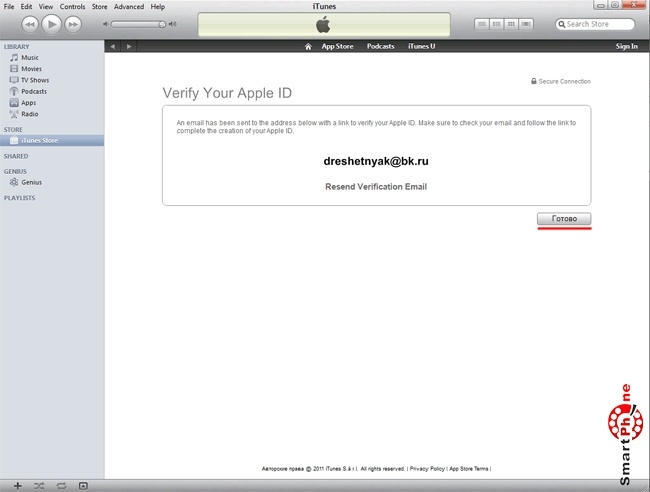
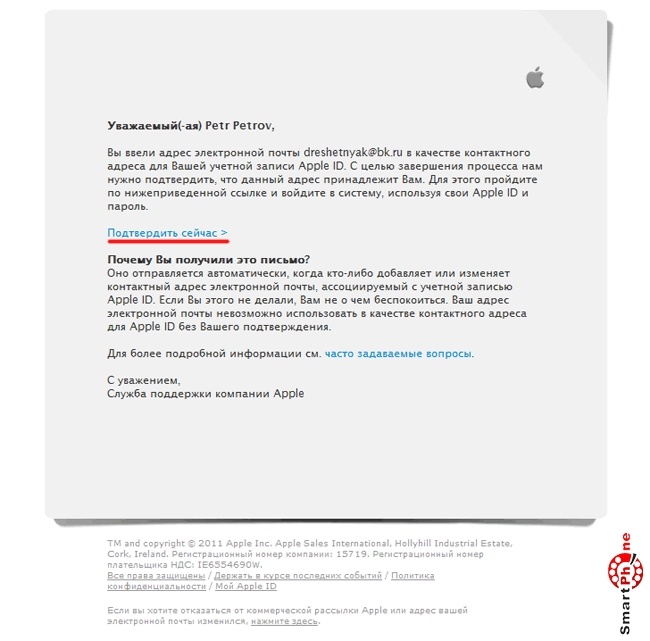
Go to your Mailbox, open the email from Apple and follow the “Verify Now” link.
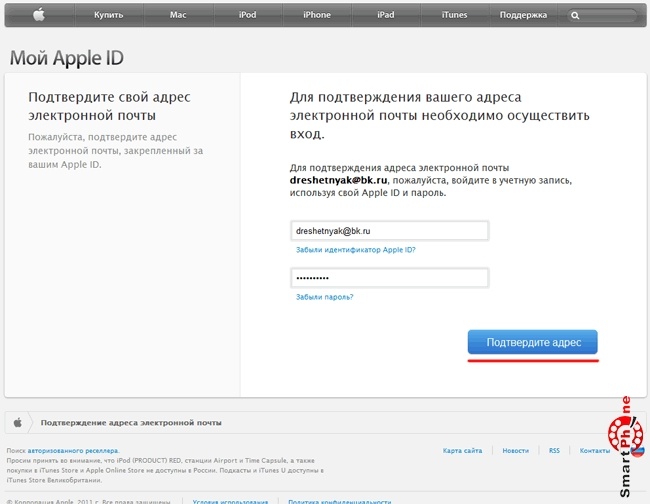
To verify your account, enter the email address and password you provided during registration.
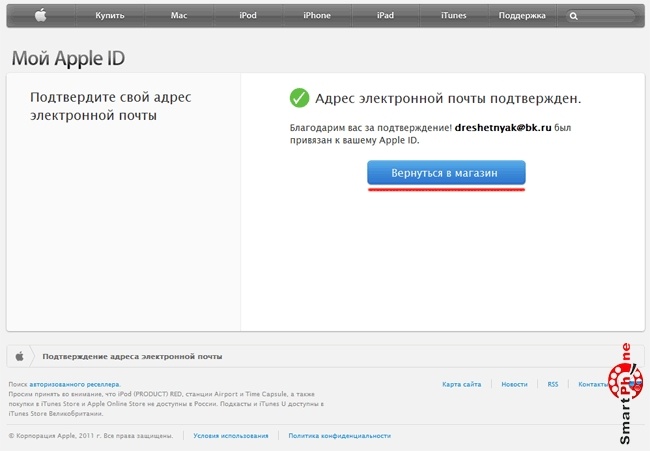
After completing the verification, complete the registration by clicking “Return to Store”. You should be redirected to iTunes from your browser.
Registration completed successfully. Click "Done" to continue.
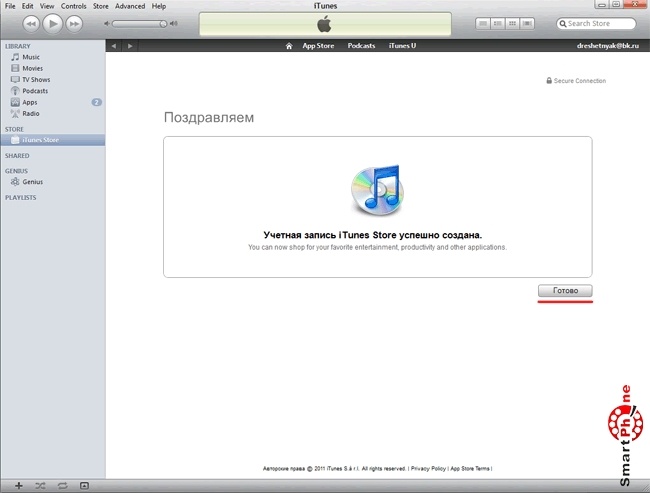
iTunes is now performing the specified actions. The program is downloaded to the computer. At the top of the program you can find out how much time is left until the download is completed. Right in top corner Your email address appears - confirmation of authorization in iTunes.

In the next article I will describe how to work with iTunes program and sync data with iPhone.
Do you have a question about how you can register in the iTunes store without using credit card? In this article you can read about how you can log into iTunes without entering your credit card information
So, when you first log into services such as iTunes Store, App Store or iBooks Store using your personal ID, the system will ask you to enter a payment method so that you can purchase various products here.
If you do not want to indicate the card in this capacity, then you need to perform the following steps.
If you already have Apple ID ID. The first time you try to enter the store, you will still need to indicate contact information Maestro is not accepted for any Visa or MasterCard bank card that you have. The next time you log in, you can delete this payment method; we explain how to do this on the pages of our website.
If you don't have your own personal ID. In this case, you need to create it, as well as create an account for the store. For this:
- Open the service you need, select any free program, video, song or book and click on the "Download" button next to the desired object, and then again at her;
- When the system prompts you to sign in, select “Create new Apple ID";
- Follow the on-screen instructions and enter all required information. When prompted to specify a payment method, click on the “No” option.
- After entering all the data, you will need to confirm your ID by email.
Please note that if "Family Access" is used, then the "None" option will not be available on the page with payment information. You will need to first specify a card and then delete it from the system.
In the event that you carry out the registration operation not through mobile device , but using a computer, then in this case the sequence of actions will be slightly different:
- Launch iTunes
- Go to the iTunes Store;
- Scroll down the page and find your country's flag in the lower right corner of the window, click on it;
- Next you need the App Store section, there you need to select “Music”, “Books” or “TV Shows” by clicking on the corresponding icon in the upper left corner;
- After that, download free content. To search for it, use the “Free” link, and then click on the “Download” button under its icon;
- Next, follow the same instructions as above, i.e. create an account without entering a payment method, i.e. Select the “No” button and also go through authorization.
If the “No” button is not available for you, this means that you have already completed some paid subscription, or there is a debt to the store. Check these options, pay the debt or delete the subscription so that your card is not “tied” to anything, after which it can be removed from the system.
If you are unable to register yourself with iTunes store without providing credit card details, contact customer service Apple support By following link getsupport.apple.com.
If you want to know how to get a loan without refusal? Then go through
You can register an Apple ID directly from your iPad from the App Store. The topic is relevant for people who do not have desktop computer and use iPad as their main " workhorse" Holders personal computers can use iTunes. The instructions below illustrate the process of registering an account without a credit card and subsequently downloading free content from the App Store.
To purchase applications, you must create an account with active credit card information.
Apple ID– your personal login Apple servers. It serves as an identifier in common system and distinguishes the user from the crowd, allowing not only to purchase applications, but also to set up data transfer via iCloud, synchronize the operation of Apple services and configure personal system communications. With proper distribution of Apple ID accounts, it is possible to achieve maximum comfort for the user.
1. We begin registration in the App Store
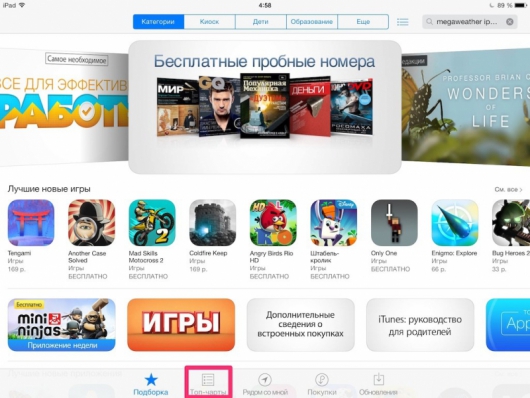
- Open the application App Store on iPad. Select the menu on the bottom panel Top charts.
- We have three columns: top paid, top free, top cash. We select one application among the free ones (the box should say “Free” or “Free”).
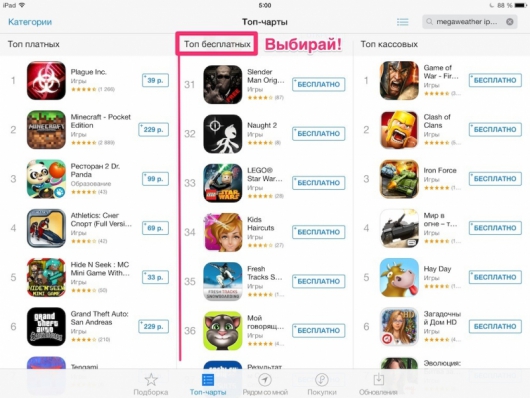
- Click on the button "For free". She will change the inscription to "Install". Click on it again.

- The system issues a request to log in personal account. Choose "Create an Apple ID"

2. We indicate the country in which the App Store is located.
![]()
The fact is that the content in the Russian and foreign App Store may differ. This is why some users prefer to have two Apple account ID. For Russian App Choose Store Russia, for a foreigner – America. Press the button "Further".
Attention! When choosing a foreign American App Store language The program will automatically change from Russian to English. We recommend that beginners start by exploring the vastness of the Russian store.
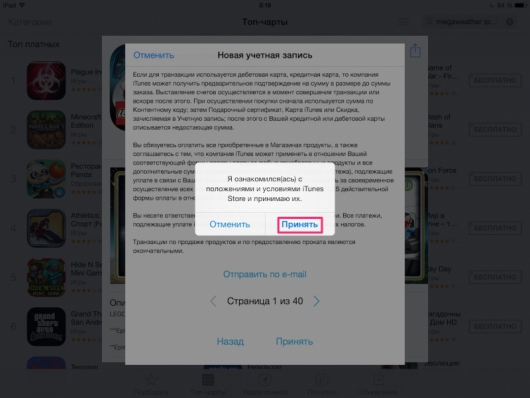
3. We agree to the terms of the license agreement.
To do this, scroll down the text and press the button "Accept". For beginners and if you have free time, we still recommend reading the terms and conditions - there you can find useful information. For example, the answer to the question: “ Why may payments for applications be debited with a delay?”
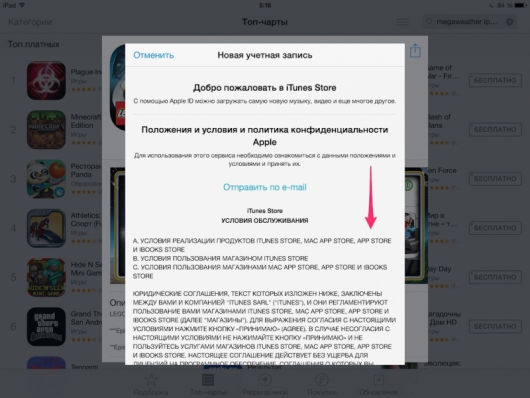
Latest version iTunes asks for confirmation twice. Press " again" Accept».
4. Enter personal data: main and backup email, password, control information, date of birth, mailing list.
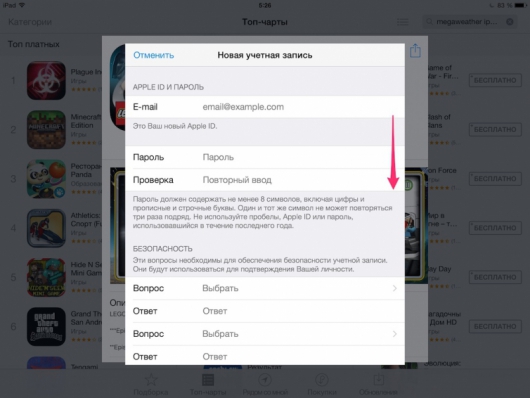
- E-mail address must be valid, since it is to this email that a letter will be sent confirming registration in the system. Your email will also come in handy if you need to restore access to your account.
! The selected Email will become your personal Apple ID.
- Password we come up with it ourselves - we will enter it every time we download applications from the App Store. The system requirements for passwords for Apple ID are described in detail in the article about registering an account through the iTunes Store.
- Examination– repeat our newly created password.
- In the Security category, select 3 security questions and manually write down the answers to them.
- Backup email may be useful if for some reason you cannot access your mail, as well as when Apple settings ID for multiple family members.
- Date of Birth is also one of the security levels of your Apple ID account.
- From newsletters from Apple and iTunes Store e can be painlessly refused.
When filling out the information, scroll down the form until you reach the blue button. "Further". Let's click!
5. Credit card details and address.
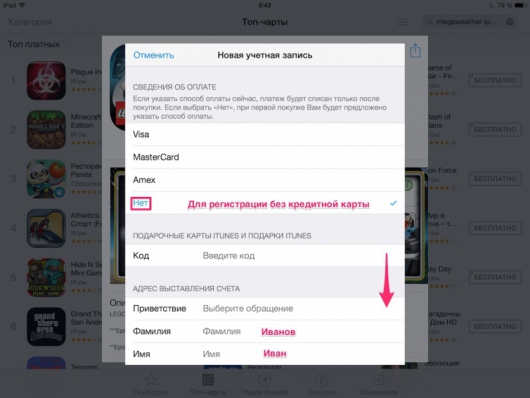
- From the list of cards, select the item "No".
- Address And phone number you can come up with, and at the same time try on the name of Vasya Pupkin or Ordinary Cinderella from Skazochnaya Street.
6. After this, the system will notify you that a confirmation letter has been sent to your email.
Don’t be lazy and go to your mail through a browser, where we follow the suggested link. You will be taken to the Apple website where you will need to enter your new Apple ID And password, created in step 4 of this instruction.
Attention! Emails may end up in the Spam folder and be delayed for up to 12 hours, and even longer during sales and presentations.
7. Open the App Store again and try to download the free application.
This time we enter the details of the newly created Apple ID. If everything is done correctly, the application will download to the iPad.
Short diagram: App Store->Top Charts -> Free app-> Free -> Install -> Create Apple ID -> Country –> License agreement(twice) -> Personal data and control information -> Credit card information -> Confirmation of registration by mail -> Entering Apple ID on the Apple website -> Entering account information in App Store


