A program for creating quick screenshots. Free programs for taking screenshots
Screenshot 2.2.0 - download free program for taking screenshots from your computer screen. The program was developed by Russian guys and ensures fast, as well as convenient creation screenshots
As you know, you can take screenshots using standard means Windows is not very convenient. In addition, there is no way to select only a certain area of the screen. But fortunately there are third party applications that will allow you take screenshots quickly, convenient and high quality. One such program is.
Description of the Screenshot program
Screenshot program developed in Russia, so it fully supports the Russian language. As such, the program does not have an interface window that is familiar to us, but during installation it builds its items into the context menu Windows, and can be accessed by right-clicking the mouse on the screen.
Taking a screenshot is quite simple. There are several options. The first, easiest, is by pressing the “ Prt Scr" At the same time, the program automatically captures the entire screen and saves this screenshot on the desktop. If you need to select only part of the screen, then you need to use the key combination - “ Ctrl+ Prt Scr" In this case, you will have the opportunity to select the area that you want to save in the screenshot. The second option is the previously mentioned context menu. Just click right click mice. Also call up the window for select screenshot area You can do it from the program itself, from the tray area.
It is worth noting that those created using Screenshot images, are saved both on your desktop and in cloud storage. This is very convenient, since you can immediately send a link to the image without uploading it to your email or messenger. Also, you must remember that Images, stored in the cloud, “live” there only 60 days from the last access to it, that is, 2 months.
You will now receive useful advice and the full “layout”: How to take a screenshot of the screen on a computer. We'll tell you and show you everything. And even step by step, together with us, you will make your first screen.
Let's start with what kind of word is “screenshot”? It happens that you urgently need to send a friend via computer the location of an object on the map. But I don’t have a photo at hand, and I can’t find it in Yandex or Google image search.
Or if you are doing online business, and some technical support requires a screenshot of what is happening from you. Here, no matter how you look at it, the need arose: how to take a screenshot of the screen on a computer.
And computer gamers consult with each other and show how they managed to triumphantly overcome the pitfalls in the game.
In general, it will be useful for many to learn how to take a screenshot.
Now we will show you an overview of the most popular programs to take screenshots. With these necessary things, you can scan your computer screen as a picture (image) yourself and for free.
- Using standard Windows tools and the “print screen” button
- Special programs to take a screenshot
- Using the browser you are using
How to take a screenshot on a Windows 7 computer and where to find it
This is the simplest way, but not the easiest. The advantage of it is that it is always at hand, there is no need to download or use special programs. The downside is that in addition to the fact that you need to press a button on the keyboard, you will need a number of other actions to get a screenshot of the screen and find it.
Now to the point. If you need to take a screenshot of the screen on a Windows 7 computer (Windows 7), you will first need one action, or rather a button - the “PrtSc” key ( Print Screen) or “Psc”, or “PrtnScn”, depending on what type of keyboard you have.

If you don’t find it, if there is no “print screen” button, don’t despair, use an electronic keyboard. This is not a problem - press “Win” + “U” at the same time. A standard Windows window pops up, select “keyboard” and turn on “ electronic keyboard».
Where can I find the screenshot I took and where is it saved?
By default, after you take a screenshot of the screen on your computer, Windows saves it to the clipboard. Do not try to find the screen yourself and do not find out where it is saved - just know that your “snapshot” is already in the computer’s memory.
Instructions on how to take a screenshot on a computer using a standard Windows program
- Press the “print screen” button when found the desired picture. It is usually located on the right top corner at "F12".
- Open standard graphics program"Paint". How? Click “Start”, then either type “Paint” into the search box, or select “All Programs”, then “Accessories” and “Paint”.
- Will open graphics editor. In the left corner, click “Paste” or the keyboard shortcut “Ctrl + V”. And your picture will appear from the “clipboard”.
- If you don’t need to do anything with the screenshot you took, then save it. How? In the upper left corner " blue square"("File") - click it and select "Save As". I recommend saving in PNG format.
- After you have selected the “image format”, a window will pop up in which you indicate to the computer where you want to save the “screen”. All.
If you want to edit the resulting image: crop it or make changes (text, for example), then this is easy to do in “Paint”.
Know that when you combine the “PrtSc” (Print Screen) and “Alt” buttons, the system will save only the active window to the clipboard, not the entire monitor image, but part of it. These are ordinary dialogue or reminder Windows windows: Like "Are you sure you're going to delete all your images?" warnings when you empty the Trash folder.
How to take a screenshot on a Windows 7 computer using the standard Snipping Tool
Windows 7 has a “scissors” tool that you can use to cut out an area of the screen on your computer.
- Again “Start”, then “All programs”, “Standard”, and “Scissors”.
- The picture on the display will turn white and a window will appear where you need to click on “Create”.
- Using the mouse, you move the cursor - you indicate, as it were, the area that you need to take a screenshot.
- A new window will appear where you click “File” and “Save As” in the upper left corner.
- Choose a place to place the screen and give it a name. All.

We didn’t find anything characteristically different from how to take a screenshot on Windows 10 or another Windows. In both cases, the screen is easy and simple to prepare using standard programs utilities that are included in every set of operating systems.
Moreover, you can do without any programs at all.
As mentioned above, in order to take a screenshot of the screen on a computer on Windows 10, you need to pay attention to the keyboard and find special Win keys+ Print Sc SysRq (Win + PrtScr). And then, using a combination, click on them - the image on the monitor will darken a little and Windows will instantly take a screenshot and place your screen in a folder.
Where can I find it? - you ask. And here everything is easy and simple. It is located in the Screenshots folder in operating folder"Image". Open and see the screenshots you created.
Useful advice for those who use Windows 10: you can also take a screenshot using combinations Windows keys(with flag) and "N" (English). IN this method the program will take and save a screenshot in the cloud. And it will give you a list of applications with which you can send the picture by email or edit it in an online service.
What to do if there is no such “magic” “print screen” button on the keyboard?
How to take a screenshot if there is no “print screen” button? Or a screenshot program
There is a solution for this method as well.
The most basic thing is to select the “electronic keyboard” and repeat the necessary steps step by step. There is another option using specialized programs.
To be honest, there are a lot of such utilities. And even we haven't tried all of them. But we definitely know that taking a screenshot of the screen using them is not possible. special effort. It’s all quite simple: you need to download the program to your computer, run it and take a “screen capture” - a picture.
Programs for screenshots
- Lightshot (https://app.prntscr.com/ru/index.html)
- Screenshoter (https://screenshoter.rf/)
- FastStone Capture(http://www.faststone.org/download.htm)
- Fraps (http://www.fraps.com/download.php) – takes screenshots in games
- PicPick (http://ngwin.com/picpick)
- Clip2Net (http://clip2net.com/ru/)
- Screenshot of Joxi (http://joxi.ru/lander/)
- Paparazzi (https://derailer.org/paparazzi/) – Mac only
Online services for saving screenshots
- PasteNow (https://pastenow.ru/)
- Makescreen (https://makescreen.ru/chrome)
- Snapito (https://snapito.com/) – you can send pictures to Pinterest
- Web Capture (https://web-capture.net/ru/)
- IMGonline (https://www.imgonline.com.ua/website-screenshot.php) – Ukrainian service
- S-shot (https://www.s-shot.ru/)
- ScreenPage (http://screenpage.ru/)
As you understand, you don’t need to download anything. Just select and copy the link where you want to take a photo, paste it into a special field online tool and edit as you please - save it to your computer.
Take a screenshot using your browser
The browsers themselves will help you on how to take a screenshot of the screen on your computer. There are apps and extensions for everyone search engines: “Yandex”, “Opera”, “Google”, “ Mozilla Firefox"and others.
Today, the leading Yandex, Opera, Google, and Mozilla Firefox in our country already have a page capture function built into the settings.
How to take a screenshot using the Lightshot program?

Let’s look at “Lightshot” as an example; we use it very often. By the way, I took this picture above using “Lightshot”.
- Download the program for free from the official website. (There are no viruses, don’t worry - everything is clean)
- Install (the program always starts along with the computer, along with Windows).
- An icon appears in the upper right corner - an image of a lilac-violet “feather”.
- When you need to take a screenshot of the screen, click on this “pen”.
- The display will dim and you will be asked to select an area to take a photo.
- Right-click and drag the frame to the desired size.
- At the bottom and side of this frame there are additionally located useful features, including for saving a screenshot. (Dealing with the additions will not be any problem. Schoolchildren do everything “with a kick”).
Video - how to take a screenshot step by step on a laptop or computer:
If you have anything to add, you are welcome to comment. And so introduce your friends (share on social networks - it’s useful for them, I’m very pleased, and it won’t be difficult for you to click on the icon of your favorite social network) with 20 or more ways “How to take a screenshot of the screen on a computer yourself.”
Well, proven folk wisdom does not age as quickly as our smartphones and laptops go out of fashion. “It’s better to see once than to hear 100 times”.
We tried to explain to someone through correspondence how to set up WI-FI router? Then you probably understand that it would be better, indeed, for a person to see 1 time than to hear 100 times or read 100 messages! That's why many people ask how to take a screenshot on a computer.
A few words of theory
The word screenshot was exactly transferred into the Russian language from international English. It means an exact image of the user's screen, a screenshot. An abbreviated version of this concept, “screen,” is in common use.
How to take a screenshot on Windows
Actually, here are the main groups of solutions:
- standard Windows tools;
- online services that allow you to take a screenshot on a computer;
- special programs.
Method 1. Screenshot on Windows using system tools.
If you look at the top left side keyboard, there you can find a button PrtScr. The name of this button comes from English Print Screen- screen printing. Previously, by pressing this button, the printer would print the active screen. Now, when we click this button, the screen image goes to the clipboard. All that remains is to paste the image into some program from which it can be saved.
Honestly, on a laptop, this button can be anywhere on the right side of the keyboard. Sometimes, as in the example below, for this button to work you need to start a button with it Fn(Functions - this is usually located on the lower left side next to the button Ctrl) and without releasing it, press the button labeled PrtScr.

To action: press PrtScr, go to the Paint program, it is in any operating system Windows system and click “Insert”.
You can access Paint through the Start menu → All Programs → Accessories → Paint.
Start menu depending on Windows versions is different, the screenshot below shows how to enter Paint in, because I use this particular operating system.

IN Paint program need to press "Insert" and our screenshot ends up here. If necessary, it can be edited using the program or simply saved using the button "File" and than "Save" or t.

IMPORTANT. When you press just the PrtScr key, a screenshot of the entire computer screen is copied to the clipboard. When you press Alt combination+ PrtScr copies the active (selected) window. If you use Win combination+ PrtScr the image of the entire screen is saved in the folder c:\Users\Username\Pictures\Screenshots\. It can be easily found from the Computer menu. In the left column, click the “Images” menu item and then select the “Screenshots” folder.
So, to take a screenshot on Windows means system needs to be pressed PrtScr key, go to any image editing program, such as Paint, and click the “Insert” button.
Method 2. How to take a screenshot on a computer using an online service
It happens that a screenshot needs to be edited and it is often more convenient to do this using some kind of website than installed program. For example, let's take 2 such services. What unites them general principle how to take a screenshot of the screen. Press the button PrtScr(if you don’t know where it is, see the first method just above). We go to the site and click Ctrl+V.

And, as we are advised, we press Ctrl+V.

We see that the screenshot has been inserted into the site window. If you need to save it, then click on it, it opens in a new browser tab.

Congratulations! The image is saved on the computer.
So, to take a screenshot on your computer using online service you need to press the PrtScr, or Alt+ PrScr key, go to the service that we have chosen, press Ctrl+V to paste the image and save it to your computer.
Method 3. How to take a screenshot on a computer using special programs
It is worth saying that there are actually a huge variety of programs that allow you to take a screenshot of your computer screen. If you look at the Softportal service, the request “screenshot” returns 181 applications.

Of course, each of them has its pros and cons, but often people use such programs out of habit. Once installed, figured it out and that’s it. There are especially powerful ones, even paid applications, which allow you to quickly not only create a screenshot, but also edit it. For example, you can add arrows, frames, and other effects.
One of the worthy free options, Joxi program.
You can download it from the official website joxi.ru.
After installation, an icon for this program appears in the taskbar. The first time you launch it, in the bottom right corner you'll be given the option to choose whether you want to capture the entire screen, a snippet, or other options. Subsequently, after clicking on the icon, you can select the area of the screen that you want to save and after selection, the program looks like this:

pay attention to blue icon in the upper right corner. By clicking on the small arrow on the right, you can select:

Conclusions from our “screenshot production”
If you make a resume, there are 3 main solutions that allow you to take a screenshot on a computer
- Use Windows tools;
- Online services;
- Special programs.
Here, as they say, who likes what and for what purposes. Try it, experiment.
I decided to write short review programs that allow you to take screenshots of your desktop. I think the topic is always relevant, in general I’m thinking of starting small reviews of this kind, maybe someone will find it useful in choosing a program.
I would like to draw your attention to the fact that you can download all programs for screenshots from our website, so you don’t have to go far and search.
A good program for creating screenshots, initially it comes without Russian support, but local craftsmen, namely Kopejkin, make good translations to it, so understanding all the settings will not be difficult.
Features include creating several screenshots at once, support for working with multiple monitors at once, full optimization for working with Windows 7 and higher, can ideally capture scrolling pages, after creating a picture you can immediately send it to one of the supported services, you can insert your comments on the created pictures, there are several modes of operation, there is a small side panel that will allow you to view thumbnails, the created screenshot can be immediately sent via e-mail.
I haven’t noticed any drawbacks for myself, plus the program is in a portable version, it leaves no traces on the system, the presence of the Russifier is even more pleasing to the eye, so if you need a program for creating screenshots with an impressive list of capabilities, I think this development will suit you, plus it's free.

- the complete opposite of Screenshot Captor, since it has very little functionality, has almost no settings, does not consume resources, and in general “weighs” little.
However, if you don't need programs with large set possibilities, you just need to take a photo, then in general I think the option should be suitable. From the settings, you just need to check the box next to the task, let’s say you need to take a screenshot of the Active window or the entire screen, plus you need to set a screenshot name template.
Don’t forget that the program’s functionality is very limited, you won’t even be able to use “Hot Keys” - I’m not talking about other standard features.

- probably one of the most famous programs for creating screenshots, it seems to have been produced since 2005, and maybe earlier, version 4, I remember for sure, was available in 2006.
Among the advantages, we can note a convenient capture panel with a wide range of functions, there is support for “hot keys”, you can capture absolutely everything, from windows and menus to any area and scrolling windows, you can even capture several windows. There is an excellent internal editor, you can add text and any lines, arrows and other objects to your screenshots. There is a small set of built-in effects; you can edit the images themselves in terms of size, sharpness, and so on.
The created screenshot can be saved in different formats: BMP, GIF, JPEG, PCX, PNG, TGA, TIFF and PDF, images can be sent immediately after creation FTP protocol, by email or load into another program. Tool available magnifier, eyedropper, ruler, can work with multiple monitors. True, the program requires money from us, as much as 20 dollars, this can be called its disadvantage. There is no Russian support, but there are Russifiers.

- famous program from Ashampoo GmbH & Co. KG, which, like the previous one, requires money from you, also costs 20 dollars, but it already has Russian support, which should make us happy.
The program is optimized to work on multi-core processors, pictures can be taken in one click, in real time you can view our screenshot and start working with it, there are also several capture modes: Capture desktop, capture window, capture menu, capture multiple objects, you can capture a scrolling window, capture free region. By the way, there is also a pipette.
Regarding consumption system resources, here these values will be slightly higher than those of other programs, slightly higher, in general by modern computers You can completely forget about this, but if this is an important parameter for you, you can think about normal operation program requires 256 MB random access memory.
I forgot to add, you can take one photo or several at once.

- this is one of those programs that I have used for a very long time to create screenshots and me for a long time everything was fine, but then, I don’t even remember, some problems started and I began to look for an alternative, but that’s not about that now.
The program is paid and it costs more than its competitors, namely $30. It seems to have been produced since 2005. Russian support appeared in latest versions, for which thanks to the developers. As you already understand, there are a lot of bells and whistles in it.
You get very flexible screen capture options, you can work with the active window, multiple windows, the desired area, you can capture non-rectangular window shapes and the problems will be automatically filled with the desired background color, for example white. Plus, you get the opportunity to work with shadows at a professional level and edit screenshots.
The program can automatic mode Rotate and resize images without losing quality. Support implemented PNG transparency and Alka-canal, plus you can take pictures of several windows at once. Of course, images can be published online, work with formats: JPEG, PNG, TIFF, GIF and BMP, use hotkeys and mouse gestures.

- this time the program is free, which should make us happy, there really is no Russian support. After launch, a beautiful window with a selection of functions awaits you.
you can take a screenshot, capture the entire desktop, images from a webcam, you can use the eyedropper, ruler, play with the brightness parameters, there is a magnifying glass tool.
Of course, when working with photographs, you will have at your disposal convenient panel with the right tools. I forgot to add that you can take pictures after a certain period of time, set it for example for 10 seconds and after this time a screenshot will be taken, sometimes this can be really useful. In general, the program is not bad, it has a pleasant appearance, does not require money from you, the truth has not been updated since 2014, but maybe there are simply no errors in it, which means this is also a plus.

- paid program, the main purpose of which is not to take screenshots, but to write videos, so I won’t talk much about it, detailed review wait until I review video capture programs. Costs this program$37, no Russian support, has not been updated since 2013, but still remains relevant
It takes screenshots well, you can use hotkeys and customize the output format, you can take pictures with a delay. In general, this is all for pictures; it only works with the entire desktop; you cannot select anything separately. I would not use it for screenshots, although in general it was not created for that, I repeat once again.

- very small and simple program, which does not require money from you, has almost no functions, is useful only to those who want to take a screenshot and that’s it, that’s where it’s ideal. As far as I remember, the developer did something tricky with the installation, so be careful.

- a free program that also has a minimal interface and capabilities, but it has a Russian language.
You need to indicate the format you want to work with, set up hot keys, then select a snapshot of what you want to take, the entire desktop, just a window or a selected area, then click on the desired button and you get a picture, everything is very simple as I wrote above.

- the program that I chose for myself, and since I often take screenshots, it took me a long time to choose, but this does not mean that the development is better than others, it just suited me, that’s all.
Among the advantages, one can note the presence portable version, there is Russian support, the program is completely free. There are both General settings and quick ones, where you can specify only the basic parameters for work without bothering to delve into the rest.
I am often asked what settings I have, generally nothing unusual, the output is PNG format, I can’t capture the mouse pointer, the playback sound is on (it’s more convenient for me), I turned off notifications, but turned on the magnifying glass, the delay is 10 MS, when taking window pictures the inter mode is set active window, aspect ratio and IE capture are set, I turned off copying the screenshot to the buffer, JPEG quality costs 85 percent, in the destination I checked the box next to Save directly, I didn’t touch anything in the printers or the expert. Thus, the program takes a screenshot quickly, without asking questions, it immediately throws it where I need it.
Integration with the Imgur service has been implemented, you can capture both the active window and an area, the desired window element, the entire desktop, you can capture a window from the list.

- a very well-known program, among the advantages it is immediately worth noting Russian support, the presence of a portable version from the developers themselves, plus it is free, has good functionality, is not inferior to many paid analogues.
When you create a photo, you can immediately send it for printing via a printer and save it in one of the supported formats. There is an auto-scroll mode, you can work with two monitors, there is sound effects. The program is compatible with FTP, browsers, mail clients and other services. You can take a screenshot of the entire screen, only the active window, you can work with scrolling windows, take a screenshot of only the desired area, there is a repeat mode for the last capture.
After the screenshot is taken, you can edit it, add your own drawing, shape, line or arrow, text, and so on. There are sharpness and blur effects, you can adjust the brightness parameters, there are color palette. There is a screen magnifier and other useful tools.
This application can be safely called ideal for creating screenshots, the program is very good, it was released, if I’m not mistaken, in 2004, it has proven itself well, I think many will like it. Very fast and not demanding on system resources.

- a program from Russian developers that is perfect for those who want to quickly take a screenshot, then add an annotation to it and immediately send it to a social network, such as Facebook or Twitter.
The program has its own cloud where you can store screenshots, it seems like only 1 GB is given, for this you need to go through authorization, or you can log in using an account on a social network, Vkontakte is supported. In the settings you can specify the quality of the picture; this will determine how much your screenshot will weigh.
You can take pictures of the entire desktop or the desired area, in general, everything is the same here, there is also an editor in which you can add different elements to your pictures. Can be blurred certain areas leaving only the pictures important information, which is also useful.

- another program whose name already makes it clear that its main feature is that you can immediately upload the created screenshot to one of the hosting sites; the list of supported ones is very large, so almost everyone will find what they need.
Among the advantages, it is worth noting the Russian language, the presence of a portable version, support large quantity hosting, the ability to extract frames from videos, support for arranging several pictures into one. In the settings, you can specify the screenshot in what format you want to take, there you can also specify the quality of the desired picture, the delay in seconds, and so on. Overall, the program pleased me; it meets almost all the functions of such applications.

- probably one of the most expensive and weighty programs for creating screenshots and recording videos, since we are talking only about screenshots, we’ll close the conversation about video for now. The program costs almost $50, you will need 2.4 to run it GHz processor with one core and two if we're talking about about video, 1 GB of RAM, .NET 4.0 or higher, Active Accessibility 2.0 for capturing links from Internet pages, the free version is limited to 15 days of use, plus copyright will be everywhere.
In addition to standard features, you will have the opportunity to combine screenshots, you will be able to mark the desired area on the screenshot, after which the program will blur everything else and focus on the desired place, it is possible to add all sorts of arrows, buttons and other markup elements to your pictures. There is an Auto-save mode, you can mark your screenshots for quick access to them. Of course, you can quickly share your photos with friends, after processing them in the built-in editor. Thanks to Russian craftsmen, namely Kastaneda, you can Russify the program interface.

If you urgently need functionality standard key Prtsc will be quite enough for this. But if taking screenshots is part of your job, no special programs not enough.
There are many, even many, utilities for taking screenshots, so choosing the one that's right for you may not be easy. Personally, I've tried about a dozen similar programs and, in the end, settled on one, which I still use to this day. True, I still hesitated for some time, choosing three of them, as it seemed to me then best programs to capture screenshots.
Ashampoo Snap
A very original, but somewhat “heavy” instrument. The program has a wonderfully designed interface, by the way, this is the first thing you notice after installation, and a rich set of tools for capturing and editing images.
Ashampoo Snap supports capturing application windows, highlighted menu items, various shaped areas, web pages, taking timed screenshots, sending images via email, etc. social media And so on.

Screenpresso
I used it for a while free version Screenpresso – enough powerful program with a wide range of image capture and editing tools. The advantages of this application are simplicity, automation of tasks, and the ability to create pictures of different shapes.
Screenpresso supports hiding the transparency of borders and corners of program windows, sending images to social networks, via email and FTP, auto-scrolling web pages, sorting screenshots by date, the ability to export to video formats, in other words, complete stuffing.

Screenpresso even has a very good built-in graphics editor with basic set drawing tools - arrows, shapes, selection, the ability to apply effects. Screenpresso also has a nice interface. Why did you delete it? I needed something even simpler and yet powerful, which is why I chose FastStone Capture.
FastStone Capture
Light and small, with a minimalist user interface, FastStone Capture, however, has everything you need to quickly and quality creation screenshots The program is a small floating panel with ten buttons for performing various tasks.
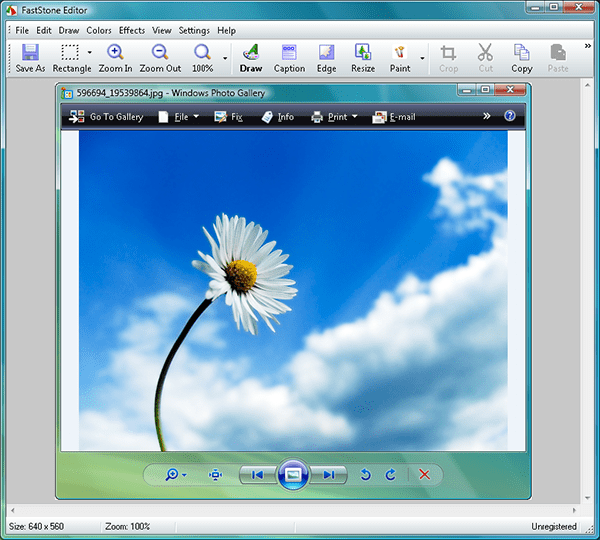
It supports capturing areas of various forms, windows and their individual elements, scrolling web pages, importing captured screenshots from third-party applications, clipboard, printing, sending via ftp, email.
The built-in editor deserves special attention - despite its small size, it has everything you need to operational processing images. It supports overlaying text, markers, arrows, shapes, applying effects, etc. And of course automation, you can’t do without it.
You can “program” FastStone Capture so that each image is processed accordingly.
In general, I chose FastStone. The program combines power, simplicity, low resource requirements, convenience and high speed, and it’s impossible to imagine more for working with screenshots.


