How to log in as root in Linux Debian. All sorts of miscellaneous things about multi-user Linux and the Root administrator account. Obtaining root privileges in a terminal or console
If you want to dig deeper into the Android system, you may find that many applications require presence of root right IN Lately There is practically no need to obtain superuser rights, but some applications still require root rights. This article describes how to open root rights on Android and why you might need them.
Why do you need root rights on Android?
Android is based on Linux. On Linux and other Unix-like operating systems, the root user is equivalent to the administrator on Windows. The root user has access to the entire operating system and can do anything. By default, you are not rooted on your Android device, and some apps will not work without root privileges. Like other modern mobile operating systems, Android runs applications in a sandbox for security purposes.
A root user always exists in Android, there's just no built-in way to access it. Getting root rights means that you gain access to an account with superuser rights. This process is often compared to jailbreaking an iPhone or iPad, but rooting and jailbreaking are different actions.
Root rights allow you to do many useful things. With superuser rights, you can remove or freeze pre-installed applications, run a firewall, enable modem mode even if your operator blocks it, create backup copy system and use many other settings that require low-level access to the system.
Applications that require root access are not difficult to find in Google Play Store, but they will not work until you get superuser rights. Some apps have features that work on rooted devices. Therefore, you need to learn how to root Android to take advantage of these features.
Warnings
On Android devices root rights cannot be obtained by various reasons. In fact, device manufacturers are trying their best to prevent you from obtaining rights to an Android gadget. And that's why:
- Safety: On rooted devices, applications run outside the sandbox. Applications can abuse the superuser rights you have granted and break into other applications, which is usually not possible. That's why Google doesn't approve using Android Pay on rooted devices.
- Guarantee: Some manufacturers claim that after receiving root rights, the warranty disappears. However, obtaining superuser rights will not violate Hardware. In many cases, you can perform the non-root procedure and the manufacturer will not be able to know whether the root rights have been obtained or not.
- Breaking: As always, you do this at your own risk. Obtaining root rights is usually a safe process, but you do it yourself. If you mess something up, you won't be able to count on free warranty service to fix it. If you are worried whether everything will go smoothly, we recommend that you first look for information about successfully obtaining superuser rights on your device to be sure that there will be no pitfalls in the process.
Additionally, rooting may void your warranty, at least for some repairs.
Several ways on how to open root rights on Android
There are many ways to root Android, and which one you should use depends on your phone. In general, rooting will involve one of these processes:
- Unlocking the bootloader: Google and device manufacturers do not officially support rooting, but they do provide an official way for low-level access to some devices, which allows you to then gain root rights. For example, Nexus devices are designed for developers and you can easily unlock the bootloader with a single command. And then get root rights to download the .zip archive containing the file to obtain rights through the recovery screen. Nexus Root Toolkit utility for Nexus devices automates this process. Other manufacturers also offer bootloader unlocking methods, but only for certain devices.
- Exploiting a Security Vulnerability: Other devices are blocked. Their manufacturers do not provide an official way to unlock their bootloader and tamper with their software. These devices can only be rooted by exploiting a security vulnerability that allows the necessary file to be installed on the system partition.
- Installing CyanogenMod or other custom firmware on Android: Technically, this is an extension of one of the above methods. Unlocking the operating system's bootloader and exploiting a security vulnerability allows you to install custom ROMs, such as CyanogenMod, which are often already rooted. CyanogenMod has a simple toggle in the settings that allows you to enable or disable root access. Upgrade to new version CyanogenMod or other custom ROM will not disable root rights if the ROM is already rooted.
In this article we will primarily use the first method, which involves an unlocked bootloader. If your phone requires exploitation of a vulnerability, then we will not be able to help you as the process is different for each phone. You can search for information on how to root Android on the XDA Developers forum. You can use the Kingo Root and Towelroot applications, which allow you to gain superuser rights in one click.
Before you can root your android, you will need to unlock the bootloader using the official method and then install the TWRP recovery environment using these instructions. We will use TWRP to root your phone.
How to download SuperSU on your phone and get root access
So, your bootloader is unlocked and you have installed TWRP. Great! You've done almost everything. To root we are going to use the SuperSU program. This best app, which can grant root access to other applications. SuperSU is also available on Google Play Store, but this version will not give you superuser rights; it can only be used if you already have root rights. Luckily SuperSU is also available as. zip file, which we can download from TWRP. This will allow you to gain superuser rights and install SuperSU app.
So, to get started, follow this link to download latest version SuperSU. Download the .zip file to your computer, connect your phone via USB cable to your PC and download SuperSU to your phone.
Next, boot your phone into TWRP mode. On different phones This is done in different ways, but usually you need to turn off the phone and press and hold the power button + volume up key for 10 seconds, then use the volume keys to go to the “Recovery Mode” item and press the power button to select it.
Once you do this you will be taken to main screen TWRP. Click on the "Install" button.
NOTE: You must make a twrp backup before continuing.
The following screen will appear. Scroll down and navigate to the zip file you downloaded earlier.

Click on the zip file and you will see this screen. Swipe the slider to confirm installation.

When the process is complete, click on the “Wipe cache/Dalvik” button that appears and swipe the slider to confirm.

When the process is complete, click on the “Reboot System” button to reboot the Android system.
If TWRP asks whether to install SuperSU, click “Do Not Install”. Sometimes, TWRP cannot detect that you already have SuperSU installed.
Managing root rights with the SuperSU application
Now that you have learned how to open root rights on Android, you need to learn how to manage these rights.
After rebooting your phone you should see new icon SuperSU in the application menu. SuperSU distributes rights to applications that require them. Whenever an application wants to ask for superuser rights, it must ask your application SuperSU, which will show this request. To make sure that root rights are working, you can download the Root Checker application to check superuser rights.
For example, let's open and add the Clean Master application, which allows you to clean your device of accumulated garbage. It requires root rights for more effective cleansing. After launch, you will see a message stating that you need to provide superuser rights. Click Submit.

For root management rights, open the application menu and click on the SuperSU icon. You will see a list of applications that have been granted or denied superuser rights. You can click on an application to change its permissions.
To remove root rights, open the SuperSU application, go to settings and select the option " Complete removal Root". If this is applicable for your device, then root rights will be removed.
Now you know how to open root rights on Android and how to remove them. Good luck!
In any Linux system there is always one privileged user - root. This user has the rights to perform any actions, delete any files and change any settings. It is almost impossible to somehow limit the freedom of action of root. On the other hand, all other users of the system usually do not have most of the necessary rights, such as the right to install programs, since this is an administrative operation that only root has rights to. Another common operation, accessible only to the superuser, is copying and changing files in system folders where a regular user does not have access.
Earlier this problem The solution was quite simple: if you had the root password, you could log into the system under his account or temporarily obtain his rights using the su command. Then perform all the necessary operations and return back to the normal user. In principle, this scheme works well, but it has many significant drawbacks, in particular, it is impossible in any way (more precisely, it is very difficult) to limit administrative privileges to only a certain range of tasks.
Therefore, in modern Linux distributions instead of the root account, the sudo utility is used for administration.
In Ubuntu default root The account is completely disabled, i.e. There is no way you can become root without enabling it. root is disabled, i.e. it is present in the system, you just can’t log into it. If you want to return the ability to use root, see the paragraph below about enabling the root account.
What is sudo
sudo is a utility that grants root privileges to perform administrative operations according to its settings. It allows you to easily control access to important applications in system. By default, when installing Ubuntu, the first user (the one created during installation) is given full rights to use sudo. Those. in fact, the first user has the same freedom of action as root. However, this behavior of sudo is easy to change; see below in the paragraph about setting up sudo.
Where is sudo used?
sudo is used whenever you run something from the System Administration menu. For example, when you launch Synaptic you will be asked to enter your password. Synaptic is an installed software management program, so to run it you need administrator rights, which you get through sudo by entering your password.
However, not all programs that require administrative privileges, run automatically via sudo. Typically, you have to manually launch programs with administrator rights.
Running graphical programs with administrator rights
To launch graphical programs with administrator rights, you can use the program launch dialog, called up by default with the combination Alt keys+ F2 .
Let's say we need to run file manager Nautilus with administrator rights to somehow change the contents of system folders through the graphical interface. To do this, enter the command in the application launch dialog
Gksudo nautilus
gksudo can be substituted with gksu , and KDE users should also write kdesu instead of gksudo . You will be asked to enter your password, and if you have the necessary rights, Nautilus will run as administrator. You can launch any graphical software with administrator rights by simply writing in the launch dialog
Gksudo<имя_команды>
Be extremely careful when working in applications running with administrator rights. You will be able to perform any operation without any warnings from the system, in particular, delete system files, making the system inoperable.
Running programs with administrator rights in the terminal
To run a command in a terminal with administrator rights, simply type sudo in front of it:
Sudo<команда>
You will be asked to enter your password. Be careful when entering the password no way is not displayed, this is normal and done for security purposes, just type to the end and press Enter. After entering the password specified command will be executed as root.
The system remembers the entered password for some time (keeps the sudo session open). Therefore, subsequent executions of sudo may not require entering a password. To guarantee termination of the sudo session, type in the terminal
Additionally, errors related to channels in Linux are common. When executing a command
Sudo cat test.txt | grep text > result.txt
with root rights only cat will execute, so the file result.txt may not register. You either need to write sudo before each command, or temporarily switch to superuser.
Gaining superuser rights to run multiple commands
Sometimes it becomes necessary to run several commands in a row with administrator rights. In this case, you can temporarily become a superuser using one of the following commands:
Sudo -s sudo -i
This will put you in superuser mode (with restrictions imposed through the sudo settings), as indicated by the # symbol at the end of the command line prompt. These commands are similar in action to su , however: - sudo -s- does not change the home directory to /root, the home directory of the calling user remains home sudo -s, which is usually very convenient. - sudo -i- will also change the home directory to /root.
To exit back to normal user mode, type exit or simply press Ctrl + D.
Using a traditional root account and the su command
Unlocking the root account leads to unnecessary risks (working constantly under root, you have 100,500 ways to “shoot yourself in the foot”), and also makes it easier for an attacker to gain access to your computer.
Ubuntu 11.04 and earlier
To log in as root, just give it a password:
Sudo passwd root
Then on the login screen, click Other... and enter the username (root) and password that you set.
Ubuntu 11.10 and older
Starting with version 11.10, the lightdm login manager was installed, and logging in as root is a little more complicated.
1. Set the root password. Enter in terminal:
Sudo passwd root
2. Turn on the “Enter login” item. Enter in terminal:
Gksu gedit /etc/lightdm/lightdm.conf
At the end of the file add:
Greeter-show-manual-login=true
3. Reboot lightdm. Enter in terminal:
Sudo service lightdm restart
That’s it, the “Login” item will appear on the login screen. In the login field we enter “root”, in the password field - the password that we set in the first stage.
To reverse lock the root account you will need to roll back changes in lightdm settings and also lock account root command in terminal:
Sudo passwd -l root
Setting up sudo and permissions to run various commands
sudo allows you to allow or disable users from running a specific set of programs. All settings related to access rights are stored in a file /etc/sudoers. It's not really regular file. To edit it necessary(for security reasons) use the command
Sudo visudo
By default, it says that all members of the group admin have full access to sudo , which is what the line says
%admin ALL=(ALL) ALL
You can read more about the syntax and customization options for this file by running
Man sudoers
If you make a mistake when editing this file, you may completely lose access to administrative functions. If this happens, you need to boot into recovery mode, in this case you will automatically receive administrator rights and will be able to fix everything. You can also edit this file from a LiveCD.
Allow a user to execute a command without entering a password
In order to prevent the system from asking for a password for certain commands, it is necessary to add sudoers after the line # Cmnd alias specification add a line where you list the desired commands with the full path separated by commas (the path of the command can be found by executing which command_name:
# Cmnd alias specification Cmnd_Alias SHUTDOWN_CMDS = /sbin/shutdown, /usr/sbin/pm-hibernate, /sbin/reboot
And add the line to the end of the file
Username ALL=(ALL) NOPASSWD: SHUTDOWN_CMDS
Attention! The above steps do not replace the need to enter the sudo command before your command
Creating synonyms (aliases)
To not only avoid having to enter a password for sudo, but also to avoid having to enter sudo at all, do the following: open the .bashrc file located in your home directory
nano ~/bashrcand add the lines to the end of the file
alias reboot ="sudo reboot" alias poweroff ="sudo poweroff" alias pm-hibernate="sudo pm-hibernate" alias hibernate ="sudo pm-hibernate" alias shutdown ="sudo shutdown"The validity period of the entered password
Perhaps you want to change the length of time that sudo lasts without entering a password. This can be easily achieved by adding something like the following to /etc/sudoers (visudo):
Defaults:foo timestamp_timeout=20
Here's sudo for the user foo valid without the need to enter a password for 20 minutes. If you want sudo to always require a password, set timestamp_timeout to 0.
sudo doesn't ask for password
sudo without a password is a terrible security hole, anyone is allowed to do whatever they want. If you allowed this on purpose, immediately return it back to how it was.
However, in some cases, sudo suddenly stops requiring a password on its own. If you do visudo , you can see something like this line, which the user apparently did not add:
ALL ALL=(ALL) NOPASSWD:ALL
Most likely, this disastrous line was added when installing a program like Connect Manager from MTS or Megafon. In this case, it needs to be changed to a line that allows only this Connect Manager to be run as root, something like this:
Username ALL= NOPASSWD: /path/to/program
There are other options to solve the problem, small discussion.
Hello, friends! Next up is another very important article (but only if you use operating system Ubuntu). We will talk about superuser rights. The fact is that Linux follows a different path from Windows. For greater protection, they don’t sit under administrator status all the time (unlike how we are used to doing this under Windows). But when performing tasks to configure or install new programs, you have to log in as root. Next we'll talk about how to set up root password ubuntu, how to use superuser rights and why this is all done.
Superuser rights
Ubuntu is, for the most part, a client-centric operating system. Therefore, any serious changes in it, although not prohibited, are not recommended if the user has no idea what exactly is happening.
In particular, even installing software, both third-party and from the Center Ubuntu Applications, requires entering the superuser password - a privileged user (root) who has all rights over the system.
It is clear that the average user who works with the Internet, office and graphic programs, plays games and listens to music, there is absolutely no need to install new applications or make changes to system folders, install and remove equipment.
However, there are still situations when the system needs to perform certain commands from administrator (superuser) mode.

To do this, you can do the following.
There is a utility specially written for this case, sudo, which temporarily gives us administrator rights and allows us to execute superuser-level commands.
Let's say you are going to install software from source texts, downloaded from the network, for this you need to run a number of commands, namely.
Open a console terminal.

Go to the folder with source codes(assume the path to it in the file system looks like this /home/projects/myprog)
cd /home/projects/myprog
Once in the desired folder, run the command./configure (the dot and slash at the beginning of the command are required)
You need to wait until it configures the package for your system and checks whether everything is installed in it for the program to function fully. Depending on the size of the files being installed, this process may take a long time, but all information about what is happening is sent to the console.
The following make command compiles Current Package.
In conclusion, we need to free the system from temporary files make clean command.
Nothing complicated, agree. Unless, before entering each command, you need to “turn on” the system administrator mode using sudo, which always asks for a login password. After a while it will start to get boring.
What is sudo?
This is a utility that provides all the administrator's capabilities to perform operating system management tasks within the framework specified in its settings. In Ubuntu, full rights to use sudo are given to the first user (that is, the one created when initial installation systems). Thus, the first user becomes the superuser root. And the root account is completely disabled by default in Ubuntu. And to register in the system as root, you need to enable it.
How to use the sudo utility?
1. Suppose you need to run some program with administrator rights. Often this need arises for audio or video processing applications, so that the system is configured at the first launch and peripheral equipment is detected.
2. Then, from the keyboard, use the Alt+F2 key combination to call up the program launch dialog.
3. In the line that opens, enter
and the name of the program we want to run. In our case, this is the jackd application (system music adapter) or
For Kubuntu users the utility will look like this
after this, you will be asked to enter the password of the first user and the program will start with administrator rights.
That is, to run any program with graphical interface In the window that opens, through the key combination Alt+F2, you need to execute the option:
gksudo (or kdesu for Kubuntu)
and enter your password.
In the terminal, to run programs with administrator rights, simply type sudo in front of it:
Upon request, you will also need to enter a password. Please note that for security reasons the entered password is not displayed in any way (either in letters or asterisks). You simply type it to the end and press Enter.
For some time, the entered password will be stored in one of system buffers. And you may not have to inject it constantly. However, this is also specified in the settings of the sudo utility.
To disable the sudo session, enter the command in the terminal:
this is guaranteed to disable superuser mode.
There are cases where sudo doesn't work as it should.
In Linux, the channel method of working with data is very often used, when one command immediately transfers the processed data to another. For example
cat test.txt | grep text > result.txt
in this design cat command copies the contents of the test.txt file and passes the data to control with the grep command, which writes all occurrences of the word text to the result.txt file.
So, if you try to execute this sequence using the sudo utility (for example, both files are system files),
sudo cat test.txt | grep text > result.txt
then nothing may come of it. For the first part of the expression, sudo will work, but for the second it will not.
Here you need to either write sudo in both parts, which is not entirely convenient. Or temporarily switch completely to superuser using the command
The -s option allows you to temporarily enter administrator mode (with the restrictions specified in the sudo utility settings) and remain there as long as necessary.
To get out of this mode, just type exit or the key combination Ctrl+D.
How to enable root account in Ubuntu.
Let us make a reservation once again that there is no great need to use root (instead of sudo) in the system. Moreover, in root mode there are often problems with the graphical interface.
However, a disabled root only indicates that its login parameters are not fully specified, namely, there is no password.
In order for the user to work as root, you need to set a password for him using the command
sudo passwd root
After this, the system will ask you for two passwords: for the first user and a new one for root. Entering both will give you access to root administrator capabilities.
Another action that must be performed is unlocking the entrance user root into the system via GDM - login manager. Go to the System menu? Administration? Login window, on the “Security” tab, check the box next to “Allow local input system administrator."
That's it, now you can log in as superuser root and have all the privileges and problems associated with root.
If you need to disable this feature, you can simply remove the password for the root user using the command
sudo passwd -l root
Let us repeat once again that the use root rights on the system unnecessarily risks crashing the platform and ultimately reinstalling it. Therefore, you need to thoroughly weigh the pros and cons before creating the ability to work in the system under the root superuser.
Thanks for reading the article. I apologize for the lack of traditional pictures, the fact is that my laptop began to act up virtual machine, so I can't log into my Ubuntu and take screenshots. I'll try to fix this issue as quickly as possible. I recommend that you subscribe to blog updates, because an article will be published soon, with which it would probably be worth starting a series of articles about this operating system. The article will be, as you probably already guessed, about installing Ubuntu. Ask your questions in the comments. Until the next articles!
Articles that may be useful:
1.
2.
3.
I myself have been using Ubuntu at work and at home as my main OS for almost two years now. On home server I use server Ubuntu - it works like clockwork, for days on end, it is used as a gateway and NAS. But with Windows it’s not possible to work for days on end without any problems; something is always happening to it, even if you don’t touch it.
Answer
Data-lazy-type="image" data-src="http://androidkak.ru/wp-content/uploads/2015/08/Android-Root..jpg 500w, http://androidkak.ru/wp- content/uploads/2015/08/Android-Root-300x127.jpg 300w" sizes="(max-width: 500px) 100vw, 500px">
 If you opened this article, then you probably already have at least some idea of superuser rights. But in the rare case that you are regular user Android and opened the article out of idle interest - a small educational program.
Superuser rights, also known as root rights (from the English “root”, which means “root”), are the ability to record, change and delete information located in the system (or root) partition file system. This concept similar to administrator rights on Windows and used on UNIX-based operating systems (Linux, Android, Tizen, etc.)
Root rights can be obtained on almost all Android devices and we will definitely go through the most popular ways to get them, but first let's answer two very important issues: Is what we are about to do now safe, and also whether it is worth it.
What are the consequences of obtaining root rights?
Data-lazy-type="image" data-src="http://androidkak.ru/wp-content/uploads/2015/08/vnimanie.jpg" alt=" please note" width="145" height="121" srcset="" data-srcset="http://androidkak.ru/wp-content/uploads/2015/08/vnimanie..jpg 300w" sizes="(max-width: 145px) 100vw, 145px">
!}
 First of all, answer the question - did you read the warranty agreement that came with your phone? If you’ve read it, then you know that obtaining root rights is a gray area and whether your warranty will remain with you at the end of the process depends only on the manufacturer’s policy.
Next, remember one thing - being a superuser gives you full access. FULL. That is, if it suddenly occurs to you to delete important system files, no one will stop you. So pay close attention to which programs receive these rights from you, and also consult with others who are more experienced users Android before you do anything stupid.
What benefits can you get with root rights?
Data-lazy-type="image" data-src="http://androidkak.ru/wp-content/uploads/2015/08/android-vigody.jpg" alt="Benefits of obtaining rights" width="159" height="50" srcset="" data-srcset="http://androidkak.ru/wp-content/uploads/2015/08/android-vigody..jpg 300w" sizes="(max-width: 159px) 100vw, 159px">
!}
The list of things you can do with root rights is simply huge. Just take a look at the most popular reasons for gaining root privileges!
IMPORTANT: The program that allows you to perform this action is indicated in parentheses.
- Removal preinstalled programs a la Facebook or Twitter from system partition(Titanium Backup);
- Transferring application cache from internal map memory to external (FolderMount);
- Transferring the application section to a memory card (Xposed App2SD);
- Global modification of the interface with the ability fine tuning(almost all Xposed modules);
- Disable advertising in all applications (Adaway);
- Hacking in-app purchases from PlayMarket (Freedom);
- Disabling license verification in non-hackable applications, as well as hacking them (Lucky Patcher).
Read also: How to do Hard Reset on an Android device
And that is not all! In fact, with root access to your phone, you can do almost anything with it. And if your fuse has not yet cooled down, let’s move on to the actual process of obtaining root rights.
Instructions
data-lazy-type="image" data-src="http://androidkak.ru/wp-content/uploads/2015/08/Android-s-root-pravami.jpg" alt="Rooted Android" width="165" height="91" srcset="" data-srcset="http://androidkak.ru/wp-content/uploads/2015/08/Android-s-root-pravami..jpg 300w" sizes="(max-width: 165px) 100vw, 165px">
!}
 Unfortunately, you cannot simply enable root access on Android - manufacturers have tried to protect their creations from the crooked hands of users and this is, in fact, correct - otherwise the number of calls to service centers would have increased significantly. But this does not mean that it is impossible to obtain root rights at all. Moreover, for most phones this procedure is extremely mundane and takes only a few minutes.
There are many ways to obtain root rights and, as in our other instructions, we will go from simple to complex.
1. From the device itself
Data-lazy-type="image" data-src="http://androidkak.ru/wp-content/uploads/2015/08/google-play-logo-274x300.png" alt="google play market"width="92" height="100" srcset="" data-srcset="http://androidkak.ru/wp-content/uploads/2015/08/google-play-logo-274x300..png 405w" sizes="(max-width: 92px) 100vw, 92px">
![]() Despite the fact that many manufacturers block access to their smartphones as much as possible, hackers from all over the world from time to time find loopholes that allow them to gain rights with just one tap on the screen. And other manufacturers simply trust their users and even publish algorithms for bypassing their protection. It is on this principle that various automatic recipients of root rights are based, the most famous of which is KingRoot.
Despite the fact that many manufacturers block access to their smartphones as much as possible, hackers from all over the world from time to time find loopholes that allow them to gain rights with just one tap on the screen. And other manufacturers simply trust their users and even publish algorithms for bypassing their protection. It is on this principle that various automatic recipients of root rights are based, the most famous of which is KingRoot.
All it takes to root your device using KingRoot is to press one button. Among the disadvantages, KingRoot is not the most familiar to old users Android manager right Instead of the usual SuperSU, KingRoot uses own program, which, however, is not very different from SuperSU in terms of functionality.
In addition to KingRoot, the Framaroot program is popular, as well as numerous other applications for Android devices, for example, VRoot,
2. Using a PC and special programs
Data-lazy-type="image" data-src="http://androidkak.ru/wp-content/uploads/2015/08/android-i-pk-300x258.jpg" alt="Connection android to pc" width="150" height="129" srcset="" data-srcset="http://androidkak.ru/wp-content/uploads/2015/08/android-i-pk-300x258..jpg 473w" sizes="(max-width: 150px) 100vw, 150px">
!}
 If it is impossible to transmit instructions for unlocking from inside the Android system, this does not mean that this cannot be done at all. At least, programs such as SuperOneClick, Kingo and many others operate according to this principle. As the basis of their work, they use a USB connection between an Android smartphone and a PC, through which commands are sent.
Read also: How to make from Android Windows devices Phone
In order to be able to do this, you need to enable the “USB Debugging” option in the settings of your Android smartphone. It is located in hidden section“For developers”, and to open this section (if it is closed), go to the “About tablet” section and click on the “Build version” item ten to fifteen times.
After you have turned it on, simply connect your Android smartphone to your PC (in Mass mode Storage, of course) and launch the program of your choice, then follow the instructions for working with it. You will have to think for yourself about which program to choose and how exactly to use it - the number of Android devices is too large for you to be able to say with confidence which ones work with one program and which ones work with another.
3. Using PC and ADB terminal
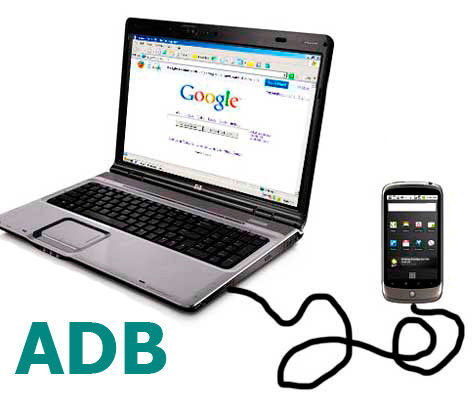
For those who do not know what adb is, we answer. ADB is a special protocol that allows your Android device to receive instructions from your computer via a USB cable. Thanks to the fact that ADB is part of the Android systems, such teams in most cases have more high priority, how security solutions phone manufacturer.
For normal operation ADB with your phone you will need at least:
- Computer with operating system Windows system 7 (newer operating systems may be unstable or not work at all with the necessary drivers);
- A set of adb drivers for your device (usually issued by the manufacturer);
- USB cable;
- Actually, a smartphone with the “USB Debugging” option enabled in the settings;
- An archive with an ADB terminal unpacked into the “X://ADB” folder, where X is a (preferably) non-system drive.
IN Linux Mint(as in Ubuntu) root login is disabled by default. On the one hand, this is correct so that a user who previously worked in Windows constantly as an administrator does not repeat this mistake in Ubuntu/Mint. But it is still possible to log in as root.
root in Linux Mint
Attention! Working as root is dangerous! It is recommended to use the sudo utility to perform administrative tasks. The author is not responsible for the consequences of careless work with elevated privileges!
Obtaining root privileges in a terminal or console
To obtain root privileges in command line just enter sudo -i, then your password. This can be used when you need to enter multiple commands as root().
Assigning a root password
In order to be able to log in as root, you must first assign a password for it (by the way, in Debian and openSUSE the password for root is assigned during the installation process). To do this, enter on the command line sudo passwd root, and then enter your password and the root password twice. After this, you can log in as root on the command line. In addition, if you enter su and enter the root password, you will receive elevated privileges (as from sudo -i).
Enabling the ability to log in as root in MDM
So, by assigning a root password, we were able to log in as root in the console, but not in graphical environment. The fact is that by default in the MDM settings, logging in as root is prohibited. In order to resolve it, you need to go to the system settings, open Login Window Preferences, open section Options and mark Allow root login. After this you can log in as root in graphical mode.
By the way, Thunar, launched from root, shows a yellow line with a warning, while Nemo only shows a red line with the words “Elevated Privileges”.
By the way, in the same Ubuntu, logging in as root is less limited: Ubuntu's LightDM does not prohibit logging in as root by default, and the Nautilus file manager that comes with Ubuntu, launched with root rights, does not show any warnings (like Dolphin).


