Burning a bootable USB flash drive for Windows 7. Five programs for creating a bootable USB flash drive
In this article we will look in detail at how to make a bootable USB flash drive for Windows 7. I have repeatedly received emails about how to create bootable flash drive Windows 7, but to convey information, just words are not enough, because there are nuances that you need to know.
Now let's figure it out with you when you need to create a flash drive with Windows 7. Sometimes while working on personal computer, laptop or netbook, there is a need to download from some external device. This may be needed to recover from any failures, eliminate the consequences of a virus infection, or simply when reinstalling operating system.
On desktop computers this problem, as a rule, is solved with the help of CD/DVD media, but for other devices, for example, netbooks that do not have a disk drive, using a bootable USB flash drive is often much easier than looking for an external DVD-ROM. I have it, but ordinary users Those who need to install Windows 7 from a flash drive do not need to buy it. Since they will not do this procedure often.
This is what the external drive looks like:

I also want to note that those users who recently bought a computer, laptop or netbook that has USB 2.0 and USB 3.0 ports should connect a USB flash drive with Windows 7 to USB 2.0. Because Windows 7 does not support USB 3.0. Define USB port 3.0 are easy, they are usually colored blue. Look at the photo below:

In any case, you will understand this when the error appears and further installation Windows 7 will not be possible. Below in the photo you can see how it will look on your monitor 😉: 
I recommend that you read the first method and about the Windows 7 USB/DVD Download Tool program, because they are the most reliable options for creating an installation flash drive with Windows 7. The first method is good because you will not need to use any programs, everything you will need - do this procedure already installed Windows 7. Of course, if it is not at hand, then proceed to method number two.
What you need to know before creating a flash drive
Before starting the process, you need to check that certain conditions are met:
- Availability of installation Windows disk 7 or an image with the Windows 7 operating system;
- Availability of a “clean” flash drive with a size of at least 4 GB. If there is information on it, it must be copied somewhere, because during the work the USB drive will be formatted and all its contents will be destroyed;
- Support boot/select from flash drive in BIOS.
I hope there are no difficulties with the first two conditions, but I’ll say a few words about the third. Actually, installing an operating system is a topic for a separate article, but in short it’s done like this. In the moment bootstrap computer we enter BIOS settings(on most computers, to do this, immediately after turning on the power, press or hold DELETE key). For one of the most popular versions BIOS initial the menu looks something like this:

Next we go to the menu “ Advanced BIOS Features" and there we find the item "Boot Sequence". It specifies the sequence of devices from which the BIOS will try to boot the computer. After that we look at everything possible options selection in the “First” item Boot Device" If there is anything related to USB there, it means booting from flash media possible.

After any changes in the BIOS, remember to save using the “F10” key.
So, if all the conditions are met, then you can move on to the topic of the article, how to make a bootable USB flash drive for Windows 7. In this article, we’ll talk about four methods that are the most popular.
Why am I talking about more than one method? Each user has preinstalled programs, and one of the programs may already be on your computer. Why install other programs, because you can use the ones that exist.
By the way, there is an article on the blog about how to install Windows 7 when your computer has a disk drive: "". It will also be useful when you create a bootable USB flash drive and begin installing Windows 7.
The procedure for creating a flash drive via the command line
As I said above, this method is one of the most proven, which is why I want to talk about it at the very beginning of the article.
In the following three methods, you will learn how to make a bootable USB flash drive with Windows 7 using specially created programs with convenient graphical interface. But in the operating room Windows system 7 has a built-in feature that does not require downloading any utilities, but it does force you to work hard, typing a lot of letters on the keyboard.
If any of the readers saw those times when all work on the computer was done by typing various teams V DOS system(white letters on a black screen, English-language commands and no multitasking!), then he will probably experience some nostalgia for the old days.
And for those who believe that Windows has always been graphical, they are deeply mistaken.
All work is carried out in the so-called team Windows mode. To go there, click the “Start” - “Run” button.

Enter “cmd” in the field and click “OK”.

A black screen appears in which we type commands, each of which is completed by pressing the “Enter” key.

To make everything clear, I will provide screenshots after each command. This way you will know that you are doing everything right.
Diskpart – enters disk management mode. You may be required to confirm running as an administrator - enter the administrator password and click “Yes”.

List disk – displays a list of all disks, by serial numbers, starting from zero.

Be especially careful here: all drives are displayed, including HDD partitions. So get it right the required flash drive. It's not difficult: it's listed after all hard drives and has a size you know.

Let's say that the flash drive is number 3. We type select disk 3. For example, if you have it in 4th place, then type select disk 4 accordingly.
Attention! Let me remind you, in order not to be mistaken, you can calculate your flash drive by size (look in the “Size” column).

After this, a message will appear on the screen confirming that you have selected some kind of media. It says: “Disk 3 selected.”

Now, if you are 100% sure that you are selected correct number media, enter the “Clean” command. This command completely deletes all files. I hope that you have already copied all the data from the flash drive; I talked about this at the very beginning of the article.

Type the command “Create partition primary” and press “Enter”. For those who want to know what will happen now - the creation of a primary partition on the disk.

Your section has been created.

Now enter “Select partition 1”.

Enter the command “active” to mark it as active and press “Enter” as always.

Enter "Format fs=NTFS". We format our flash drive as a file one NTFS system. This operation will take a few minutes.

We are waiting for the formatting to finish.

After formatting the flash drive, a corresponding message will appear.

Enter the Assign command. As a result of executing this command, the utility will automatically create new disk, for example, H: and will display an information window with a message about this event.

All necessary actions were performed with the flash drive. Type Exit. We're finally leaving command mode.

Now we have an empty but bootable USB flash drive. All that remains is to copy the files from the Window 7 distribution onto it and you can begin the installation. Make a bootable USB flash drive for Windows 7 using command line It’s simple, the main thing is to remember all the steps.
UltraISO program
UltraISO - extremely useful utility for working with disk images. It will be useful not only for our current purposes, and therefore I recommend that you familiarize yourself with its capabilities. The program is not free, but it has trial version with quite suitable functionality for our task. Download the program here: and click on the “Free Trial” link.

We select a language from a long list (Russian is also available, among others). Click on any arrow in the “Russian” line (these are links to download from different site mirrors).

After downloading the program, run it to install.

In the next window, read the license text (optional) and select “I accept the terms of the agreement” and click “Next” again. Friends, who reads program licenses? I personally don't ;).

Now you need to specify the location on the disk where the files will be copied. necessary files. Leave it as default and click “Next”.

We receive an offer to create a shortcut to launch in the Start menu. We agree by clicking the “Next” button again.

If you want to add a program shortcut to your desktop, click on the first checkbox.

We are ready to install the program, click the “Install” button.

When copying files is finished, click “Finish”.

If everything is correct, click on “ Trial period..." and go to home screen programs.


Insert the flash drive into your computer, laptop or netbook.
Then go to the “Bootboot” menu and select “Burn image” hard drive».

After that, click “Format”.

Set the file system to NTFS, FAT32 is selected on the screenshot:


After formatting, click “Burn”.

Select "Yes".

We are waiting for the Windows 7 bootable USB flash drive to be created.

Now you can install Windows 7.

Microsoft utility
Usage special program from Microsoft allows you to make a bootable USB flash drive for Windows 7 in many ways similar to the previous case, except that the utility is free and you can use it as much as you like. It's called Windows 7 USB/DVD Download Tool, download the program using .
To use the program, you must install Microsoft. NET Framework 2.0. To download it, follow the link.
After downloading the program, launch it and click “Next”.

The next window displays information that everything is ready for installation. We confirm by clicking on the “Install” button that we agree to install this program.

That's what he told how to create a bootable USB flash drive with Windows 7 V Windows program 7 USB/DVD Download Tool. This official program from Microsoft and it seems to work not bad. But a comment appeared that it was impossible to create a bootable USB flash drive with this program. Maybe so, anything can happen, so I’ll write another way in which you can create a bootable USB flash drive with Windows 7. And this time we will use good program Ultra ISO, I have already written about her more than once on the blog, in various articles.
I think that there is no need to tell us why such a bootable flash drive will be useful to us; if you are reading this article, then most likely you are interested in the question of how to create it, and not why it is needed.
In this way you can create a flash drive not only with Windows 7, but also Windows XP and Windows 8. What’s up, you can burn any image, any boot disk, for example Dr.Web LiveCD. Well, if you have already changed your mind about creating such a flash drive, then the image can be written to disk without any problems, I wrote about this in the article.
How to create a bootable USB flash drive with Windows 7?
We will need:
- UltraISO program. You can download it on the Internet in a couple of minutes, just type in search engine request “Download UltraISO”. After downloading, you need to install it. Installation is the most common, but if you don’t know how, then read the article. The program is paid, but when starting just select “Trial mode”. And if you want, you can buy it.
- A disk image with Windows 7, or any other image that you want to burn to a flash drive. This image must be in the format .iso, I hope you have already downloaded it.
- Flash drive size minimum 4 GB(this is for Windows 7, if you want to burn a small image, then 1 GB is enough). The flash drive will have to be formatted, and this will destroy all the files on it, so you need either a clean flash drive, or copy all the information from it to your computer in advance.
If everything is ready, then let's begin.
Launch the program Ultra ISO(there should be a shortcut on the desktop and in the start menu). I will show by example English version, since I had a problem with Russian, all menu items are displayed in an incomprehensible font. But there’s nothing wrong with that, everything is clear and so.
The program has opened, now we need to select the .iso image of the boot disk, in our case with Windows 7. Click “File” and select “Open”.

Find our image, select it and click “Open”.

Now our image is open in the UltraISO program, all that remains is to write it to a flash drive. Click and select “Write Disk Image...” image of a tough disk...).

A window will open in which we need to specify some settings. Look what's opposite “Write Method:”, the value has been set to “USB-HDD+”. And on the contrary “ Disk Drive” the flash drive we needed was selected.
Now we still need to format the flash drive and we can start recording. Click the button “Format”. Don’t look at the fact that I have a 1 GB flash drive, I just don’t have a larger capacity at hand. You must have a flash drive of at least 4 GB.

A small window will appear in which we will format our flash drive.
Formatting a flash drive will destroy all files on it. So save them to your computer in advance.
Only needed at point "File system" select NTFS, and click “Start”.

A warning will appear, click “Ok”.

 That's it, the flash drive is formatted. Closing the window “Format” by clicking on “Close”.
Cast aside doubts, believe in your abilities, making a bootable USB flash drive for Windows 7, 8.1 or 10 is as easy as shelling pears, and you will definitely be convinced of this. There are several ways to create a bootable USB flash drive from iso, using different programs- simple and smart, humpbacked and crooked, which one to choose is up to you.
In this article I will try to show you a fairly simple method with 100% efficiency. Whether you like it or not, soon the world of optical drives will sink into oblivion and will never return; everyone without exception will have to learn how to create a bootable flash drive, and in my opinion it is better to do this before than after the OS crash. A thousand-times proven boot program will help you realize your need. Rufus flash drives USB
How to make a bootable USB flash drive for Windows 7-8.1 correctly - detailed instructions.
So, correct creation bootable flash drive 7, 8.1 will require the following from you. Flash drive with a capacity from 4GB to 8GB (depending on the size iso image A). Next you will need good ISO image of the operating system, and note that it’s not a shmurdyak rebuilt by some unknown person, with a set outdated programs, and 100% working official Windows version 7 or 8.1 (whatever you like). It is this image that will save you from surprises, ensure error-free operation and DirectX update, drivers, etc., will allow you to make a high-quality bootable USB flash drive 7, 8.1.
For those who have problems with the image Windows iso– the disc is scratched, the DVD drive is broken, it’s not in the laptop initially, I’m too lazy to create an image, etc., I suggest using the largest Russian-language torrent tracker and filling this gap. Win 7 and Win 8.1 images are based on official Microsoft releases, with the addition of a small useful feature- For example, Win image 7 contains all 32-bit and 64-bit versions from Starter to Ultimate, which you will agree is very convenient.
The second thing we really need is a program for creating a bootable Rufus flash drive. No installation required, just download and run. To avoid any surprises, the name of the folder with the program, the folder with the image and the path to them should not contain Russian letters, use the Latin alphabet - English.
Next to the Rufus program folder, create another one with the intuitive name Windows-7 or Win-8. Opening file manager Total Commander(if you don’t know what this is, it’s time to learn how to operate files correctly) or an archiver WinRAR– unpack the archive with the program, transfer it Windows image from the downloads folder to the created folders.
It remains to voice the last cautionary phase - the transfer and preservation of information important to you from USB Flash drive on HDD. The first step in the process of creating a bootable Windows 7 USB flash drive will be formatting - cleaning and repartitioning the media.
Step one. We turn our attention to the desktop, double click launch the “Computer” shortcut, right click Click on the flash drive shortcut with your mouse. In the menu that opens, left-click on “format”, then what to select and where to click is shown in the picture. We are waiting for completion preparatory process completed, we are 100% ready to make a bootable Windows 7 USB flash drive correctly and the first time.
1. Open the folder with Rufus program– launch it, in the program window that opens, find “Device” and point to the flash drive, if it’s not picked up automatically.

2. The next item is “Partition scheme”, select “MBR for computers with BIOS or UEFI”. If you need to install the operating system on a hard drive with a capacity of more than 2000GB, use “GPT for computers with UEFI”.
3. “File system” - FAT32 can be used with images smaller than 4GB, images larger than 4GB require the use of the file system - NTFS.
4. We leave this item unchanged, the default “Cluster size” is 4096 bytes.
5. “ISO image” - click on the optical drive icon, select the ISO image of the required system in Explorer.
6. Raise your gaze a little higher, set a name that is clear to you for the “new volume label” - in English letters, Win-7 - for example.
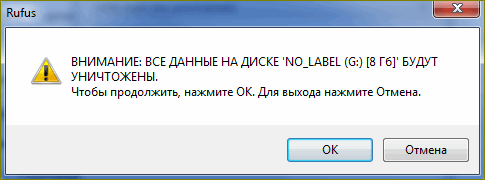
7. We check the correctness of the choice and next action we command Rufus to make a bootable USB flash drive 7, press the “Start” button. The program will issue a warning in Russian, click “OK” and leave the computer alone.
We take our playful hands and carry them to the kitchen, by force of will we force them to pour tea or coffee - we slowly enjoy the drink. This is a simple precaution; by not doing so, you will ensure the continuous creation of a bootable Windows flash drive; you will not be able to cause an error, overload the processor, stupefy the file subsystem, etc.

Depending on the speed characteristics of your PC, after 5-15 minutes you will see the inscription - 8 “Ready” - the bootable flash drive has been created, press nine - “Close”.
That’s actually the whole science, how to make an image of a bootable flash drive - you now know. As you can see, nothing extremely complicated or impossible, the main thing in this matter is to maintain a sequence of actions and you will definitely succeed.
How to make a flash drive bootable inBIOS.
To successfully install Windows from a flash drive, there is only one question left to answer - how to make a flash drive a boot disk in the BIOS? The question is important, because starting the installation differs from your usual order, with DVD disc, which leads to a common mistake and a surprised look.
For those who missed it, let me remind you that in the process of creating a flash drive, we selected the USB-HDD option. The bootable flash drive is recognized exactly as we called it, so there is no need to look for the usual DVD activation in the BIOS section - First Boot Device.
We place the installation flash drive in a free USB 2.0 connector, wait until the PC picks it up, and then reboot. During the system boot process, press Delete or F2 and enter the BIOS. Depending on the BIOS version, the name of the required Boot sector may differ, but the principle of operation will be the same. Open "Advanced" BIOS Features».
Next, click on the “BootSeq & FloppySetup” section, find “Hard Disk Boot Priority”, go in and see the list of drives installed in your PC. Your bootable USB flash drive should be on an honorary last place– this is exactly what needs to be corrected. To make a flash drive a boot disk, we need to move it to the top of the list - using the keyboard arrows (up and down), select flash drive. Next, use the “+” keys, press — for now installation flash drive won't be first on the list. We complete the manipulations in the BIOS by pressing the “F10” (save) button.
In order to make the flash drive bootable in BIOS - UEFI, we still find the same Boot sector– Loading, “Fixed Boot Order” opens before us and a sea of “Boot Option” under it - this is setting the system boot sequence. We look at “Boot Option #1” - as a rule, the hard drive or SSD is located there, the system queries it first and the operating system starts loading from there. Click on “Boot Option #1”, find and select the inscription “USB Key:” with the name of your flash drive.
Press “F10” - Windows installation 7 started from a flash drive, then we wait for the first reboot, go into the BIOS, return the hard drive to first place, save. After the reboot, the installation will continue, if you missed this moment, refuse reinstallation, The PC will start to reboot, go to the BIOS - return the HDD to its place.
How to make the image of a bootable flash drive active in the BIOS - and now you know this. The likelihood that you won’t succeed is practically zero - and these are not just words - this has already been proven by more than tens of thousands of users. A little attention plus a sequence of actions - nothing more is required from you. No. 2 - .
Before installing the OS, I advise you to take a look at - I’m sure you will find something interesting for yourself. Well, after successfully installing the operating system, do not forget to tell your friends how to make a bootable Windows 7 USB flash drive correctly - it will be useful for everyone. Good luck!
Best wishes
Denker.
Have you decided to reinstall Windows? Then you will definitely need a bootable USB flash drive. Especially if you have a PC, netbook or laptop without a disk drive. Therefore, we will tell you in detail how to create a bootable Windows 7 USB flash drive using ultraiso. This popular program, which makes it possible to mount images, write various data to disk, copy images from disks, and also create bootable media. True, not everyone knows how to use the utility. But you shouldn’t worry - after reading this article, you will know how to make a bootable USB flash drive using this program.
It is believed that this is one of the simplest and convenient utilities. Mainly used to create, read and edit disk images. With its help you can easily run a file with iso extension or mdf (although ultraiso works with more than 30 formats). But the most important thing is that you can easily make a bootable USB flash drive so that you can then install a new operating system (Windows, Linux, MS-DOS) on a laptop or PC without using a CD or DVD-ROM.
The ultraiso program can be freely downloaded from the Internet. Just type its name into a search engine. After that, all that remains is to select any resource to download the installation file of this utility.
By the way, the program itself is paid. But Ultra ISO also has a trial mode, which has slight limitations in functionality. However, they do not interfere with recording the OS “bootloader” onto a flash drive.
Has ultraiso and Russian-language interface. Of course, this makes working with this program easier. Another plus is its small size. Installation file weighs only a little more than 4 MB.
How to make a bootable USB flash drive using ultraiso?
As an example, let's look at how to use this program to create a bootable USB flash drive with "seven". Moreover, we immediately note that with ultraiso you can make bootable media from another OS.
What do we need in addition to the program?
- First, you need a disk image with Windows. In this case, it is advisable to iso format.
- Secondly, you can’t do without the flash drive itself. Its size is at least 4 GB. By the way, the “Seven” distribution kit weighs approximately this much. In addition, we recommend formatting the drive in advance (best). Thus, you will remove everything unnecessary and prepare the flash drive for new entry files.
All is ready? And is ultraiso installed on your computer? Then let's begin.


That's all. The creation of the bootable USB flash drive is complete, and it can be used to install the operating system. To do this, you will need to go into the BIOS or UEFI and set it to boot from this media.
For reference! Usually the default menu in the ultraiso program is set to English language. To change it to the Russian-language interface, you need to click on the “Options” tab, then go to the “Language” section and select the appropriate item.
Is it possible to create a bootable USB flash drive from a folder with files or from a DVD using ultraiso?
Above we looked at the option in which an iso disk image was used. But if you have a DVD on which Windows distribution, then you can make a bootable USB flash drive directly from it. For this:
- We install the disk into the drive of a laptop or PC.
- Launch ultraiso.
- Click "File".
- Select “Open CD/DVD”.
- We indicate the path to the drive where the Windows disk is located.
- Everything else is done according to the instructions described above. Therefore, click on “Boot”. Then click on “Burn hard disk image”. We check all the parameters and click on the “Record” button.
Another option for creating a bootable flash drive is possible, which does not use a boot disk or its image with a distribution kit, but only a folder on the computer where all the files for installing Windows are copied:
- In the ultraiso program, at the top of the menu, click “File”.
- Select the “New” item.
- Next, click on “Bootable DVD image”.
- In the window that appears, you need to specify the path to the distribution. And specifically to the file called “bootfix.bin”. As a rule, it is located in the “boot” folder.
- Click "Ok". Now at the bottom of the menu ultraiso programs select the folder where the Windows installer is stored.
- Using the mouse, transfer its contents (not the folder itself!) to the top right side, which is just empty.
- If a message appears that “ New look is full”, and the special indicator on the right turns red, then click on it with the mouse. Then set the size to 4.7 GB.
- All other steps are the same as in the previous options.
Increasingly, USB drives are used to install or reinstall the operating system. They are not only easy to transport, but also more functional than CDs (for example, a netbook does not have a disk slot).
Sometimes during the installation of new software a driver error may occur: “Not found required driver for floppy drive optical disks" In this case, you should connect the flash card to a different slot. Usually this problem occurs among users of new PCs equipped with 2.0 and 3.0 USB ports. More new port not supported by Windows 7. You can identify it by its blue color.
We will tell you how to create a bootable Windows 7 USB flash drive in several ways.
What do we need to create a bootable USB flash drive?
To create a bootable USB flash drive, we need the following things:
- A disk with a recorded Windows 7 OS or its image.
- Empty flash drive, size 4 GB or more.
- Settings that make it possible to work with a flash card in the BIOS.
If you do not have a boot disk, you can download the OS from the Internet. Use only trusted sites.
Format flash drive
As for the memory card, it must be completely cleaned. To do this, you need to resort to formatting. Save important files before starting this process. The formatting itself can be done as during recording boot file, and before that.
To clean the flash drive, connect the USB to your computer. In the My Computer folder, right-click on the icon of the desired removable disk. Click "Format".
When specifying parameters, select file system NTFS. You can also change the name of the removable drive (Volume Label). Other indicators should not be changed.

The flash drive can be formatted using the command line. To do this, write in it: format H:/FS:NTFS/Q/V:My_Fleshka and press Enter.
Selecting boot in BIOS
To select boot from a flash card, enter the BIOS. Typically this will be done by pressing Delete or F2.
First, you need to make sure that the USB controller is turned on. The status can be checked in the Integrated Peripherals tab. Opposite USB Controller and USB Controller 2.0 should be Enable.

Command line
Writing a bootable Windows 7 USB flash drive using the command line is the simplest method that does not involve additional downloads software. However, you will need to enter enough a large number of tasks.
Open the command line using the combination Win + R – cmd. Enter the following tasks using Enter:
- Diskpart. This command allows you to manage objects via the command line.
- List disk. After entering this command, a list of disks will appear in front of you. Determine which one is your flash drive. As a rule, it is located after the hard drives. In addition, you can recognize it by its memory size.
- Select disk #. Instead of #, write the number under which the flash drive is listed.
- Clean. Deletes all information from the selected media.
- Create partition primary. Creates a primary partition.
- Select partition 1. Select the created partition for further work with it.
- Active. Enabling a section.
- Format fs=NTFS . This command will format the flash drive on the required system.
- Assign. A new disk will be created. If necessary, you can assign a letter to it by adding letter=N.
- Exit.
- Next, simply transfer the OS files to removable media and you can get to work.
This method is only complicated big amount commands You may have noticed that the process of formatting a flash drive is included in the description of the steps. If you have done this beforehand, simply omit these items.
Please note that the files you transfer to the flash drive must be unpacked. The program will not work if you just transfer the .iso file.
Ultra ISO
The utility is designed for developing and editing disk images. Making a bootable Windows 7 ultraiso USB flash drive is quite simple. To do this, you just need to download and install the program. You can purchase the full certified version or use the free trial mode.
Install the program on your PC using the Installation Wizard. As an administrator, launch the application by clicking Trial period. Next, follow this algorithm:

Windows 7 USB/DVD Download Tool
This application is located in public access and works on the ultraiso principle. It is offered by the official Microsoft developer. 
Go to the Start menu and launch the program. Find the image you need software. Click Browse, select a file and click Next.
A window will appear asking you about your preferred storage medium – flash card or disk. Select USB Device.
Click Begin copying. If a pop-up window appears, select Erase USB Device – Yes.
When the process is completed, the flash drive can be used.
UNetBootin
The advantage of this program is that you can simply download and run it. No installation required. Creating a USB flash drive with Windows 7 takes place in one step.


