Ssd what to disable. Enable the TRIM function. Firmware update for SSD
Even in very powerful PCs the main brake for a long time remained hard disks(HDD). The reason for this phenomenon is that the principle of operation of such a disk is associated with the rotation of the spindle, and the rotation speed cannot be increased above a certain limit. This manifests itself in the form of delays when accessing data. Modern solid state drives (SSDs) are free from this drawback, but to get the maximum SSD performance-Disks require some optimization. The article discusses issues related to working in Windows 7.
Intended use of SSD drives
If we take into account that the cost of SSDs is still significantly higher than the cost of HDDs (although there is a tendency for it to decrease), then the main area of application for SSDs remains the media on which the operating system is installed. Performance is exactly system partition usually defines overall speed PC operation, including boot and shutdown speeds, execution time of most OS functions while the PC is running, which are sometimes even invisible to the user. Moreover, this application does not require an SSD large capacity, usually no more than 80 GB is enough, and the price of such a drive will not greatly affect the user’s wallet.
The need for SSD optimization
Modern OSes, not excluding Windows 7, were designed to work with SSDs, but many OS functions designed for HDDs were still allowed for solid state drives, although they did not provide an increase in productivity, and sometimes even reduced it. These are functions such as indexing, defragmentation, PreFetch, SuperFetch, ReadyBoot and some others.
An SSD, unlike a HDD, has a large but limited number of write cycles, which determines its “lifetime” and the reliability of the entire system as a whole. To achieve maximum effect and the maximum lifetime of such a drive, it is necessary to optimize (set up) both the SSD itself and Windows.
SSD optimization
Before installing Windows 7 on an SSD, you must complete the following settings:
- Make sure that the SSD is hardwired latest version microprograms To know current version Firmware can be updated using the CrystalDiskInfo utility. Then you need to go to the site SSD manufacturer and compare the current version with the last one listed on the site. If the need for a firmware update is discovered, you need to know about this before installing the OS, otherwise after the update all data will be lost! The firmware must be updated in accordance with the manufacturer's instructions;
- Switch the SATA disk controller to AHCI mode. This mode allows you to use the latest technologies to improve disk performance, in particular SSDs. This mode supports technologies such as:
- Hot Plug, providing " hot swap"and installation of the drive (without turning off the PC);
- NCQ, which supports deep command queues;
- TRIM, which significantly increases the performance of SSD drives and their service life.
Switching to this mode is done through the BIOS, but this is only if done before. Switching to AHCI mode when the OS is already installed means getting an unpleasant effect - you will not be able to load the OS;
- In cases where the "seven" is already installed, you can also switch to this mode if you know how to edit the system registry. To do this you need to follow the branch HKEY_LOCAL_MACHINE\System\CurrentControlSet\services\msahci, find the Start parameter and set its value to 0. Then restart the PC, go into the BIOS and change SATA mode-controller on AHCI. After reboot Windows 7 will detect a new device and install it;
- When installing the OS, it is advisable to leave about 15-20% of the entire SSD capacity unallocated. This area will be used as the drive gradually wears out.
SSD disk and optimization of Windows 7 OS
When optimizing, you need to keep in mind that some actions will require editing system registry. Therefore, before performing optimization, you should create a restore point or a copy of the registry. It is also advisable to determine the index before optimization Windows performance 7, so that after it you can see the result of the settings made.
Setting up an SSD disk when working in Windows 7 consists of performing the following steps:
- Disable indexing for SSD drive A. To do this, click Start – Computer. Then click right click By system disk and select Properties. In the window that appears, there is an option “Allow the contents of files on this disk to be indexed in addition to the file properties”; you need to uncheck it;
- Disable automatic defragmentation SSD disk. The easiest way to do this is to type the word “defragmentation” in the search bar (on the “Start” button) and click OK. A window will appear in which the only thing you need to do is uncheck the “Run as scheduled” option and click OK;
- Disable file logging NTFS systems. To do this, click “Start” and enter cmd in the search bar. A command line window will appear (administrator privileges are required), in which you need to enter a command like fsutil usn deletejournal /D C: (if the system drive is C:) and press Enter;
- Disable sleep mode. If the OS is located on an SSD disk, then it will boot very quickly even without sleep mode, so there is no need for it. To do this, you need to do the same as in previous paragraph, but then enter the line -powercfg –h off and press Enter;
- Disable the page file. It is advisable to perform this action if you have a 64-bit OS and a RAM size of 4 GB or more. To do this, you need to follow the path Computer - Properties - Extra options system — Advanced — Performance Parameters — Advanced — Virtual memory- Change. Uncheck the option automatic selection and check the “Without” option;
- If the swap file is still used, then disable unloading of kernel and driver codes from RAM. If they remain in RAM, the number of entries on the SSD will be reduced and the system’s response to user actions will improve. To do this you need to open the registry key KEY_LOCAL_MACHINE\SYSTEM\CurrentControlSet\Control\Session Manager\Memory Management, find the DisablePagingExecutive parameter in it and change its value to 1.
Optimization with SSD Tweaker
Many PC users do not have sufficient training to deal with manual setting Windows 7 on SSD. The utility was developed specifically for them. SSD Tweaker. It exists in several versions - free and paid. In demon paid version some functions are disabled, but even without them you can achieve optimal interaction between Windows 7 and the SSD, and do this both manually and automatically.
Hello!
After installing the SSD drive and transferring to it copies of Windows from my old one hard drive- The OS needs to be configured (optimized) accordingly. By the way, if you installed Windows “from scratch” on an SSD disk, then many services and parameters will be configured automatically during installation (it is for this reason that many recommend installing “clean” Windows when installing an SSD).
Optimizing Windows for SSD will not only increase the service life of the disk itself, but also slightly increase the speed Windows operation. By the way, regarding optimization, the tips and recommendations from this article are relevant for Windows: 7, 8 and 10. And so, perhaps, let’s begin...
1) Is ACHI SATA mode enabled?
how to enter BIOS -
You can check in which mode the controller operates quite simply - look BIOS settings. If the disk operates in ATA, then you need to switch its operating mode to ACHI. There are really two nuances:
The first is that Windows OS will refuse to boot, because... it does not have the necessary drivers for this. You need to either install these drivers first, or simply reinstall Windows (which is preferable and easier in my opinion);
The second caveat is that your BIOS may simply not have the ACHI mode (although, of course, these are already somewhat outdated PCs). In this case, most likely, you will have to update the BIOS (at least check the official website of the developers to see if the new BIOS has such an option).

Rice. 1. AHCI operating mode ( Laptop BIOS DELL)
By the way, it would also be a good idea to go to device Manager(can be found in the panel Windows management) and expand the tab with IDE ATA/ATAPI controllers. If there is a controller with “SATA ACHI” in its name, then everything is in order.
AHCI operating mode is required to support normal operation TRIM SSD disk.
REFERENCE
TRIM - command ATA interface, necessary so that Windows can send data to the drive about which blocks are no longer needed and can be overwritten. The fact is that the principle of deleting files and formatting in HDD and SSD drives is different. When using TRIM, the speed of the SSD drive increases and uniform wear of the drive's memory cells is ensured. Windows 7, 8, 10 OS support TRIM (if you use Windows XP, I recommend updating the OS, or buying a disk with hardware TRIM).
2) Is TRIM support enabled in Windows?
To check whether TRIM support is enabled in Windows, just run command line on behalf of the administrator. Next, enter the command and press Enter (see Fig. 3) .
If DisableDeleteNotify = 0 (as in Fig. 3), then TRIM is enabled and nothing else needs to be entered.
If DisableDeleteNotify = 1, then TRIM is disabled and you need to enable it with the command: fsutil behavior set DisableDeleteNotify 0. And then check again with the command: fsutil behavior query DisableDeleteNotify.
Optimizing Windows (relevant for 7, 8, 10) for SSD drive
1) Disable file indexing
Moreover, when this function is disabled, the number of writes to the disk decreases, which means its lifespan increases. To disable indexing, go to the properties of the SSD disk (you can open Explorer and go to the “This PC” tab) and uncheck the box next to “Allow indexing of files on this disk...” (see Fig. 4).
2) Disabling the search service
This service creates a separate index of files, which speeds up the search for certain folders and files. An SSD drive is fast enough, and besides, many users practically do not use this feature - which means it is better to turn it off.
First open the following address: Control Panel/System and Security/Administration/Computer Management
3) Disable hibernation
At using SSD disk - this function somewhat loses its meaning. Firstly, the Windows system already starts quite quickly with an SSD, which means there is no point in saving its state. Secondly, unnecessary write-rewrite cycles on an SSD drive can affect its service life.
Disabling hibernation is quite simple - you need to launch the command prompt as an administrator and enter the command powercfg -h off.
4) Disable auto-disk defragmentation
Defragmentation is a useful operation for HDD drives, which helps to slightly increase the speed of work. But this operation does not have any benefit for an SSD drive, since they are designed slightly differently. The access speed to all cells in which information is stored on the SSD disk is the same! This means that no matter where the “pieces” of files lie, there will be no difference in access speed!
In addition, moving “pieces” of a file from one place to another increases the number of write/rewrite cycles, which reduces the time SSD services disk.
If you have Windows 8, 10*- then you don’t need to disable defragmentation. The built-in Storage Optimizer will automatically determine
If you have Windows 7, you need to go to the disk defragmentation utility and disable its autorun.
5) Disable Prefetch and SuperFetch
Prefetch is a technology thanks to which the PC speeds up the launch of frequently used programs. It does this by loading them into memory in advance. By the way, on the disk it is created special file with the same name.
Since SSD drives are quite fast, it is advisable to disable this function; it will not give any increase in speed.
SuperFetch- similar function, with the only difference being that the PC predicts which programs you are likely to run by loading them into memory in advance (it is also recommended to disable it).
When you open the registry editor, go to the following branch:
HKEY_LOCAL_MACHINE\SYSTEM\CurrentControlSet\Control\Session Manager\Memory Management\PrefetchParameters
Next, you need to find two parameters in this registry subkey: EnablePrefetcher and EnableSuperfetch (see Fig. 8). The value of these parameters must be set to 0(as in Fig. 8). By default, the values of these parameters are 3.
Rice. 8. Registry Editor
By the way, if you are installing on an SSD Windows disk“from scratch” - then these parameters will be configured automatically. True, this does not always happen: for example, failures may occur if you have 2 types of disks in your system: SSD and HDD.
Utility for automatically optimizing Windows for SSD drive
You can, of course, manually configure all of the above in the article, or you can use special utilities for thin Windows settings(such utilities are called tweakers, or Tweaker). One of these utilities, in my opinion, will be very useful for owners of an SSD drive - SSD Mini Tweaker.
SSD Mini Tweaker
An excellent utility for automatically configuring Windows to run on an SSD drive. Settings that changes this program allow you to increase the operating time of your SSD by an order of magnitude! In addition, some parameters will slightly increase the speed of Windows.
Advantages of SSD Mini Tweaker:
- completely in Russian (including tips for each item);
- works in all popular OS Windows 7, 8, 10 (32, 64 bits);
- no installation required;
- completely free.
PS
Many people also recommend transferring browser caches, swap files, temporary Windows folders, system backup(and so on) from the SSD drive to the HDD (or disable these features altogether). One small question: “why do you need an SSD then?” So that the system just starts in 10 seconds? In my understanding, an SSD drive is needed to speed up the system as a whole ( the main objective), reducing noise and rattling, increasing laptop battery life, etc. And by making these settings, we can thereby nullify everything benefits of SSD disk...
That's why I'm under optimization and shutdown unnecessary functions I only understand that it really won’t speed up the system in any way, but it may affect the “lifetime” of the SSD drive. That's all, good luck everyone.
Windows 7 was not originally designed to run on SSDs. Since their introduction, Microsoft has released numerous updates designed to improve the performance of the OS on solid-state drives. However, you need to carry out additional optimization manually, which gives much more effect.
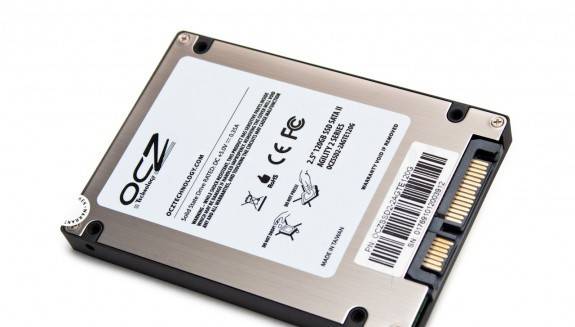
SSD drive
Solid State Drive (Solid State Drive) is a storage device based on flash memory and a control controller.
They are widely used in computer technology and have some advantages over HDD:
- high speed;
- impact resistance;
- heat resistance;
- small size and weight;
- noiselessness.
In Windows 8 and higher, they work stably and quickly, but under older OS, problems with wear and performance are inevitable. To avoid this, you need to optimize the parameters, which is what this article is devoted to.
What does optimization give?
Windows 7 has several services that increase the performance of regular hard drives. But with SSDs, they not only do not bring any benefit, but interfere with operation and significantly reduce the service life of the device. Windows setup 7 on an SSD nullifies all attempts by the OS to destroy it, and allows you to achieve better performance.
Are solid state drives faster?
Even if you compare the maximum read/write speed declared by the manufacturer, the difference will be huge.
The linear speed of solid-state drives is 3-4 times higher.
Ordinary HDD rarely can demonstrate a read speed of 180 MB/s. At the same time, he does not waste time moving the head, but focuses on reading the data.
For a regular SSD, such as the Kingston SKC380S3, the limit is 550 MB/s. for reading and 520 for writing. In mode linear reading it uses all channels and reads data big blocks. However, if you take a deeper look at performance, the superiority of SSDs becomes even more impressive.
When testing the reading speed of 512 KB blocks (small files), the gap becomes even larger. The SSD does not spend much time searching for a block, as a result of which its speed still remains within 500 MB/s. The hard drive spends more time moving the head than reading files. Its speed is reduced by three times and averages 60 MB/s, which is 8 times slower than an SSD.

If we go deeper into the tests and check the speed on 4 KB blocks, the SSD will outperform the hard drive by 50 times. Loading OS, copying documents, small images and launching programs - all this corresponds to this mode of operation. In addition, solid-state drives can simultaneously handle multiple requests, while HDDs are single-threaded.
Video: how to properly configure the system for operation
Setting up an SSD in Windows 7
This process, requires patience and includes the following procedures:

Setting up Windows 7 for an SSD begins with flashing the drive's firmware. All manufacturers regularly release new versions of software for their devices, which eliminate errors and weak spots previous versions. You can download it from the official websites of the brand. The software package also usually includes instructions for installing it and updating the firmware.
AHCI and TRIM
The SATA interface has many features that speed up data transfer. In order for them to become available, you need to enable AHCI controller, since most PCs are still configured by default to work with an outdated ATA controller. You can switch to AHCI either automatically or manually.
Automatic switching:

During the next Windows startup 7 will do the rest of the work itself. If for some reason the utility does not work, then you can do everything manually.
Manual switching:

As a result, after a reboot, the AHCI controller will be visible in the device manager.

AHCI is finished, the TRIM command is next. It helps the OS notify the SSD about what data file system no longer contains, and which the drive can delete. That is, this command removes garbage and does not allow it to reduce the level of performance.
You can enable TRIM if the following conditions are met:
- The SSD controller supports this command;
- SATA: AHCI mode is enabled.
If the conditions are met, you can proceed to enable TRIM:

Disabling system protection
The instructions are quite simple:

It is important to understand that by disabling protection, the OS will not make recovery checkpoints and, in case of failure, will resort to Windows recovery will be impossible. Therefore it is worth taking advantage software other developers to provide recovery functionality, e.g. Acronis True Image.
Disable disk indexing
Indexing is carried out only to speed up the search process. hard drive. Given the SSD's multi-threading and performance, indexing and searching services are not needed.
Disable search like this:

We disable indexing like this:
- open “Computer”;
- click right key mouse on the section -> Properties;
- at the very bottom of the window that opens, uncheck the “allow indexing...” checkbox;
- apply and close the window.
Along the way, you can also disable defragmentation, which is useless on SSD drives due to quick access to the cells.
You can do this:

Disabling paging
The paging file is necessary for running programs that require a large amount of memory. If there is not enough RAM, then temporary data is loaded into this file. You can disable it only if you have sufficient RAM installed on your computer (at least 8 GB). Otherwise, it is better to move the swap to another partition, that is, to the hard drive.
Disable:

Disabling hibernation
Computer hibernation or deep sleep was invented by Microsoft so that the computer does not spend a lot of time starting up. This feature allows you to turn off the computer's power without closing applications. When you wake up the next time, all programs continue to work.
At the same time, when the PC goes to sleep, a large amount of data is written to the drive and the SSD wears out faster. Also, for many people, hibernation is not needed, since PCs with solid state drive loads very quickly.
If you decide to disable hibernation, you can do it like this:

SSD Tweak Utility
To optimize your system to use the SSD drive automatically, you can use the SSD Tweak Utility. The program allows you to quickly and easily do everything that was stated above, except for turning on AHCI mode. The program is published with a different set of tools.

Eat free version With basic set functions:
- disabling defragmentation;
- disabling recovery;
- stop indexing.
Other features available in the paid version of Tweaker Pro:
- enable and disable services;
- setting hibernation settings;
- validation and experimental optimization of the TRIM command.
The program allows for more deep customization, which includes many more parameters. After starting the program, on the right side of the window you can see detailed description and tips for setting up the system.

To start optimization, just click big button In the middle of the program window is the auto-tuning configuration. The utility itself will configure the basic parameters and provide a report.
Settings and Windows optimization 7 under SSD - the process is not fast, accompanied by several system reboots and visits to the BIOS. However, if you do not configure it, you will not be able to disable it. unnecessary services, then after a few months the once-fast SSD may exhaust its supply of write cycles and stop working.
To prevent this from happening, after each reinstallation of the system, it is necessary to optimize it. This can be done either manually or automatically using SSD utilities Tweaker.
If you use an SSD hard drive, you may experience that your computer running Windows 10 will start to slow down and freeze while working with the disk. But before you start looking for the reason and changing the drive settings, it’s worth considering that Windows 10 is different from previous versions operating system, including in terms of relations with the SSD drive.
Do I need to configure and optimize an SSD drive in Windows 10?
In Windows 7, XP and others outdated versions systems, one could stumble upon processes that prevented the computer from using the SSD drive. For example, it was necessary to manually disable automatic disk defragmentation, since it was harmful to it. Nose the advent of Windows 10, the situation has changed in the opposite direction: now the system independently determines that an SSD drive is connected to the computer, and not only does not conflict with it, but also automatically optimizes it.
From all of the above, we can conclude that you should not touch the settings of the SSD drive, as this will not help you eliminate errors and problems associated with it. The only thing you can do is change some of the parameters described in one of the following paragraphs of the article to extend the life of the disk and prevent it from breaking prematurely.
If you notice that your computer has started to perform worse, and you are sure that the reason lies in the hard drive, then there can only be a few reasons for this:
Automatic optimization carried out by the system
Above in the article it was said that Windows 10 performs automatic setup and disk optimization, so you don’t need to change anything manually. Here is a list of actions performed by the operating system to achieve maximum performance SSD drive:
- Changes the type of disk defragmentation from regular to special, based on the Retrim function. This defragmentation option does not harm the disk, but, on the contrary, helps sort the information redirected to it. Therefore, there is no need to disable automatic disk defragmentation in Windows 10 unless there are some reasons for it.
- Disables the ReadyBoot feature, which by default changes the way the page file works to speed up slow hard drives.
- Does not disable the Superfetch function, as it did in previous versions operating system. WITH Windows release 10, this function, which allows you to optimize the performance of applications and games through the use of cache, can also work with an SSD drive.
- The system automatically adjusts the power supply parameters of the disk to provide it with the most comfortable recharge conditions.
This is where the optimization actions performed by Windows end, but there are still some functions that can either harm the disk or simply have no effect on it. Setting them up will be discussed in the paragraph below, but first you need to familiarize yourself with the rules that should be followed when using an SSD drive.
Rules for using the disk
So, if you are an SSD drive user, then you should adhere to the following rules so that your drive lasts as long as possible:

Manually configuring functions that affect disk performance
Next, all functions that in one way or another affect the speed of the disk will be considered separately. Many of them have both positive and bad influence to the disk, depending on certain factors, so do not rush to completely disable these functions, first experiment with how deactivating them will affect the disk.
Swap file
The page file is needed to help the system run some applications that require large quantity random access memory. Sometimes it can have a negative impact on SSD operation disk, but there are often cases when everything happens the other way around, the page file helps the disk. Disabling this file may cause certain programs will stop opening on your computer because there simply won’t be enough RAM for them. Moreover, according to statistics provided by Microsoft, this file is used only in one case out of forty, that is, very rarely, therefore, if problems with the SSD drive arise, it is most likely not because of it.
But if you want to check whether the page file is really the problem in your case, you can temporarily disable it by following these steps:
- Using search bar Windows, run the System Presentation and Performance Settings program.
- In the window that opens, expand the “Advanced” tab.
- Click on the “Change” button.
- Uncheck the option that enables automatic settings for the paging file.
- Check the box next to the line “No paging file” and click on the “Set” button to save changes made. Done, the paging file is disabled, now you should test how the disk will perform without it: will it improve, deteriorate, or not change its speed. If there are no changes or the performance worsens, then turn on the paging file back.
Hibernation
Hibernation is a feature that allows your computer to boot quickly. If the computer goes into hibernation mode, then all information about the programs running on it is written to a special file that takes up space on the hard drive. This is necessary in order to quickly get all this information and not lose it. But if the function fast loading If you don't use it, you can disable hibernation so that the file related to it does not take up much disk space.

System protection
System protection is expressed in the fact that the system automatically creates restore points that allow you to roll back your computer to certain period time if an error appears on it that cannot be eliminated by another method. There is one drawback to this function - sometimes it can load the system and, accordingly, the disk background processes. To avoid this, some drive manufacturers recommend disabling system protection. But in reality, it’s better not to do this, since no one is immune from a computer breakdown, and if you encounter one, you’ll really need a restore point. If you are ready to take a risk and think that disabling creation backup copies can help you with the disk, then follow these steps:
- Using a search engine Windows string, launch Control Panel.
- Go to the "Recovery" section.
- Go to the sub-item “System Recovery Settings”.
- In the window that opens, expand the “System Protection” tab.
- Click on the “Configure” button.
- Select the "Turn off system protection" option.
- Click the “Apply” and “OK” buttons successively. Done, protection is disabled, no more checkpoints will be created. It remains to be seen whether this had a positive or negative effect on the operation of the system and disk.
Superfetch and Prefetch functions, record caching and clearing, indexing of hard drive partitions
All these functions have undergone changes when comparing Windows 10 with Windows 7, so their operation should not negatively affect the SSD drive. The only thing is that these functions can put an excessive load on the disk if it is overloaded not only with them, but also with running applications, small quantity free memory and many background processes. Based on this, you should not get involved in setting up the functions described above, since this will not give any positive result.
Third-party SSD optimization programs
If you are not well versed in computer settings or do not want to spend time on this, you can use third-party programs that will change the parameters of all the above functions to the optimal option for the disk. For example, you can use simple and free application SSD Mini Tweaker, which can be downloaded from the official website of the developer -
http://spb-chas.ucoz.ru. It is very easy to use, just check the boxes which settings you would like to change and click on the “Apply changes” button. The program will automatically make all changes. You may have to restart your computer after the process is complete for all the changes to take effect.
So, if the SSD drive does not freeze and shows no signs that it needs to be repaired, then it is better not to try to make any changes to the system to optimize it. If you still encounter the fact that the disk needs to be configured manually, then use third party program, which will automatically do this for you. Also make sure that the disk is not being loaded by the system or background processes. You can view information about disk load through the task manager, located in the “Processes” section.
We have already told you what an SSD is and how to install it correctly in a laptop or computer.
But in addition to all of the above, it is necessary to clarify one point: Windows 7 itself is not very optimized for working with SSDs.
It was developed and created to work with conventional mechanical HDD. And some services and operations that Windows 7 performs not only do not speed up the system, but in addition also lead to strange “glitches” when working with the SSD and to its rapid wear.
In this article we will tell you how to properly configure and optimize Windows 7 to work with SSDs.
Before you start using the SSD highly recommended update the SSD firmware from the manufacturer's official website. In order to subsequently avoid “glitches” in work.
Now on almost all SSDs you can update the firmware directly from Windows, along with the data. But to be on the safe side, it is better to do this on a “clean SSD” to avoid losing important information.
Look for instructions and methods for flashing your SSD firmware only on official websites and forums of manufacturers.
So. After installation necessary drivers, we need to optimize the OS itself.
More specifically:
- Disable or move the OS swap file;
- Disable indexing and SSD caching;
- Disable SSD defragmentation;
- Disable Prefetch and Superfetch;
- Disable system recovery;
- Disable Hibernation;
- Check if TRIM is enabled
- In SSD+HDD systems, you can move the TEMP folder.
Note: all these manipulations are not a panacea, and no one will give you a 100% guarantee. There have been cases where disabling caching reduced the performance of some SSDs (mostly on the SandForce controller).
In the end, everyone decides for themselves whether it is necessary this optimization for his SSD.
And so, if you have firmly decided that you need optimization, then let’s proceed with the settings:
First thing disable or move the swap file.
It is used by the system to store temporary data when there is insufficient RAM.
Frequent handling, or rather writing/rewriting data on an SSD, quickly wears out its cells.
So it will be optimal disable page file
, if you have the amount of RAM more than 4Gb
.
If 4Gb or less, then it should be transferred to the HDD or increased the amount of RAM.
To disable the paging file you need to go to the icon Computer right click and go to Properties systems

Then in the tab Advanced system settings/Advanced/Options/Advanced click Change

Uncheck "automatically" and check "without swap file" and click Set

The system complains, but we agree and then reboot the computer.
If there is not enough RAM, then we can transfer the paging file, indicating on which disk to reserve space or specify minimum size, whichever the system asks.

Also, in systems where SSD and HDD are installed, you can transfer from SSD to HDD system TEMP folder, where Windows stores temporary files.
- create on HDD folder TEMP, for example on drive D (provided that D: is a partition on the HDD), and make it hidden so that it’s not an eyesore :)
- right-click on the “Computer” icon and select “Properties”.
- In the window that opens, select “Advanced system settings” on the left.
- On the Advanced tab, click the “Environment Variables” button

Change the value of “TEMP” and “TMP” to D:\TEMP

Click “OK”, then “Apply”
Next step disable indexing and SSD caching.
Since SSD is much faster than HDD, and file search speed is much higher, as well as write speed is much higher, these SSD functions are not needed. In addition, we will increase the reliability of data recording during power outages. Let's disable these functions so that the data is not indexed in RAM and cached in the SSD buffer.
Note: for some SSD models based on the SandForce controller, it is not recommended to disable caching, since the read/write speed of the SSD may significantly decrease (as well as the evaluation of disk performance Windows systems 7).
In Explorer, right-click on the C: drive and in the properties of the C: drive, uncheck "Allow indexing..."
Applies only to drive C:


We right-click on our SSD and in the section Properties/Policies disable file caching

Next step shutdown SSD defragmentation
.
On an SSD, direct access to files is already very fast and there is no need to defragment it.
This technology was developed for conventional HDDs and in the case of SSDs it only harms the SSD cells.
We disable defragmentation in the properties of our C: drive. Right-click on the C: drive and on the tab Properties/Tools/Defragment turn off Scheduled defragmentation

You can also disable the defragmentation service in the section Management/Services , but if SSD + HDD are installed in the system, then defragmentation for our regular HDD will be unavailable. You can completely stop the service only on systems that use only an SSD (for example, a laptop).


Next we turn it off Prefetch and Superfetch.
These are OS components that speed up the process bootstrap, and also reduces program launch time.
But since the SSD is already “fast”, and the OS boots from it in a matter of seconds, we don’t need them.
Prefetcher is a manager component Windows memory 7, responsible for optimal loading of the operating system and frequently used programs. Prefetching is the selection and loading into RAM data needed to run certain processes before those processes are started. This technology, when using an SSD, it only clogs up the RAM with unnecessary processes.
Superfetch performs all prefetch functions, plus a few additional functions. The advantage of supersampling is that it avoids one of the main disadvantages of Prefetching technology. Prefetching loads most of the files and data needed to run an application or process into memory to improve its startup speed. But when other applications access memory, the prefetched data is paged out to the hard drive, to the page file. And when this data is required again, the system will load it back from the page file into memory, which is not desirable to avoid frequent overwriting of SSD cells
You can disable these components in the Windows registry. To open the registry, press the Win+R buttons simultaneously (button Win  ) a window should appear Execute...
And enter the command Regedit

Will open Windows registry. We're moving along the path HKEY_LOCAL_MACHINE\SYSTEM\CurrentControlSet\Control\Session Manager\Memory Management\PrefetchParameters and in the parameters (double-click on the parameter) EnablePrefetcher And EnableSuperfetch change the values to zero "0". Save changes

We also turn off System Restore.
Although this controversial issue, necessary or not. But we will disable it to limit the writing of information to our SSD.
For me, personally, it is better to restore the system from a backup Acronis image True Image, than to search by control points system failure.
You can disable recovery in Computer properties/System protection/Configure


