Linux mint 18 actions after installation. Adding applets to the panel. Installing the necessary programs
Today we will look at the operating system distribution Linux Mint 18.3 Cinnamon, we will download this version, install it on your computer, talk about innovations, and I will also show you the process of updating to this version.
Review of the Linux Mint 18.3 distribution
First, let's remember what Linux Mint is.
Linux Mint is a distribution of the Linux operating system, it is free and is intended for use on home computer. Linux Mint is available in both 32-bit and 64-bit versions, supports the Russian language, it is functional, stable and undemanding of resources. Therefore, if you want to use Linux as an operating system on your home computer, then I personally recommend installing the Linux Mint distribution.
Linux Mint can be installed with such graphical shells as: Cinnamon, Mate, KDE and Xfce. As the title of the material suggests, today we will be looking at the version with the Cinnamon desktop environment.
The official website of the distribution is www.linuxmint.com
What's new in Linux Mint 18.3 Cinnamon?
Codename for Linux Mint 18.3 version " Sylvia", be supported this version will be available until 2021, like the entire line of 18.X versions, it is based on the Ubuntu 16.04 package base.
Major Components and Changes :
- Linux kernel 4.10;
- Cinnamon version 3.6;
- Browser Mozilla FireFox 57.0;
- Mail client Mozilla Thunderbird 52.4;
- Office suite LibreOffice 5.1.6.2;
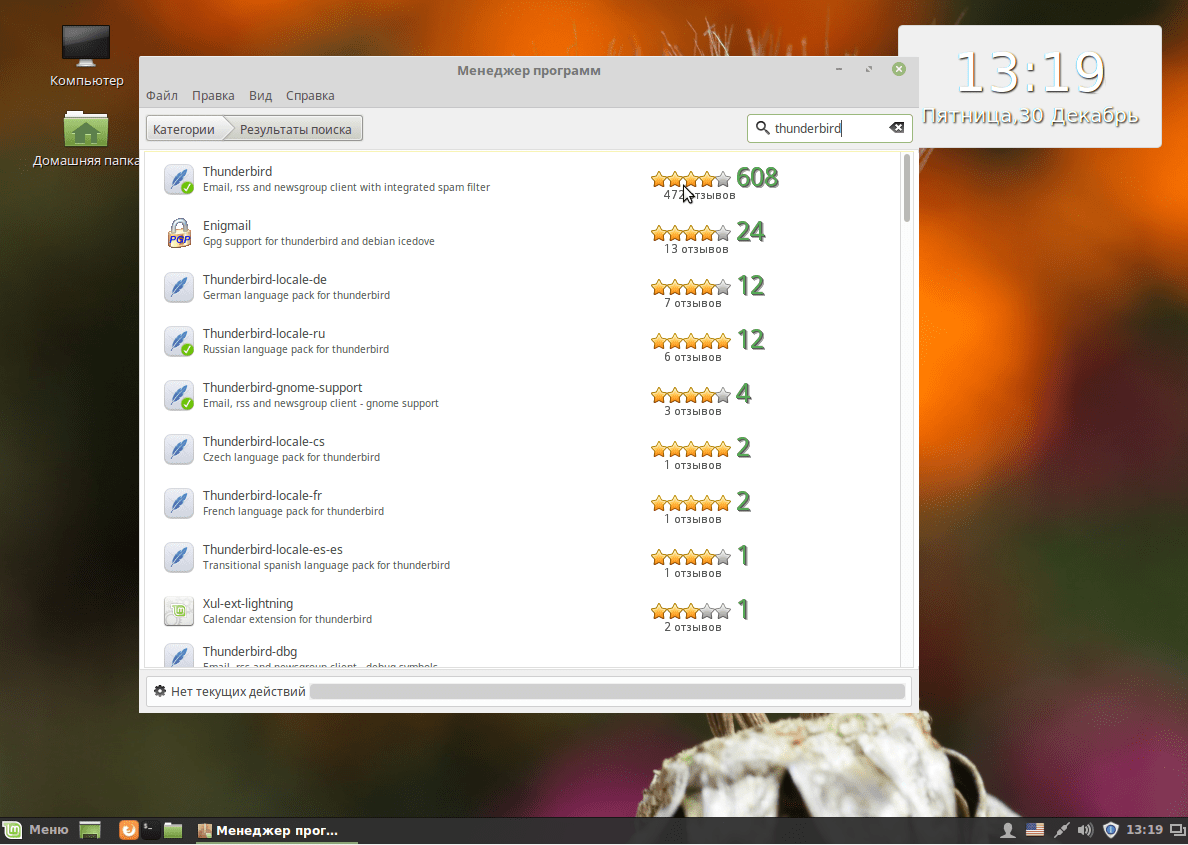
- Updated program manager ( Software Manager) – probably the main innovation current version is a redesigned program manager. It has been redesigned almost completely, including GUI user. Now, by the way, you don’t need to enter a password in order to simply launch the manager for viewing available applications, the password is only required to install these applications. I hope this version will be as convenient as the previous one, which I personally really liked. Currently the program manager looks like this;
- Available popular apps– now programs such as Skype, WhatsApp Steam or Minecraft can be easily installed from the program manager using standard tools;
- Flatpak support – the distribution now supports Flatpak technology. Flatpack is a technology that allows applications to run in an isolated container, making it unimportant which Linux distribution you use. In other words, you may be installing an application that is not compatible with the Linux Mint distribution. The program manager even has a separate category that houses applications developed using Flatpak;
- GNOME Online Accounts Support – Cinnamon now supports GNOME Online Accounts, allowing you to browse Google Drive and OwnCloud in the Nemo file manager;
- Tools Reserve copy: Personal Files and System Snapshots. Tool " Backup" has been completely rewritten and now works in user mode ( those. no need to enter a password), this tool designed to create a backup copy of your home directory. It is also now possible to take system snapshots thanks to the Timeshift functionality, which is designed to take snapshots of the operating system similar to System Restore in Windows;
- System reports - added in this version new tool « System reports", which is designed to generate reports when software failures occur, such reports are called " Crash Reports", as well as to display system information, reports " Information Reports»;
- Window Progress ( Window progress) - LibXapp now allows applications to pass their progress to the window manager, in other words, the progress is shown in the panel's window list. This opportunity supported the following applications: file manager Nemo ( file operations ), backup tool, Timeshift, software manager, driver manager and some other applications that use dialog boxes Synaptic;
- Improvements to XApps applications – e.g. text editor Xed now has a minimap, Xreader detects DPI, Xplayer has improved full-screen window;
- Improved login window - added additional settings, for example, it became possible to hide the list of users and enter user names manually, and various elements on the panel can be disabled and now, by the way, they show tooltips;
- Linux Mint now has improved support for spell checking and synonyms in English, German, Spanish, French, Italian, Portuguese and Russian;
- Redshift is now installed by default. This software adapts color temperature screen depending on the time of day, in other words, the screen will be warmer at night, thereby reducing the impact on your eyes.


Backup

Timeshift


![]()

Linux Mint 18.3 Cinnamon System Requirements
- 1 gigabyte random access memory (recommend more);
- 15 gigabytes of free disk space ( recommend 20 gigabytes);
- Supports screen resolution 1024x768.
The version with Cinnamon is one of the most undemanding in terms of resources and it works really fast.
Where to download Linux Mint 18.3 Cinnamon?
Download current version operating system Linux Mint 18.3 can be found on the download page of the official website - here it is.
After going to the page, you need to select your desktop environment and system architecture ( 32-bit or 64-bit). Click on the desired link.

Then you need to choose a download method, for example via torrent or from any available mirror, for Russia you can choose Yandex Team, here is a direct link to download Linux Mint 18.3 Cinnamon 64-bit from this mirror.

As a result, I downloaded the 64-bit version, namely the file ( iso image ) linuxmint-18.3-cinnamon-64bit.iso approximately 1.76 gigabytes in size.
Installing Linux Mint 18.3 Cinnamon on your computer
Process Linux installations Mint is simple, and we have looked at it many times, but for those who will be installing Linux Mint on a computer for the first time, I will describe this process step by step and with pictures.
Step 1
We burn the image that we downloaded to disk and boot from it. After loading, the disk menu will open, select “ Start Linux Mint».

Step 2
Loading Live version, on the desktop, click on the shortcut “ Install Linux Mint", the installation program will eventually start on HDD computer.

Step 3
First, select the language, click " Continue».

Step 4

Step 5
Now we select the disk partition type, I have a test installation, so I select the first item “ Erase disk and install Linux Mint" To manually partition the disk, select " Another variant" We discussed manual partitioning in detail in the material “Partitioning a hard drive in Linux Ubuntu during installation.” In my case, click " Install now».

Confirm the changes by clicking “ Continue».

Step 6
Specify your location and click “ Continue».

Step 7
Select the keyboard layout and press the “ Continue».

Step 8
All that remains is to create account, to do this, enter your name, computer name, username and password with confirmation, click “ Continue».

The installation has started.

The installation is complete when the following message appears, click " Reboot»
Upgrading Linux Mint to Linux Mint 18.3
It is not necessary to install Linux Mint from scratch, if you already have the previous release of Linux Mint 18.2 installed, you just need to update the already installed system, for example, using " Update Manager" To do this, open “ Menu ->Administration -> Update Manager».

If there is no update " mint-upgrade-info", then first press the button " Check for updates", and then " Install updates I".

Enter the administrator password, since installing updates requires certain privileges, click " Authenticate».

After you have installed this update, in your menu “ Edit» update manager the item « Update to Linux Mint 18.3 Sylvia", to update the entire distribution we need to click on this item.

As a result, the update program will start. In the first window, click " Next».

Then we are asked to read the release notes ( for this, if you want, you can click on the appropriate link), click " Next».

Before updating, we are asked to find out the new features of this version ( if you want to see them, click on the appropriate link), click " Next».

Next we are warned that there is a risk of harming the system, since after any update some problems may arise, but in standard cases everything goes well, we check the box, thereby confirming our intentions to update the system, and click “ Apply».

To update the system you need to enter your password, click " OK».


The system update will be completed when the following window appears, click “ Close"and reboot the computer.

Screenshots of Linux Mint 18.3 Cinnamon
Desktop

File manager

System parameters

That's all, good luck!
Linux Mint is an excellent distribution developed and supported by a community of users on Ubuntu based. Compared to Ubuntu it contains more programs by default, for example, there are many proprietary drivers, as well as proprietary software that makes working with the system easier, such as a backup or update program.
The Cinnamon shell is based on Gnome, but strives to be simpler for users, has a familiar appearance and widget support. Latest version Linux Mint 18.1 came out a few weeks ago. This release updates the Cinnamon version, software stack, updates Xeader, Xviewer, Xplayer and fixes several bugs. This article will cover setting up Linux Mint 18 Cinnamon after installation.
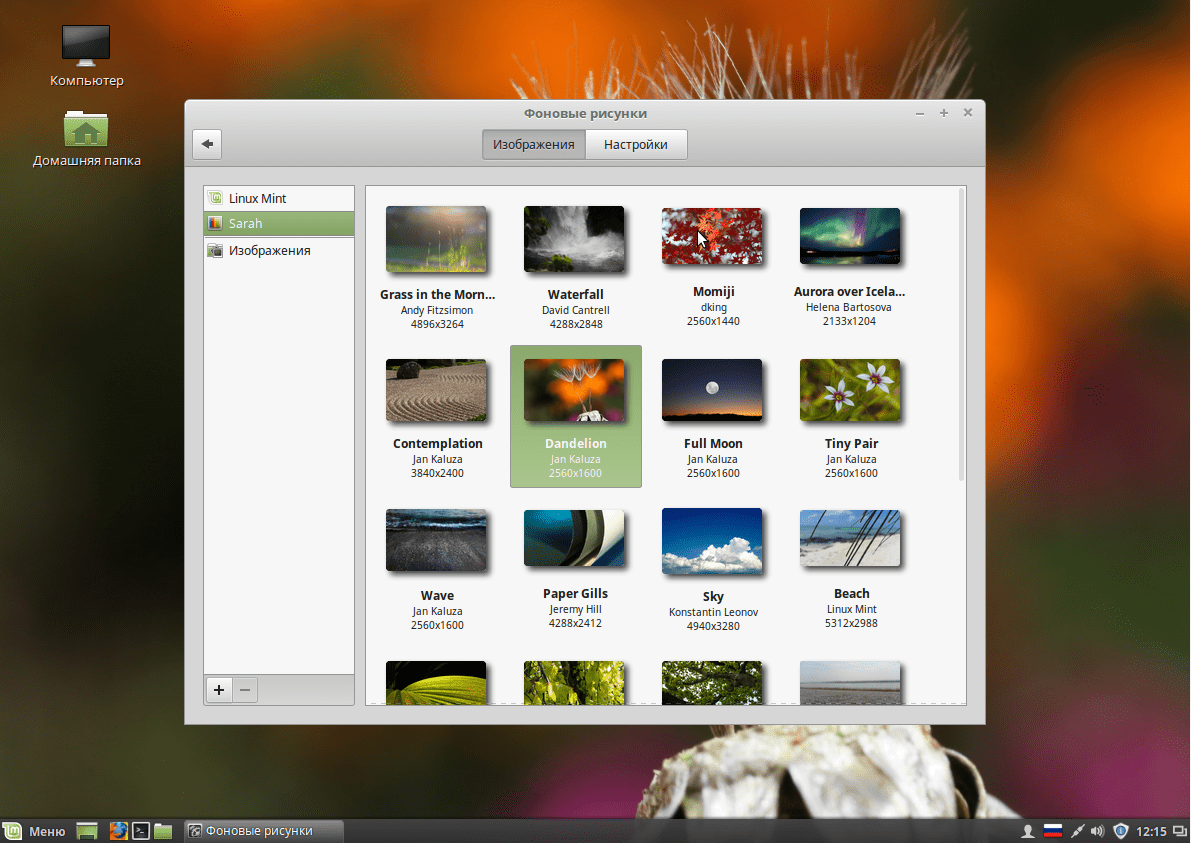
I have nothing against the Linux Mint logo and dark background, but it is more pleasant to work on the system when the desktop background is set to beautiful image. So first of all, let's change the background. Open Menu -> Options -> Background pictures:
Then go to the Serena tab and select the picture you like. On the images tab you can upload your own:
2. Theme
Mint 18 also added the Mint-Y theme. It is made in a modern flat style and looks quite nice. You can activate it in the settings. To do this, open Menu -> Options -> Themes and select values for all parameters Mint-Y:
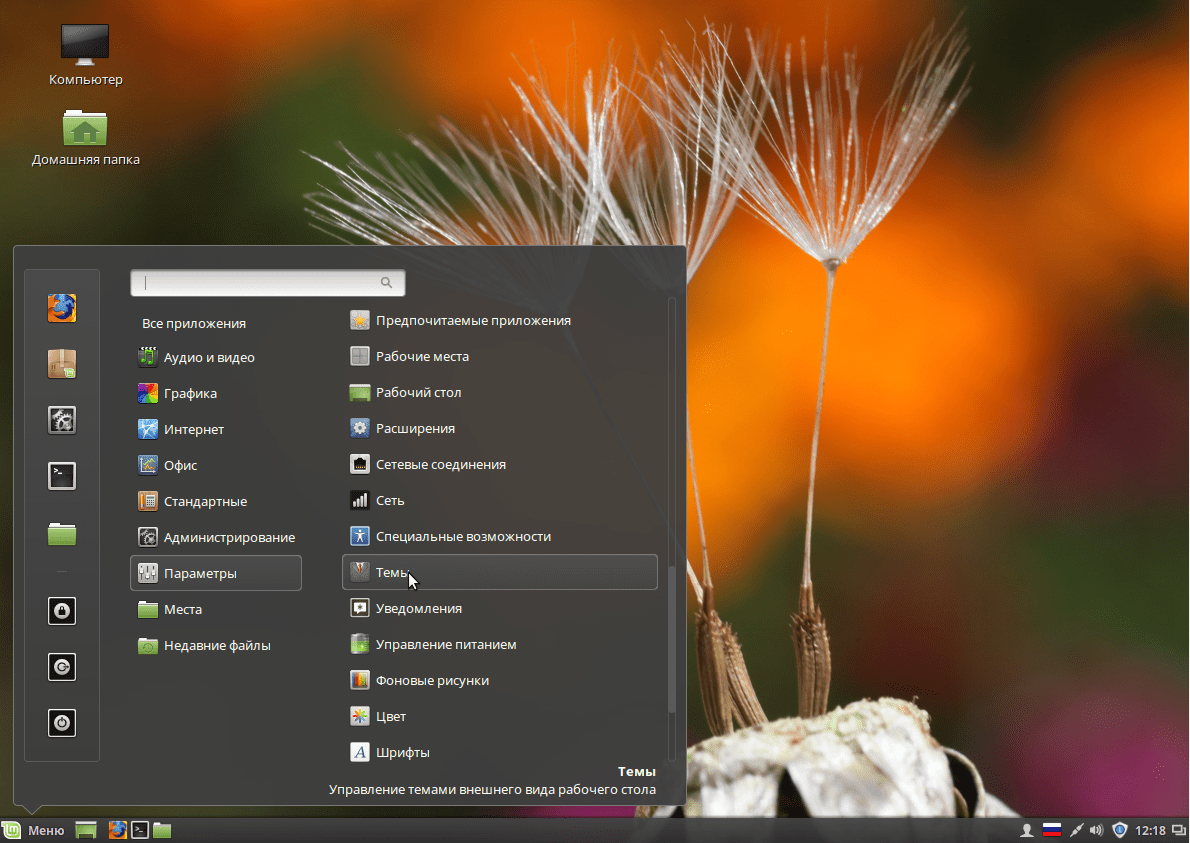
Looks quite nice.

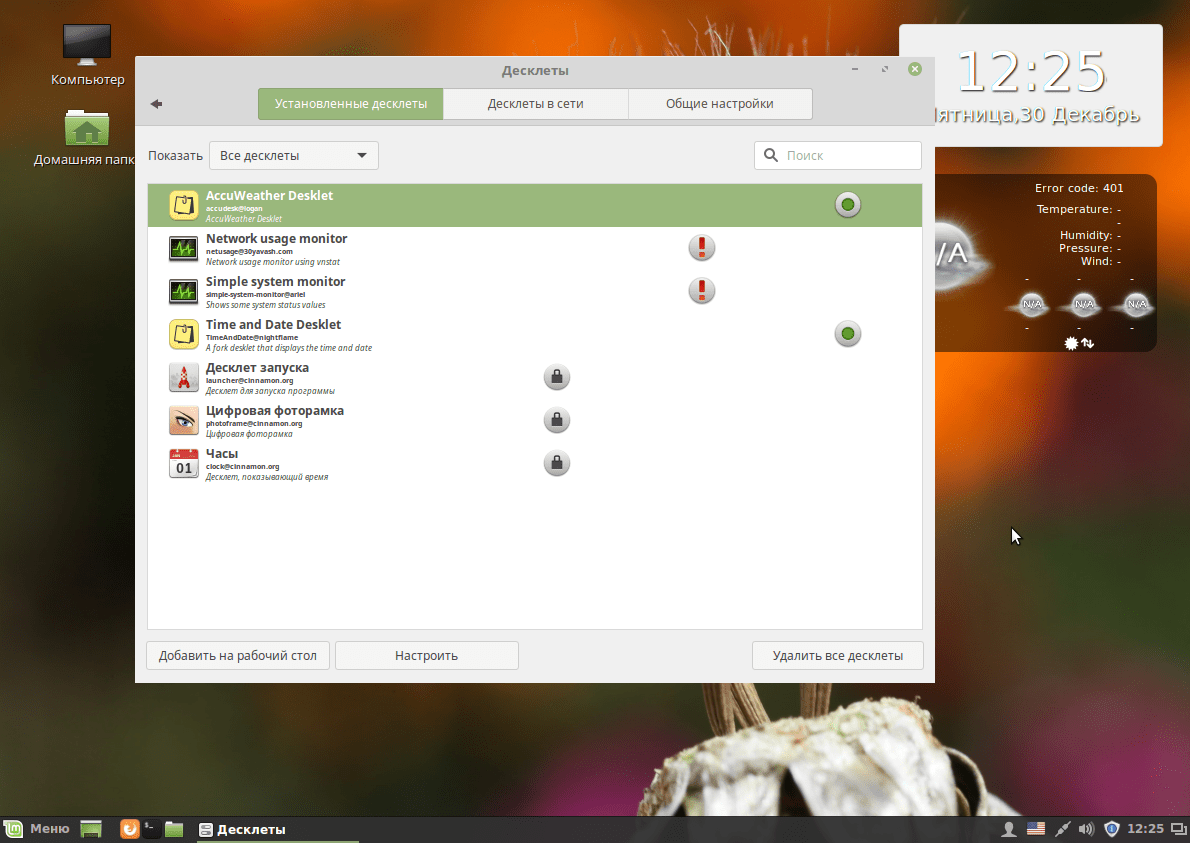
3. Add widgets
Cinnamon supports widgets, which are called desktops here. Return to the main menu of the Settings utility and select Desclets:

Here you can add required widget to the desktop using a button Add to desktop:

Or install additional widgets from the network:
4. Update your system
It is important to keep your system up to date. Linux Mint has a special update tool, run it from the main menu:

When you first start it, the system will prompt you to choose which updates to install; it is recommended to leave it as is to get the new software:
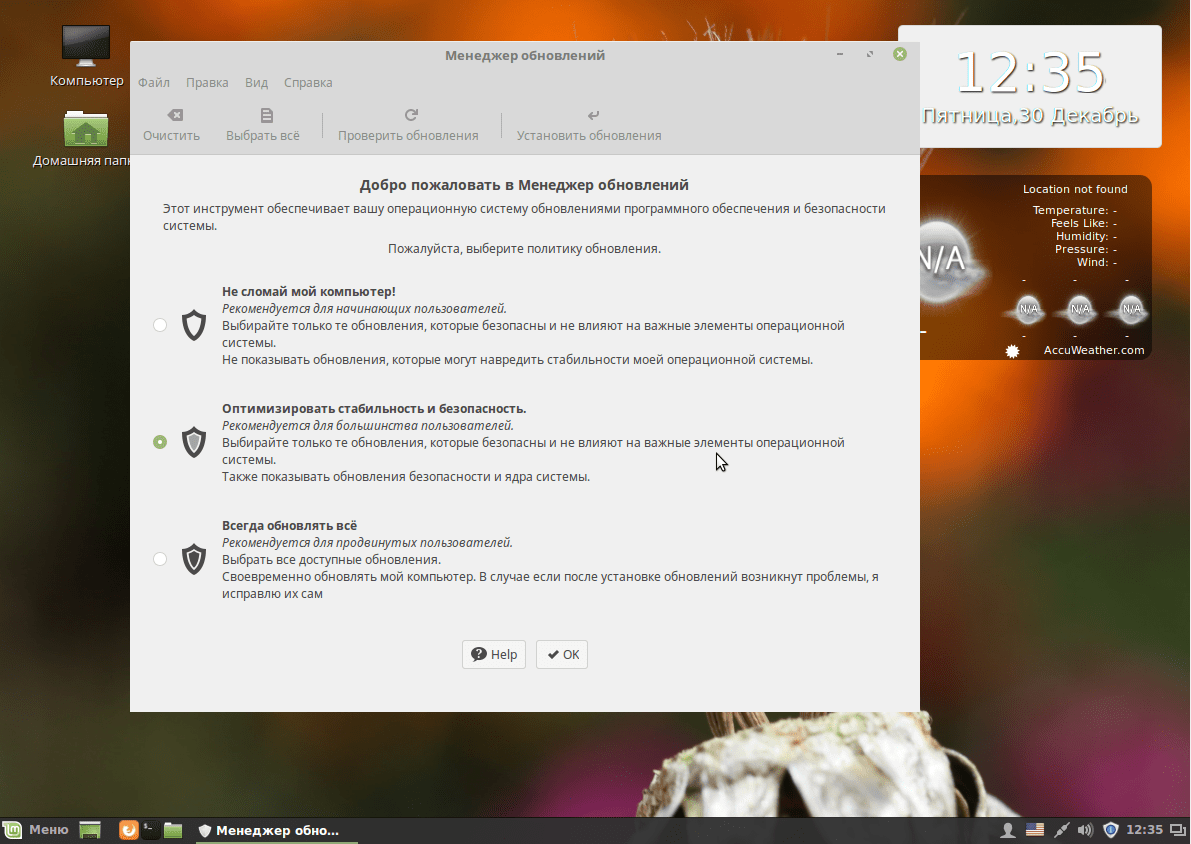
Then you can choose necessary updates and press Install updates:

Most likely, you will need to do the procedure twice, since you may first need to update the update manager itself.

5. Installing codecs
Previously, codecs were supplied with the distribution and there were no problems with this. But then the developers decided to remove them. But we can install linux mint codecs from official repositories. For this we have an application center:
In the search, type mint-meta-codecs or just codecs, you will immediately see the package found, as well as its rating:

To open the package description window, double-click on it and then click Install for installation.
To install all available codecs, open a terminal and run the command:
sudo apt-get install gstreamer1.0-libav gstreamer1.0-plugins-ugly-amr gstreamer1.0-plugins-ugly libgstreamer-plugins-bad1.0-0 gstreamer1.0-plugins-bad-videoparsers gstreamer1.0-plugins- bad-faad gstreamer1.0-plugins-bad libdvdnav4 libdvdread4
6. Install drivers
The system already contains drivers for many peripheral devices, even if they have a closed source, But not all. For example, drivers for a video card must be installed separately. Open the driver manager through the main menu:

When the program loads, select the drivers you want to install and click Apply changes. After installing the driver, you will need to restart your computer.

7. Installing programs
Despite the fact that the system already contains many of the programs you need, not everything is there. Everything you need can be installed through the application center. Skype communication program:

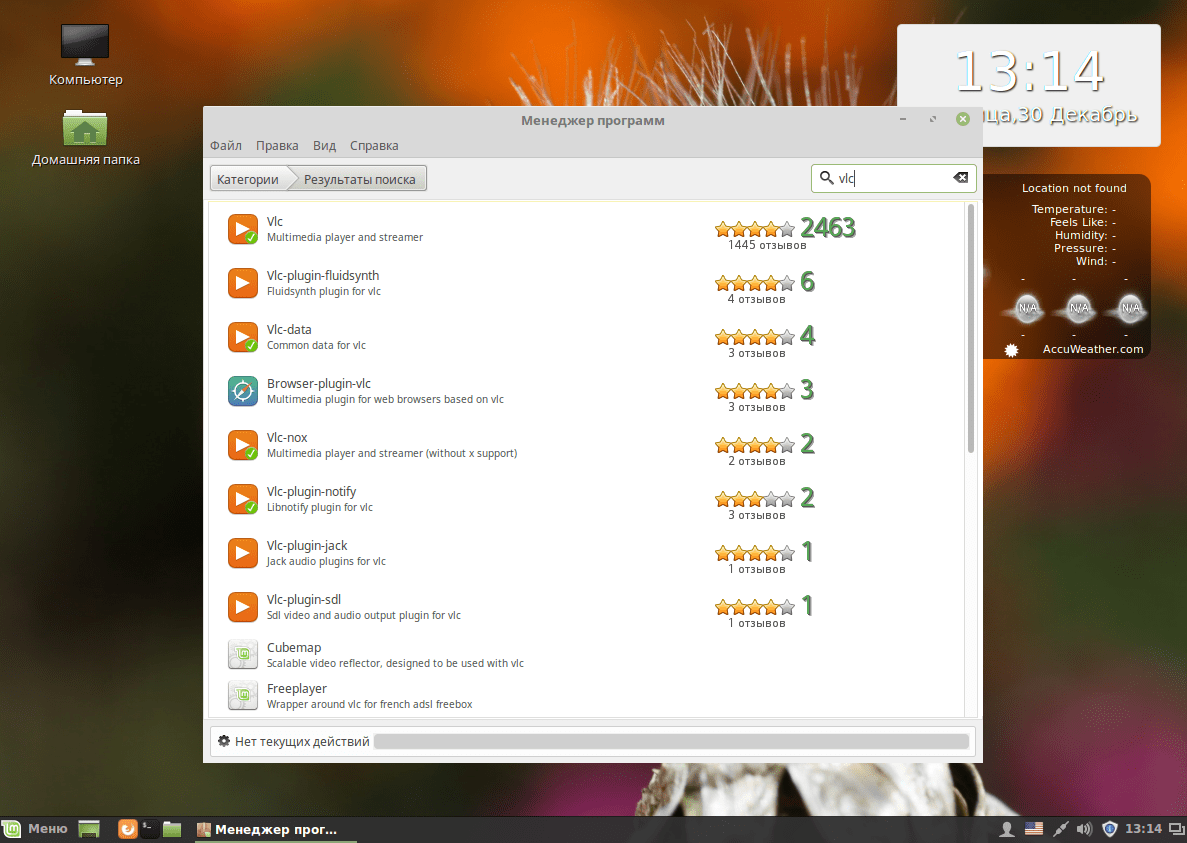
VLC media player:
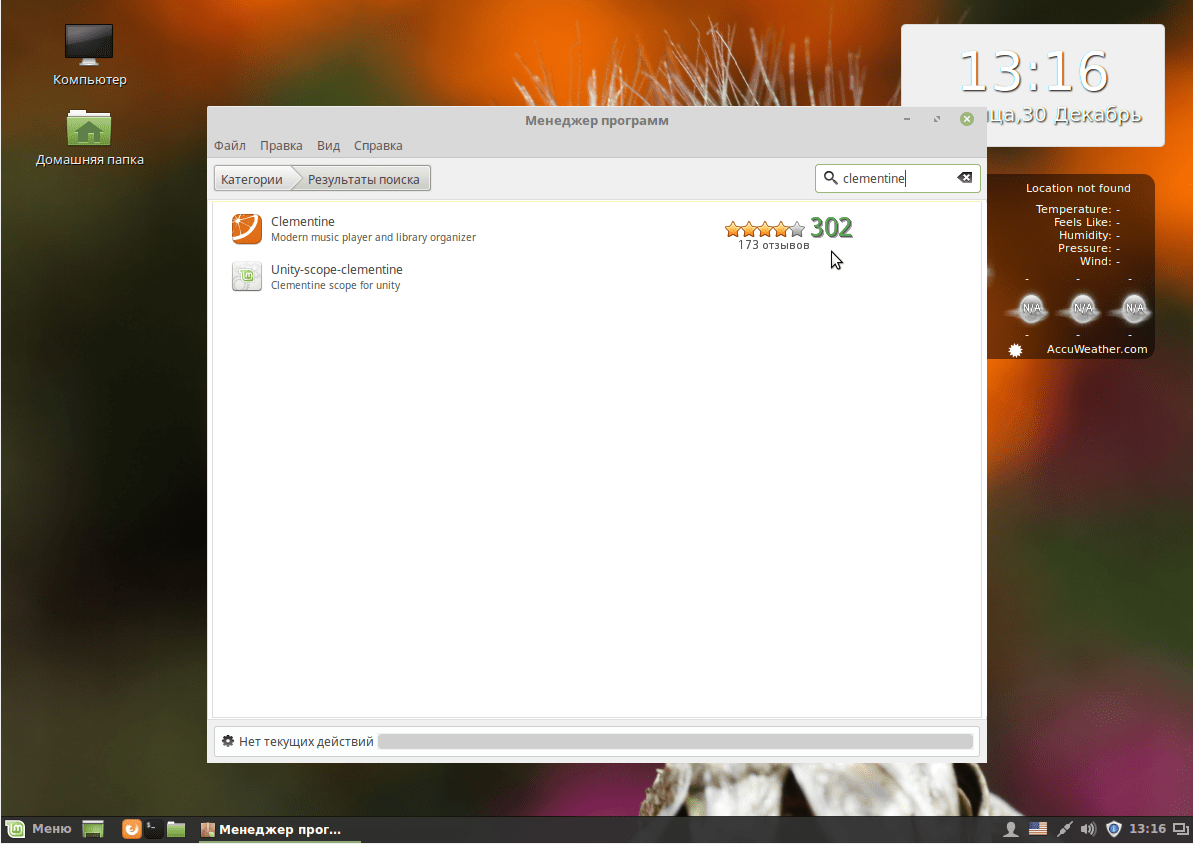
Audio player Clementine:
Graphic editor Inkscape:

Torrent client qBittorrent:

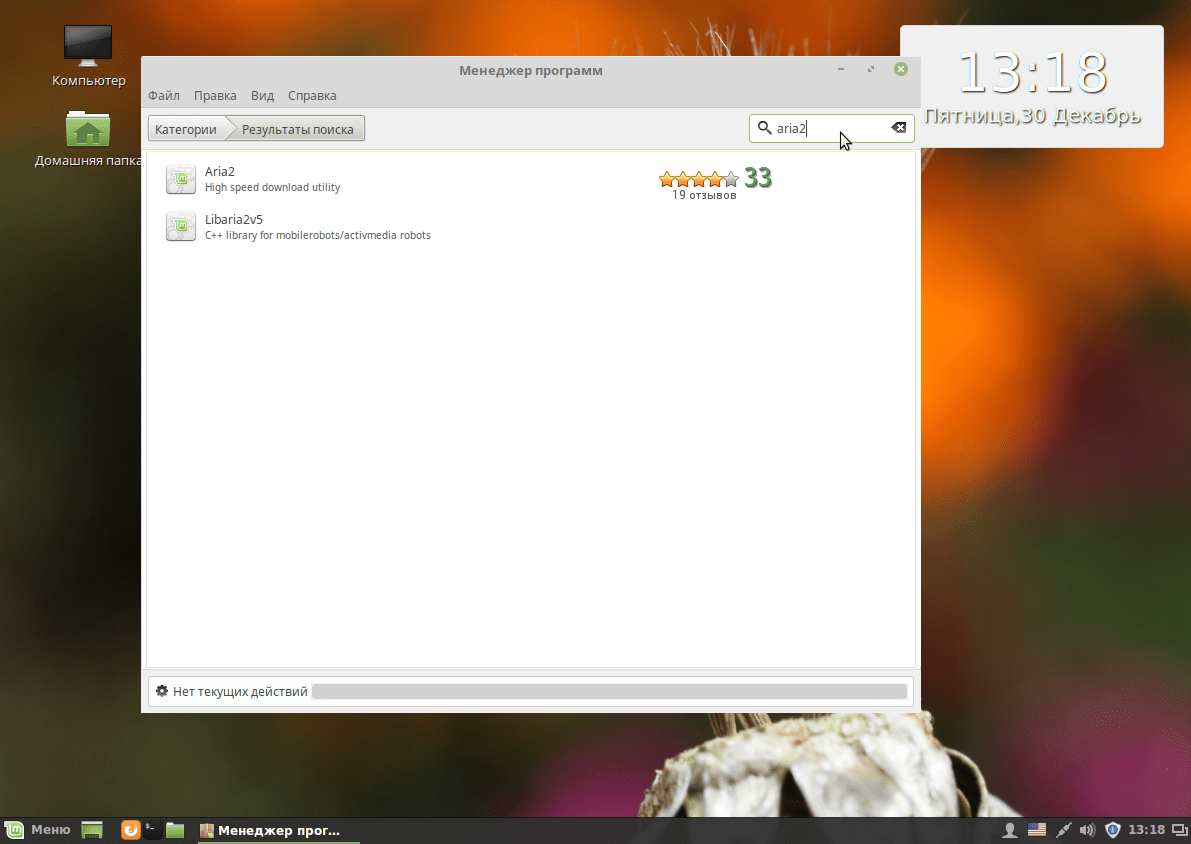
Aria2 Download Manager:
Mail Mozilla client Thunderbird:
Chromium browser:

BleachBit system cleaning program:

You can find and install others popular programs In chapter Favorites:

8. Installing Adobe Flash
Flash technologies are used less and less on websites, and are being replaced by HTML5, but many users still need Flash player. To install it, use the following commands in the terminal:
sudo apt-get install pepperflashplugin-nonfree
$ sudo dpkg-reconfigure pepperflashplugin-nonfree
9. Install Java
Many programs require a Java machine to run. You can install it from the PPA repository. First add the repository:
sudo add-apt-repository ppa:webupd8team/java
$ sudo apt-get update
Then install the package:
sudo apt-get install oracle-java8-installer
10. System backup
Setting up Linux Mint 18 cinnamon after installation should include backup. While the system is still clean, you can create backup copy, so that you can quickly restore it later. To do this, you can use the TimeShift utility. First install it from the PPA:
sudo apt-add-repository -y ppa:teejee2008/ppa
$ sudo apt-get update
$ sudo apt-get install timeshift
Then launch the program from the main menu, then configure the backup frequency and create your first copy using the button Create:

Now you can restore the system if necessary.
conclusions
Even though Linux Mint contains more improvements compared to Ubuntu, it also requires linux setup mint 18 after installation. We have looked at everything in sufficient detail so that even a beginner can figure out how to prepare his system for everyday use. If you have any questions, ask in the comments!
Hello everyone, I haven’t written on this blog for a long time, but I still decided to, today I want to talk about what I recommend everyone to do after installation. I decided to write an article because I installed this wonderful operating system on my computer. It’s not surprising, but my attitude towards linux mint 15 was ambiguous, maybe I just got used to the new environment in ubuntu, or maybe it just didn’t work out. And besides, after installation there were enough bugs with graphics, sound and other heresies, when running the software through wine, atop showed 100% system load, and it didn’t matter what exactly I was running, be it notepad, be it microsoft office. Despite everything, I always liked this environment for its simplicity, friendliness and unobtrusive appearance, so after waiting a little time after the official release of Linux Mint 16 Petra, I decided to install it, the surprise was overwhelming (perhaps this was also influenced by the fact that I was tired of Ubuntu =)) and this even despite the fact that mint 16 was collected on Ubuntu based 13.10.
After installing any new OS, only one question comes to mind: what to do next? And this is despite the fact that any build of Linux systems comes with a standard package of programs and drivers, which may be quite enough for work, but we want more, don’t we? You can, of course, entrust the development of a website to more qualified specialists, for example, Andrey Baturin’s digital agency, and then just enjoy working on your website.
So what should you do after installing Linux Mint 16:
I wrote this article using assembly Linux Mint Cinnamon, despite this, all the recommendations I proposed in this article will be relevant for the version Mate.
1. Installing updates.
The first thing I recommend doing on any OS, be it Windows 7 - 8, or Linux. Since a lot of time could have passed since the release of the image for downloading the OS and the developer company could have released new updates to close system holes and other little things, thanks to the updates you can easily download the missing drivers and software for your system.
Update Linux Mint possible in 2 ways.
1 -via the console (press Ctrl+Alt+T) and enter the command:
sudo apt-get update && sudo apt-get upgrade
2 - through menu - Administration - Update Manager.

2. Install the necessary drivers.
Let's start installation necessary drivers, go to " menu - Administration - Driver Manager", we choose, for starters, those recommended to us by the system itself.

3. Installation of the rar archiver
In order to install, open a terminal and enter:
sudo apt-get install rar

4. Installing windows fonts
To set basic truetype microsoft fonts, open " Program Manager"go to the fonts tab and install the most 1.

5. Install the required languages, locales and layouts.
I think this point cannot be explained. First, let's install the language we need, " Menu - Options - Language and systems". Add the language we need, drag it to the top and click apply to the entire system. Next we go to “ Menu - Administration - Region and language", go to the keyboard layout tab, click + and add the language we need, use the up and down arrows to move it, thereby setting the priority. To change the layout, click parameters and select “ Keys for changing layouts" in my case it is installed: Left Alt + left Shift
6. Install a new theme and a new wallpaper.
Oh, I think everyone fulfills this point without exception, although it is quite banal, but I will still describe it. To select, go to “ System Settings— Background pictures", select the image we need as quality background image, by the way, you can also try installing it on your desktop.
In order to change the design theme, again go to all the settings, then to the themes section, to install new ones, go to the “all available" tab, select the ones we need and click on the install button.
7. Installing Clipit or glipper
Without these software I can’t imagine working with linux systems. These programs are text clipboards that to a large extent simplify routine work, if you haven’t installed or worked with them yet, I recommend them. In order to install them, there are two ways: as always, you can use the console, or you can use the application manager. I still installed Clipit, let’s open the console and write:
sudo apt-get install Clipit
Launch, click right click mouse over the icon on the panel, settings, go to the hotkeys tab, set
8. Install Oracle Java Packages
In Linux Mint, OpenJDK is already installed by default, but some programs, as well as web services, may ask you to install the Oracle Java Runtime Environment (JRE) before installing it; to install it, type in the terminal:
sudo add-apt-repository ppa:webupd8team/java
sudo apt-get update
sudo apt-get install oracle-java7-installer
9. Installing Skype and chrome browser
Skype is an application that is used by most users on various operating systems, I have already written a guide to setting it up, you can read it in.
Everything is as always very simple:
sudo apt-get install skype
sudo apt-get install google-chrome-beta
10. Adding the necessary applications to autorun.
That's all, of course, there are many more programs that I install, including playonlinux and many others, but which programs do you immediately install after installation?
Alexey Fedorchuk
Being delighted with Mint with Cinnamon on the desktop, I decided to install it on my Laptop. Moreover, on it Mint, even in Live mode, from a flash drive, showed greater performance than Xubuntu installed on the hard drive.
No sooner said than done, and Mint was installed. My hard drive on my laptop (half a terabyte in size) was divided into two partitions - root (28 MB) and home (everything else). Without touching the second one (but ordering it to be mounted at the same /home point), I reformatted the first one to XFS. There are no more features compared to what was not present during installation.
Configuration of my Laptop, according to data Control Center Cinnamon's, the following:
And it should be noted that Mint worked like a glove on it: the video system was detected correctly (although who would be surprised by this nowadays?), WiFi picked up on the fly, the touchpad worked with some default settings. What else does a Laptop need to be happy? That's right, for complete happiness you need to make some adjustments to such a successfully installed system.
Next, in essence, will be logging my actions to configure Mint with Cinnamon on the Laptop - for memory for the future. Because all these actions, except those specific to laptops (touchpad settings, for example), will need to be done on any desktop. I do not suggest following my algorithm - but perhaps it will help someone develop their own algorithm.
Despite the presence Application Manager And Control Center Having a graphical interface, many actions for installing packages and configuring the system are more convenient to perform using the CLI. And therefore the first action is to create a comfortable living environment in the shell. To do this, I open a terminal (let me remind you that in Cinnamon the default is GNOME Terminal) and install my favorite command shell:
$ sudo apt install zsh
Next is configuring zsh. I still have its dot files from the previous installation, but in general, I would need to create (or copy) a suitable ~/.zshrc. This is a very separate issue, which I will not touch on now; I will simply refer to and from previous notes on the topic (however, both of them need correction). And the specificity of Mint (and all other ubuntoids) is that you will need another config - ~/.zshen , with a single line:
DEBIAN_PREVENT_KEYBOARD_CHANGES=yes
Without this, such a valuable feature of this shell as history-substring-search (details) will not work.
Now I make zsh the user's login shell, requiring the user's password:
$ chsh -s /bin/zsh
And I move on to setting up the terminal itself - that is, editing the profile Default. For what - right-click in the terminal window, then Profiles -> Profile Options. And here in the tab Are common I choose the appropriate font:

If you wish, you can also make the menu bar visible.
In the tab Header and commands— I mark boxing Run command as a shell entering:

In the tab Colors— I select a calm color scheme:

And in the tab Scrolling— I define its value as 1024 lines, this is usually enough for me:

Now, for all the settings to take effect, it is better to restart the Cinnamon session. That's what I do, and then I launch Control center:

The first thing to do here is to put Yakina on a stake and set up the fonts. Why do I simultaneously install my favorite Cantarell in the terminal:
$ sudo apt install fonts-cantarell
Then I update the font cache there:
$fc-cache -f
After that, I launch the font configuration module from the Center and install the appropriate typefaces and fonts:

Now - the keyboard. The installed system inherits the layout and its variant selected. However, it is required, firstly, to define layouts for windows (I have my own for each):

Secondly, assign a layout switch (I have a traditional CapsLock):

Laptops usually do not have LED indicators, but for a desktop it makes sense to define them as indicators of the current layout:

Here, so as not to return, in the tab Keyboard shortcuts, I assign switching between desktops (long-familiar Alt+# ):


And at the same time I’m figuring out power management:

Then - Touchpad, running two fingers along it is more convenient for me than crawling along the edge with one:

The desktop background is an important aspect of aesthetics, although, like most users, I almost never see it. The set includes some good pictures for variety:

Hot corners- a matter of taste and habits, for me it’s convenient like this:

In this article, for novice users of the Linux OS, the process of installing and initially configuring the latest version of the distribution will be described and illustrated step by step. Linux Mint 18 (Sarah) based on package base Ubuntu 16.04. The development team announced support for this release until 2021.
Brief list of changes: MATE
1. Desktop environments Cinnamon 3.0 and MATE 1.14.
2. Support for cross-desktop applications - xapps, an analogue of snap and flatpak packages. — a universal, non-distribution method for software distribution.
3. New topic registration - Mint-Y. An excellent theme that is not yet enabled by default. I like it very much and, as for me, it’s hers dark version Doesn't strain your eyesight at all.
4. Support for HiDPI screens high density pixels or simply with a very high resolution.
5. Changing the utility apt, making it even easier to use, updating many system utilities and versions of pre-installed applications.
To begin installation, insert the disk or USB drive with the distribution kit into the DVD drive. You can download the system from the developer's website. When booting the computer, using the Boot-menu (called by pressing the F8\F10\F12\esc keys, depending on Bios version your PC) select the required drive For loading. The Live CD will start Linux Mint 18 (Sarah). Clicking on the icon on the desktop will launch the installation wizard.
In the screenshots above, the first steps are choosing the installation language, a window with a question about installing proprietary software - codecs and players. The next step is setting up the disk. I have one disk, empty, and I left the default partition. If there are other Linux partitions on the computer, partitions with installed Windows, then the dialogue will contain a proposal to leave the existing file system, install Mint on free place and select options for the bootloader. Next steps— selecting the time zone, default keyboard layout, user login and password. This is not the root superuser password; it is not set when installing the system in Mint\Ubuntu. Below we will describe how to set it.
For now, everything should be extremely simple and clear. The following steps are completely automatic. The installer will copy, install and configure the system with everything software. The duration of the process depends on the performance of your PC (for me it takes about 10 minutes on average hardware). At the end, you need to remove the distribution media and reboot.
First launch - login window and appearance of the Cinnamone 3.0 desktop:
The first thing I wanted to do was change the design of my desktop to the highly praised one. Mint-Y. Themes can be changed in “Menu-Options-Themes”. Traditionally, I chose the dark option - it strains my eyesight less:
sudo apt-get update sudo apt-get upgrade
The first updates the local repository cache - the list of packages available for installation and/or updating, the second updates the system and all applications.
Appearance graphical utility for an update that's a bit like Windows:
The next step is completely optional. In Mint\Ubuntu it is assumed that there is no need for a root password, everything can be done the same way. This is convenient in some places, not so much in others. I prefer to set a password for the superuser:
su - passwd root
first command - you log in as root in it root folder, second - change (create) a password for it.
The last thing for today is adding the Russian keyboard layout and changing the switching combination.
Actually, that's all. I note that Windows installation 10 on this PC takes about half an hour - without drivers, office and other applications. Mint installed in 10 minutes with a rather large set of software.
Have a nice day.


