Installing Apache on Windows. Be your own host or install Apache on the Windows platform
The web server is installed on 64-bit Windows platform. Enterprise 1C server is also 64-bit, platform version 8.3.10.2561
- The very first attempt to install Apache was using XAMPP. It didn't take off due to lack of skill.
- The continuation was with IIS. Here, difficulties arose with launching 1C information databases, which were resolved by installing a 32-bit web extension of the enterprise 1C server, however, I wanted to get by with installing only a 64-bit platform. Discussion of error with IIS
- According to the description from the article, I installed Apache 2.2, but the web server did not start by mistake
With Apache 2.4, everything finally worked out.
Description of installation step by step.
Step 1. Download the distribution
Step 4: Edit environment variable pathWindows.
You need to add the path to the executables to the path environment variable. Apache files C:\Apache24\bin
On Windows Server 2008 R2 and on Windows 7, on which I performed these steps, via the desktop icon Computer - Properties systems- Extra options systems-environment variables

Step 5. Install the C++ component
To do this, run the previously downloaded file VC_redist.x64.
I installed on Windows 7 Professional and on Windows Server 2008 R2.
I noticed that the vc libraries on 7 were installed in the C:\Windows\SysWOW64 folder, and on Server 2008 in the C:\Windows\System32 folder, although both systems are 64-bit.

To work web server, as it turned out, has no effect.
On Windows 7 the operating system had to be restarted, on Windows Server 2008 - not.
Step 6. Installing Apache as services
Launch command panel with administrator rights Start-Run-cmd, change the folder to C:\Apache24\bin , run
httpd.exe -k install
In the list of services - Start - Administration - Services - find the Apache 2.4 service - Launch it, set the startup type.
The web server installation is now complete..
Further steps are well described in the publication I linked to at the beginning
- Checking that the web server is running - point your browser to http://localhost and see It works!
- Set up a firewall for access from other computers
- Publication information base. I noticed here that after publication, when answering the question about restarting the web server, an automatic restart does not occur; the web server must be restarted manually.
When working using web client an error was detected

appears when opening an object from the list by double click on the link. The workaround is to open the object from the context menu.
Apache is the most popular free web server. As of 2016, it is used on 33% of all Internet sites, which is approximately 304 billion sites. This web server was developed back in 1995 as a replacement for the popular NCSA that server and fixed many of its problems. Rumor has it that his name comes from a patchy, as he was fixing NCSA errors. Now, it is a cross-platform program that supports Windows, Linux and MacOS and provides sufficient flexibility, customization and functionality. The program has a modular structure, which allows you to expand its functionality almost indefinitely using modules.
Installing Apache on Linux can be done with a few commands, but the program provides very a large number of settings that can be changed, as well as modules, after enabling which it will work better. This article will cover installation and Apache setup, we will use Ubuntu as the main system, but you can repeat these steps in any other distribution. We will look at not only installing the program itself, but also how to configure it, setting up apache virtual hosts, as well as the most useful modules.
On this moment, the most a new version programs 2.4; therefore, setting up Apache 2.4 will be considered. As I already said, in Linux program installs in literally a couple of commands. To install on Ubuntu, first update the system to the latest version:
sudo apt update
$ sudo apt upgrade
Then install apache2:
sudo apt install apache2
In other distributions, the program package is called either this or httpd and installing it will not cause you any difficulties.
After installation is complete, you need to add the web server to startup so as not to start it manually after turning on the computer:
sudo systemctl enable apache2
Apache setup
Gone are the days when Apache configuration was stored in a single file. But it’s correct: when everything is distributed in its own directories, it’s easier to navigate the configuration files.
All settings are contained in the /etc/apache/ folder:
- File /etc/apache2/apache2.conf responsible for basic settings
- /etc/apache2/conf-available/*- additional web server settings
- /etc/apache2/mods-available/*- module settings
- /etc/apache2/sites-available/*- virtual host settings
- /etc/apache2/ports.conf- ports on which apache runs
- /etc/apache2/envvars
As you noticed, there are two folders for conf, mods and site. These are available and enabled. When you enable a module or host, a symbolic link is created from the available folder to the enable folder. Therefore, it is better to perform settings in the available folders. Generally speaking, you could do without these folders, take everything and dump everything into one file the old fashioned way, and everything would work, but no one does that now.
First let's look at main file configurations:
vi /eta/apache2/apache2.conf
Timeout- indicates how long the server will try to continue the interrupted transmission or reception of data. 160 seconds will be enough.
Keep Alive On- a very useful parameter, it allows you to transfer several files in one connection, for example, not only the html page, but also images and css files.
MaxKeepAliveRequests 100 - maximum amount requests per connection, the more, the better.
KeepAliveTimeout 5- connection timeout, usually 5-10 seconds are enough to load a page, so you don’t need to set any more, but you also don’t need to break the connection before all the data has loaded.
User, Group- user and group on behalf of which the program will run.
HostnameLookups- write to logs instead of IP addresses domain names, it is better to disable it to speed up the work.
LogLevel- level of error logging. By default, warn is used, but to make the logs fill out more slowly, just enable error
Include- all include directives are responsible for connecting the configuration files discussed above.

Directory directives are responsible for setting access rights to a particular directory in file system. The syntax here is:
Parameter value
The following basic options are available here:
AllowOverride- indicates whether .htaccess files should be read from this directory; these are the same settings files and have the same syntax. All - allow everything, None - do not read these files.
DocumentRoot- sets from which folder documents should be taken to be displayed to the user
Options- indicates which web server features should be allowed in this folder. For example, All - allow everything, FollowSymLinks - follow symbolic links, Indexes - display the contents of the directory if there is no index file.
Require- sets which users have access to this directory. Require all denied - deny everyone, Require all granted - allow everyone. You can use the user or group directive instead of all to explicitly specify the user.
Order- allows you to control access to the directory. Accepts two values: Allow,Deny - allow for everyone except those specified or Deny,Allow - deny for everyone except those specified..ru.
All these directives are not used here, since we are happy with the default values, but in .htaccess files they can be very useful.
We are left with the /etc/apache2/ports.conf file:
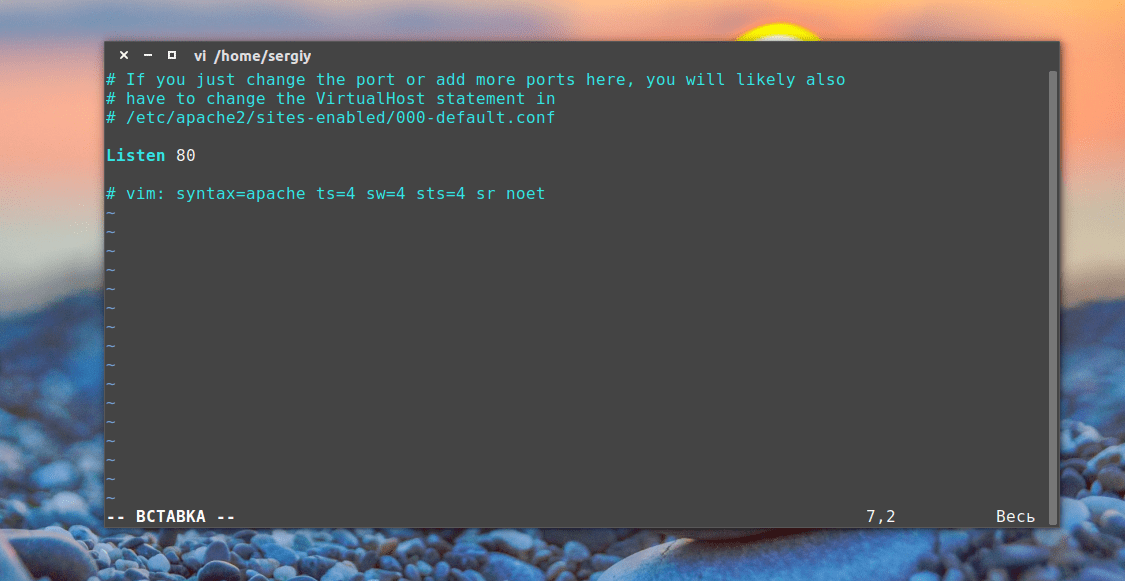
It contains only one directive, Listen, which tells the program which port it should work on.
The last file is /etc/apache2/envvars, you are unlikely to use it, it contains variables that can be used in other configuration files.

Setting up an Apache server via htaccess
.htaccess files allow you to configure your Ubuntu web server to behave in a specific directory. All instructions specified in this file are executed as if they were wrapped in a tag
It is important to note that in order for the server to read instructions from .htaccess, the settings for this folder in the main or virtual host file must not contain AllowOverride None for all settings to work you need AllowOverride All.
Otherwise, any configuration of the Apache server can be done here, from enabling modules to simply changing folder access. Since we have already considered all the parameters, let’s just give a couple of examples:
Order Deny,Allow
Deny from all
Denies everyone access to this folder, important to apply for configuration folders. Most often, .htaccess is used to work with the mod_rewrite module, which allows you to change requests on the fly:
RewriteEngine on
RewriteRule ^product/([^/\.]+)/?$ product.php?id=$1 [L]
But this is a very broad topic and is beyond the scope of this article.
Configuring Apache Modules
As I already said, Apache is a modular program, its functionality can be extended using modules. All available modules bootloaders and configuration files modules are located in the /etc/apache/mods-available folder. And activated in /etc/apache/mods-enable.
But you don't have to analyze the contents of these folders. Configuring Apache 2.4 by adding modules is done using special teams. You can view all running modules with the command:

You can enable the module with the command:
sudo a2enmod module_name
And disable:
sudo a2dismod module_name
After enabling or disabling modules, you need to restart apache:
sudo systemctl restart apache2
When one of these commands is executed, a symbolic link to a module file with the extension load is created or deleted in the mods-available directory. You can look at the contents of this file, there is only one line. For example:
vi /etc/apache2/mods-available/deflate.load

This means that the module could be activated simply by adding this line to the apache2.conf file. But it is customary to do just that to avoid confusion.
The module settings are located in the same folder, only in a file with the .conf extension instead of load. For example, let's look at the settings of the same module for deflate compression:
vi /etc/apache2/mods-available/deflate.conf

Files in the conf-available folder, these are the same modules, only they are installed separately from apache, these can be configuration files for inclusion php module or any other programming language. Everything works exactly the same here, only the commands for enabling and disabling these modules are slightly different:
a2enconf module_name
a2disconf module name
As you have seen, enabling modules is very simple. Let's enable a few necessary but not enabled by default modules:
sudo a2enmod expires
$ sudo a2enmod headers
$ sudo a2enmod rewrite
$ sudo a2enmod ssl
The expires and headers modules reduce the load on the server. They return a Not Modified header if the document has not changed since last request. The expiries module allows you to set the time for which the browser should cache the received document. Rewrite allows you to change requested addresses on the fly, very useful when creating CNC links, etc. And the last one to enable support for SSL encryption. Don't forget to restart apache2 after completing the settings.
Configuring Apache Virtual Hosts
It would not be entirely convenient if on one physical machine Only one site could be hosted. Apache can support hundreds of sites on a single computer and serve the correct content for each one. Virtual hosts are used for this. The server determines which domain the request is coming to and serves the required content from the folder of this domain.
Apache hosts settings are located in the /etc/apache2/hosts-available/ folder. To create a new host, just create a file with any name (it’s better to end with the host name) and fill it with the necessary data. You need to wrap all these parameters in a directive VirtualHost. In addition to the parameters discussed here, the following will be used:
- ServerName- primary domain name
- ServerAlias- additional name by which the site will be accessible
- ServerAdmin - Email administrator
- DocumentRoot- folder with documents for this domain
For example:
vi /etc/apache2/sites-available/test.site.conf

Web Apache server quite popular. It's free software open source. Typically installed on computers with an operating system UNIX family, but it is possible to install it on a Windows operating system.
I found Apache version 2.4.25, and installed it on windows 7 x64 httpd-2.4.25-win64-VC11.zip. There are 32 bit version and 64 version. On Windows 7 x64 you can install both versions, on 32 bit Windows 7 will only work the 32-bit version. So choose according to your capabilities. I will also note that executable files compiled in Microsoft Visual Studio 2012, I need to install the Visual C++ redistributable package for them to work. You can download it from the Microsoft website vcredist_x64.exe. And choose a package of the appropriate bit size
Let's start the installation. If not installed Microsoft package, then install. It's not difficult, everything is done automatically. Then from zip archive extract the Apache24 folder and move it to “C:\Program Files”. If you have Windows x64 and the server is x86, then go to the folder "C:\Program Files (x86)".
I saw advice on the Internet that you need to create a folder in the root of the C: drive and unpack the contents of the archive into it, but I have a different opinion. For programs there is a folder "C:\Program Files". For those who object that the configuration files are deeply buried and you will need administrator rights to edit them, I answer: there is no problem. Create a shortcut for notepad ("C:\Windows\notepad.exe"), in the properties of the shortcut after the notepad path add in double quotes full path to the configuration file ("C:\Program Files\Apache24\conf\httpd.conf"), and in additional properties Check the "run as administrator" checkbox. Place the shortcut in a location convenient for you, and when you click it, a notepad with administrator rights will be launched and it will open the server configuration file. Once you open it, you need to adjust it a little.
After editing httpd.conf you need to create batch file, write into it
"C:\Program Files\Apache24\bin\httpd.exe" -k install and run it as administrator. This command is for the server to register itself as a windows service, which will automatically start when the system starts. You can also place a small assistant program “C:\Program Files\Apache24\bin\ApacheMonitor.exe” into startup. It is located in the tray, shows the status of the service, and allows you to start, stop, restart the Apache service. You need to restart the Apache service after each edit of the configuration files for the changes to take effect.
If the batch file is completed successfully and the apache service is running, then you can type http://127.0.0.1 or http://localhost in the browser, the browser will open the file “C:\Program Files\Apache24\htdocs\index.html”, in which single line " It works!"If the browser was able to display this, then the server is running.
Of course, the default location for HTML documents that will be processed by the web server is not very convenient, but that doesn’t matter. The fact is that apache can contain many virtual hosts, each of which can be individually configured. Denver's supporters take credit for Denver's ability to host several different sites, but that is due to the apahce server that is built into Denver. We have a full-fledged server that works like windows service. And now it’s time to start creating
Installing a web server on Linux:
- If you have Ubuntu, then the article “How to install Apache web server with PHP 7, MariaDB/MySQL and phpMyAdmin (LAMP) on Ubuntu 16.10” is suitable for you.
- If you have Arch Linux, then the article "Installing LAMP (Linux, Apache, MySQL/MariaDB, PHP7 and phpMyAdmin) on Arch Linux / BlackArch" is suitable for you.
Local server Very useful tool. It will definitely be useful for webmasters, PHP programmers, and penetration testers. All programs included in typical installation web servers are free, they all have open source. A local web server consumes minimal resources and is actually not difficult to install and configure.
This instruction will tell you how to install a local web server without using ready-made assemblies. This method has its advantages. The most important of them are: full control on what you install; opportunity to use the most latest versions software.
If you follow the instructions exactly, then everything will definitely work for you! Except for those who have Windows XP - if you like this operating system, then special instructions have been made for you.
I will show an example of installation on Windows 10, but if you have a different Windows version, then don’t let this bother you - the procedure is identical everywhere. I will download the latest (most recent) versions of the programs at the time of writing. If by the time you read, new versions will be released, then download them.
Installation steps:
You may also find it useful:
1. Preparation (downloading programs included in the server, creating the server structure)
We need:
- Apache(directly web server)
- PHP– environment for PHP work programs (required by almost all websites)
- MySQL– database management system (required by most websites)
- phpMyAdmin- Very handy tool for database management
The official website of the Apache developers is httpd.apache.org. You can download Apache from this site. But official version built using an old compiler, for this reason it does not work with new versions of PHP. PHP authors recommend Apache from apachelounge.com/download. Therefore, for this instruction, we download Apache from the site apachelounge.com/download.
If you have a 64-bit version of Windows, then you can choose both 64-bit and 32-bit versions of components. The main rule is that all components must be of the same bit size. If you have a 32-bit version of Windows, then all components must be 32-bit. This does not apply to phpMyAdmin, which is written in PHP language. For PHP programs the concept of bit depth is not applicable.
The free version of MySQL is called MySQL Community Server. It can be downloaded on the page. There is an executable installer on this same page, but I recommend downloading the ZIP archive. On the download page we are asked to register or log in to an existing one. account- but this is not necessary. Just click on the link " No thanks, just start my download" Pay attention to the bit depth.
We also need the C++ Redistributable Visual Studio 2017 file, i.e. Visual C++ redistributable component for Visual Studio 2017 (or any other later), you can download it on the official Microsoft website using the link (direct link to download the 64-bit version; direct link to download the 32-bit version). This file is needed for the web server. And MySQL requires Visual C++ Redistributable Packages for Visual Studio 2015. It can be downloaded from .
So, I downloaded the following files:
- httpd-2.4.29-Win64-VC15.zip
- php-7.2.0-Win32-VC15-x64.zip
- mysql-8.0.11-winx64.zip
- phpMyAdmin-4.7.6-all-languages.zip
- vc_redist.x64.exe
- vcredist_x64.exe
Install files vc_redist.x64.exe And vcredist_x64.exe.
2. Create a web server structure
Let's create the directory structure of our server. The main idea is to separate executable files and website files with databases. This is convenient for server maintenance, including backups.
At the root of the disk C:\ create a directory Server. In this directory, create 2 subdirectories: bin(for executable files) and data.
Go to the directory data and create subfolders there D.B.(for databases) and htdocs(for websites).
Go to the directory C:\Server\data\DB\ and create an empty folder there data.
3. Installing Apache 2.4
The contents of the downloaded archive (more precisely, only the directory Apache24), unpack into C:\Server\bin\.
Go to the directory c:\Server\bin\Apache24\conf\ and open the file httpd.conf any text editor.
In it we need to replace a number of lines.
Define SRVROOT "c:/Apache24"
Define SRVROOT "c:/Server/bin/Apache24"
#ServerName www.example.com:80
ServerName localhost
DocumentRoot "$(SRVROOT)/htdocs"
DocumentRoot "c:/Server/data/htdocs/"
DirectoryIndex index.html
DirectoryIndex index.php index.html index.htm
# AllowOverride controls what directives may be placed in .htaccess files. # It can be "All", "None", or any combination of the keywords: # AllowOverride FileInfo AuthConfig Limit # AllowOverride None
# AllowOverride controls what directives may be placed in .htaccess files. # It can be "All", "None", or any combination of the keywords: # AllowOverride FileInfo AuthConfig Limit # AllowOverride All
#LoadModule rewrite_module modules/mod_rewrite.so
LoadModule rewrite_module modules/mod_rewrite.so
Save and close the file. That's it, Apache setup is complete! A description of each changed directive can be found on this page.
Open command line(this can be done by pressing the Win+X keys simultaneously). Select there Windows PowerShell(administrator) and copy there:
C:\Server\bin\Apache24\bin\httpd.exe -k install
If a request is received from the firewall for Apache, click Allow.
Now enter into the command line:
C:\Server\bin\Apache24\bin\httpd.exe -k start
And press Enter.

Enter root as the username. Leave the password field empty. If everything is done correctly, then everything should look like this:

7. Server use and data backup
In the catalog c:\Server\data\htdocs\ create folders and files, for example:
c:\Server\data\htdocs\test\ajax.php - this file, accordingly, will be available at http://localhost/test/ajax.php, etc.
To create a complete backup of all sites and databases, just copy the directory C:\Server\data\.
Before updating modules, do backup folders bin- in case of problems, you can easily roll back to previous versions.
At reinstallation server or when updating it, you need to re-configure the configuration files. If you have copies of these files, the process can be significantly speeded up. It is advisable to backup the following files:
- c:\Server\bin\Apache24\conf\httpd.conf
- c:\Server\bin\mysql-8.0\my.ini
- c:\Server\bin\PHP\php.ini
- c:\Server\data\htdocs\phpMyAdmin\config.inc.php
All settings are stored in them.
8. Additional PHP setup
PHP is now a very powerful, flexible, user-friendly tool. On local computer it can be used to solve a variety of problems that are not necessarily related to the generation of Web pages. When solving extraordinary problems, you may run into restrictions set in the settings. These settings are contained in the php.ini file (c:\Server\bin\PHP\php.ini). Let's look at some of them:
Memory_limit = 128M
sets the maximum amount of memory that a script can use
Post_max_size = 8M
sets the maximum amount of data that will be accepted when sending POST method
;default_charset = "UTF-8"
sets the encoding (by default, the line is commented out)
Upload_max_filesize = 2M
the maximum size of a file uploaded to the server. Initially installed very small size- only two megabytes. For example, when loading a database into phpMyAdmin, you will not be able to upload a file larger than 2 megabytes until this setting item is changed.
Max_file_uploads = 20
maximum number of files to upload at one time
Max_execution_time = 30
maximum execution time for one script
Changing these settings is completely optional, but it is useful to know about them.
9. Additional settings for phpMyAdmin
We have already configured phpMyAdmin and for most people the basic functionality is enough. However, on home page phpMyAdmin there is an inscription: “Additional features of phpMyAdmin are not fully configured, some functions have been disabled.”
New features are:
- showing relationships between (related) tables;
- adding information about tables (starting from version 2.3.0 you can describe in a special table ‘table_info’ which column will be shown in the tooltip when moving the cursor over the associated key);
- creating a PDF diagram (starting from version 2.3.0 you can create PDF pages, showing the relationships between your tables);
- display column comments (since version 2.3.0 you can make a comment describing each column for each table. And they will be visible in " preview for print". Since version 2.5.0, comments are used on own pages tables and in view mode, appearing as tooltips above columns (property tables) or embedded in the table header in view mode. They can also be shown in the table dump);
- create bookmarks (since version 2.2.0, phpMyAdmin allows users to bookmark queries. This can be useful for frequently used queries);
- history of SQL queries (starting from version 2.5.0 you can save your history of all SQL queries, which were made through the phpMyAdmin interface);
- designer (starting from version 2.10.0, the Designer tool is available; it allows you to visually manage relationships between tables);
- information about recently used tables;
- customizing the interface of frequently used tables;
- tracking (starting from version 3.3.x, a tracking mechanism is available. It helps you track every SQL command, which was executed by phpMyAdmin. Recording of work with data and recording of commands is supported. Once enabled, you will be able to make versions of tables);
- user settings (starting from version 3.4.x, phpMyAdmin allows users to set most settings and save them in the database);
- custom menus (starting from version 4.1.0 you can create user groups that will only have access to assigned menu items. A user can be assigned to a group and will only see menu items available to their group);
- hide/show navigation items (starting from version 4.1.0 you can hide/show items in the navigation tree).
- and others
Now we will configure these additional features fully. Go to the link http://localhost/phpmyadmin/chk_rel.php and click "Create database". After this, all new features will be activated.
A few screenshots of the new features:
1) Designer

2) Tracking

10. Installation of a mail plug
In the C:\Server\bin\ directory, create new catalog with the name Sendmail. Now in this directory create a file sendmail.php with the following content:
#!/usr/bin/env php
Open the PHP configuration file, it is located here C:\Server\bin\PHP\php.ini. And add one line there:
Sendmail_path = "C:\Server\bin\PHP\php.exe C:\Server\bin\Sendmail\sendmail.php --dir C:\Server\bin\Sendmail\emails"
Save the file and restart the server. Great, now all sent emails will be saved in the directory C:\Server\bin\Sendmail\emails\

Letters will have the extension .eml and they can be opened, for example, by the program Thunderbird. Or a regular text editor.
11. Adding a PHP directory to PATH on Windows
If this is not done, there may be problems with some PHP modules, including php_curl.dll, php_intl.dll, php_ldap.dll, php_pdo_pgsql.dll and php_pgsql.dll. At least, every time the server starts, the following appears in the logs:
PHP Warning: PHP Startup: Unable to load dynamic library "C:\\Server\\bin\\PHP\\ext\\php_curl.dll" - \xef\xbf\xbd\xef\xbf\xbd \xef\xbf\ xbd\xef\xbf\xbd\xef\xbf\xbd\xef\xbf\xbd\xef\xbf\xbd\xef\xbf\xbd\xef\xbf\xbd\xef\xbf\xbd\xef\xbf\xbd\ xef\xbf\xbd\xef\xbf\xbd\xef\xbf\xbd\xef\xbf\xbd\xef\xbf\xbd \xef\xbf\xbd\xef\xbf\xbd\xef\xbf\xbd\xef\ xbf\xbd\xef\xbf\xbd.\r\n in Unknown on line 0 PHP Warning: PHP Startup: Unable to load dynamic library "C:\\Server\\bin\\PHP\\ext\\php_intl.dll " - \xef\xbf\xbd\xef\xbf\xbd \xef\xbf\xbd\xef\xbf\xbd\xef\xbf\xbd\xef\xbf\xbd\xef\xbf\xbd\xef\xbf\xbd \xef\xbf\xbd\xef\xbf\xbd\xef\xbf\xbd\xef\xbf\xbd\xef\xbf\xbd\xef\xbf\xbd\xef\xbf\xbd\xef\xbf\xbd \xef \xbf\xbd\xef\xbf\xbd\xef\xbf\xbd\xef\xbf\xbd\xef\xbf\xbd.\r\n in Unknown on line 0 PHP Warning: PHP Startup: Unable to load dynamic library " C:\\Server\\bin\\PHP\\ext\\php_ldap.dll" - \xef\xbf\xbd\xef\xbf\xbd \xef\xbf\xbd\xef\xbf\xbd\xef\xbf\ xbd\xef\xbf\xbd\xef\xbf\xbd\xef\xbf\xbd \xef\xbf\xbd\xef\xbf\xbd\xef\xbf\xbd\xef\xbf\xbd\xef\xbf\xbd\ xef\xbf\xbd\xef\xbf\xbd\xef\xbf\xbd \xef\xbf\xbd\xef\xbf\xbd\xef\xbf\xbd\xef\xbf\xbd\xef\xbf\xbd.\r \n in Unknown on line 0 PHP Warning: PHP Startup: Unable to load dynamic library "C:\\Server\\bin\\PHP\\ext\\php_pdo_pgsql.dll" - \xef\xbf\xbd\xef\xbf \xbd \xef\xbf\xbd\xef\xbf\xbd\xef\xbf\xbd\xef\xbf\xbd\xef\xbf\xbd\xef\xbf\xbd \xef\xbf\xbd\xef\xbf\xbd \xef\xbf\xbd\xef\xbf\xbd\xef\xbf\xbd\xef\xbf\xbd\xef\xbf\xbd\xef\xbf\xbd \xef\xbf\xbd\xef\xbf\xbd\xef \xbf\xbd\xef\xbf\xbd\xef\xbf\xbd.\r\n in Unknown on line 0 PHP Warning: PHP Startup: Unable to load dynamic library "C:\\Server\\bin\\PHP\ \ext\\php_pgsql.dll" - \xef\xbf\xbd\xef\xbf\xbd \xef\xbf\xbd\xef\xbf\xbd\xef\xbf\xbd\xef\xbf\xbd\xef\xbf\ xbd\xef\xbf\xbd\xef\xbf\xbd\xef\xbf\xbd\xef\xbf\xbd\xef\xbf\xbd\xef\xbf\xbd\xef\xbf\xbd\xef\xbf\xbd\ xef\xbf\xbd \xef\xbf\xbd\xef\xbf\xbd\xef\xbf\xbd\xef\xbf\xbd\xef\xbf\xbd.\r\n in Unknown on line 0
To avoid these warnings, you need to add the path to PHP to your system environment variables.
Click the Start button (or whatever it's called on Windows 10?), start typing " Changing system environment variables» and open the corresponding settings window.

There click " Environment Variables»:

In the window " System Variables» find and click on Path, then click " Change»:


Move the entry to the top:

Close all windows and save your changes.
Restart the server.
12. Freeze, slow traffic and/or server error Asynchronous AcceptEx failed
If your server freezes even without load - it does not show web pages until restarted, and in the server logs there are errors Asynchronous AcceptEx failed:
AH00455: Apache/2.4.9 (Win64) PHP/5.5.13 configured -- resuming normal operations AH00456: Apache Lounge VC11 Server built: Mar 16 2014 12:42:59 AH00094: Command line: "c:\\Server\\ bin\\Apache24\\bin\\httpd.exe -d C:/Server/bin/Apache24" AH00418: Parent: Created child process 4952 AH00354: Child: Starting 64 worker threads. (OS 64)The specified network name is no longer available. : AH00341: winnt_accept: Asynchronous AcceptEx failed. (OS 64)The specified network name is no longer available. : AH00341: winnt_accept: Asynchronous AcceptEx failed. (OS 64)The specified network name is no longer available. : AH00341: winnt_accept: Asynchronous AcceptEx failed. (OS 64)The specified network name is no longer available. : AH00341: winnt_accept: Asynchronous AcceptEx failed. (OS 64)The specified network name is no longer available. : AH00341: winnt_accept: Asynchronous AcceptEx failed. (OS 64)The specified network name is no longer available. : AH00341: winnt_accept: Asynchronous AcceptEx failed.
Then add to the Apache configuration file:
AcceptFilter http none AcceptFilter https none EnableSendfile off EnableMMAP off
13. Configuring cURL in the Apache web server on Windows
If you don't know what cURL is, then you don't need it. Those. Feel free to skip this step.
cURL is a console utility that allows you to exchange data with remote servers using a very large number of protocols. cURL can use cookies and supports authentication. If a web application requires cURL, then this must be specified in the dependencies. Many popular applications do not require cURL, for example phpMyAdmin and WordPress do not need to configure cURL.
If cURL is not configured correctly, you will receive errors:
Fatal error: Call to undefined function curl_multi_init() in ...
curl error: SSL certificate problem: unable to get local issuer certificate
To make cURL work in Apache on Windows you need:
1) Be sure to add the PHP directory to PATH (system environment variables). How to do this is stated just above:
2) In a file C:\Server\bin\PHP\php.ini line should be uncommented extension=curl
This is usually not required, but you can make a backup copy of the server binary (executable) files if you wish. All these files are located in the folder C:\Server\bin\. These are Apache, MySQL and PHP - i.e. programs that are responsible for the operation of the server, but which we can download from official websites and configure again at any time.
If you want to make a backup copy of them (for example, before upgrading the server), then stop the services:
C:\Server\bin\Apache24\bin\httpd.exe -k stop net stop mysql
And copy the folder to a safe place C:\Server\bin\.
By the way, you can copy the entire server, i.e. folder C:\Server\– in this case, you will simultaneously get a backup copy of both executable files and data (databases, websites).
When the copying is complete, start the services again:
C:\Server\bin\Apache24\bin\httpd.exe -k start net start mysql
15. Server update
All components that make up the web server are actively being developed and new versions are regularly released. When a new version is released, you can update one component (for example, PHP), or several at once.
Deleting a server
If you no longer need the server, or you want to install it again, stop the services and remove them from autostart by sequentially executing on the command line:
C:\Server\bin\Apache24\bin\httpd.exe -k stop c:\Server\bin\Apache24\bin\httpd.exe -k uninstall net stop mysql c:\Server\bin\mysql-8.0\bin\ mysqld --remove
Delete the server files; to do this, delete the folder C:\Server\. Warning, this will delete all databases and your sites.
How to protect your Apache web server from hacking on Windows
With PHP (with choice of versions), with MySQL and phpMyAdmin. This site is hosted exactly on it: responsive and qualified technical support, installation of WordPress and other web applications in one click, as a gift when paying for a year, free site transfer. When ordering hosting + 1 month free (promotional code b33e0e2f).
Apache Lounge has provided up-to-date Windows binaries and popular third-party modules for more than 15 years. We have hundreds of thousands of satisfied users: small and large companies as well as home users. Always build with up to date dependencies and latest compilers, and tested thorough. The binaries are referenced by the ASF, Microsoft, PHP etc. and more and more software is packaged with our binaries and modules.
The binaries, are build with the sources from ASF at httpd.apache.org, contains the latest patches and latest dependencies like zlib, openssl etc. which makes the downloads here mostly more actual then downloads from other places. The binaries don't run on XP and 2003. Runs on: 7 SP1, Vista SP2, 8 / 8.1, 10, Server 2008 SP2 / R2 SP1, Server 2012 / R2, Server 2016.
Build with the latest Windows® Visual Studio C++ 2017 aka VC15. VC15 has improvements, fixes and optimizations over VC14 in areas like Performance, MemoryManagement, New standard conformance features, Code generation and Stability. For example code quality tuning and improvements done across different code generation areas for "speed". And makes more use of modern processors and supported Windows editions (win 7 and up) internal features.
Be sure!! that you have installed the latest (14.16.27027.1) C++ Redistributable Visual Studio 2017: vc_redist_x64 or vc_redist_x86 .
Note: VC15 is backward compatible to VC14. That means, a VC14 module can be used inside a VC15 binary (for example PHP VC14 as module). Because this compatibility the version number of the Redistributable is 14.1x.xx. And after install is the Redistributable VS2015 updated from 14.0x.xx to VS2017 14.1x.xx (you can still use VC14). Apache 2.4 binaries VC15
Apache 2.4 modules VC15
Mail for the PGP signatures and/or SHA checksums to verify the contents of a file.
mod_fcgid
FastCGI ASF module mod_fcgid-2.3.9-win64-VC15.zip info 25 Apr "17 44K mod_fcgid-2.3.9-win32-VC15.zip 40K
mod_security
Application firewall, intrusion detection and prevention engine mod_security-2.9.3-win64-VC15.zip info 09 Dec "18 591K mod_security-2.9.3-win32-VC15.zip 522K
mod_jk & isapi_redirect.dll
Tomcat connector mod_jk-1.2.46-win64-VC15.zip info 29 Oct "18 165K mod_jk-1.2.46-win32-VC15.zip 133K isapi_redirect.dll-1.2.46-VC15.zip info 389K
mod_xsendfile
Processes X-SENDFILE headers registered by the original output handler.
It is useful for processing script-output of e.g. php, perl or any cgi. mod_xsendfile-1.0-P1-win64-VC15.zip info 30 May "17 14K mod_xsendfile-1.0-P1-win32-VC15.zip 14K
mod_log_rotate
in-process server-native log rotation mod_log_rotate-1.00a-win64-VC15.zip info May 30 "17 10K mod_log_rotate-1.00a-win32-VC15.zip 9K
dbd_modules
DBD Virtual Host and DBD Logging from/to an (My)SQL database dbd_modules-1.0.6-win64-VC15.zip info 30 May "17 24K dbd_modules-1.0.6-win32-VC15.zip 22K
mod_bw
Bandwidth limiter


