Turn on your iPhone for the first time. Initial iPhone setup. Can't restore iCloud backup when setting up
Often, after purchasing an iOS device, the user does not know what to do with it next, which is why a beginner has the question: “How to set up an iPhone and start using it”?
According to advanced apple growers, the initial setup is an extremely important stage, on which the quality and ease of use of the device in the future depends.
The article will discuss in detail how to properly configure a new, newly purchased iPhone.
You will have the opportunity to enjoy all the advantages of Apple technology and not pay store managers for the initial settings of your device.
General settings
So, you took your iPhone out of the box and pressed the power button.
If you are setting up a new Apple device, then this setting is optional, and you can skip this step by clicking “Next”.
If you decide not to skip this step and are within range of Wi-Fi networks, then select the one you need and enter the password, then click “Next”.
The next window will ask you to choose whether to enable or disable location services.
Important! Responsible for the operation of geolocation servicesGPS module. When activated, the iPhone will track your location, use maps, receive the latest weather forecast, be able to change the time zone as you move, and much more. But, moduleGPS consumes quite a lot of battery iOS device.
In principle, when setting up a new iPhone, you can disable geolocation services, which can always be activated as needed.
Click “Disable” and confirm your decision by clicking the “Yes” button.

After you have decided on the geolocation, you will see the settings screen for your Apple gadget.
Since we are considering a new, “boxed” iPhone, we need to “tap” on the line “Set up as a new iPhone.”

Creating an Apple ID Account
You've moved on to the most important process - setting up Apple ID.
Using this account, you will subsequently log into Apple services, buy applications, music, synchronize several devices, make free video calls between them, chat, etc.
This step is not considered mandatory and can be skipped when setting up a new iOS device, but experienced Apple growers recommend creating this identifier right away.
Select “Create Apple ID for free”

Important! Please note that if the owner of the “Apple gadget” is under 18 years of age at the time of creating the account, the system will refuse registrationAppleID.
After entering the data, the system will ask which mailbox to use. You can enter an existing email address, or get one for free in iCloud.
In this article, we will look at registering with Apple ID with an existing address.

Use current mailbox
- enter your available email address;

E-mail address
- create a password and confirm it;

In order to use the mobile Internet you need:
- Insert the SIM card into the iPhone and then go to the Settings application.
- After that, go to the “Cellular Communications” section and turn on the Internet in the “Cellular Data” column.

Data for operating an iOS device on the Internet arrives immediately after installing a SIM card in the iPhone. You just need to save the SMS with the settings in your phone.
In order to use your iPhone as a Wi-Fi modem, you must:
- We enter the “Settings” of the iPhone.
- Go to the “Modem Mode” section and move the slider to the ON position.

After this simple procedure, your iPhone can distribute Wi-Fi, working like a modem. A blue bar with the number of connections will indicate that the wireless connection is working.
If your Mac computer is not equipped with a Wi-Fi module, then the iPhone can still be used as a modem and broadcast Internet traffic via a USB cable.
To do this you need:
- Go to Mac system settings. In the “Internet and wireless network” section, click on the “Network” icon.

- In the left column at the bottom of the window, click “+” and select “USB to iPhone” in the drop-down menu. After this procedure, click “Create” and the “Show all” button.

- In the drop-down window, click the “Apply” button.
We connect the iPhone to the computer with a USB cable and turn on the modem on the phone. As described above.
The main thing is to remember to connect the phone itself to the Internet, via Wi-Fi or 3G.
There is another way to broadcast the Internet from an iPhone and use it as a full-fledged modem: via Bluetooth.
To do this you need:
- Enable Bluetooth on both iPhone and Mac and create a connection between the devices.
- Then turn the iPhone into modem mode, as described above.
- Click on the Bluetooth icon on your Mac, select iPhone from the drop-down list, and “Connect to network.”

The fact that your gadget works as a modem will be indicated by a blue bar with the number of connections.
Advice: If you use 3 to connect to the InternetG or 4G networks, then choose unlimited tariffs, since mobile Internet is not cheap.
First launch and setup of iPhone and iPad
How to set up an iPhone: Instructions for dummies
- Select your language and country.
- Connect to a Wi-Fi network.
- Select Set Up as New iPhone from the Set Up iPhone menu.
- Create an Apple ID. It is needed to access the App Store (from there applications, games, music, movies, TV series are downloaded), communication via iMessage and FaceTime and synchronization - in general, without an Apple ID you will not be able to use any Apple services. Also, without an account, you will not be able to block and find your smartphone in case of loss or theft.
How to set up an iPhone 6s if you previously had an Apple device
If you have already used an iPhone, then use a backup copy to transfer all the data to a new smartphone. There are two types of backup. Photos, accounts, documents and system settings are saved to the iCloud cloud daily. And on your computer with iTunes, a complete copy of your iPhone is stored.
Setting up the iPhone 6s in this case begins with the same steps as in the previous section.
- After unpacking, insert the SIM card into your smartphone and turn it on.
- Select your language and country.
- Turn on location services (you don’t have to turn it on, but then the Maps app won’t be able to determine your location).
- Connect to a Wi-Fi network.
- Select "Recover from iCloud Backup" or "Recover from iTunes Backup".
- If you chose to restore from iCloud, you will need to enter your Apple ID and password, and then choose which copy to restore from. If you chose to restore from iTunes, then connect the device to the computer on which the copy is stored. After that, click on the smartphone icon in the top menu, and in the “Backups” section, click on “Restore from a copy.” Do not disconnect your phone from your computer until all data has been transferred.
Hello dear friends! I thought for a long time about what would be so useful to write on New Year’s Eve and the decision came by itself. Surely, due to the upcoming holidays, the number of iPhone owners has increased significantly. This means that the number of questions about using the gadget, proper configuration and optimization of its battery life has increased.
Initial iPhone setup
First of all, I want to warn you that you should not fall for the offers of an abstruse seller to set up an iPhone and create an Apple ID for a symbolic amount. Firstly, you can do it yourself without any problems with the help of this small guide, and secondly, I have repeatedly had to fix the mistakes of such customizers (either the Apple ID will be made ugly, or they will not tell the owner the answers to the security questions). So send them to hell, we’ll set everything up and create it ourselves. And just one more important recommendation - be sure to keep your receipt, despite the fact that Apple’s international warranty (1 year) obliges official service centers to carry out repairs and maintenance without a receipt, it will be of great use to you if you sell your phone. This way you can easily prove that the iPhone was bought in a store and you are not a huckster.
Attention! Depending on the phone model and software version, the above setup items may vary slightly.
1. So, we press the treasured power button and we see such a screen.
2. Select a country, region.
3. Connect to WiFi or use cellular communication. Next, you are prompted to enable or disable location services. As a rule, I enable and then, at the detailed configuration stage, disable geolocation for applications where it is not needed. The fact is that it does a good job of reducing the battery life of the phone, so it’s better to turn off everything unnecessary. I'll tell you more about this later.
4. If you purchased an iPhone model 5s or higher, you can set up the Touch ID function, which allows you to access the phone, as well as the AppStore and some applications using a fingerprint.
Next, you need to come up with a six-digit numeric password, which is necessary if it is impossible to unlock the iPhone using a fingerprint. By the way, if six digits is too much for you, you can set a 4-digit password by clicking “password options.”
5. If the iPhone you purchased is not your first and you have prudently made a backup copy of data from your old device, you can select the appropriate item. Or set it up as new.
9. This step is for owners of iPhone 6 and later models. The system offers you to choose one of two options for displaying information on the screen: “standard” and “enlarged”. If there are no vision problems, then “standard” is fine.
10. Click “get started”, drum roll... and the phone’s home screen finally appeared before our eyes. Congratulations :)
What I mean is that the advice below is purely advisory in nature and is not dogma. It all depends on which of the two user groups you belong to.
2. Import contacts to iPhone. Read this short article about all the simple ways to transfer contacts to iPhone.
3. Now let's return to the issue of setting up geolocation services (settings>privacy>geolocation services). I recommend turning on geolocation (select “when using the program”) for the following items:
- Cards
- Camera. Your photos will be automatically assigned a geolocation.
All other checkboxes are optional.
Scroll down the list and select “system services”. Disable:
- Geolocation iAds
- Compass calibration
- WiFi networks
- Diagnostics and use.
Be sure to leave the “find iPhone” switch turned on, the rest is again optional. If necessary, you can always adjust the geolocation settings to suit you.
4. Software Update. Don't forget to update iOS promptly (Settings>General>Software Update), as a rule, Apple improves stability and performance with each new firmware. But not always :). Keep in mind that this procedure requires stable WiFi if you are updating over the air (without a computer). Since updates weigh around 1 GB and not everyone can afford to spend all their mobile traffic on this matter.
For a complete look at the coolest features of iOS 9, read on
5.Get to grips with iTunes. Unfortunately, many beginners cannot make friends with iTunes. I think the reason lies in the fact that Apple decided to cram too large a list of functions into it. Here are a couple of articles for your reference.
7. Installing applications. If you have already created an Apple ID, then now you just need to go to the AppStore, select the desired application, download it and launch it.
By the way, if you don’t want to enter a password every time you download applications and content, then in the Touch ID settings (settings>Touch ID and password) you can activate fingerprint access.
This is where I think I will end my short guide. I sincerely hope that these tips could save someone from mistakes. Of course, this is not a complete list of everything that can be configured and optimized. Therefore, I look forward to your comments with recommendations.
Happy upcoming year everyone! I wish you new iPhones and successful operation! 🙂
When I was about to buy my first a couple of years ago iPhone 4s, then of course I was interested in everything related to this device. And before purchasing it, I asked many questions to Yandex, Google and my friends who already had it. I even wrote something down at that time.
And recently, while flipping through my notebook, I came across these entries and decided to save them on the blog.
Today’s article can hardly be called relevant: anyone who has an iPhone most likely already knows all this. However, let my “ unofficial iPhone user guide” will remain here.
If you need it then official iPhone user guide you can view on your iPhone via browser Safari, opening the “iPhone Guide” tab:  You can also go to the application iBooks and download the guide for free from the iBooks Store.
You can also go to the Apple website from computer and there find the required manual for your version of iOS.
So, my questions before and after buying an iPhone and the answers to them:
1. Will my regular SIM card work for iPhone?
No. For iPhone 4S you need Micro-Sim, for iPhone 5 and 6 – needed Nano-Sim: You can try to make an iPhone SIM card out of your regular SIM card yourself by cutting it with scissors. But it’s better not to risk it, but simply contact your mobile operator’s service center and they will give you a new one. They charged me 50 rubles for this, and they also credited it to my account. After they give you a new one, the old SIM card will stop working.
2. What should I buy to protect my iPhone from scratches?
Personally, immediately after purchasing an iPhone, I purchased it in a store protective film for him. A set of two films (for the front and back of the smartphone) cost me 400 rubles. The thing is that I didn’t want to immediately buy either a book case or a protective cover for the back wall for the iPhone. But if the smartphone is not protected in any way, then micro-scratches will appear on it very quickly (especially on the back side). That's why I bought a protective film, stuck it on and am happy.
Gluing the film is not at all difficult: just read the instructions for it (or watch a video on YouTube) and do everything slowly. If you are afraid that you won’t stick it carefully yourself and “there will be bubbles,” then you can turn to specialists (I was offered to do this right in the store for 200 rubles). 
3. What to do with your iPhone immediately after purchase?
First you need to insert a SIM card into it and then turn on the device itself. Turns on iPhone 4S And 5
by holding the button on top: 
On iPhone 6 this button is located on the right side edge: 
4. Where to insert the SIM card in iPhone?
The iPhone box contains a special clip. Take it and insert it into the hole on the side of the device. A small tray will slide out from the body. We insert the SIM card into it and push the tray back.
By the way, you can install and remove a SIM card from an iPhone without turning off the device itself. 
5. What should you do with your iPhone immediately after turning it on?
After turning on your iPhone for the first time, you need to activate. There is nothing complicated about this: follow the instructions on the screen - the iPhone is smart and will tell you everything. The only thing that may confuse you is the offer. Don't be afraid of anything - just create it.
For full setup you will need internet access. Therefore, at this moment it is better to be within the coverage area of some Wi-Fi network.
6. What is Apple ID?
Apple ID- This is your account, which allows you to use all Apple services. Namely, this is a link: email + password, which you specify when registering your account.
Having an Apple ID, you can install games and applications from the App Store, buy media content in iTunes, use iCloud cloud storage and use it to synchronize your mail, contacts, notes, and more. In general, if you own an iPhone or iPad, you cannot do without an Apple ID.
7. How to activate iPhone?
After turning on the iPhone for the first time, you will need to activate it. First we will be greeted by a welcome screen. Swipe it from left to right to unlock your device: 
Then select the language (in our case, Russian). Next, the country of location (Russia):

Then select Wi-Fi network(You won’t be able to activate your iPhone without the Internet). Next you need to enable or disable geolocation service. Geolocation determines your location (needed for maps and navigation, for geotagging photos). It can be enabled later for individual applications:
 There are two ways to set up your iPhone: like New, And restore backup from the iCloud cloud service or computer using iTunes. If this is your first iPhone, then feel free to select the “ Set up like a new iPhone”.
On the next screen, click “ Create an Apple ID for free”:

Further enter your email(I entered my mailbox address, which I always use anyway), Create a password(it must be at least 8 characters long and contain at least one capital letter and one number).
Be sure to remember or write down the password you created - you will now have to enter it and your e-mail often when accessing Apple services. The specified e-mail and password are your Apple ID.
Next, to ensure the security of your account, you will be asked several additional questions, asked to provide a backup email address - we do what they ask. A letter will be sent to you at the email address indicated above. You can open it later (for example, I logged into my email from my computer a few hours later) and follow the link in the email to complete creating your Apple ID.
Next you will be asked if you agree to use various Apple services. You can agree or not - in any case, all this can then be turned on or, conversely, turned off in the smartphone settings.
At the last point we will be asked if we want to send diagnostic data to Apple. You can refuse to help the company.
That's all. The iPhone is finally ready to go! 
8. What operating system is on iPhone?
Operating system: iOS. At the time of writing, the current version is: 8.4
9. How can I check that my iPhone is original (not fake)?
Each original device has own serial number. You can find it on the box below, on the smartphone itself on the SIM card tray, or look in the settings:
Click the “ icon Settings” on the iPhone home screen – then select “ Basic” – “About this device" Scroll down the screen and find your serial number.
The numbers must match everywhere (both on the box and in the settings).
Once we have found the serial number of the device, you can check it on the Apple website. On the page that opens, enter the iPhone serial number and click “Continue.”
If we have entered all the letters and numbers of the serial number correctly, the name and model of our device should appear. If it appears, it means our iPhone is original and officially released. If you just bought a new iPhone and have not yet activated it, then when checking on the website you will see the following message: “You need to confirm the date of purchase of the product”:  If nothing is found, then you have a fake in your hands.
10. I’m calling from a new iPhone, but I can’t hear the other person well. What's the matter?
You will laugh: immediately after the purchase, I checked the quality of the connection and called a friend from my iPhone - I couldn’t hear him well. I was already upset, but then I noticed that did not peel off the protective film from the screen, which covered the speaker :) When I took it off, audibility became excellent.
Not to be confused with the film that I specifically bought to protect against scratches.
11. How to copy photos and videos from iPhone to computer?
Connect your iPhone to your computer using a USB cable (it comes with your smartphone). Windows will automatically detect the device.
Open it by double clicking - then open “ Internal Storage” – go to the folder DCIM. Here we will see a folder (or folders) whose name contains letters and numbers. It contains photos and videos taken on an iPhone. Select the necessary files and copy them to your computer.
I described this process in more detail and with screenshots.
12. How to copy music from computer to iPhone?
To transfer songs or, for example, audiobooks from a computer to an iPhone, you need to install the program on this computer iTunes. All manipulations for copying any files to Apple devices are performed only through this program.
Because The instructions for copying music from a computer to an iPhone turned out to be quite voluminous, I put it in the form of a separate article - you can.
The iPhone already has a built-in official application for reading books - it’s called iBooks. This “reader” can open formats PDF And ePub. I talked about how to copy books from a computer to an iPhone.
14. How to install applications on iPhone?
On the iPhone home screen, click on the icon App Store. The application store will open. There are both paid and free applications. Press your finger on the word “ Top charts” at the bottom of the screen – then at the top we go to the “ tab For free" We will see a long list of applications that can be installed completely free of charge. Click the button to the right of the application you like Download" After " Install”:
Next we will be asked to enter the password for our Apple ID. Let's introduce it. Then we wait for the application loading indicator to make a full circle. That's it - the application is installed. It appeared on our main screen, we can open it: 
15. How to remove an application from iPhone?
Press your finger on the icon of any application and do not lift your finger for several seconds. Suddenly everything on the screen begins to shake: applications begin to rattle. A cross will appear on the icons of applications that can be deleted in the upper left corner. Click on it and select “Delete”. 
16. How to turn on Wi-Fi on iPhone?
You need to go to “ Settings” – “WiFi" Here you can not only turn on Wi-Fi, but also select the network to connect to.
You can also swipe up from the bottom of the screen– an additional menu will appear in which you need to click on wifi icon:
17. How to close applications on iPhone?
Press the button twice Home on your smartphone (it's a round button in the center). The multitasking panel will open with running applications. Use your finger to swipe up the rectangle with the app you want. The screenshot of this application will fly off the screen. This means that the application was closed successfully.
It is impossible to close all applications at once, but you can close three at a time by swiping them up with three fingers.
You don't have to close the app every time. There is nothing wrong with it hanging in the multitasking bar (in this state, applications practically do not consume the resources of your iPhone).
18. How to disable mobile Internet on iPhone?
Many applications on iPhone periodically access the Internet. And if you want them to do this only via Wi-Fi networks, then be sure to disable your iPhone’s access to the global network via EDGE and 3G. Otherwise, you risk facing a situation where money will be debited from your account for unknown reasons.
Go to “ Settings” – “cellular” and deactivate the switches here “ Cellular data" And " Enable 3G”:
19. How to remove the password to unlock an iPhone?
If you set up an unlock password when you initially set up your iPhone, and now you’re tired of entering it every time, do the following:
Go to “ Settings” – “Password” – then enter your password – click “ Turn off password” – and enter the password for the last time. The iPhone will no longer ask for it. 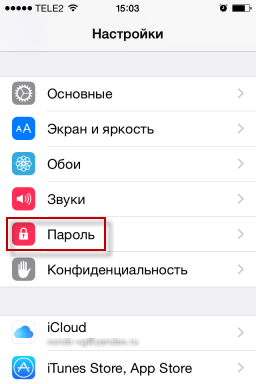
20. How to turn on the flashlight on iPhone?
Swipe up from the bottom of the screen and an additional menu will appear, in which you need to click on the flashlight icon in the left corner. It turns off in the same way.
21. How to put iPhone into silent mode?
Click the switch Ring/Silent” to put your iPhone on silent mode:  In this mode, the iPhone does not play a call signal (only vibration), sound warnings and other sound effects; However, alarms, audio apps (such as Music or YouTube), and some games will still play sound through the built-in speaker.
22. How to turn off the iPhone camera sound when taking photos?
To do this, simply switch your iPhone to silent mode using the switch located on the left side of the case.
23. How to cancel an incoming call on iPhone?
If your iPhone is locked and you receive an incoming call, there is no “Reject” button on the smartphone screen - only “Answer”. How to reject a call or at least turn off the sound of an incoming call?  You can turn off the sound of an incoming call by pressing the iPhone's Power button once:
  Pressing the Power button again will reset the incoming call, and the caller will hear short beeps.
24. How to take a screenshot on iPhone?
To do this, you need to simultaneously press the round Home button and the iPhone’s Power button:  The screenshot will automatically be saved in the same place where all your photos are saved. Go to the “Photos” application and see the screenshot taken.
25. How to set your own ringtone on iPhone?
On an iPhone, setting your own ringtone is not so easy. To do this, you need to do certain manipulations. In short, the procedure is as follows:
1. Add the melody we need to the program iTunes on the computer.
2. From this melody we cut out a musical fragment with a duration no more than 38 seconds. This will be our ringtone, which we will then set for the call.
3. Convert the ringtone to the format A.A.C..
4. After conversion, change the extension of the resulting file to .m4r.
5. Copy the finished ringtone from iTunes to iPhone
6. On the iPhone, set our ringtone as a ringtone for a specific person, or for everyone.
Although the list of actions turned out to be impressive, in fact it all gets done quite quickly. If you’re not scared, then go on, in which I described everything in more detail.
26. How to group several applications into one folder on the iPhone screen?
Press your finger on the icon of any application and do not lift your finger for several seconds. Suddenly everything on the screen begins to shake: applications begin to rattle. Drag the selected application icon onto another icon. A folder will be automatically created containing both of these applications. The folder name can be edited by going into it.
The folder will be deleted automatically if you remove all application icons from it.
27. Which browser do you use to access the Internet on iPhone?
iPhone already has a built-in browser Safari, which is great for surfing the Internet. If you want to experiment, you can install a third-party browser (Google Chrome, Yandex Browser, Opera). Personally, I'm quite happy with Safari.
28. How to copy video from computer to iPhone?
This can be done through the program iTunes. But there is one important point here: in order to add a video to iTunes, it must be converted using the codec h.264 and have a format .mp4, .mov or .m4v. If your video is in a different format (for example, .avi), then it must be converted to the required format. You can read more.
29. How to transfer files via Bluetooth on iPhone?
The iPhone does not have the ability to send or receive files using Bluetooth technology. On the iPhone, Bluetooth is needed to synchronize with various external devices: headsets, sports accessories, monopods. To be honest, when I first became the owner of an iPhone, I was very surprised by this circumstance. However, over time I became convinced that this is not what I really need :)
You can transfer a file from one iPhone to another using AirDrop technology. But both of these iPhones must be at least version 5 (so I’m flying with my 4s :)).
Please note that iPhone owners with an iPhone can transfer a file via Bluetooth to another smartphone (not iOS). Jailbreak. To do this, you will need to download a special extension in an alternative application store Cydia(like the App Store).
30. What is Jailbreak on iPhone?
Jailbreak (Jailbreak) is a software operation with mobile devices running the iOS operating system, which allows various software to access the file system. In simple terms, Jailbreak gives you access to the system as an Administrator, not as a User.
You can do this operation yourself: the Internet is full of iOS jailbreak programs and instructions for them.
The main advantage of jailbreaking is the ability to install third-party applications that Apple for some reason has not approved for downloading in the App Store.
After jailbreaking your iPhone automatically Cydia program will appear. This is an alternative application store for iPhone - similar to the App Store. Just like the App Store, you can download various apps from Cydia (most of them are free).
Also, after jailbreaking, you will be able to download paid applications from the App Store for free.
Although jailbreaking is not an officially supported operation by Apple, it is not a violation of the company's copyrights. However, after the jailbreak procedure, the device loses the Apple warranty and is not subject to warranty repair. But you can restore your iPhone to factory settings through iTunes and no one will prove that you have ever jailbroken this device.
Be aware that if your iPhone is jailbroken and you decide to update iOS to the latest version, this will remove the jailbreak from your iPhone. Every time there is a firmware update for iPhone, you have to wait for some time for enthusiasts to release a new Jailbreak.
Is it necessary to jailbreak? Personally, I think that there is no particular need for this: only if for the sake of interest, just to “play around”. But I believe that Jailbreak can be harmful. The software available in Cydia, unlike the App Store, is not tested for reliability and security, and therefore can damage your data on the device or cause it to become unstable.
After purchasing a new iPhone, iPod or iPad, or simply performing a hard reset, for example to fix problems with the device, the user needs to complete the so-called activation procedure, which allows you to set up the device for further use. Today we will look at how device activation can be performed through iTunes.
Activation via iTunes, that is, using a computer with this program installed on it, is performed by the user if the device is not able to connect to a Wi-Fi network or use cellular communications to access the Internet. Below we will take a closer look at the procedure for activating an Apple device using the popular iTunes media combiner.
How to activate iPhone via iTunes?
1. Insert the SIM card into your smartphone and then turn it on. If you are using an iPod or iPad, start the device immediately. If you have an iPhone, then you won’t be able to activate the gadget without a SIM card, so be sure to take this point into account.
2. Swipe to continue. You will need to set the language and country.
3. You will be prompted to connect to a Wi-Fi network or use a cellular network to activate the device. In this case, neither one nor the other suits us, so we immediately launch iTunes on the computer and connect the device to the computer using a USB cable (it is very important that the cable is original).
4. When iTunes detects the device, in the upper left area of the window, click on its miniature icon to go to the control menu.

5. Next, two scenario options can develop on the screen. If the device is linked to your Apple ID account, then to activate it you will need to enter the email address and password from the identifier linked to the smartphone. If you are setting up a new iPhone, then this message cannot appear, which means you can immediately proceed to the next step.

6. iTunes will ask what needs to be done with the iPhone: set it up as new or restore it from a backup. If you already have a suitable backup on your computer or iCloud, select it and click the button "Continue" to have iTunes proceed to activate the device and restore information.

7. The iTunes screen will show the progress of the activation and restoration process from the backup. Wait until this procedure is completed and under no circumstances disconnect the device from the computer.

8. As soon as activation and restoration from the backup are completed, the iPhone will reboot, and after restarting the device will be ready for the final setup, which includes setting up geolocation, enabling Touch ID, setting up a digital password, and so on.
In general, at this stage, activation of the iPhone via iTunes can be considered complete, which means calmly disconnect your device from the computer and start using it.


