Tag Archives: Kerio winroute. Configuring Kerio VPN Server to connect individual VPN clients
Settings Kerio VPN Server for connecting individual VPN clients.
The VPN server is used to connect the remote ends of VPN tunnels and remote clients using Kerio VPN Client .VPN server available on the Interfaces tab (Interfaces) in the Settings/Interfaces section (Configuration/Interfaces) as a separate interface.
We go to this tab and among the interfaces we see the desired VPN Server. Double click on the VPN server interface opens a dialog that allows you to set VPN server parameters (you can also highlight the interface and click Edit or select Edit from the context menu).

In the window that opens, you need to activate the VPN server (Enable VPN server). And specify the network IP address for VPN clients. In my network, all local users have addresses like 192.168.100.xxx, and all VPN clients have 192.168.101.xxx
By default (at first start after installation) WinRoute automatically selects a free subnet to be used for VPN. Under normal conditions, there is no need to change the default network. U Make sure that the VPN client subnet does not conflict with the local subnet!

On the DNS tab, you need to specify the DNS servers that will be assigned to your VPN clients. This may be necessary in a domain network where access to computers by NS names is required.
Use special servers DNS (Use specific DNS servers) This option allows you to specify the primary and secondary DNS servers for VPN clients. If in local network not used DNS Forwarder, and another DNS server, then use this option.
My users do not use NS names, so I left everything here without exceptions.

I also don’t need the Advanced tab, but we’ll write about it anyway.
Listen on port - The port on which the VPN server accepts incoming connections (using TCP protocols, and UDP). The default port is 4090 (under normal conditions there is no need to change the port).
Notes:
- If the VPN server is already running, when the port is changed, the connection with all VPN clients will be automatically disconnected.
- If the VPN server cannot run on the specified port (the port is being used by another service), the following error message will appear in the Error log (see Error Log chapter) when you click Apply: (4103:10048) Socket error: Unable to bind socket for service to port 4090.
(5002) Failed to start service "VPN"
bound to address 192.168.1.1.To ensure that the specified port is indeed free, check the Error Log for similar entries.
Custom Routes
In this section, you can define other networks to which routes will be established through the VPN tunnel. By default, routes to all are defined local subnets from the VPN server side - see chapter Exchange of routing information).
Advice: use the netmask 255.255.255.255 to determine the route to a specific host. This can help, for example, when adding a route to a node in the DMZ from the VPN server.

The first rule allows Internet users to access the VPN server using the Kerio VPN protocol (port 4090).

This is where connected users will be displayed. In the settings of the users themselves, you can configure whether the VPN server will issue addresses to clients, or you can assign a specific IP address on the network to each VPN client.

That's all. If anything is not clear, please ask here.
Kerio Winroute Firewall, setting up rules, user quotas
Exercise:
1) Install from the Proxy\Kerio Winroute Firewall directory on the CD software Kerio Winroute Firewall 6.0.4 and configure this program so that it works as a proxy server, providing the client (virtual computer under Windows control 98) access the Web server on the teacher’s computer. Wherein network adapter The Local Network Connection should act as the interface connected to the Internet (public), and the VMware Network Adapter VMnet1 should act as the interface connected to the internal local network (private).
2) Create a user TestUser with the password test in the internal database of Kerio Personal Firewall and configure its rights so that it can access the Internet. Give him an Internet quota of 50 MB per day and 500 MB per month. On behalf of this user, connect to the Web server on the teacher’s computer, and then view the work log and the remaining quota on his behalf.
Note. Kerio internal user (not user Windows domain 2000) is used because during execution of this laboratory work we have no way to connect to the domain controller.
3) After completing the lab, turn off virtual computer Windows 98 and remove Kerio WinRoute Firewall using the Add/Remove Programs console.
Answer to task 1:
1) Run the file kerio-kwf-6.0.4-win.exe from the Proxy\Kerio WinRoute Firewall directory. On the Setup Type screen, select the Custom installation type and on the next screen make sure that all components are selected (help in Czech does not need to be installed).
2) On the Administrative Account screen, leave the default administrator name as Admin and assign the password P @ssw 0rd to it.
3) On the Remote Access screen, make sure the Remote Access checkbox is cleared.
4) If a Windows warning appears indicating that the Kerio VPN Adapter component has not passed Windows compatibility testing, click the Continue Anyway button.
5) After installation of Kerio WInRoute Firewall is completed, restart your computer.
6) After rebooting, answer Yes when prompted to launch Kerio Administration Console. In the New Connection window, check the connection parameters offered to you and enter the password. The Network Rules Wizard window will open. On its first screen, click on the Next button.
7) On the Type of Internet Connection screen, leave the switch in the up position (Ethernet, DSL, cable modem or other).
8) On Internet screen Adapter select adapter Local Area Connection.
9) On the Outbound Policy screen, leave the switch in the Allow Access to the following services only position and leave the checkboxes only opposite the lines HTTP, HTTPS, FTP and DNS.
10) On the VPN Server screen, set the switch to No.
11) On the Inbound Policy screen, click on the Next button without defining any internal servers, which should be accessible to users from the Internet.
12) On the Internet Sharing (NAT) screen, leave the switch in the Enable NAT position and on the next screen click on the Finish button. Take a look at the basic configuration options for Kerio Winroute Firewall from its administrative console. Expand the Content Filtering node, in it - HTTP Policy, go to the Proxy Server tab and look at the values in the "General Options" group.
13) Launch the Windows 98 virtual computer in VMWare Workstation and click on the Internet Explorer icon on the desktop. The Internet Connection Wizard window will open. Set the switch to the "Set up an Internet connection manually" position and click on the "Next" button.
14) On the next screen, set the radio button to “I am connecting to the Internet via a local network” and click on the “Next” button.
15) On the next screen, uncheck " Automatic detection proxy server" and check the " Manual setting proxy server".
16) On the next screen, check the “One proxy server for all protocols” checkbox and in the Proxy server for HTTP field enter the IP address of the VMNet 1 interface, in the port field - 3128. Click Next twice, and then click the button "Ready".
17) B address bar Internet Explorer enter
HTTP://London
and view the page that opens.
Answer to task 2:
1) In the Administration Console window, expand the Users and Groups node and click on the Users line. On the User Accounts tab, click on the Add button. The New User Creation Wizard window will open.
2) On the first screen - General, enter the username TestUser and password (for example, test). Make sure that Internal User Database is selected in the Authentification line and click on the Next button.
3) On the Groups and Rights screens, leave the default values.
4) On the Quota screen, check the Enable daily limit and Enable monthly limit checkboxes and set the daily limit to 50 MB and the monthly limit to 500 MB. Leave the Content Rules and Automatic Login screens at their default values. Click on the Finish button.
5) After creating the user, go to the Authentification Options tab and check the Always require users to be authenticated when accessing web pages checkbox. Click on the Apply button.
6) Go to node Content Filtering -> HTTP Policy. On the URL Rules tab, click on the Add button. In the Description field, enter Deny All. In the Action group, set the radio button to Deny Access to the Web site (leave all other controls at their default values) and click OK.
7) Click on the Add button again, enter TestUser Allowed in the Description field, move the switch below to Selected Users and click on the Set button. Add TestUser to the Selected Users list. Leave all other parameters unchanged and click OK. Then use the arrow buttons on the right side of the screen to change mutual arrangement the rules you created so that the TestUser Allowed rule is above Deny All and click on the Apply button. Restart Kerio Personal Firewall to clear cached permissions data.
8) Reboot the Windows 98 virtual computer, and then open Internet Explorer and access http://london. A Security Alert window appears warning you that the certificate cannot be verified. click on the Yes button.
9) In the Firewall Authentification Page window (opened via secure connection) enter the username and password Test. After another security warning, the Web site page will open on the teacher's computer.
Note. Sometimes a username and password prompt appears in the built-in Windows window. To explicitly open the authentication page, enter HTTP://192.168.X.1:4080 in your Web browser.
10) To view statistics for a user, you must return to the authentication page (using the Back button) and click on the Index Page link, and then Statistics.
11) To remove Kerio Winroute Firewall, use the Add/Remove Programs console in the Control Panel.
The address works, but the server name does not, etc.). In general, people are lazy and don’t read documents, so I decided to do brief instructions on setting up DNS on a computer with Kerio Winroute Firewall and client computers.
Let's look at the three most common general cases:
1. Peer-to-peer network, without a domain (as defined by comrade Naliman;), more precisely, without a DNS server, a separate machine with Winroute installed is used as a gateway to the Internet;
2. Network with a domain, the DNS server is located on a DC (domain controller), a separate machine with Winroute installed is used as a gateway to the Internet;
3. Network with a domain, the DNS server is located on the DC, Winroute is also installed on this DC.
The third option is categorically not recommended for reasons of safety and common sense, but unfortunately it is used quite often in small networks, where there is already a domain, but there is no money anymore :)
In any case, there is a computer with two network cards (one internal - looks into the local network, the other external - into the Internet, respectively), through which we will access the Internet, and on which, naturally :) Kerio Winroute Firewall will be installed.
Do not forget that the addresses on these network cards must be from different subnets, i.e. for example like this:
| Quote: |
192.168. 0 .1 192.168. 1 .1 |
For some reason, beginners very often get caught in this, if for example they have an ADSL modem.
1. DNS Settings in a peer-to-peer network.
Internal network settings
But! We don’t blindly stuff them into the external network, but do it a little differently:
Click Advanced. In the DNS tab, uncheck Register this connectionТs addresses in DNS, in the WINS tab, uncheck Enable LMHOSTS lookup and set Disable NetBIOS over TCP/IP. Also, there SHOULD NOT BE any checkboxes for Client for Microsoft Networks, Network Load Balancing, Fail and Printer Sharing Microsoft Networks.
By the way, it is convenient to rename the external interface, not call it Local Area Connection, but, for example, Internet Interface.
Next, go to Control Panel, Network Connections, in this window (Explorer window) menu Advanced -> Extra options. In the "Adapters and Bindings" tab, move "Local Area Connection" to the most top position.
On the client computer, the network card settings will be something like this:
In Winroute, Configuration -> DNS Forwarder, check the "Enable DNS Forwarding" box and specify the provider's DNS servers.
2. Network with a domain, the DNS server is located on a DC (domain controller), a separate machine with Winroute installed is used as a gateway to the Internet;
The settings are not very different from the previous version, in principle everything is the same, only:
2.1 In DNS forward lookup zones, you should remove the "." zone, if it is there. After this, restart the DNS Server service.
2.2 On the domain controller, in the DNS properties, you need to allow forwarding to the IP address of the provider's DNS server (and do not forget to add a rule in Traffic Policy that allows the controller to access the provider's DNS server). Forwarding in the winrout then needs to be turned off.
2.3 Internal network settings
We DO NOT specify the gateway!
External network settings:
2.4 Client settings:
3. Network with a domain, the DNS server is located on the DC, Winroute is also installed on this DC.
All settings are identical to the first case, with the exception of some very important points:
3.1 On a network that is connected to the Internet through a gateway that is a domain controller with running service DNS server, on this controller in the configuration of the internal and external interface, the DNS server must be configured for itself.
In DNS forward lookup zones, you should remove the "." zone if it is there. After this, restart the DNS Server service.
In the DNS server properties on the Forwarding tab, you should allow forwarding to the provider's DNS server. Restart the DNS Server service
3.2 It is necessary to create a reverse lookup zone (the correct admins probably created it when raising DNS :)), since without it the DNS server cannot determine its name. We indicate the first 3 groups of digits of our IP address as the network code.
To check, go to the zone properties and make sure there is our DNS server (or servers, if there are several) on the “Name Servers” tab. If there are not enough servers, we add them there. It is advisable to do this using the "Review". All. All that remains is to resolve dynamic update, to client machines registered in this zone, although you can do without it.
3.3 On the domain controller in the DNS properties, you need to allow forwarding to the IP address of the provider's DNS server, in in this case 80.237.0.97;
3.4 Disable DNS Forwarder in Winroute (uncheck "Enable DNS Forwarding");
3.5 External interface settings on the server:
To check on the client, run the following commands:
| Code: |
| nslookup(GateWayName) nslookup (GateWayIP) nslookup yandex.ru nslookup 213.180.204.11 |
If as a result of executing all the above commands there are no error messages, then everything worked out for you.
P.S. If something doesn’t work for you, please do not ask your question in this topic, but create a separate one (don’t forget to describe the problem in detail, there are no telepaths here. Also indicate the result of the ipconfig /all command from the computer with winroute and the client computer).
How to configure Internet distribution to users via NAT in Kerio Winroute Firewall. NAT setup in Kerio Winroute Firewall.
Given - Windows Server 2003 Server EE, with Kerio Winroute Firewall 6.4.2 installed and configured.
Task - Release the system administrator onto the Internet not through a proxy, like everyone else, but through NAT. So that contra and webmoney can be launched. Go...
First, let's create a new rule in the section Traffic Policy. It will be called first New rule.
Next you need to add a source. That is, the computer of the person who will have access to the Internet. In our case this is a computer system administrator. I wrote DNS name computer in the domain - sysadmin.local. You can also write the IP address. Depends on the situation.

After adding Source need to add and Destination. In our case, this is a network connection named Internet. Click Add -> Network Interface and select our Internet connection from the list.

After adding these parameters to our rule. We, as it were, hint to the computer that the car sysadmin.local has access to network connection Internet. Next, we need to specify the connection type, ports and services through which it will have this access.
In field Service we won't add anything. There's already a meaning there Any. Obo says that access is open to all ports and services.
In the tab Translation default is empty. We are not interested in this, so click on empty field on the tab Translation and we see a window (Edit Translation) NAT settings in front of you.

We only need to release the user to the Internet on all ports. Therefore we choose the option "Translate to IP address of outgoing interface (typical settings)". With this rule, we tell Kerio that all outgoing traffic from the user must be directly broadcast to the Internet. You can select any interface where packets will be broadcast, and an IP address. But we don't need it now.
Click OK and see our rule. Everything seems to be ok, but it doesn’t work :) Why?
Forgot to allow the rule and click the button Apply. To enable the rule, click on the empty field under the tab Action and select the parameter there Permit.

Now our rule looks like this:
And it works. The user has NATed outgoing Internet access. Can play counter, Warcraft and run Webmoney.
To organize control in the local network of our organization, we chose Kerio Control Software Appliance 9.2.4. Previously, this program was called Kerio WinRoute Firewall. We will not consider the pros and cons, and why Kerio was chosen, too, let’s get straight to the point. The program version 7 and higher is installed on bare metal without any operating system. In this regard, a separate PC has been prepared (not virtual machine) with the following parameters:
AMD 3200+ processor;
HDD 500GB; (much less needed)
— Network card – 2 pcs.
We assemble the PC, insert 2 network cards.
To install a Linux-like system you need to create bootable media– flash drive or disk. In our case, the flash drive was created using the UNetbootin program.
Download Kerio Control Software Appliance. (you can buy a license or download an image with a built-in activator)
The volume of the Kerio image does not exceed 300MB, the size of the flash drive is appropriate.
Insert the flash drive into the USB connector of your PC or laptop.

We format it in FAT32 using Windows.

Launch UNetbootin and select the following settings.

We don’t touch the distribution.
Image – ISO standard, indicate the path to the downloaded Kerio image.
Type - USB device, select the desired flash drive. OK.

After some time of creation, bootable flash drive ready. Click exit.

We insert the bootable flash drive into the prepared PC, turn it on Boot menu select boot from USB-HDD. When the download starts, select linux.

Will begin Kerio installation Control Software Appliance 9.2.4. Choose a language.

Read the license agreement.

We accept it by pressing F8. 
Enter code 135. The program warns that HDD will be formatted.

We are waiting for the installation to proceed.

The system will reboot.

We are waiting again.

Finally they arrived. The message on the screen says that you need to go to the written address in your browser on any PC that is connected to the same network as Kerio.

We won’t do this for now, but go to Network Configuration in Kerio itself.

Configuration network interface Ethernet. Mark with a space – Assign static IP address. 
And we appoint him.

IP address: 192.168.1.250
Subnet mask: 255.255.255.0

If, before installing the software, the two necessary network wires for external and internal networks, then you can forget about this computer. I put it in a corner and even took away the monitor.
Now in the browser of the laptop in which the bootable flash drive was created, I go to the address:
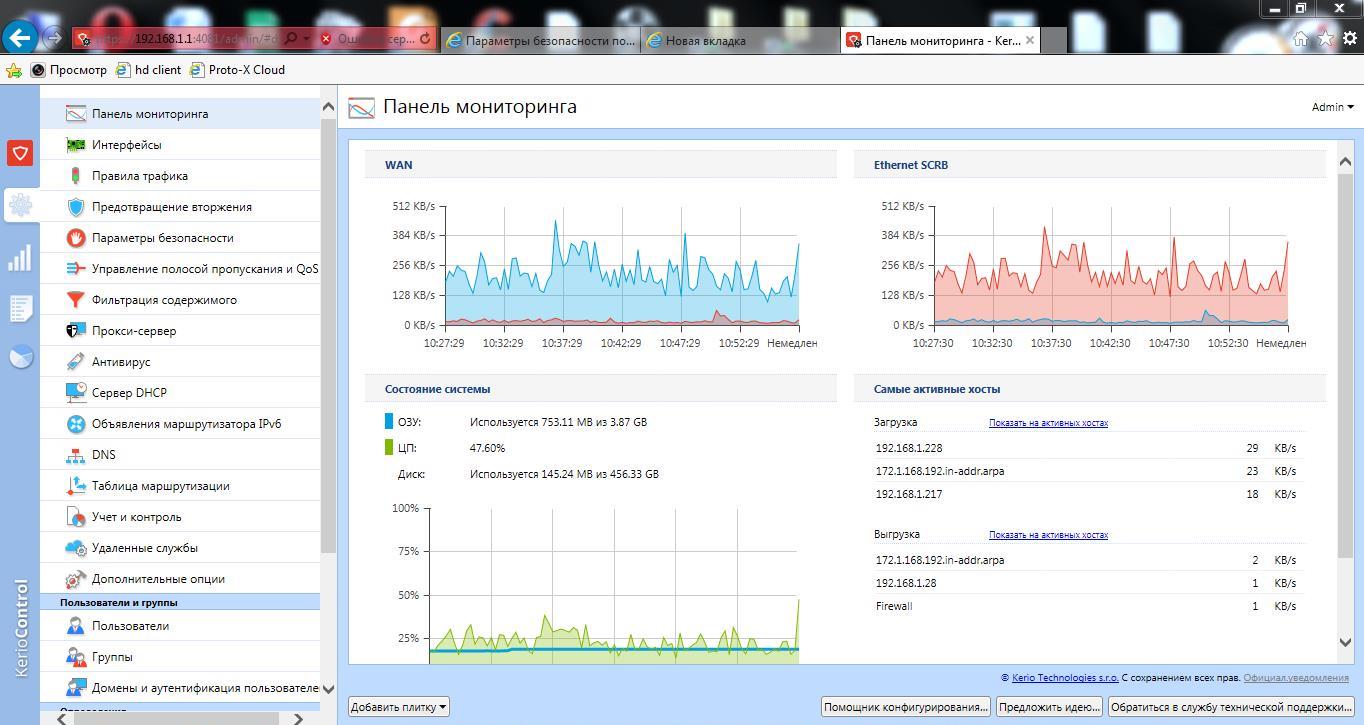
https://192.168.1.250:4081/admin. The browser may report that there is a problem with this site's security certificate. Click below – Continue opening this website and you will be taken to the activation wizard.
Of course, we don’t transmit anonymous statistics; we uncheck the box.

Enter New Password administrator.


That's all. Hello Kerio.

It should be noted that it was decided to change the selected IP address 192.168.1.250 for the network card of the internal network to the address 192.168.1.1 in order not to reconfigure a lot of equipment. The network existed for a long time without control and Kerio had to be added to it by embedding. After changing the IP, to get to the interface you need to enter https://192.168.1.1:4081/admin. Below in the picture structural scheme connections.

Initially, all routing and DNS functions were performed by a modem with an IP address of 192.168.1.1. When installing Kerio, the modem was assigned the address 192.168.0.1 and it accesses the external Kerio network card with the address 192.168.0.250. Addresses in the same subnet. The internal network card received the address that the modem used to have. All equipment on the network with static IP addresses and a registered gateway (and this is almost our entire network) saw the new gateway as the old one and did not even suspect a substitution :)
When you launch Kerio for the first time, the wizard prompts you to configure interfaces. Can be configured without using a wizard. Let's take a closer look at everything described above.
In the Interfaces tab, select Internet Interfaces.

Coming up with a name for the type External network or Internet, by default it says WAN. We manually enter the IP address, mask, gateway and DNS data, all in the same subnet with the modem. OK.

Next, select the next connection in the Trusted/local interfaces item - our internal network. These items may be called differently depending on the version of Kerio. Come up with a name and enter the data as in the picture below. The external and internal networks cannot be on the same subnet. This should not be forgotten. DNS from Kerio. We don't write the gateway. OK.

Click the Apply button in the lower right part of the screen, the settings are activated. Let's check your Internet connection. The Internet is working.
You can proceed to create traffic rules, filter content, see who is downloading torrents and overloading the network, limit the speed or block. In short, Kereo works fully and has many settings. Here everyone configures what they need.
Let's look at one more important point– this is the opening of ports. Before installing Kereo, ports were forwarded to the server in the modem. Also, initially the necessary ports were open in the server itself. Without these ports special. The server software cannot work properly. Consider opening port 4443.
Modem HUAWEI HG532e, go into it, to do this, enter 192.168.0.1 in the address bar of the browser. Go to the tabs Advanced—>NAT—> Port Mapping and enter the data as in the picture below.

The interface is our connection (in route mode, by the way).
Protocol – TCP/UDP.
Remote host - nothing.
External start port/end port – 4443 (external port).
Internal host – 192.168.0.250 (address of the Kereo external network card).
Internal port – 4443 (internal port).
Mapping name – any friendly name.
The principle of operation is such that access from the Internet to an external static IP address to port 4443 will be redirected to the external Kerio network card. Now we need to make sure that the request from the external network card is redirected to the internal one network card and then to our server on port 4443. This is done by creating two rules. The first rule allows access from outside, the second rule allows access from inside.

We create these two rules on the Traffic Rules tab. The difference is in the source and destination points. The service is our port 4443. See the picture above.
In the Broadcast section, make the settings as in the picture below. Check the box - Address NAT destinations and write there the IP address of the destination server and desired port. OK.

Click apply. We check whether the port is open in the online service. The port is open.

We check the server services for which all this was done - they are working. You can open any port in a similar way.
Other settings of Kerio Control Software Appliance may be written in other articles.
(optical connection)


