Installation of CMS Joomla on virtual and local hosting. Installing joomla on hosting
This step by step guide how to install Joomla on hosting or Denver. In this tutorial we will focus on installing Joomla 3, as this is the latest branch of the engine being updated. Content:
Step 1: Downloading the Joomla installation package
Step 3: Creating a database MySQL data
Step 4: Installation process
Step 1: Download Joomla 3 Installation Package
To upload the Joomla installer to your hosting, you first need to download it. We recommend downloading only from the official website. If you downloaded Joomla 3 from another site, then there is a risk of detecting malicious code in the installation files.

Click once on the “Download” button from latest version Joomla and the installation package will be saved to your HDD. Find the installer you just downloaded (it's roughly called Joomla_3.4.1-Stable-Full_Package.zip), and unpack it into a new folder.
Step 2: Uploading Joomla files to hosting
Now you need to upload the unpacked files and folders to your hosting. The easiest way is to download the Joomla installer from using FTP. For these purposes we recommend using free program FileZilla.
Important! If you want to install Joomla 3 on the main domain (for example, www.mydomain.com), then you need to upload the extracted files to root folder(for example public_html). If Joomla is on a subdomain (for example, www.mydomain.com/joomla), then you need to upload it to a folder with the name of the subdomain (for example, public_html/joomla/).
Step 3: Create a MySQL Database for Joomla
The next step we need to create a MySQL database and assign a user to it with full rights. Detailed instructions How to do this, see the manuals of your hosting provider. Once you have created the MySQL database and user, write down the database name, user and password. We will need them during the installation process.
Step 4: Installation Process
If you have already uploaded the installation files to your hosting, simply open your browser and enter address bar the name of your domain (for example, http://mydomain.com) or subdomain (for example, http://mydomain.com/joomla), depending on where you downloaded the Joomla installation files. After this, you will see the Joomla 3 installer welcome screen in your browser. In the first installation step, we need to enter information about your site and add the Joomla administrator name.

- Site name: Enter the site name. Most templates use it for the title of the main page.
- Description: add short description site. Where it will be displayed depends on the template.
- Administrator's email: enter real email. It is used to recover your password and system messages.
- Administrator login: Account with administrator rights. When creating an administrator login, remember that “admin” or “administrator” is most often used when hacker attacks. Do something unusual. For example, userking67.
- Admin password: Enter the admin password as complex as possible.
- Site Offline: Select “Yes” if you want the site to be in “Offline” mode after installation. In our guide, we will leave “No” (this way, the site will be available immediately after the installation is completed).
On next page You need to enter information about the MySQL database.

- Database type: MySQLi is installed by default. Leave it unchanged because MySQLi is the most optimized and stable version MySQL. It is supported by many servers.
- Database server name: again leave the default value (localhost).
- Username: Database username (see Step 3).
- Password: Enter the database user password (see Step 3).
- Database name: Enter the name of the database you want to use (see Step 3).
- Table prefix: Joomla adds this prefix to all tables in the database. This is useful if you want to use several Joomla sites in one database. The default value should be left.
- Action on existing tables: If you already have a database, then specify what the installer should do with its tables. Select “Rename” or “Delete” any existing data. We recommend leaving it at Rename for security reasons.
After the required fields are filled in, click “Next”.
You will be moved to last page installer On this page you need to determine whether you need to install demo data on the server. For beginners, we recommend choosing “Standard demo data”, as this will serve as an example that you can use in setting up your site. Note that you can delete all demo articles, menus, etc. Anytime.

The second part of the page shows everything we have entered so far and an initial check to see if your hosting meets the requirements for installing Joomla 3.
Finally, click the “Install” button to install Joomla 3 on your site. After a few minutes you will be redirected to the final page of the Joomla Web Installer.
On the final screen of the installer, you need to click the “Delete installation directory” button. This is necessary for security purposes so that no one can reinstall the existing site. Please note that Joomla 3 will not launch until you completely delete this folder.

OK it's all over Now! Now you have a fully functioning Joomla 3 website. Now you can start filling it with content!
Before it begins direct installation Joomla! for hosting, you need to make sure that the basic parameters of the selected server meet the minimum system requirements. This is important because installing Joomla! to a server that does not meet the parameters - this means predetermining the instability of the future site.
Minimum system requirements to install Joomla 1.5
– PHP version 4.3.10 and higher,
– MySQL 3.23,
– Apache 1.3, (with mod_mysql, mod_xml, and mod_zlib)
Minimum system requirements to install Joomla 2.5
Installing Joomla! to the appropriate server will help avoid possible problems.
After making sure that the requirements are met, you need to prepare (create) a database for the system, since installing Joomla! only possible with a prepared (existing) database. On most suitable servers(hosting) suitable for installing Joomla! was successful, the database administration panel is used. Having selected the database name and encoding for connection mapping (preferably UTF-8, since Joomla 1.5! uses this encoding), you need to click the “Create” button. Some hosting sites additionally require you to select a username and password. Sometimes the hosting provider provides a ready-made, configured database, in this case you need to find out the database parameters, since installing Joomla! It’s impossible without them.
Installing Joomla! is not possible without uploading the selected installation package to the hosting.
You can do this in several ways:
– sometimes the hosting provider provides relatively convenient tools(ISPmanager or Cpanel) to upload the distribution to the server and then unzip it (just remember to delete the archive after extracting the files so that it doesn’t take up space),
– you can unzip the installation distribution on your computer and use the FileZilla FTP client to transfer the files to the server,
– as an option, you can transfer an unpacked archive and an unpacker to the server using an FTP client, which will extract the files already on the hosting, significantly saving your time, but again this all depends on the hosting. For example, this hosting is not required.
When you're done with unzipping, you can continue.
Installing Joomla! occurs through an Internet browser (it is important that the “accept cookies” option is enabled, since it will not be possible to install Joomla! without this).
If the Joomla archive has already been uploaded to the server and unpacked, then you need to type the resource address (the domain name of your site) in the address bar and press “Enter”, this will download the system’s web installer.
Installing Joomla! has begun, and the first thing the Joomla web installer will offer is the choice of installation language. Having chosen a convenient language, and this is most likely Russian, you need to click on the right top corner"Next" button.
In the next window, the Joomla installer will show the results of checking whether your hosting meets the minimum system requirements Joomla, what is needed for correct operation Joomla.

In the top window, all parameters should be checked green (Yes ) if some parameters are marked in red ( No), this means your server does not meet the minimum system requirements of the system.
To do this, you may need to contact your hoster with a request to update the hardware configuration or make some modifications to the .htaccess or php.ini file.
The parameters of the bottom window must also match the recommended settings, but if one of the parameters is marked in red and does not correspond to the recommended settings, Joomla will work on that server.
Basically, the entire installation of Joomla! not complicated enough. After making sure that all required parameters are confirmed, you need to click the “Next” button. Installing Joomla! continues.

The next step will be the GNU/GPL license. If you install Joomla! it is not urgent, you can read it and familiarize yourself with the rules, then click on the familiar button and agree to the terms.

The next page that loads will prompt you to select a database configuration.
If the database server is located together with the web server, then the database type and host name must be entered according to the examples suggested here (“mysql” and “localhost”), if not, then the parameters should be clarified with your hosting support service. You need to enter the parameters accurately, since Joomla will try to connect to the database, and Joomla will not be able to install without them.
Having selected the user and his password, as well as the database name in accordance with the values filled in phpMyAdmin (or issued by the hosting provider), you again need to click “Next”.

The Joomla installer will display the next step. It will be configuration FTP settings , which is optional and you can enable the Joomla FTP client at any time general settings site. You can install Joomla with the default settings and you can go straight to next step.

At the sixth stage of installing Joomla, you will need to fill out the main configuration. Since moving to the next installation step is impossible without specifying the site name, mailbox name and administrator password.
Here you can also transfer data from sites created by earlier versions of the CMS. If the parameters are specified incorrectly, installing Joomla! will not continue until they are corrected.

Pressing " Further", you can see the last page with a warning about the need to remove the "INSTALLATION" directory from the hosting, since it is only needed for installing Joomla and will no longer be needed. To delete the “installation” folder, go to your server via FTP or, better yet, through the file manager that is in the hosting control panel. Find and delete the installation folder.
That's all! Joomla installation finished and you can access the site by clicking one of the buttons on the top right side of the screen (site or admin). By clicking the site button you will be redirected to the main page of your new site, and the Admin button is the entrance to the administrative section. To log in to the admin panel, enter: Username - admin And password administrator that you specified in the sixth step.
Entering administrative panel, you can edit the site and evaluate all the advantages that the chosen CMS provides.
Now I think it’s clear how to install Joomla 1.5 and there shouldn’t be any problems with it.
Joomla is one of the top 3 most common content management systems on the Internet. About 5% of all websites run on this engine. Our hosting provides the ability to automatically install Joomla.
In order to install Joomla on hosting without downloading the archive from CMS files, without setting up and connecting databases - go to the “Hosting” - “Sites” section and click the “Add” button.
- Add our domain;
- Check the “Install CMS” flag;
- Select Joomla;
- Click “Apply”.
As a result, we will see a notification that all steps have been completed correctly and the site will be available in 10-15 minutes (provided that the ns servers have not changed in the last 2 days).
Virtual website hosting for popular CMS:

At this stage, attach the domain to the hosting and CMS installations completed, after 10 minutes site visitors will see the Joomla main page:

How to remove Joomla from hosting
Before proceeding to the instructions for manual installation Joomla (where the CMS can be installed on almost any hosting) - remove the CMS from the subdomain. This requires:
- Delete CMS files.
- Delete the database.
In order to delete a database, go to the “Hosting” - “MySQL” section, mark the database and click “Delete”:

In the pop-up window, confirm deleting the database.
To delete files we will use file manager WebFTP. To launch it, go to the “Hosting” - “Sites” section. Open the menu opposite the domain and select “WebFTP”.

In the window that opens, select all engine files (1) except system files hosting(2) and click “Delete”(3).

Confirm deletion. That's all, you have removed Joomla from your hosting.
How to install Joomla on hosting manually?
We will install Joomla 3 CMS on the subdomain of the site joomla.demo-domen.ru. There are no differences from installing on a domain; a subdomain is essentially a separate website.
When adding a new domain (or subdomain) in the “Hosting” - “Sites” section, you can immediately create a database and user. To do this, you need to check the “Add database” field:

In this case, after adding a new site in the “MySQL” section will be added New user and database.
How to create a database and user
If on previous step The database and user have not been created, they can be added at this stage.
To do this, in the “Hosting” - “MySQL” section, go to and click “Add”:

After the database and user are added, you need to download the Joomla archive.
How to download Joomla from the official website
We recommend downloading all distributions, templates and add-ons only from the official website or from trustworthy sites (well-known template stores). When downloading from unknown source You risk getting modified files with a virus, “left” links or with open external access. This also applies to various “assemblies”, “ready-made kits with useful modules”, etc..

The result is a downloaded archive with the latest version of Joomla:
How to upload Joomla to hosting using FileZilla
It is more convenient and faster to first upload the archive to the server, and then unpack it into the desired folder. To connect to the server we use the FileZilla file manager. On the “Hosting” - “FTP/Shell” page we take the data necessary for connection - server, login and password (which relate to the domain on which we install the engine):

This data must be entered into FileZilla:

After connecting, go to the root folder of the site and copy the archive into it.

Unpacking an archive via WebFTP
Now the archive needs to be unpacked. The easiest way to do this is to use the WebFTP utility built into the hosting control panel. We have already used it when removing an automatically installed CMS.
In the window that opens, mark the archive and click “Unpack”:
We check which folder the archive will be unpacked into (there should be an html folder), click on green flag:

After the files have been unpacked, you can delete the archive from Joomla.
Launch the Joomla installer
To start the installation, you need to go to the address of the site where Joomla CMS is installed, after which the installation page will automatically open:

Available on this page following settings:
- The name of the site - depending on the selected template (design) is shown at the top of the screen. If desired, it can be changed after installation.
- Site administrator email address.
- Administrator login. It is advisable not to use the standard login as in the screenshot, in order to complicate the selection of the login and password for attackers.
- Enter your password and confirm it.
- Click "Next" and proceed to the second installation step.
Step 2 – Database Configuration.

Enter the database server name, username, database name, and password. Take this data from the “Hosting” - “MySQL” page in the hosting control panel. Click Next.

We saw the site interface without demo data when automatic installation, we will install demo data for the business card website. We also recommend sending the site configuration and administrator password to the administrator’s e-mail address. After selecting the required options, click “Install”.

Don't forget to delete the INSTALL folder after installation is complete!
Completing installation and testing
Once the installation is complete, go to the specified Mailbox You will receive a letter confirming the successful installation of Joomla:

If Joomla was installed correctly, home page The site will look like this:

Demo data is in English, you can replace it with yours in the control panel:

Everything works correctly, installation completed successfully.
A website template is not complete finished project, and for it to become such, it is necessary to go through several stages: from installing the engine on the hosting and template files in the administrative panel, to optimizing and customizing an existing resource.
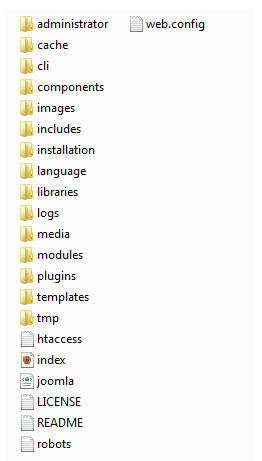
The resulting archive must be unpacked using an archiver. The unzipped files look like this:
Step 2: purchasing hosting and domain
To install everything necessary files For a website, you need hosting and a domain.
The website address is the domain. It is tied to the hosting and, if possible, should reflect the activities of the web project being created, and be easy to remember and understand by ear. The domain that has been registered belongs entirely to its owner. Typically, hosting companies provide all services for maintaining websites on the network, so most often users register a domain and purchase hosting from one provider.
DNS servers are required to link a domain to hosting. With their help, computers find required servers in the Internet. When you enter a website address in a browser, the hosting provider checks it through the DNS - domain name server. Any server on the Internet has its own IP address - specific set numbers (for example, 192.168.0.1). Domain name may not always belong to the same IP address. If you want to move your site to another hosting, it will work on the network under a different address. Therefore, the mechanism for detecting a web project on the network looks like this:
http://www.your-site.ru – DNS server - 192.168.0.1 - displaying a full site
When purchasing hosting, the provider gives the user the necessary access to manage the site. DNS server addresses are specified in the domain settings.

Step 3: Install Joomla. FTP server
The first thing we did was download the Joomla CMS archive and unzip it. Now all received files must be uploaded to the hosting. To do this you need to gain access to FTP server, which is issued by the provider. And to upload files to the server, you need to use an FTP manager.
FTP client is a program that allows you to access an FTP server remotely. The most popular FTP managers among users are Total Commander, FileZilla, etc.
The engine files are copied to the WWW or PUBLIC_HTML root directory.
Step 4: Databases
So, all Joomla files are installed. Now you need to connect the database to the content management system. Different hosting providers provide their own mechanisms for connecting and creating a database, but they are all of the same type and similar, and therefore even ordinary users should not have any difficulties installing and working with them.
The MySQL database is one of the most popular and widespread among users and webmasters, it has an open source source and provides maximum performance. Particularly popular MySQL database gained through her interaction with PHP - a programming language for creating web pages.
In the hosting control panel there is special menu, which is responsible for MySQL management. Here you need to enter the name of the database, create an administrator(s), come up with a password and assign access rights to the created database.
Step 5: Joomla installation
To install Joomla 3.0, you need to complete only three steps. Compared to previous versions, this process has been greatly simplified - from 7 steps to 3. The installation wizard supports all popular browsers.
The Joomla installer independently detects the browser language and selects the language version of the CMS in accordance with it. 
To install Joomla 3.0 you need:
- enter the name of the future site;
- brief information about the resource - description;
- E-mail address;
- site administrator name and password.
- Database
In the Database tab we get a connection to the database created above. Connecting Joomla 3.0 to MySQL is the key to the performance of your site.

To make sure your server responds to everything necessary requirements To install Joomla 3.0, there are several corresponding items in the Overview tab.

The engine installation process involves a step-by-step implementation. Otherwise established software may not function properly.
After all installation steps have been successfully completed, the configuration.php file will appear in the configuration directory.
Attention! After complete installation CMS Joomla, you need to delete the installation directory.
Note: installation of Joomla 2.5 or more earlier versions slightly different from version 3.0, but the principle of operation remains the same.
This is what the Joomla 3.0 admin panel looks like

And this is the admin panel Joomla versions 2.5

Installing a template in the Joomla admin panel
Installation Joomla template carried out directly through the administrative panel. After you have downloaded the necessary template archive for your future website, you need to upload it to the admin panel.

and download the archive by clicking on the “Download and Install” button.
Now the template installed in the admin panel must be activated. To do this, go to Extensions - Template Manager and click on the asterisk next to the installed archive.

The topic is set.
Website installed on Joomla: general settings
Immediately after installing the site, for it to work correctly, you need to make some general settings.


Name of the site. The name that you enter in this field will be displayed in the title of the control panel itself, in the title of the site, as well as on the page that will be displayed when the “Site is offline” option is enabled.
The site is down. Blocking access to the site.
Show offline message. This option allows you to enable a message that will be shown on the site when it is turned off.
Message when the site is turned off. Here you can type exactly the message displayed on the site pages when it is offline.
Image with the site turned off. An optional image that will be displayed when the site is turned off.
Default editor. Choice visual editor, which will be used to create default materials.
CAPTCHA (default). Selecting the CAPTCHA type for the site.
Default access level. Selecting the level of access to new materials, menu items and other elements.
Default list length. Length of lists of objects in work areas of control panel managers.
Limiting the news feed. The number of items that are shown in the news feed.
E-mail news feeds. The email address that will appear instead of the author's name in the materials.

Meta Description tag for the site. A description of the website that will be sent to search engines.
Meta tag Keywords. Kit keywords or phrases that best reflect the theme of the site.
Meta tag Robots. Instructions for robots search engines: noindex – prohibition of indexing, nofollow – prohibition of following links, index – indexing of the document, follow – following links.
Show Author meta tag. When this option is enabled, the meta tag will be visible when viewing the material.
Show Joomla! version. Adding information about the control system version.

Enable SEF (CNC). URL optimization.
URL redirection. Redirect links according to the server.
Add a suffix to the URL. Adding a special suffix to URLs.
Aliases in Unicode. Transliteration of headings into Latin characters.
Include the site name in the page title. The site title will appear, for example, before or after current page(Site name - Material name).

Domain Cookie. The domain will specify a session cookie when created.
Path for Cookie. This field specifies the path for which the cookie should be valid.
- System

In this field you must specify the path where the system log files will be stored.
Help server. reference Information on working with Joomla.
Debugging options
System debugging. When this option is enabled, diagnostic messages and SQL query errors, if any, will be displayed at the bottom of the page.
Debugging the language. The function works even when the “System Debugging” mode is turned off. Displays information about localization files.
Cache settings
Cache. Determining the caching level. Not suitable for large sites.
Caching handler. Selecting a caching handler.
Caching time. Sets the lifetime of the cache files, after which it will be updated.
Session settings
Session lifetime. If no actions are performed within the period specified here, the user's session will automatically be terminated.
Session handler. Identification of those users who connect to the site without using cookies.
- Server

The physical path where all temporary files will be stored.
Gzip page compression. Speed up website loading on the Internet.
Enable SSL. Access to certain areas of the site via SSL.

You need to select the city where the server itself is located and set the time and date in accordance with its time zone.

When this option is enabled, you can access files via FTP. To do this, you need to specify the FTP host, port, username, password and path to root directory FTP server.
Database setup
The database settings are specified in configuration.php at the stage of installing the site on hosting. Therefore, these fields can be left unchanged.

Settings feedback By e-mail: PHP or SMTP.
- Rights

Filtering settings apply to all text fields, they provide control over the HTML code and sufficient good protection from attacks.


