USB OTG from A to Z
The USB OTG cable is a rather interesting accessory that may be useful when used with your tablet or . What prospects does it open up for us and what opportunities will become available when using it? And what does “OTG” even mean? These questions are often asked by users who are hearing about this type of cable for the first time. Let's find out more about it.
How to use a USB OTG cable for your Android tablet or smartphone
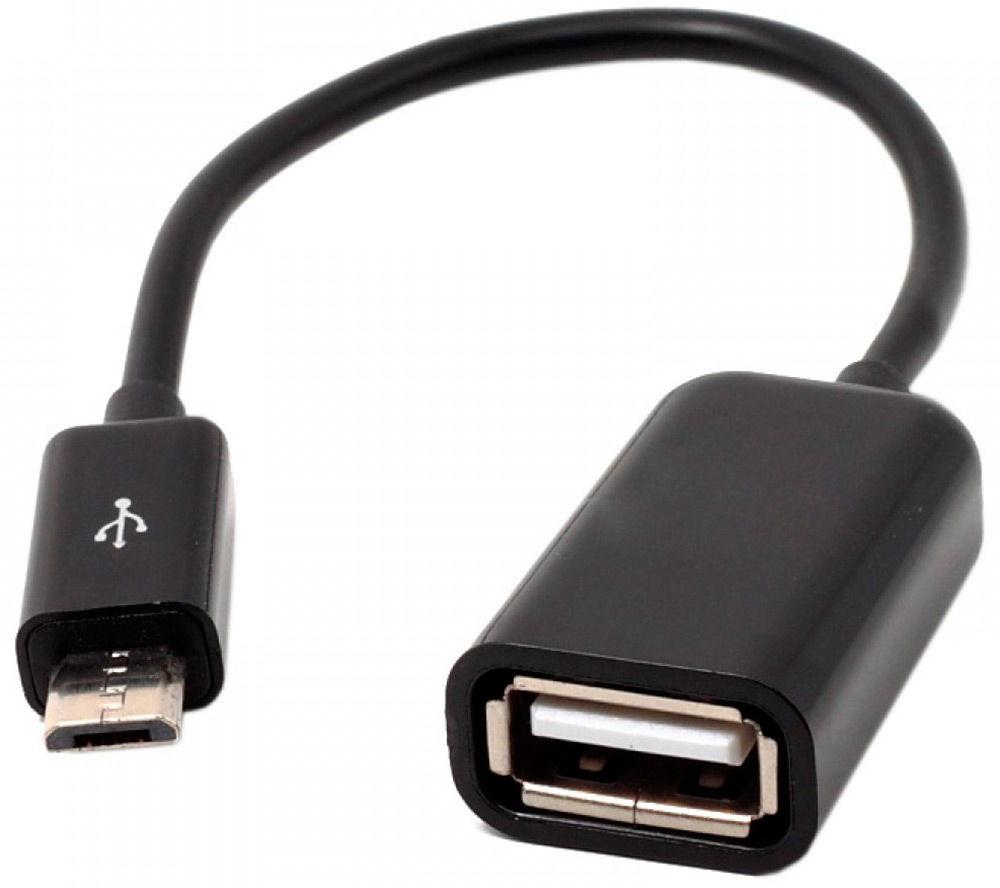
In general, OTG is an abbreviation for On-The-Go, which means “on the go” in English. This is a technology that expands the functions and capabilities of USB 2.0. With its help, you can, flash cards, printers, keyboards, hard drives, cameras and other peripheral devices without connecting to the computer itself. The only condition is that your device must support this feature at the hardware and software level.
If you connect using the USB OTG standard, the capabilities of the master (current source) and slave (power consumer) gadgets are assigned based on whether it has a jumper between the fourth and fifth pins in the cable connector for connection.
There is also partial support for USB-host devices on Android (mainly smartphones), when your gadget can control the device without powering it. Then the auxiliary electronics are connected using an active USB hub, which has its own power supply system. How can you use such a miracle cable?
Examples of using a USB OTG cable
There are a huge number of ways to use a USB OTG cable. Let's look at the most popular of them.
But it happens that you don’t currently have such a cable, and you have neither the time nor the desire to look for the nearest mobile accessories store. Well, in this case, you can try to make such a cable yourself. Although this procedure is more intended for professional people.
Making a USB OTG cable with your own hands
Don’t rush to rejoice so quickly, because you still have to go to the supermarket or radio store to buy a whole list of different things!

First, use a sharp knife to open the microUSB connector. The meaning of the action is to carefully divide the connector sleeve longitudinally into two equal parts to gain access to its internal contents. But it happens that the connector body is held on by simple latches or even glue. Then you will not have problems with separation. But in the first case, you need to be extremely careful: you cannot destroy the outer sleeve of the connector, since it will be used in the future. You may also find white plastic inside protecting the necessary wires. In this case, you will need to cut through it.
Now you can move on to the next step. Having opened the connector contacts, you will find that their number is not four, but five. Basically the four pins are +5V power, two data wires D+ and D-, and ground. And the fifth wire, not connected to anything, is the mode switching input (sense). It must be connected to ground before connecting to the device in order for it to switch to OTG mode and detect the USB device connected to the interface. The image below shows the differences between regular cable and OTG.
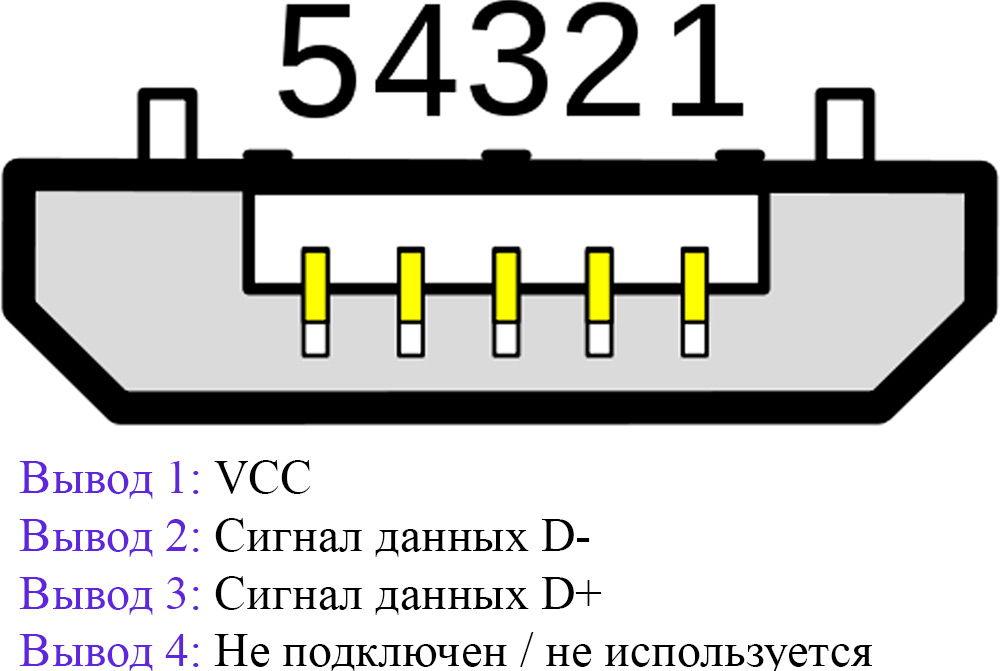
So, to switch the gadget to OTG mode, you need to close the fourth and fifth contacts. If you want to connect them “to death”, you can solder them together or connect two wires to them (we take these wires out and connect them to a microswitch, with which you can perform I/O operations in OTG mode if necessary). Then on the opposite part of the cable it is necessary to solder Type A Female (second type) in parallel to Type A Male (the first type of connector). In addition to everything, you can build a small adapter with two Type A Female for its further connection to the opposite part of the cable. Having decided to connect the fourth and fifth contacts permanently, you need to replace the connector of the first type on the opposite side with the second one so that it is suitable for connecting a USB device.


