A simple carousel in jquery. Packing JS carousel into a single script. What types of sliders are there and where they may be needed
/* This is where our carousel begins. Block.carousel-wrapper is positioned relatively, wrapper.carousel-item is positioned absolutely. . */ .carousel-wrapper( position:relative; /* Absolutely positioned boxes get their height and width from their parent. We made them transparent by default, and then they will appear smoothly when clicking on links.arrow-prev and.arrow-next. * / .carousel-item( position:absolute; top:0; bottom:0; left:0; right:0; padding:25px50px; opacity:0; transition:all0.5sease-in-out; /* Noticed the padding on the left and on the right 50px? In this way we can position our links! Each one will be 50px wide. In addition, I use empty links with. background image so that the links look like arrows. Check if you have changed Link URLs with the original URL so that your links aren't just transparent rectangles. */ .arrow( position:absolute; top:0; display:block; width:50px; height:100%; -webkit-tap-highlight-color:rgba(0,0,0,0); background:url( "/carousel-arrow-dark.png")50%50%/20pxno-repeat; /* Let's return our arrow to the left */ &.arrow-prev( left:0; ) /* And the second one is to the right. same image for the arrow, I rotate it 180 degrees */ &.arrow-next( right:0; -webkit-transform:rotate(180deg); transform:rotate(180deg); ) ) /* I really like it. love how the carousel slides look on dark background, and if block.carousel-item has the class "light", we will change its text to white and use white arrows instead of gray ones. Double-check that the path to the arrow image is correct */ &.light( color:white; .arrow( background:url("/carousel-arrow-light.png")50%50%/20pxno-repeat; ) ) /* Let's write a media query to change the size of the arrows on devices with smaller screen sizes.*/ @media(max-width:480px)( .arrow,&.light.arrow( background-size:10px; background-position:10px50% ; ) ) ) /* Set the link targets to display: none; This way, we get rid of the browser constantly jumping to the very top of the carousel every time we click on the arrows. This property is effective for any elements whose ID begins with "target-item". */ ( display:none; ) /* Above, we've made all of our carousel slides transparent, which means that when the carousel loads, we'll get a big empty box instead. Let's change the transparency value for the first slide to 1 for display. We also set the z-index to 2, positioning it higher than the other slides. */ .item-1( z-index:2; opacity:1; ) /* But we don't want the first slide to always have an opacity value of opacity: 1; otherwise we'll have to work our way through this slide while rotating the others. */ *:target~.item-1( opacity:0; ) /* ..but if #target-item-1 is in focus and we want to show the first slide, then select it using the ~ icon and set the opacity again to 1:-) */ #target-item-1:target~.item-1( opacity:1; ) /* If other target-item-# are in focus, select them using the ~ selector, smoothly show them, and place them on top using z-index: 3. Here you can add additional spans with the target-item identifier if you have more than three of them. Can add 10 pieces at once.. */ #target-item-2:target~.item-2,#target-item-3:target~.item-3( z-index:3; opacity:1; ) )
jQuery carousel plugins allow you to display website content in a more attractive way. With the help of such plugins, you can create beautiful presentations directly on website pages and attract the attention of visitors.
1. Bootstrap Ambilight SliderBootstrap Ambilight Slider is a plugin for creating sliders/carousels with an ambient glow effect and Bootstrap functionality.
2. jQuery TouchSwipe Carousel
The TouchSwipe Carousel jQuery plugin allows you to detect touches on the touch screen and simulate a mouse key press.
3.ItemSlide
ItemSlide.js is a jquery plugin for creating a carousel that will work on both desktop and mobile touch devices.
4.
– jquery plugin for creating adaptive carousels/sliders.
5.
Fully responsive and mobile-optimized jquery carousel plugin. For animation, CSS3 transitions are used here, but there is also a fallback option in jQuery. The plugin supports an unlimited number of slides with any type of content. can interact with the keyboard, and at the same time works well in most browsers, including mobile ones.
6. SilverTrack
SilverTrack is an extensible jQuery plugin. It consists of a small core to which you can connect convenient plugins.
7. Owl Carousel 2
Owl Carousel 2 is a fully responsive jQuery/Zepto carousel with touch screen support.
8. UtilCarousel
UtilCarousel – jQuery carousel plugin with smooth transitions, realized through hardware acceleration. It is completely adaptive. The plugin supports touch screens, and it uses hardware-accelerated 3D CSS3 animation. Thanks to this, the plugin will look good on both desktop PCs and mobile devices. You can control UtilCarousel using touches, navigation, or the mouse wheel.
9. Slick
Slick is a responsive jQuery carousel that has everything you need.
10. CodingJack 3D Carousel
This carousel is supported by iOS and Android devices and is equipped with touch swipe functionality. Looks great on tablets and smartphones.
11. jQuery Slideshow
jQuery Slideshow is a carousel and slider with gesture support for touch devices. The plugin archive weighs only 2 kilobytes.
12. FlimRoll
FlimRoll is a miniature jQuery carousel that focuses the user's attention on specific object, placing it in the center of the screen.
13. Tikslus
Tikslus is a fully responsive jQuery carousel with many features and properties. And the plugin’s high adaptability allows you not to specify image sizes. In addition, it is worth noting the support for custom animations based on CSS3 classes. Tikslus can be used with the Jquery Mobile plugin.
14.Scrollbox
Scrollbox is a simple, miniature jQuery plugin that turns lists into a carousel or ticker.
15. Sky Touch Carousel
Sky Touch Carousel is a jQuery carousel plugin with a rich set of functions. The plugin is adaptive, supports touch screens, and at the same time works quickly and smoothly. Settings allow you to change the appearance of the carousel using CSS.
16.
– flexible jQuery plugin for creating slideshows or carousels. It has many settings, including transition types, image alignment, and frame switching speed.
Sometimes I have to solve problems related to the frontend, despite the fact that I don’t like it :)
As a matter of fact, you could estimate my attitude towards everything related to “beautiful” from the design of this site, which was developed by me alone :)
However, relatively recently I was faced with the need to implement a slider in JavaScript, and this had to be done without any ready-made libraries and even without everyone’s favorite jQuery.
Called this need was that the result should be a JS script, which, through third party service I would connect to the site. Consequently, ready-made carousels in JavaScript were no longer needed, because To integrate them, it was necessary to add a library connection to the site’s HTML code via a script tag and copy the files themselves either to the server or pull them via cdn, but this would again require editing the resource code.
How to make a JavaScript slider: the beginningToday, I think that everyone who found themselves in a similar situation began by searching for existing developments, because... when the task of making a JS carousel is within the scope of work, it should always be done as quickly as possible. And under such conditions, no one will allow you to sit and invent your own bicycles.
Customers always don’t care about how the code is written, what its architecture is, the main thing is to see the result!
As a result, as you understand, before writing a slider in JavaScript without jQuery, I decided to find a ready-made one and modify it to suit my needs. Why no jQuery? Yes, because on the target resource, where I planned to connect my slider through the service, the jQuery call in the code was located later than the script connected by the service. Therefore, jQuery constructs in my code were simply not perceived.
As a basis, I took this JavaScript image slider - https://codepen.io/gabrieleromanato/pen/pIfoD.
I decided to stop there, because... its JS code was written using OOP principles and its classes are based on prototypes, not on banal functions.
To be honest, I deeply do not understand and do not recognize the current hype around JavaScript using OOP, frameworks and other architectural things in a language that was originally intended to be a simple dynamic scripting language. Just like JS itself, I frankly dislike it with its syntactic vinaigrette, which allows the same constructions to be written in several ways.
But, unfortunately, in the modern world few people share my positions, because... this language is developing at a crazy pace and is even making attempts to win the minds of backend developers using Node.js as an alternative to Java, PHP, C#, Ruby and other monsters.
As a result, in order not to simply be left without work, you have to quietly figure out JavaScript. And in the pure JavaScript slider implementation I chose, I encountered something that, as you understand, I despise in given language. That’s why I chose it, so that there would be at least some reason to work and understand JavaScript OOP and prototype classes - otherwise I would never have voluntarily touched them in my life :)
Based on the code I found, I needed to develop a slider in pure JS in a pop-up window (this thing is also called a popup, popup, etc.), which would have buttons for switching slides and clickable indicators of the current slide. It was also necessary to make a button to close this window.
This is what I ended up with.
Making a slider JS libraryFirst, I decided to implement everything wisely and make a JavaScript slider for the site in the form of a library that can be connected to the site with a single script, in which the slider components, divided into subdirectories, will be called. I decided to call it popupSlider.js in honor of its original purpose.
Its code can be found on GitHub at this address - https://github.com/Pashaster12/popupSlider.js
The library structure is as follows:

The slides folder is for slide images. Controls contains pictures of JS carousel controls (buttons for closing the slider and switching slides). And in assets there are static elements of the JS slider: HTML markup and a file with CSS styles.
Well, the popupSlider.js file is the heart of the library itself, in which the JavaScript actions of the carousel are written and a connection is established with other files. It is this one that we will connect on the site, and it will call the others.
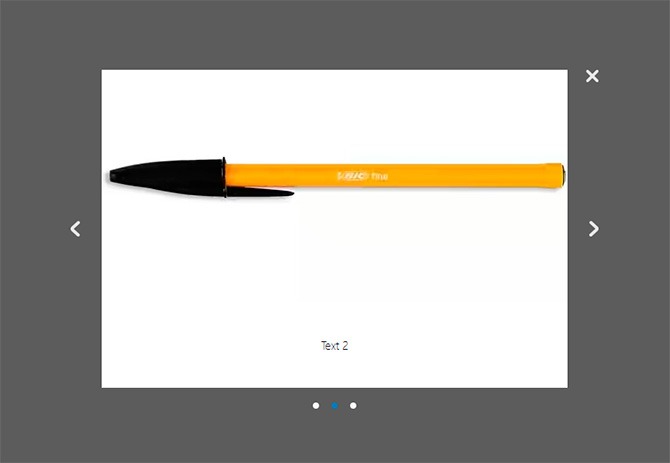
I decided to start with the HTML markup of our JS image carousel, which in my case looks like this:
 Text 1
  Text 2
  Text 3
To design the slider in JavaScript as a popup, I used the following styles:
#slider ( margin: auto; width: 600px !important; overflow: hidden; ) #slider-wrapper ( width: 9999px; height: 343px; position: relative; transition: left 400ms linear; ) .slide ( float: left; width : 600px; position: relative overflow: hidden; .caption (width: 600px; height: 110px; line-height: 1.5; font-size: 15px; font-weight: 300; text-align: center; color: # 000; display:table; ) .caption-container ( display: table-cell; vertical-align: middle; padding: 0 20px; ) #slider-nav ( position: absolute; bottom: -36px; text-align: center; left: 50%; transform: translateX(-50%); ) #slider-nav a ( width: 8px; height: 8px; text-decoration: none; color: #000; display: inline-block; border-radius: 50%; margin: 0 5px; background-color: #fafafa; ) #slider-nav a.current ( background-color: #337ab7; ) .horizontal-controls ( position: absolute; display: inline-block; width: 12px ; height: 20px; top: 50%; margin-top: -10px;
left: -40px; ) #prev:hover ( background: url(../controls/arrow_left_active.png); ) #next ( background: url(../controls/arrow_right_inactive.png); right: -40px; ) #next:hover ( background : url(../controls/arrow_right_active.png); #cq-popup ( width: 600px; z-index: 23; left: calc(50%); top: calc(50%); position: fixed !important ; background-repeat: no-repeat; background-color: #fff; font-family: "Roboto","Segoe UI","Helvetica","Georgia","Calibri","Verdana" ; transform: translate(-50%, -50%) scale(1); #cq-popup .header ( display: inline-block; font-size: 17px; font-weight: 500; ) #cq-popup > div ( width: 500px; font-size: 22px; line-height: 36px; ) #cq-popup-btclose ( text-decoration: none; position: absolute; right: -40px; top: 0; background: url(. ./controls/btn_delete_inactive.png); height: 16px; width: 16px; ) #cq-popup-btclose:hover ( background: url(../controls/btn_delete_active.png); ) #cq-popup-bg ( position : fixed; width: 100%;
height: 100%; background: rgba(51,51,51,0.8); popupSlider.html and popupSlider.css, which are located in the assets directory of the JavaScript slider library. I did this on purpose so that when using this code, users could easily adjust the markup and design without messing around in the JS code, where what would have to be written out would have to be written directly.
In addition, many people still like to minimize JS to speed up site loading. So customize this decision under these conditions it would be very difficult.
As a result, I decided to simply include ready-made files in the main library file popupSlider.js, which for my task took the following form:
Function Slider(element) ( this.loadStatic(); this.el = document.querySelector(element); this.init(); ) Slider.prototype = ( init: function () ( this.links = this.el.querySelectorAll ("#slider-nav a"); this.wrapper = this.el.querySelector("#slider-wrapper"); el.querySelector("#prev"); this.navigate(); ), navigate: function () ( var self = this; for (var i = 0; i< this.links.length; ++i) { var link = this.links[i]; link.addEventListener("click", function (e) { self.slide(this); }); } self.prevBtn.style.display = "none"; self.nextBtn.addEventListener("click", function (e) { var currentSlideNumber = document.querySelector("#slider-nav a.current").getAttribute("data-slide"); var nextSlide = document.querySelector(""); nextSlide.click(); }, false); self.prevBtn.addEventListener("click", function (e) { var currentSlideNumber = document.querySelector("#slider-nav a.current").getAttribute("data-slide"); var prevSlide = document.querySelector(""); prevSlide.click(); }, false); self.close(); }, slide: function (element) { this.setCurrentLink(element); var index = parseInt(element.getAttribute("data-slide"), 10) + 1; var currentSlide = this.el.querySelector(".slide:nth-child(" + index + ")"); this.wrapper.style.left = "-" + currentSlide.offsetLeft + "px"; if (index < this.links.length) this.nextBtn.style.display = "block"; else if (index == this.links.length) this.nextBtn.style.display = "none"; if (index >1) this.prevBtn.style.display = "block";< a.length; ++j) { var cur = a[j]; if (cur !== link) { cur.className = ""; } } }, loadStatic: function () { var self = this; var link = document.createElement("link"); link.rel = "stylesheet"; link.href = "assets/popupSlider.css"; document.head.appendChild(link); var sliderHTML = ""; var xhr = new XMLHttpRequest(); xhr.open("GET", "assets/popupSlider.html", false); xhr.send(); if (xhr.status != 200) { alert("Can not load the popupSlider.html. Got the error " + xhr.status + ": " + xhr.statusText); } else { sliderHTML = xhr.responseText; } var div = document.createElement("div"); div.innerHTML = sliderHTML; document.body.appendChild(div); }, close: function () { document.getElementById("cq-popup-btclose").onclick = function () { document.getElementById("cq-popup-bg").remove(); document.getElementById("cq-popup").remove(); } } };
else if (index == 1) this.prevBtn.style.display = "none";
), setCurrentLink: function (link) ( var parent = link.parentNode; var a = parent.querySelectorAll("a"); link.className = "current"; this.currentElement = link; for (var j = 0; j
A few comments about the above code. The contents of the popupSlider.js file is a single JavaScript Slider class, which, like in PHP, contains a constructor and class methods. Only in JS, the definition of a constructor, unlike PHP, is mandatory.
The constructor is defined using the following construct:
Function Slider(element) ( //constructor code)
Inside the constructor, the actions that will be performed when creating a class object must be specified.
The class methods themselves will be located inside the prototype and will be available to all instances of this JavaScript class. The JS prototype in my case is described by the following design:
Slider.prototype = ( //methods )
They will be called outside the class body as follows:
Var slider = new Slider(); slider.class_method();
And inside the class code itself, the following method is available: This.class_method(); The main thing is not to forget that in
Var self = this; self.class_method(); //to access a method that is one level higher than the code of the described method
It seems like I talked about all the nuances of writing code. Now a few words about the methods of our JavaScript class, which contain descriptions of the JS actions of the image carousel.
loadStatic()
The very first method called when an instance of a class is created in the constructor. Responsible for adding slider markup and a file with styles to the HTML code of the website page.
First, a new link tag is created in memory with using JavaScript function document.createElement() and it is assigned the values of all the necessary attributes, including the path to the CSS file with the JS slider styles. And finally, it is added to HTML pages s using JavaScript method appendChild() to the end of the head section, where the styles should be.
Next, we do the same for the file with the HTML markup of our slider in pure JavaScript. There’s just a small nuance here: you can’t just include an HTML file inside the same one, as we did with a CSS file. For this there is special libraries, for example, in order to connect HTML to HTML, the lib from w3.org is excellent - https://www.w3schools.com/howto/howto_html_include.asp
But then it would have to either be included in the slider library itself, or ask users to install it themselves. But all this is suboptimal, because... requires a lot of body movements and slows down the site loading speed due to additional scripts.
In the end, I decided to get the contents of the HTML file inside JavaScript code and load it into a new one div element, created in memory, as I did earlier to connect CSS file in JavaScript. The generated element is connected to the very end of the section body HTML site page code.
If you want to insert a div with slider markup not just at the end of the body, but in a specific container, you can instead of the following code:
Var div = document.createElement("div"); div.innerHTML = sliderHTML; document.body.appendChild(div);
Enter the following, specifying the desired identifier of the target container (in my case, the HTML JS slider will be located in the element with id popupSlider):
Var target = document.querySelector("#popupSlider"); target.innerHTML = sliderHTML;
The method, which is called in the constructor after loadStatic(), is needed to initialize the class properties corresponding to the main HTML elements that we will access in the following code.
At the end, the navigate() method is called.
navigate()
In this method, the actions that occur when you click on the slide switch buttons and navigation elements located under the slider itself are indicated in the form of circles.
For convenience, I moved the JavaScript code for changing slides into a separate slide() method, but in this one I just attach it to the click event for each round button in the loop.
When you click on the “previous slide” / “next slide” buttons, as you can see, I decided to just emulate a click on the corresponding circle, defining the desired one relative to the current one, which has a CSS class current.
slide(element)
The method “responsible for the magic” of the JavaScript carousel itself, which contains the code that changes the positions of the slides. At the very beginning, the setCurrentLink() method is called, which we will talk about a little later.
The JS slider navigation button object in the form of a circle is passed to it as an input parameter.
The slide switch itself works like this:
At the end of the method, the behavior for the “previous slide”/”next slide” buttons, designed as left/right arrows, respectively, is described. If the current slide is the first of the entire list, then the button to go to the previous slide is hidden. If the latter, then remove the button to move to the next slide.
setCurrentLink(link)
This method of our class JavaScript slider is responsible for highlighting the navigation round button corresponding to the current element. Those. if we have the second slide selected, the second button will be highlighted.
The object of the button that should be selected as the current one is passed as an input parameter to the function.
The logic for highlighting the current element is simple:
The very last method of the class, which defines the action when clicking the close button of the slider in the form of a cross. Here, in fact, the code is the most understandable of all contained in the JS slider class.
When you click on the close button, which is accessed by its identifier, the slider element and the element that defines it are removed from the page. translucent background. They are also, in turn, obtained by unique identifiers.
The method itself is called inside the previously described navigate(), which contains all the scenarios of actions taking place on our JavaScript slider.
By the way, if you want to close the slider when you click outside of it, then just add the following code to this method:
Document.getElementById("cq-popup-bg").onclick = function () ( document.getElementById("cq-popup-bg").remove(); document.getElementById("cq-popup").remove() ;
JavaScript slide show based on the developed librarySometimes in practice you may need to make a JS scrolling carousel, which is often called a slide show. In my case this was not required, but I still decided to make one based on the final library code for a case where it might be useful.
In fact, JavaScript implementation The slide show differs from a regular slider quite slightly. The only difference is that in a slide show, the slides switch automatically at a given time interval, while in the case of a regular JS carousel they change manually using navigation elements.
SlideShow: function (timeout) ( var sliderCount = this.links.length; var self = this; this.slideCycle = setInterval(function () ( var currentSlideNumber = document.querySelector("#slider-nav a.current").getAttribute ("data-slide"); var slideId = parseInt(currentSlideNumber, 10) + 1; self.slide(document.querySelector(""));
I think it’s clear what’s happening here. For creating this method I copied the code from the click event on the manual slide switch buttons and placed it inside JavaScript call setInterval() function, which performs a specified action after a specified period of time.
The action script is passed as the first argument as an anonymous function, and the time interval is passed as the second, which I decided to make as a variable whose value is passed when slideShow() is called.
The only modification to the code inside setInterval() that was required was determining the number of slides and comparing the index of the current slide with it to loop the automatic switching.
Well, and in order to this code earned, the method itself must be called. I decided to do all this in the same navigate(), which is precisely a collection of all sorts of scripts. I placed the call at the very end, passing as an argument the value of the time interval for automatic change slides in our JS slideshow (I chose 2000 milliseconds or 2 seconds, you can change this number as necessary):
Self.slideShow(2000);
After that check JavaScript work slider, without forgetting to clean your browser.
In theory, everything should work. If not, study the errors in the browser console and share them in the comments.
As a result, we got a JS slide show in which the slides switch automatically and in a circle, i.e. when the last slide is reached the show switches to new cycle, and the display starts again from the very first element.
While working with various JS libraries for image carousels and reviews, I noticed that this practice developers actively use, but with some addition. In all the solutions I've seen, the automatic slide show is interrupted if the user makes a manual switch. So I decided to do the same in my library.
To interrupt automatic display JavaScript slides carousel, I decided to use the standard JS function clearInterval(), to which I pass as an argument the identifier of the time interval returned by the setInterval() function when it is set.
As a result, I got the following code, which I decided not to write as a separate method:
ClearInterval(self.slideCycle);
And placed it in places where the actions are described when clicking on various navigation elements, i.e. in the following:
Link.addEventListener("click", function (e) (...)); self.prevBtn.addEventListener("click", function (e) (...)); self.nextBtn.addEventListener("click", function (e) (...));
It is better to call clearInterval() closer to the click event itself, the main thing is before it, and not after it.
Integration of JavaScript slider into the websiteSo, our slider in pure JS is ready. Now all that remains is to connect it to the site.
To do this, you must perform sequentially next steps, that are standard actions when integrating any third-party JavaScript libraries at all.
Step 1 . We copy the library files to our website in a separate directory.
Step 2. Add the following code to the HTML of the pages where the slider will need to be displayed, placing it before the closing body tag:
Step 3. We place the following code for calling the JS carousel in any existing JavaScript file, which is included on the page after connecting the slider itself:
Var aSlider = new Slider("#slider");
As you can see, this code is essentially creating an object of the Slider class, which is contained in popupSlider.js. That is why it should be called only after connecting the class file itself to the page.
Adding new slides to a JavaScript carouselEverything is very simple here. Since our slides are taken from a separate directory of the slides library, when adding new pictures you will just need to drop them into it necessary files, having previously given them the same size as the others.
And then in the code of the file assets/popupSlider.html add new block into the container with id slider-wrapper :
 Text
Text
In principle, you can simply copy a similar existing one and change the path to the image file and the text of the signature (if it is needed at all).
You will also need to add new element navigation in the form of a circle, because on this moment its automatic addition has not yet been implemented. To do this, you will need to add the following code to the container with the slider-nav id, writing it at the very end:
The value of the data-slide attribute must be greater than the largest value of the other elements. It is enough just to increase the maximum current by one.
Packing JS carousel into a single scriptThat's it, the JavaScript slider is ready and connected. I personally recommend using this option in practice if you need it at all :)
To speed up its operation, by the way, you can further compress static components: CSS, HTML and JavaScript files. I didn’t do this and offer you minified code, because there are a lot of frontend build systems now: Gulp, Grunt, Webpack and others. And each of them has its own algorithms for compressing and connecting files.
In addition, minified results may work differently on different OSes. In general, there are many reasons.
And the source codes themselves, I think, are not so heavy that they need this procedure. But if you need them, then configure the minification yourself, taking into account your OS and collector.
As I wrote at the very beginning, in order to solve the task initially set for me, I needed to get a single JS file for the correct use of my slider through a third-party service on the site. For this reason, I, strictly speaking, did not use ready-made third-party libraries.
Then the option of a single JavaScript script Carousels will come in handy for you, because... all content will be contained directly in it, including HTML/CSS code, which in the case of a library is stored in separate files.
The script in my case consists of two parts. The first part contained the contents of the popupSlider.js file, which I will not present a second time. Insert it yourself, removing the description of the loadStatic() method and its call from the class code, because we won't need them.
The second part of a single JavaScript slider script for the site is a handler for the DOMContentLoaded event, which occurs when the page content is loaded.
There we will add the carousel JS code to the HTML/CSS page and create an object of the Slider class, which is equivalent to activating the slider itself.
Schematically the code looks like this:
/* contents of popupSlider.js without describing the loadStatic() method and its call */ document.addEventListener("DOMContentLoaded", function())( var str = "\ \ /*css code*/ \ /* html code*/ "; var div = document.createElement("div"); div.innerHTML = str; document.body.appendChild(div); var aSlider = new Slider("#slider");
Since in my case the option to upload files to the server was generally closed, I had to upload image files of the elements JavaScript controls carousel to the cloud and instead of paths to them in the HTML and CSS code, write the links generated when saving.
If you don’t have such difficulties, then you don’t have to change anything, but don’t forget to copy the slides and controls library directories to the server and specify the correct paths to them.
Custom JS slider - development prospectsTo be honest, I don’t plan to engage in targeted support and development of the solution I created :) At the moment, there are a bunch of similar sliders and a small cart, which, unlike mine, have their own history, are thoroughly tested and are supported by a large community of users and developers.
It’s somehow not interesting for me to start this whole journey from scratch alone and create another bike, and I don’t really have time for it. But given JavaScript the slider is an excellent opportunity to practice development by refactoring its code and implementing new ones interesting features, which may not yet exist.
So if you, like me, need code base for experiments and you have at least some extra free time— copy the code of the JavaScript slider I described or join the contributors on GitHub. The repository is open, and I provided a link to it at the beginning of the article.
If you want to improve your front-end skills on my creation, I can even give you a small list of edits and improvements that the code needs and which may be of interest to you in terms of their implementation:
The list of edits I have given is, of course, not final and can be supplemented. Write about your suggestions, thoughts and wishes in the comments below the article and share with your friends via social media to also involve them in development.
I ask you not to judge my code strictly, because, as I already said, I do not consider myself a Frontend specialist and am not. I am also open to all your comments on coding style and hope that I can learn something from you, and you from me, i.e. fulfill the main purpose of developing and supporting OpenSource products.
Join the project communities, subscribe to updates, and you can even help me financially using the form right under the article itself, if I was able to help you with something or you just like what I do :)
That's all I wanted to say! All the best! 🙂
P.S. : if you need a website or need to make changes to an existing one, but there is no time or desire for this, I can offer my services.
More than 5 years of experience in professional website development. Working with PHP, OpenCart, WordPress, Laravel, Yii, MySQL, PostgreSQL, JavaScript, React, Angular and other web development technologies.
Project development experience various levels: landing pages, corporate websites, online stores, CRM, portals. Including support and development of HighLoad projects. Send your applications by email [email protected].
One day my friends decided to give me a pleasant surprise. The surprise itself was very simple; it required a very ordinary T-shirt without any designs.
And then they ran into a problem - all the T-shirts in the stores had images on them. They couldn't find the simplest T-shirt without any pictures. I think you too have encountered similar problem when you can't find the simplest thing.
And it’s the same story with carousels; almost all carousels already have a design. And you almost always need a clean carousel, which you can then design as the designer intended.
Therefore, in order to immediately enjoy working with carousels, and to make them quickly, I suggest you use the following plugin.
jQuery plugin clean and powerful carouselThe cool thing about this plugin is that it has no design and is much easier to work with than other beautiful plugins.
It can be decorated in any way you like.
And so, here is this plugin: Owl Carousel.
Installing the plugin1. Connect jQuery if it is not already connected, for example like this
2. Copy the plugin files to the site folder
- Unpacking
- Copy the owl-carousel folder to the site
3. Connect these files to the site:
4. Add code to the page
1 2 3 4 5 6 7 8 9 10 11 12 13 14
5. Launch the plugin
$(document).ready(function())( // Find the carousel block var carousel = $("#carousel"); // Launch the carousel plugin carousel.owlCarousel(); ));
6. We arrange
/* Main block */ .owl-wrapper-outer ( border: 1px solid #777; border-radius: 5px; overflow: hidden; background: white; ) /* 1 carousel square */ .carousel-element ( padding: 30px ; text-align: center; font-size: 300%; border-right: 1px solid #777;
Back and Forward buttonsIn this example, I will show not the fastest, but the most universal method.
1. Add the buttons themselves
Back forward
2. Attaching buttons to the carousel plugin
After launching the plugin, add the code
// Back // When you click on "Back" $("#js-prev").click(function () ( // Start rewinding left carousel.trigger("owl.prev"); return false; )); // Forward // When you click on "Forward" $("#js-next").click(function () ( // Start rewinding to the right carousel.trigger("owl.next"); return false; ));
Now, when you click on “Back” and “Forward”, rewind will be triggered.
MarkersThese are the points that show where we are now.
They can be enabled when running the plugin by adding the following parameter
// Launch the carousel plugin carousel.owlCarousel(( // Points under the carousel pagination: true ));
/* Block with dots */ .owl-pagination ( text-align: center; /* Align the dots in the middle */ ) /* 1 Point */ .owl-page ( width: 10px; height: 10px; border: 1px solid #777; display: inline-block; background: white; border-radius: 5px) /* Active point */ .owl-page.active ( background: #777; )
To show only 1 blockThis is quite often needed, for this we add the following parameter
// Launch the carousel plugin carousel.owlCarousel(( singleItem: true, // Show only 1 block at full width ));
Different number of blocks on different devicesA very useful feature that allows you to create an adaptive carousel for mobile devices.
// Launch the carousel plugin carousel.owlCarousel(( // Number of displayed blocks // depending on the device (screen width) // Number of blocks on large screens items: 10, // 5 blocks on computers (screen from 1400px to 901px) itemsDesktop : , // 3 blocks on small computers (screen from 900px to 601px) itemsDesktopSmall: , // 2 elements on tablets (screen from 600 to 480 pixels) itemsTablet: , // Phone settings are disabled, in this case they will // be used tablet settings itemsMobile: false ));
What kind of surprise is that?Friends come to my birthday party, they smile joyfully, the delight is overflowing. They solemnly present me with a gift.
I open it and look at the T-shirt. I'm unfolding it. Damn, what stupidity. I see 3 photos of myself on this T-shirt. I put on a T-shirt and everyone starts laughing, it turned out stupid and funny.


