Debugging and testing JavaScript in HTML5 applications. A detailed guide to debugging JavaScript code in Chrome Devtools. keyword debugger
We tell you how to use the panel Chrome Dev tools convenient for debugging.
Finding and fixing errors can be difficult for beginners. If you are thinking about using console.log() to debug your code The best decision, then you are wrong.
In this article we will talk about great tools Google Chrome Devtools for Debugging This process is a much more efficient way to solve this problem.
This is just one simple example of how to use debugging, but it can be applied to any problem.
Step 1: Reproduce the bug
Reproducing bugs is always the first step towards debugging. This means finding the sequence of actions that lead to the error. The process can be long, so try to optimize it.
To follow the steps in this tutorial yourself, do the following:
- Here is the web page we will be working with in this tutorial. Don't forget to open it in a new tab;
- Enter the number 5 in the “Number 1” field;
- Enter the number 1 in the “Number 2” field;
- Click on the “Add” button;
- Look, they tell you that 5+1=51;
Oops, that's obviously wrong. The result should be the number 6, and this error needs to be corrected.
Step 2: Pause execution using a breakpoint
DevTools allow you to stop code execution in progress and view the values of all variables at that point in time. The tool for pausing code is called a breakpoint. Try:
- Return to our test page and enable DevTools by pressing Cmd + Option + I (Mac) or Ctrl + Shift + I (Windows, Linux);
- Go to the "Sources" tab;
- Expand "Event Listener". DevTools will expand a list of event categories such as animation and clipboard;
- Check the “click” box;
- Returning to the page, add “Number 1” and “Number 2” again. DevTools will pause the demo and highlight the line of code in the Sources panel. DevTools will highlight this line of code:
function onClick() (
function onClick() (
Why is this happening?When you select "click", you set breakpoints that depend on click events on each element that has a handler for it.
Step 3: Perform step-by-step debugging
One common reason why errors occur is that the script is not executed in the order you think it should. You can avoid this problem by observing the execution of the code line by line. Let's try:
- In the "Sources" panel, click "Step into next function call button"
This button will allow you to sequentially track the execution of the onClick function. Stop the process when DevTools highlights next line code:
if (inputsAreEmpty()) (
if (inputsAreEmpty()) (
- Now click the “Step over next function call button”;
DevTools now knows to execute inputAreEmpty() without debugging its contents. Please note that DevTools skips several lines of code. This is because inputAreEmpty() returns false, so the if block was not executed.
This is the essence of step-by-step code debugging. If you look at the code in get-started.js, you'll see that the error is probably somewhere in the updateLabel() function. Instead of going through each line of code, you can use a different type of breakpoint to stop the process closer to where the error occurs.
Step 4: Select a different breakpoint
The line-of-code type is the most popular breakpoint. If you know where the error might be, use this type:
- Look at last line code in updateLabel() which looks like this:
label.textContent = addend1 + " + " + addend2 + " = " + sum;
label. textContent = addend1 + " + " + addend2 + " = " + sum ;
- To the left of this code you will see a line number: 32. Click 32. Now DevTools will always pause until this line of code is executed;
- Click the "Resume script execution button". The script will continue to execute until the next line of code with a breakpoint;
- Look at the lines of code in updateLabel() that have already been executed. DevTools outputs the values of addend1, addend2 and sum.
- In the "Sources" panel, select the "Watch" tab;
- Then click "Add Expression";
- Type typeof sum;
- Press enter. DevTools will show typeof sum: "string". This value is the result of Watch Expression.
- In the code editor, in the Sources panel, replace var sum = addend1 + addend2 with var sum = parseInt(addend1) + parseInt(addend2); This is line #31.
- Press Cmd + S (Mac) or Ctrl + S (Windows, Linux) to apply the changes. The background of the code will change to red to indicate that the script has been modified in DevTools;
- Click "Deactivate breakpoints"
- Click "Resume script execution".
- continue program execution
- go step by step through all stages of the program - line by line
- exit from current function where you are
- go to next function
- Here is the web page we will be working with for this article. Open it in a new tab: DEMO.
- In demo for Number 1 enter 5.
- Enter 1 for Number 2.
- Click Add Number 1 and Number 2.
- Look at the label below the inputs and button. She says that 5 + 1 = 51.
- Return to the demo and open DevTools by pressing Command+Option+I (Mac) or Control+Shift+I (Windows, Linux).
- Go to the tab Sources.
- Click Event Listener Breakpoints to expand the menu. DevTools reveals a list of event categories such as Animation And Clipboard.
- Expand event category Mouse.
- Select click.
- Returning to the demo, click again Add Number 1 and Number 2. DevTools will pause and highlight the line of code in the panel Sources:
- On the panel Sources in DevTools click Step into next function call.
- Now click the button Step over next function call.
- Look at the last line of code in updateLabel() :
- Click the button Resume script execution:
- Look at the lines of code already executed in updateLabel() . DevTools outputs the values of addend1, addend2 and sum.
- On the panel Sources DevTools click Watch. The section will open.
- Click Add Expression.
- Enter typeof sum .
- Press Enter. DevTools will show: typeof sum: "string" . The value to the right of the colon is the result of your Watch Expression.
The amount looks suspicious. It looks like it's not being evaluated as a number, but as a string. This is another one common reason errors.
Step 5: Check Variable Values
A common cause of errors is that a variable or function generates the wrong value. Many developers use console.log() to see how values change, but console.log() is a poor choice for at least two reasons: first, it may require manual editing of the code with big amount calls console.log(), secondly, you may not know which variable is associated with the error, so you will have to print several variables at once.
One alternative to console.log in DevTools is Watch Expressions. Use Watch Expressions to track changes in variable values. As the name suggests, Watch Expressions is not limited to just variables. You can save any valid JavaScript expression in Watch Expression:

As expected, sum is treated as a string, not a number. This is the same error that we talked about above.
Another DevTools alternative to console.log() is the console. Developers often use it to overwrite variable values when debugging. In your case, the console may be handy to check ways to fix the error. Example:

Step 6: Make Corrections
You have identified where the error is. All that remains is to fix it by editing the code and restarting the demo. You can edit JavaScript code directly to user interface DevTools:
The color will change to blue. In this mode, DevTools ignores any breakpoints you have set.
Enter numbers in the fields and test. Now everything should work as it should!
The ability to debug code is an important skill for a developer. It is important to understand and use the wide range of debugging tools that exist for specific language programming.
Unfortunately, debugging may not seem as obvious when working with JavaScript outside of full functionality. IDEs. At least — at first glance.
This article will look at how you can debug JavaScript code in Google Chrome Dev Tools and in the Visual Studio Code editor.
Translator's note: by clicking on this link, you can see the video version of this article Debugging JavaScript in Google Chrome and Visual Studio Code in English.
Presets
In this article, the debugging process will be discussed using the example of a test application called “ Quick Chat»:

You have two ways to use this application. You can create it yourself using this a series of video lessons. Or you can use the source code already ready-made application"Quick Chat":

Whichever option you choose, you'll need to run the Quick Chat app locally.
You can run the application from Node.js ( how do I do it). Or use the plugin under Visual Studio Code called Live Server.
If you are new to working with this plugin, you can learn how to work with it using this video — Live Server Extension in Visual Studio Code.
Translator's note: video in English.
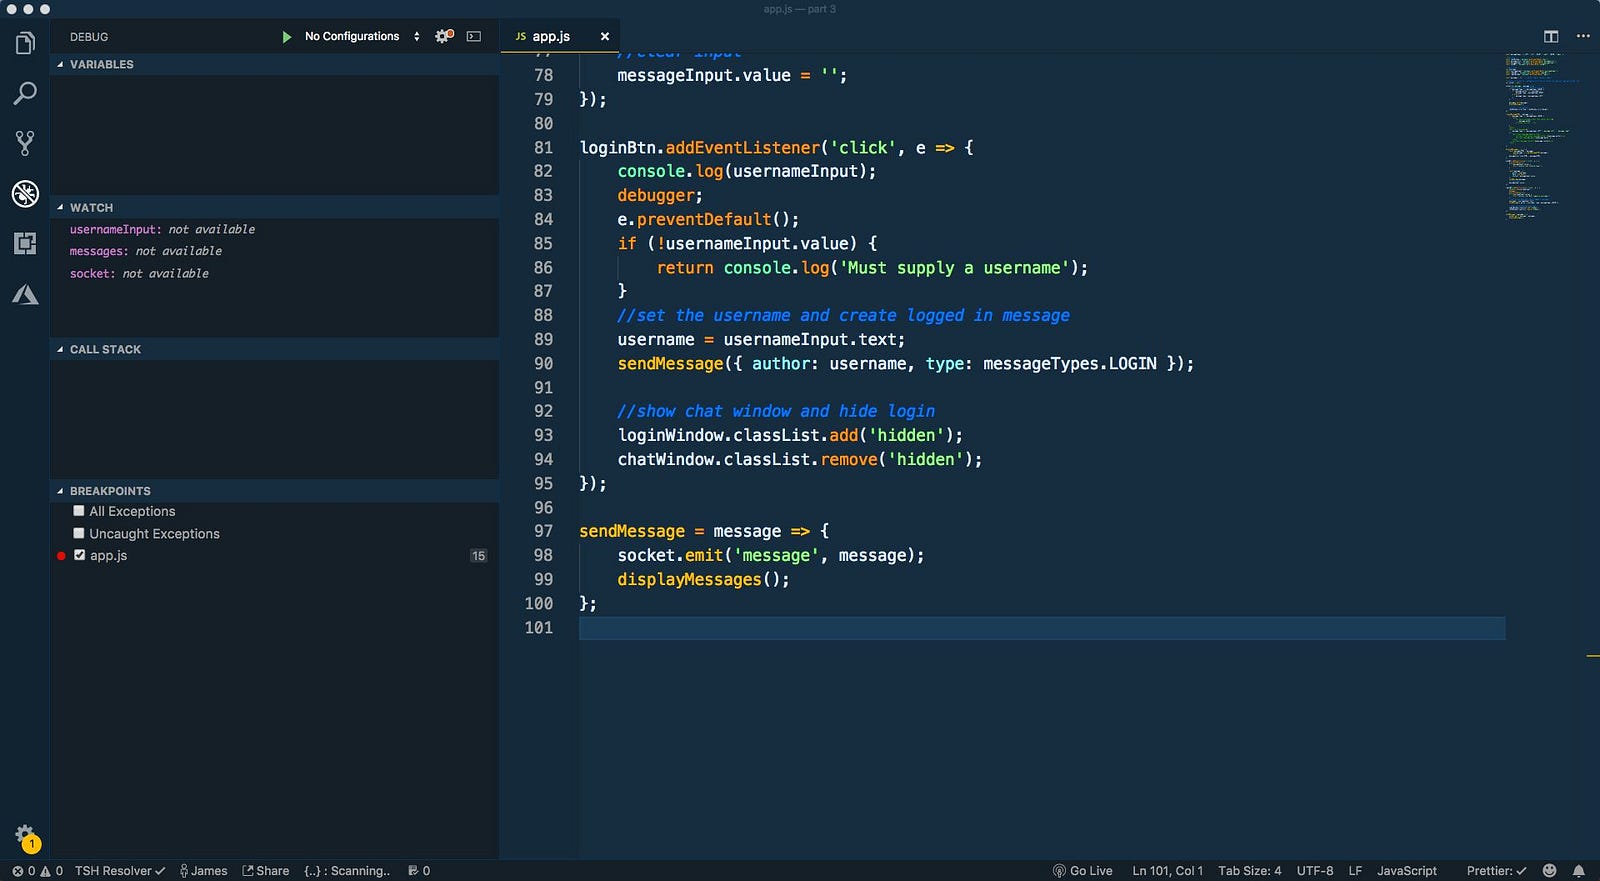
Technically I'm getting the username wrong by using usernameInput.text instead correct option usernameInput.value . If I made such a mistake in real life, my first thought would be to use the console.log() tool.
But this is not exactly the case that could help me, as you can see in the image below. If using console.log() was also your first thought, you have come to the right place and are doing the right thing by reading this article!

Debugging Basics
Let's start with the basics. The idea behind debugging is that inside program code you can set so-called breakpoints ( breakpoints) to stop program execution at a specific location.
This gives you, as a developer, the opportunity to look at the current state of the application and check, for example, the values of variables in it. You can even go further and track any variables of your choice so that whenever the application stops, you can check the values of those variables.
After setting a breakpoint ( breakpoint) in the code, as a rule, there are several options for further actions:
You will also have access to view the call stack ( call stack). In other words, since functions in a program can call other functions for execution, you can view call history these functions.
Debugging in Google Chrome
To start debugging your application in the Google Chrome browser, add a clickBtn button event handler operator debugger as below:

When the program execution reaches the line with the debugger statement, the application will be suspended and the debugging tools of the Google Chrome browser will be automatically activated.
Please note that the application in the browser window is shaded gray to show that it is paused. Also note that the Sources tab in Chrome Dev Tools opened automatically:

Let's see what we see on the Sources tab.
Sources Tab
The first thing you might notice on this tab is a copy of the application's source code. This is the code that the browser has loaded and works with.
You may also notice that the line of code with the debugger statement is highlighted in blue to tell us that the application has stopped executing at this point in the code:

The Google Chrome browser provides us with the ability to view the source code of an application. Having the source code in front of you, you can install in it breakpoints.
A breakpoint is intended to indicate a place where program execution should be stopped. Operator debugger, which we used in the example above, functions like breakpoint, but in the application source code it’s like this breakpoint there doesn't have to be only one.
Breakpoint - intentional stopping or pausing of program execution
To add breakpoint, you need to click on gutter — the field to the left of the numbering of lines of code. Once you complete this action, you will notice that the Google Chrome browser has automatically added this breakpoint to the "Breakpoints" list:

Scope tab
The Scope tab is where you can monitor variables in your application. Please note that this tab has three sections: local scope ( Local), global scope ( Global) and script section ( Script).
In the scripts section, you can track variables in the scope of the current script:

You will spend most of the time debugging the application in this tab. This is a much more efficient alternative to using multiple console.log() s.
Watch tab
As mentioned earlier, in addition to viewing variables in the Scope tab, you can also define variables whose values you would like to monitor throughout the program's execution.
By adding a variable in the Watch tab, each time you set a breakpoint, you can quickly check the value of that variable (which may be undefined depending on where you are in the code).
Click the plus sign and enter the name of the variable you want to monitor, in our case usernameInput:

Stepping, call stack, and breakpoint list
The "Sources" tab section, located in the lower left corner of the debugger window, allows you to view a list of breakpoints, the call stack ( call stack) etc.

IN call stack There is only one function which is the event handler for the login button. The function is listed because it is the only function that was called on this moment. Since some functions can call other functions for execution, this chain will be updated accordingly.
Also notice the arrow buttons at the top of the screen. These correspond to the functions above for continuing execution of your code or walking through it line by line ( stepping). I would recommend testing these buttons a little to get used to how the code can be executed.
Finally, there are Various types breakpoints that can be set. Let's look at an example of creating a conditional breakpoint ( conditional breakpoint), which will only fire when a certain condition is met.
For example, let's say we want to prevent an event on the login button from being processed only when the user tries to log in without entering a username.
We can do this by right clicking on the gutter field and creating breakpoint with the following condition — usernameInput.text === "" :

In case of debugging Quick apps Chat, if you click the login button without a username, this will be launched breakpoint. Otherwise, the code will continue to execute as usual.
Please note that there are even more available options breakpoints, which are not discussed in this article.
Debugging in Visual Studio Code
Chrome Developer Tools is one of the best of its kind. As you have already seen, it offers excellent features and functionality for debugging the application.
However, the Visual Studio Code development team has done big job in order to make the debugging process in this editor even more perfect.
I really like Visual Studio Code and spend more time in it than any other code editor. This process also includes debugging.
To start debugging code in VS Code, you will need to install the Debugger for Chrome plugin:

Let's take a look at the Debug tab. By default, it is located in the editor's sidebar. Open this tab by clicking on the icon that looks like a bug ( bug).
Once you open this panel, you will see tools very similar to those we saw in Google browser Chrome — variables, call stack, breakpoints:
Majority functionality, which we dealt with in Chrome Dev Tools, are also available in VS Code.
Now that we're familiar with the Debug tab, we need to create a configuration that will tell the VS Code editor how to debug our application.
VS Code stores the debug configuration in a launch.json file inside the .vscode folder. To have VS Code create this file for us, in the editor menu, open the “No Configurations” drop-down list and select “Add Configuration”.
VS Code stores the debug configuration in a file called launch.json inside the .vscode folder

Then from this list select "Chrome".
From the author: console.log can tell you a lot about your application, but it doesn't allow you to truly debug your code. The new JS debugger in Firefox will help you write code faster and without bugs. An article about the operating principle of this debugger.
In this example, we will open a very simple application that makes JavaScript debugging easy. The application itself runs on basic open source JS frameworks. Open it in latest version Firefox Developer Edition and run debugger.html using the combination Option keys+ Cmd + S on Mac or Shift + Ctrl + S on Windows. The debugger is divided into 3 panels: a file list panel, a code panel, and a toolbar.

The toolbar is divided into toolbar, watch expressions, breakpoints, call stack and areas.

Stop using console.log
We want to use console.log to debug our code. We just add a call to the code to find out the value of the variable, and that’s it, right? This approach will work, but it is cumbersome and time-consuming. In this example, we will step through the application using debugger.html to find the value of a variable.
With debugger.html you can dive deeper into your code by simply adding a breakpoint on a line. Breakpoints pause the debugger so you can look at the code. In this example, we will add a breakpoint on line 13 of the app.js file.

Now add the task to the list. The code will stop at the addTodo function, and we can look at the value of the field in the code. Hover over a variable to see its value, etc. This way you can see anchors, applets, child elements etc.:

The same information can be found in the Areas panel.
When the script is paused, you can execute its lines step by step using the toolbar. The Resume/Pause buttons do exactly what they say. The Step over button performs current line code, Enter – goes inside the function, Exit – executes the current function before exiting its call.

Monitor the value of a mono variable also using watch expressions. Simply enter an expression in the Expressions to Watch box and the debugger will watch for it as your code runs. In the example above, you can add title and to-do expressions and the debugger will break down the values when they are available. Especially useful when:
You step through the code and watch the value change;
You debug the same code many times and want to see common values;
You're trying to figure out why that damn button isn't working.
You can also debug React/Redux applications using debugger.html. How it works:
Navigate to the component you want to debug.
See the component diagram on the left (functions in a class).
Add breakpoints to appropriate functions.
Press pause and observe the properties and states of the component.
The call stack is simplified, so you see application code mixed with the framework.
debugger.html allows you to look at confusing or minified code that may cause errors. Especially useful when working with common frameworks like React/Redux. The debugger knows about the component you paused on and will show a simplified call stack, component diagram, and properties. Below, developer Amit Zur explains how he uses the Firefox code debugger on JS Kongress:
If you'd like to take a closer look at the new debugger.html, check out the Mozilla Developer Playground. We've created a series of tutorials to help developers learn how to effectively use the tool to debug code.
Open Source Developer Tools
The debugger.html project was launched approximately 2 years ago along with a complete overhaul of Firefox DevTools. We wanted to move DevTools to modern technologies, open them to developers around the world. And because the technology is open, it can freely grow into something the small group at Mozilla could never have imagined.
JS is the foundation of any advanced web application, so a powerful debugger was a core part of the toolkit. We wanted to create something fast, easy to use, adaptable - able to debug any new JS framework. We decided to use popular web technologies because we wanted to work closer to the community. This approach would improve the debugger itself - if we adopted Webpack and started using the build tool and source maps internally, we would want to improve the mapping between sources and hot boot.
debugger.html is written in React, Redux and Babel. React components are lightweight, testable, and easy to design. For rapid UI prototyping and documentation common components we use React Storybook. This makes it easier to work with different JS frameworks (such as React). Babel front-end allows you to do things like display the Component class and its functions in the left sidebar. We can also set breakpoints on functions and they won't move if you change the code.
Redux actions are a pure UI API. However, they can also be used to create an independent JS Debugger CLI. The Redux repository has selectors to query the current debugging state. Our unit tests run Redux actions and simulate browser responses. Integration tests bring the browser into action with Redux debugger actions. The functional architecture itself is designed for testing.
We relied on the community Mozilla developers at every step. The project was published on GitHub, and our team reached out to developers around the world, and they responded. At the very beginning, automated tests were critical to the community. The tests performed regression and documented behavior that could easily be overlooked. That is why one of the first steps was to write unit tests for Redux actions and Flow types for Redux storage. In fact, the community ensured that Flow and Jest coverage helped ensure that every file was written and tested.
As developers, we believe that tools are stronger the more developers are involved. Our core team It was always small (2 people), but on average there were 15 assistants per week. The community gave us different perspectives, which helped us anticipate challenges and write features we never imagined. We are currently formatting call stacks for 24 libraries. We didn't even know about many of them. We also show Webpack and Angular maps in the source tree.
We plan to move all Firefox DevTools to GitHub so that more people can use and improve them. We will gladly accept your help. You can go to our project page debugger.html on GitHub. We've written a whole list of instructions for running the debugger on your machine, where you can change whatever you want. Use it to debug JS code for anything - browsers, terminals, servers, phones, robots. If you see something that can be improved, write to us on GitHub.
Forget about debugging with console.log forever! Learn how to use breakpoints to debug code in Chrome Developer Tools
Translation of the articleBrandon Morelli : Learn How To Debug JavaScript with Chrome DevTools . Published with permission of the author.

Finding and fixing errors can be difficult. You may be tempted to use console.log() uncontrollably to get your code to work correctly. It's finished!
This article is about the correct way to debug! You'll learn how to use Chrome Developer Tools to set breakpoints and examine code. This approach is often the most effective method Finding and fixing errors in the code.
This tutorial shows how to debug one specific problem, but a similar workflow is useful for debugging all types of JavaScript errors.
Step 1: Reproducing the error
Reproducing the error—the first step to debugging—means discovering the series of actions that lead to its appearance. You may have to reproduce the bug many times, so it is advisable to eliminate any unnecessary steps.
To reproduce the bug we are going to fix during this manual, follow the instructions below:
Oops. This is an incorrect result. The result should be 6. This is the error we are going to fix.
Step 2: Pausing code execution using a breakpoint
DevTools allows you to pause your code mid-execution and retrieve the values everyone variables at this point in time. The tool for pausing code is called a breakpoint. Try it now:
When you select click you set a breakpoint based on all click events. When the click occurs any node and this node has a click event handler, DevTools automatically stops execution on the first line of click handler code for this node.
Step 3: Explore the Code
One common cause of errors is that the script is executed in the wrong order. By examining the code, you can execute the code one line at a time and find out exactly where it is executed in an unexpected order. Try it now:
This button allows you to execute the onClick() function one line at a time. DevTools will stop execution and highlight the following line of code:
If (inputsAreEmpty()) (
This tells DevTools to execute the inputAreEmpty() function without going into it. Please note that DevTools skips several lines of code. This occurs because inputAreEmpty() evaluates to false , so the if statement block of code is not executed.
This is the basic idea behind code exploration. If you look at the get-started.js code, you'll see that the error is probably somewhere in the updateLabel() function. Instead of examining every line of code, you can use a different type of breakpoint to pause the code closer to where the error occurs.
Step 4: Set another breakpoint
The most common breakpoints set on lines of code are when you have a specific line of code that you want to pause. Try it now:
To the left of the code you can see the number of that particular line: 32 . Click on it. DevTools will place a blue icon over the number. This means there is a breakpoint on that line. DevTools will now always pause before it.
The script will run until it hits a breakpoint.
The sum value looks suspicious. It looks like it is being treated as a string when it should be a number. This may be the reason for our error.
Step 5: Checking the Variable Values
Another common cause of errors is when a variable or function generates values other than expected. To see how values change over time, many developers use console.log() , but console.log() can be tedious and ineffective for two reasons. First, you may need to manually edit code with a lot of console.log() calls. Second, you may not know exactly which variable is associated with the error, so you may need to log many variables.
Watch Expressions is a DevTools alternative to console.log() . Use Watch Expressions to track the value of variables over time. As the name suggests, Watch Expressions is not limited to just variables. You can store any valid JavaScript expression in Watch Expression. Try it now:
As expected, sum is treated as a string when it should be a number. This is the reason for our error in the demo.
Firebug contains a powerful AvaScript debugger that gives you the ability to pause execution at any time and view every variable at that moment. If your code is sluggish, use a JavaScript profiler to measure performance and quickly find bottlenecks.
Find scripts with ease
Many web applications consist of large number files, and finding the one to debug can be a routine and boring task. Firebug's script selection menu sorts and organizes files into a clear, easy-to-understand list that helps you find any file with the click of a finger.

Pause execution at any line
Firebug allows you to set breakpoints, which tell the debugger to stop executing the script when it reaches specific string. While execution is suspended, you can view the values of any variables and inspect objects.
To set a breakpoint, click on any line number and a red dot will appear there, indicating that the breakpoint has been set. Click on the red dot again to remove the breakpoint.

Pause execution only if...
Breakpoints can cause problems if triggered too often. Sometimes we want to pause execution only when certain conditions are met. Firebug allows you to set "conditional" breakpoints. They check an expression that must be true for the breakpoint to work.
To set a conditional breakpoint, simply right-click on any line number. A bubble will appear prompting you to enter a javascript expression. You can right click again at any time to change the expression, or left click to get rid of the breakpoint.

One step at a time
When the debugger has paused execution, you can continue the script one step at a time. This allows you to clearly see how executing a specific line affects variables and objects.
You can also continue execution for more than one line. Select in context menu the desired line"Run to this Line" to continue execution to this line.

I get interrupted when I make mistakes
You don't always choose the debugger... Sometimes the debugger chooses you. Firebug gives you the ability to jump into the debugger automatically when an error occurs, so you can investigate the conditions under which the problem occurred.

Unfolded stack
When the debugger pauses, Firebug shows you the call stack, which is the collection of nested function calls that are currently running and waiting to return.
The call stack is represented by a compact strip of buttons in the panel, each with the name of a function on the stack. You can click any button to jump to the line where the function is paused and look at the values of local variables from inside the function.

Expression Watching
When debugging, you often want to see the meaning of complex expressions or objects that are buried in the DOM. Firebug allows you to print an arbitrary javascript expression, the value of which will be updated at each debugger step.
When typing expressions, remember that you can use Tab key for auto-completion of object properties.

Variable Hints
While execution is paused, you can move the mouse over any variables of the current function, viewing tooltips with values. This is a great way to keep your eyes on the code and get answers while you read.

Profile JavaScript Performance
Your web application is almost perfect. You have worked through all the errors, done stylish design and users love it. Just one problem - some features are slow and you're not sure why...
With Firebug, you no longer have to wonder why your code is running slow. Using the Firebug profiler, you can separate flies from cutlets in literally seconds.
To use the profiler, simply go to the Console tab and click the "Profile" button. Then use your application for a while or reload the page and click "Profile" again. You'll see a detailed report that shows which functions were called and how long each one took.

Logging function calls
Sometimes the problematic function is called so many times that you cannot go into the debugger each time. You just want to know when it is called and with what parameters.
To track all function calls, simply right-click on the Script tab and select "Log calls to "function name"". Then go to the console and watch the calls appear in the log...

Go straight to line 108
Often you want to go clearly to the desired line of your script. There is nothing easier, just type the line number in the window quick search, putting # first, as shown in the left screenshot.


