Creating triggers in sql server. Triggers: creation and use
 Triggers Overview Triggers DML Triggers DDL Triggers DML Events: Insert, Delete, Update Logon Triggers DDL Events: Create, Drop, Alter Logon Introduced in SQL Server 2005
 DML - trigger Object - table, VIEW Event - insert, update, delete for the table and for the VIEW. Activation time – before (instead of) or after the execution of the statement.
 DML triggers Trigger is a block that is executed automatically every time a certain event occurs - as opposed to a procedure, which must be called explicitly Event - INSERT, UPDATE and DELETE for a table, view - a trigger cannot be defined for a query
 DML triggers A trigger is created on one database table. It can also access other tables and objects in other databases. Triggers cannot be created on temporary tables or system tables, but only on user-defined tables or views. The table by which the trigger is defined is called the trigger table.
 When Triggers Are Needed To evaluate the state of a table before and after data changes and take action based on that difference. Multiple DML triggers of the same type (INSERT, UPDATE, or DELETE) on a table allow you to take several different actions in response to a single data modification statement.
 When triggers are needed For cascading changes in related database tables (if they cannot be accomplished using cascading referential integrity constraints). To prevent accidental or incorrect INSERT, UPDATE, and DELETE operations To implement integrity constraints that cannot be specified using a CHECK constraint. DML triggers can reference columns of other tables.
 More... Logging and auditing. Using triggers you can track changes to tables that require support higher level security. Table change data may be stored in other tables and include, for example, user ID, time of update operation; the updated data itself, etc. Data reconciliation and cleaning. Any simple SQL statement that updates a table can be associated with triggers that perform corresponding updates on other tables. Operations not related to database modification. Triggers can perform more than just database update operations. The SQL standard allows you to define stored procedures (which can be called from triggers) that send email, printing documents, etc.
 When you should not use triggers You do not need to implement with triggers the capabilities achieved by using declarative DBMS tools (integrity constraints or foreign keys) Avoid complex chains of triggers
 Tips Don't use triggers when you can use a CHECK constraint. Don't use a CHECK constraint when you can use a UNIQUE constraint.
 Basic trigger parameters Table (or view) name Trigger time: AFTER(FOR) or INSTEAD OF Event: INSERT, UPDATE, DELETE (TRUNCATE TABLE is not a delete!) Trigger body! The sequence of triggers of the same type is arbitrary
 Grouping Events For example, you could create a trigger that fires when an UPDATE or INSERT statement is executed, which we'll call an UPDATE/INSERT trigger. You can even create a trigger that will fire when any of the three data modification events occur (UPDATE/INSERT/DELETE trigger).
 Trigger Rules Triggers are fired after the statement that caused them to fire completes. For example, an UPDATE trigger will not fire until the UPDATE statement is executed. If any statement attempts to perform an operation that violates some table constraint or causes some other error, then its associated trigger will not fire.
 Trigger Rules A trigger is considered part of a single transaction along with the statement that calls it. Therefore, you can call a rollback operator from a trigger, and this operator will rollback both the trigger and the corresponding data modification event. If an error occurs while executing the trigger, the entire transaction is automatically rolled back. A trigger fires only once per statement, even if that statement affects multiple rows of data.
 Example CREATE TRIGGER trg ON my_table FOR INSERT, UPDATE, DELETE AS select "this is trigger"
 When a trigger is called, the SQL statements specified after the AS keyword will be executed. You can put multiple statements here, including programming constructs such as IF and WHILE.
 Selecting a trigger type INSTEAD OF triggers are used to: – Selectively disable the execution of a command for which a trigger is defined (checking a precondition); – Counting column values before the INSERT or UPDATE command completes. AFTER triggers are used for: – Accounting for completed operations; – Checks the post-conditions of command execution.
 Loops and Nesting SQL Server allows you to use nested triggers, up to 32 levels deep. If any nested trigger performs a ROLLBACK operation, subsequent triggers are not fired. Triggers are canceled if an infinite loop occurs.
 INSTEAD OF Trigger The INSTEAD OF trigger executes instead of running the SQL statement. This overrides the action of the starting statement. You can define one INSTEAD OF trigger per INSERT, UPDATE, or DELETE statement. An INSTEAD OF trigger can be defined on a table and/or a view. You can use cascades of INSTEAD OF triggers by defining views on top of views, where each view has a separate INSTEAD OF trigger. INSTEAD OF triggers are not allowed on modifiable views that contain the WITH CHECK option.
 AFTER Trigger AFTER triggers can only be defined on tables. The AFTER trigger fires after all operations specified in the trigger statement or SQL statements. This includes the entire cascade of link actions and all constraint checks.
 AFTER Trigger If you have multiple AFTER triggers defined by a table for specific operator or a set of statements, you can specify which trigger will fire first and which trigger will fire last. If you have more than two triggers defined, you can specify the firing order of only the first and last trigger. All other triggers are activated randomly.
 AFTER Trigger Order sp_settriggerorder @triggername = "Another. Trigger", @order = "first" sp_settriggerorder @triggername = "My. Trigger", @order = "last" sp_settriggerorder @triggername = "My. Other. Trigger", @order = "none" sp_settriggerorder @triggername = "Yet. Another. Trigger", @order = "none"

 Using inserted, deleted Special tables: inserted – inserted values (for INSERT, UPDATE) deleted – deleted values (for UPDATE, DELETE)
 Using the deleted and inserted tables When you create a trigger, you have access to two temporary tables named deleted and inserted. They are stored in memory, not on disk. These two tables have the same structure as the table (same columns and data types) on which this trigger is defined.
 Using deleted and inserted tables The deleted table contains copies of rows that were affected by a DELETE or UPDATE statement. Rows deleted from the table of this trigger are moved to the deleted table. The deleted table data can then be accessed from this trigger. The inserted table contains copies of rows that were added to the table of this trigger when an INSERT or UPDATE statement was executed. These rows are added simultaneously to the trigger table and the inserted table.
 Using deleted and inserted tables Because an UPDATE statement is processed as a DELETE followed by an INSERT, when you use an UPDATE statement, the old row values are copied to the deleted table and the new row values are copied to the trigger table and the inserted table. The INSERT => deleted trigger is empty. The DELETE => inserted trigger is empty but no error message will appear!
 Creating a trigger CREATE TRIGGER [ schema_name. ]trigger_name ON ( table | view ) ( FOR | AFTER | INSTEAD OF ) ( [ INSERT ] [ , ] [ UPDATE ] [ , ] [ DELETE ] ) AS ( sql_statement )
 CREATE TRIGGER plus_1 ON table 1 instead of insert AS insert table 1 (id, col 1) select id+1, col 1 from inserted;
 Handling Exceptions The ROLLBACK command instructs the server to stop processing the modification and disallow the transaction. There is also a RAISEERROR command that you can use to send an error message to the user. TRY...CATCH
 Exception handling error message RAISERROR ("Error raised because of wrong data.", -- Message text. 16, -- Severity. 1 -- State.); Severity – a number from 0 to 25 User defined error severity level. Any user can specify 0 to 18. 19 to 25 can only be specified by sysadmin 20 to 25 are considered fatal - the connection to the client is lost and an error message is logged in the application and error logs. State An integer from 0 to 255. Negative values or values greater than 255 result in an error being generated. If the same custom error occurs in multiple locations, you can use the unique status number for each location to determine where the error occurred in the code.
 Error Functions The ERROR_LINE() function returns the line number where the error occurred. The ERROR_MESSAGE() function returns the text of the message that will be returned to the application. The text contains values for substitution parameters such as length, object names, or time. ERROR_NUMBER() returns the error number. The ERROR_PROCEDURE() function returns the name of the stored procedure or trigger in which the error occurred. This function returns NULL value, if the error was not committed inside a stored procedure or trigger. ERROR_SEVERITY() returns the severity level of the error. ERROR_STATE() returns the state.
 Example of a trigger CREATE TRIGGER Low. Credit ON Purchasing. Purchase. Order. Header AFTER INSERT AS BEGIN DECLARE @creditrating tinyint, @vendorid int ; SELECT @creditrating = v. Credit. Rating, @vendorid = p. Vendor. ID FROM Purchasing. Purchase. Order. Header p JOIN inserted i ON p. Purchase. Order. ID = i. Purchase. Order. ID JOIN Purchasing. Vendor v ON v. Vendor. ID = i. Vendor. ID ; IF @creditrating = 5 RAISERROR ("This vendor""s credit rating is too low to accept new purchase orders.", 16, 1) ; END
 Managing triggers Disabling/enabling a trigger: – DISABLE/ENABLE TRIGGER trigger_name ON object_name Disabling/enabling all table triggers: – DISABLE/ENABLE TRIGGER ALL ON object_name Changing a trigger: – ALTER TRIGGER trigger_name … Deleting a trigger: – DROP TRIGGER trigger_name

 Activate/deactivate a trigger DISABLE TRIGGER (trigger_name [ , . . n ] | ALL ) ON ( object_name ) ; ENABLE TRIGGER (trigger_name [ , . . n ] | ALL ) ON ( object_name)
 Using triggers Security – Deny access based on data values Accounting – Change logging Data integrity – Complex integrity rules – Complex referential integrity Derived data – Automatic calculation of values
 Trigger Types Function AFTER Trigger INSTEAD OF Trigger Entities Tables and Views Number of Triggers per Table/View Multiple per Event One Trigger per Event No Constraints INSTEAD OF UPDATE and DELETE cannot be defined for tables that are subject to cascading referential integrity constraints. Cascading Links After next operations: Handling constraints. Execution Declarative referential actions. Creating inserted and deleted tables. The action that fires the trigger. Before the next operation: Processing constraints. Instead of the following operation: The action that fires the trigger. After the following operations: Creation of inserted and deleted tables.
 DDL - trigger DDL triggers can be used in administrative tasks such as auditing and throttling database operations. These triggers affect all commands of the same type in the entire database or server.
 DDL - Triggers DDL triggers, like regular triggers, cause stored procedures to fire in response to an event. Fire in response to a variety of Data Definition Language (DDL) events. These events generally correspond to Transact-SQL statements that begin with the CREATE, ALTER, or DROP keywords.
 Tasks for DDL triggers Prevent certain changes from being made to the database schema. Perform some actions on the database in response to changes in the database schema. Record database schema changes or events. DDL triggers fire only after the corresponding DDL instructions have been executed. DDL triggers cannot be used as INSTEAD OF triggers.
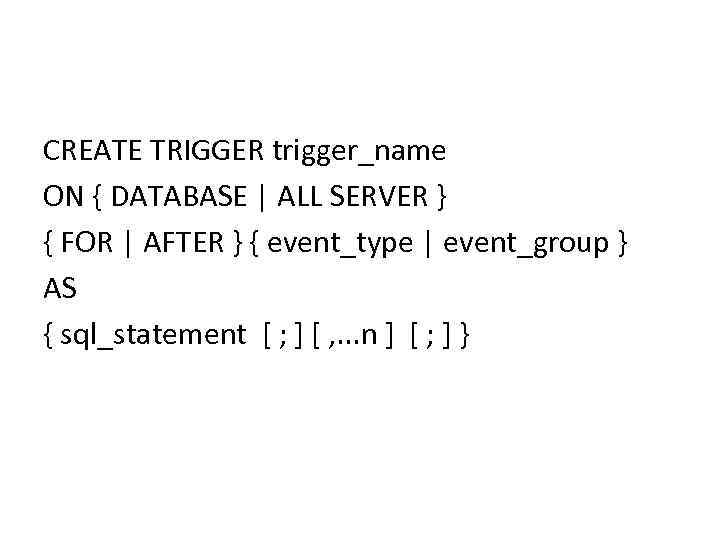 CREATE TRIGGER trigger_name ON (DATABASE | ALL SERVER) ( FOR | AFTER ) ( event_type | event_group ) AS ( sql_statement [ ; ] [ , . . n ] [ ; ] )
 Creating/deleting DDL-tr CREATE TRIGGER ddl_trig_database ON ALL SERVER FOR CREATE_DATABASE AS PRINT "Database Created." DROP TRIGGER ddl_trig_database ON ALL SERVER;
 DDL - trigger CREATE TRIGGER safety ON DATABASE FOR DROP_TABLE, ALTER_TABLE AS PRINT "You must disable Trigger "safety" to drop or alter tables!" ROLLBACK ;
 You can create multiple DDL triggers for a single Transact-SQL statement. The DDL trigger and the instruction that fires it are executed in the same transaction. ALTER DATABASE events that occurred inside a DDL trigger cannot be rolled back. DDL triggers execute only after a Transact-SQL statement completes. DDL triggers cannot be used as INSTEAD OF triggers. DDL triggers do not create inserted and deleted tables.
 Logon - trigger Logon triggers execute stored procedures in response to the LOGON event. This event is raised when a user session is established with an instance of SQL Server. Login triggers fire after the login authentication phase has completed, but before the user session is actually established.
 Logon - trigger CREATE TRIGGER trigger_name ON ALL SERVER ( FOR| AFTER ) LOGON AS ( sql_statement )
There are already many articles on the Internet about sql triggers, but I’ll add one more with adequate examples to reinforce the material for those who are “in the know” and to better understand the material for those who have just begun to comprehend the “zen of sql”. At the same time, I’ll create a discussion on the topic.
Let me say right away that my opinion is just my opinion, and sometimes it is very categorical. For a number of reasons, you have to work with highly loaded sites and complex web applications.
One valuable experience learned from working on them was to keep track of priorities and statistics. What does it mean? It's simple: if you have a blog and it has 2-3-4-10012 million visitors per day, and articles are written only 1-2-3-3435 times a day (an order of magnitude less than the number of views), then the speed of saving the article ( and the complexity of this) relative to the speed of display of the article may be proportionally less. The more we show, the more critical it is the display, and not the saving of the article/page/table. Which doesn't mean you can relax. Saving an article in 3-5-10 seconds on a blog is within the limits of adequacy, but generating a page in more than 2 seconds (+ while scripts and styles with pictures are loaded) is on the verge of “what a slow site, I’ll read something else” , and even worse, “I’ll go buy it somewhere else.”
If we take an average website with voting/karma, comments, page impression counter, etc., then many developers immediately come to mind with constructions like SELECT count(*) FROM comment WHERE comment.page=page_id. Well, just think about calculating the amount of ratings and the amount of comments for each article. Oh, we have 10 articles from each section on the main page. With a traffic of 10 people per second, on an average VPS, you can afford 60-100 SQL queries per page (hello, Bitrix).
But to hell with the lyrics (I'm probably tired of it already). Bare data:
blog table
CREATE TABLE IF NOT EXISTS `blog` (`id` int(11) NOT NULL AUTO_INCREMENT, `title` varchar(128) NOT NULL, `text` text NOT NULL, `creation` datetime NOT NULL, `modification` datetime NOT NULL , `img` varchar(128) NOT NULL DEFAULT "default.png", `status` tinyint(4) NOT NULL DEFAULT "2", `user_id` int(11) NOT NULL, `rate` int(11) NOT NULL , `relax_type` tinyint(4) NOT NULL, `timers` timestamp NOT NULL DEFAULT CURRENT_TIMESTAMP, `contest` tinyint(1) NOT NULL DEFAULT "0", `views` int(11) NOT NULL DEFAULT "0", `comment ` int(11) NOT NULL, `url` varchar(128) NOT NULL, PRIMARY KEY (`id`), UNIQUE KEY `url` (`url`), KEY `country_id` (`country_id`), KEY `user_id ` (`user_id`), KEY `status` (`status`)) ENGINE=InnoDB DEFAULT CHARSET=utf8 AUTO_INCREMENT=1456435 ;
Comments table
CREATE TABLE IF NOT EXISTS `comments` (`owner_name` varchar(50) NOT NULL, `owner_id` int(12) NOT NULL, `id` int(12) NOT NULL AUTO_INCREMENT, `parent_id` int(12) DEFAULT NULL, `user_id` int(12) DEFAULT NULL, `text` text, `creation` timestamp NULL DEFAULT CURRENT_TIMESTAMP, `status` int(1) NOT NULL DEFAULT "0", PRIMARY KEY (`id`), KEY `owner_name` ( `owner_name`,`owner_id`), KEY `parent_id` (`parent_id`)) ENGINE=MyISAM DEFAULT CHARSET=utf8 AUTO_INCREMENT=243254252 ;
As you can see, in the blog table, each article has a comment counter (comment field).
Simple practice:
1. Added a comment - increased the counter for the blog
2. Deleted/hidden the comment - decreased the counter.
Doing this in code is convenient and familiar, but there is a more convenient tool - triggers.
And so, we have 2 events (actually 3): the creation of a comment and its deletion (the third event is a change in its status (“deletion”, ban, etc.).
Let's consider only creation and deletion, and let changing the status be your homework.
There is one feature in the example: comments can be for several types of articles.
Creating a comment:
CREATE TRIGGER `add_count_comment` AFTER INSERT ON `comments` FOR EACH ROW BEGIN // for the user in personal account let's count how many comments he wrote UPDATE user SET user.countcomment= user.countcomment+1 WHERE user.id = NEW.user_id; // determine what the comment refers to and immediately increase the counter in these tables CASE NEW.`owner_name` WHEN "Blog" THEN UPDATE `blog` SET `blog`.`comment` = `blog`.`comment`+1 WHERE `blog `.id = NEW.`owner_id` ; WHEN "Article" THEN UPDATE `article` SET `article`.`comment` = `article`.`comment`+1 WHERE `article`.`id` = NEW.`owner_id` ; WHEN "PopulatePlace" THEN UPDATE `populate_place` SET `populate_place`.`comment` = `populate_place`.`comment`+1 WHERE `populate_place`.`id` = NEW.`owner_id` ; END CASE; // here we make it easier for ourselves to work with news feeds // we write the url of the article right away, so that THEN we don’t have to make unnecessary selections CASE NEW.`owner_name` WHEN "Blog" THEN SET userurl = (SELECT url FROM `blog` WHERE `blog`. id= NEW.`owner_id`); WHEN "Article" THEN SET userurl = (SELECT url FROM `article` WHERE article.id=NEW.`owner_id`); WHEN "PopulatePlace" THEN SET userurl = ``; END CASE; // write the title of the article right away so as not to make a selection THEN CASE NEW.`owner_name` WHEN "Blog" THEN SET usertitle = (select title from `blog` where blog.id=NEW.`owner_id`); WHEN "Article" THEN SET usertitle = (select title from `article` where article.id=NEW.`owner_id`); WHEN "PopulatePlace" THEN SET usertitle = ` `; END CASE; INSERT INTO user_has_events VALUES (NEW.user_id,NEW.id,"Comments",NOW(),userurl , usertitle); END
The same goes for deleting a comment:
CREATE TRIGGER `del_count_comment` AFTER DELETE ON `comments` FOR EACH ROW BEGIN UPDATE user SET user.countcomment= user.countcomment -1 WHERE user.id = OLD.user_id; CASE OLD.`owner_name` WHEN "Blog" THEN UPDATE `blog` SET `blog`.`comment` = `blog`.`comment`-1 WHERE `blog`.`id` = OLD.`owner_id` ; WHEN "Article" THEN UPDATE `article` SET `article`.`comment` = `article`.`comment`-1 WHERE `article`.`id` = OLD.`owner_id` ; WHEN "PopulatePlace" THEN UPDATE `populate_place` SET `populate_place`.`comment` = `populate_place`.`comment`-1 WHERE `populate_place`.`id` = OLD.`owner_id` ; END CASE; END
And so what we got:
1. When you insert a comment, we automatically use sql server and the sum of comments was calculated for a specific comment object (article, page, note)
2. We have created a news feed (hello to all social networks, etc.)
3. When you delete a comment, we deduct all data.
4. We did not use any framework tools.
5. Retrieval of all necessary data occurs quickly (only 1 request when displaying a page, with the exception of other “left” data on it.)
We also have sphinx, which periodically makes selections of articles that have changed in the last minute. For this purpose, the blog has a modification field.
Trigger added:
CREATE TRIGGER `ins_blog` BEFORE INSERT ON `blog` // insert the time before saving the information by “replacing” the data.
FOR EACH ROW BEGIN SET NEW.modification = NOW(); END
Now, making a selection for the last minute, we will get all the documents that were added in the last minute.
CREATE TRIGGER `ins_blog` BEFORE UPDATE ON `blog` // insert the time before saving the information by “replacing” the data. FOR EACH ROW BEGIN SET NEW.modification = NOW(); END If the data changes, we will update it
search index
Same.
Usually, in an average project, everything that can be transferred to the sql server side is transferred. The sql server itself performs such operations faster and with fewer resources than can be done through the programming language used. UPD: The holivar devoted to the feasibility of complicating the structure of the database is declared open.
Trigger database is a specially designed named PL/SQL block stored in a database. Each trigger is associated with a specific table and is automatically launched by ORACLE when one of the DML statements (INSERT, DELETE, UPDATE) or a combination of them is executed on this table.
Purpose of triggers.
Triggers can be used:
1) to implement complex data integrity constraints that cannot be implemented in a standard way when creating a table;
2) preventing incorrect transactions;
3) performing procedures for comprehensive verification of access rights and data secrecy;
4) generating some expressions based on the values available in the columns of tables; 5) implementation of complex business rules for data processing (the ability to track “echo”, i.e. the ability to update the data of related tables when one table changes). Creating and enabling triggers. To create and
automatic switching on
trigger uses the following general syntax:
CREATE TRIGGER trigger_name
(BEFORE | AFTER)
< PL/SQL_блок >
(INSERT | DELETE | UPDATE)
BEFORE design | AFTER indicates when the trigger is fired. The BEFORE option means that the trigger will fire before the execution of the triggering DML statement; the AFTER option means that the trigger will fire after the execution of the activating DML statement.
INSERT | DELETE | UPDATE specifies the type of DML statement that fires the trigger. It is allowed, using the logical OR operation, to specify a set of activating operators, for example: INSERT OR DELETE. If when using UPDATE option a list of columns is specified, the trigger will be fired when one of the specified columns is modified; if there is no list of columns, then the trigger will be fired when any of the columns of the table associated with the trigger changes.
The FOR EACH ROW construction indicates the nature of the trigger action: string or operator. If the FOR EACH ROW clause is present, then the trigger is a string; in its absence, the trigger is operator. A statement trigger fires once before or after the DML statement that fires the trigger is executed, regardless of how many rows in the table associated with the trigger are modified. A row trigger is fired once for each row that is modified by the DML statement that fires the trigger.
Using the WHEN keyword, you can specify an additional restriction on the rows of the table associated with the trigger, when modified, the trigger can be fired.
The PL/SQL_block construct represents a PL/SQL block that ORACLE runs when the trigger is fired.
Classification of triggers. There are basically twelve types of triggers. The trigger type is determined by a combination of the following three parameters:
1) the nature of the trigger’s impact on the rows of the table associated with it (string or operator);
2) the moment the trigger is launched: before (BEFORE) or after (AFTER) the execution of the DML statement that activates the trigger;
3) the type of DML operator activating the trigger (INSERT, DELETE, UPDATE);
The order in which triggers are activated. If a table has several types of triggers, they are activated according to the following scheme:
1) the BEFORE operator trigger is executed (if there are several of them, then nothing can be said about the order of their execution);
2) the BEFORE string trigger is executed;
3) the DML operator activating the trigger is executed, followed by checking all data integrity constraints;
4) the AFTER string trigger is executed, followed by checking all data integrity constraints;
5) the AFTER operator trigger is executed.
Trigger predicates. If a trigger specifies a set of DML operators that activate the trigger (for example, INSERT OR DELETE), then to recognize which specific DML operator is executed on the table associated with the trigger, trigger predicates are used: INSERTING, DELETING, UPDATING. They are logical functions that return TRUE if the type of the activating operator matches the type of the predicate, and FALSE otherwise. To specify the same actions when executing different DML statements in conditional operator trigger predicates are combined using logical operations.
Pseudo-recordings. For string triggers, there are special constructs that allow, when executing DML operations on a table row, to access both the old values that were in it before modification and the new ones that will appear in the row after its modification. These constructs are called pseudo-records and are denoted old and new. The structure of these pseudo-records is identical to the structure of the row of the table being modified, but you can only operate on individual fields of the pseudo-record. The fields of a pseudo-record are accessed according to the following scheme: before old or new the symbol “:” is placed, then the name of the field is indicated through a dot. The values that pseudo-record fields take on when activating DML statements are executed are defined as follows.
INSERT statement - pseudo-record:new is equivalent to the row being inserted, and pseudo-record:old is NULL in all fields.
DELETE statement - pseudo-record:old is equivalent to the row being deleted, and pseudo-record:new is NULL in all fields.
UPDATE statement - pseudo-record:new is equivalent to the row resulting from the modification, and pseudo-record:old in all fields is the original row value.
Turning triggers on and off. A trigger stored in the database can be temporarily disabled without removing it from the database. To do this, use the following command:
ALTER TRIGGER trigger_name DISABLE;
You can enable a trigger after a certain period of time using the command
ALTER TRIGGER trigger_name ENABLE;
You can disable or allow the firing of all triggers associated with a certain table using the command
ALTER TABLE table_name (DISABLE | ENABLE) ALL TRIGGERS;
where the DISABLE option is used to disable and the ENABLE option is used to enable all triggers of a given table.
Removing triggers from the database. Destroying a trigger, i.e. deleting a trigger from the database, is done using the following command:
DROP TRIGGER trigger_name;
Obtaining information about triggers. Triggers are stored in a database, so information about them can be retrieved from the USER_TRIGGERS data dictionary view, for example with the following command:
SELECT * FROM USER_TRIGGERS;
Examples.
1. Create a trigger that, before inserting the next row into the KNIGA_POSTAVKA table, checks the presence of the specified book code in the KNIGA table. If the specified book code is not present in the KNIGA table, an exception should be generated with the corresponding message.
New rows are added to the KNIGA_POSTAVKA table using the INSERT statement. Since the trigger must fire before executing each INSERT statement, it must therefore be a string BEFORE trigger. To maintain data integrity, it is necessary to check whether the entered book codes are also in the KNIGA table. To do this, use a one-liner SELECT statement information is retrieved from the KNIGA table, where the BOOK_CODE field of the pseudo-record is used in the selection condition: new. If the number of rows with a given book code in the KNIGA table is equal to zero, an exception will be generated and a corresponding message will be issued.
Trigger TR1 is created by entering the following statement:
CREATE OR REPLACE TRIGGER TR1
BEFORE INSERT ON KNIGA_POSTAVKA
SELECT COUNT(*) INTO KOL FROM KNIGA
WHERE BOOK_CODE = :NEW.BOOK_CODE;
IF KOL = 0 THEN RAISE_APPLICATION_ERROR
(–20212,"The KNIGA table contains no information about this book");
The action of trigger TR1 can be checked by executing the following statement, which inserts a row into the KNIGA_POSTAVKA table and thereby causes trigger TR2 to be activated:
INSERT INTO KNIGA_POSTAVKA VALUES(21,15,’Ivanov’,15,
Since book code 15 is not in the KNIGA table, an exception will be thrown and a corresponding message will be issued.
2. Create a trigger that prohibits entering into the KNIGA table rows with a PRICE field value greater than 5,000 rubles, as well as increasing the price of books, information about which is stored in the KNIGA table, by more than 20%. If this requirement is violated, an exception must be generated with an appropriate message.
Since new rows are added to the KNIGA table as a result of executing the INSERT statement, and the value of the PRICE field in the KNIGA table, containing the price of the book, can be changed as a result of executing the UPDATE statement, the trigger specifies a set of triggering DML statements. Since the trigger must fire before executing each of the specified DML statements, it is therefore a string BEFORE trigger. Since the actions performed by the trigger are different for each of the triggering DML statements that modify the KNIGA table, the corresponding trigger predicates INSERTING and UPDAITING are used to recognize the type of DML statement. Due to the fact that when inserting new rows, the new value of the PRICE field must be checked, and when modifying the value of the PRICE field, the new value must be compared with the old value, it is necessary to use pseudo-records: new and: old.
Creating a TR2 trigger is done by entering the following statement:
CREATE OR REPLACE TRIGGER TR2
BEFORE INSERT OR UPDATE OF PRICE ON KNIGA
IF INSERTING THEN
IF:NEW.PRICE > 5000 THEN
RAISE_APPLICATION_ERROR
(–20102, "Records with a book price > 5000 cannot be made in the KNIGA table");
IF UPDATING THEN
IF:NEW.PRICE > :OLD.PRICE*1.2 THEN
RAISE_APPLICATION_ERROR
(–20103, “In the KNIGA table, you cannot change the price of a book by more than 20%”);
The action of the TR2 trigger can be tested by executing the following statements, which, by inserting rows into the KNIGA table and updating rows in the KNIGA table, thereby cause it to be activated.
Operator for inserting rows into the KNIGA table, causing trigger TR2 to be activated:
INSERT INTO KNIGA VALUES(21, "Dune", "Herbert", 5268, "Ast",
"Fantastic");
Row update operator in the KNIGA table, causing trigger TR2 to be activated:
UPDATE KNIGA SET PRICE=6000;
Since these statements violate the requirements for the value and modification of the price of books, an exception will be generated in all cases and a corresponding message will be issued.
3. Create a trigger that enters the created STAT table containing the columns:
publisher name – IZD,
number of books in the “Novel” genre – KOL_ROM,
number of books in the Fantasy genre – KOL_FAN,
with each modification of the table, KNIGA generates and enters in the corresponding columns of the STAT table the total number of books for each of the publishing houses in the context of the specified topics: “Novel” and “Fiction”.
Modification of the KNIGA table is carried out by executing the following DML statements: INSERT, DELETE or the UPDATE operator, which modifies the value of the GENRE column in the KNIGA table. Since actions to generate information in the STAT table are performed after the execution of each of the operators modifying the KNIGA table, this is an AFTER operator trigger by type. Since the actions performed by a trigger are the same for all types of operators that activate it, trigger predicates are not used. Before creating a trigger, the STAT table must be created.
Creating a STAT table can be accomplished by entering the following set of statements:
DROP TABLE STAT;
CREATE TABLE STAT
(IZD VARCHAR2(15),
KOL_ROM NUMBER(7),
KOL_FAN NUMBER(7)
Creating a TR3 trigger is done by entering the following statement:
CREATE OR REPLACE TRIGGER TR3
AFTER INSERT OR DELETE OR UPDATE OF GENRE
CURSOR V1 IS SELECT PUBLISHING HOUSE
COUNT(NAME) KOL1
FROM KNIGA WHERE GENRE = "Novel"
GROUP BY PUBLISHING HOUSE;
CURSOR V2 IS SELECT PUBLISHING HOUSE,
COUNT(NAME) KOL2
FROM KNIGA WHERE GENRE = "Fiction"
GROUP BY PUBLISHING HOUSE;
DELETE FROM STAT;
FOR Z1 IN V1 LOOP
INSERT INTO STAT VALUES(Z1.PUBLISHER,
FOR Z1 IN V2 LOOP
UPDATE STAT SET KOL_FAN = Z1.KOL2
WHERE IZD = Z1.PUBLISHER;
IF SQL%NOTFOUND THEN
INSERT INTO STAT VALUES(Z1.PUBLISHER, 0,
The action of the trigger can be tested by executing the following statements, which, by inserting rows into the KNIGA table, deleting rows and updating rows in the KNIGA table, thereby causing trigger TR3 to be activated.
Operators for inserting rows into the KNIGA table, causing trigger TR3 to be activated:
INSERT INTO KNIGA VALUES(46, "Heretics of Dune", "Herbert",368,
"Ast", "Fantastic");
INSERT INTO KNIGA VALUES(42, "Ingvar and Alder",
"Nikitin", 168, "Ast", "Roman");
Operators for deleting rows from the KNIGA table, causing trigger TR3 to be activated:
DELETE KNIGA WHERE NAME = "Cossacks";
Row modification operators in the KNIGA table that cause trigger TR3 to be activated:
UPDATE KNIGA SET GENRE="Fiction" WHERE NAME =
"Ingvar and Alder";
You can view information in the STAT table with the following statement.
- Learn the types of triggers that can be created on the MS SQL Server 2000 server.
- Study the operators for describing triggers of different types and the restrictions imposed on valid operators within the body of the trigger.
- Learn how to create and debug triggers on MS SQL Server 2000.
- Develop five triggers for the training database “Library”, proposed by your teacher from the tasks described in the work.
- Prepare a report on the work done in electronic form.
1. Create a trigger
Triggers these are methods by which an application developer for MS SQL Server can ensure the integrity of the database. This is a type of stored procedure that is invoked when an attempt is made to change data in a table for which a trigger is defined. SQL Server performs this procedure during insert, update, and delete operations (INSERT, UPDATE, DELETE) on a given table. Because the trigger is applied after the operation has completed, it represents the last word in modification. If a trigger causes an error in a query, SQL Server refuses to update the information and returns an error message to the application performing the action. If a trigger is defined for a table, it cannot be bypassed when performing the corresponding operation.
Although a trigger is a type of stored procedure, it cannot be called directly: it responds only to the events for which it is defined.
A new type of trigger has appeared in MS SQL SERVER 2000 - INSTEAD OF -trigger. His fundamental difference from ordinary (AFTER) triggers is that it is executed not after the insertion, modification or deletion operation, but instead of it.
The most common use of a trigger is to maintain integrity in databases.
Triggers have a minor impact on server performance and are often used to enhance clauses that perform multi-step operations on tables and rows.
To create a trigger, you must be the owner of the table for which the trigger is being created, or be a member of the role db_owner or db_ddladmin, or be an administrator of a SQL server, that is, be a member of a fixed server role sysadmins. When you add a trigger to a table, it changes the access type, the relationship of other objects to it, etc.
Creating a trigger is similar to declaring a stored procedure and has the following syntax:
CREATE TRIGGER trigger_name
ON table
{
(FOR | AFTER | INSTEAD OF) ( [,] [,] )
AS
(IF UPDATE(column_i)
[(AND | OR) UPDATE (column_j)]
[…n]
| IF (COLUMNS_UPDATED() (bit_operator) bit_mask)
(comparison_operator) column_bitmask [... n]
}
SQL statements [...n]
}
}
- trigger_name must follow standard SQL Server object naming conventions and be unique in the database;
- table name of the table for which the trigger is created;
- WITH ENCRYPTION This option gives developers the ability to prevent users from reading the trigger text after it has been uploaded to the server. Again, note that in order to make the trigger text truly unrecoverable, you should remove the corresponding rows from the syscomments table after encryption;
- FOR DELETE , INSERT , UPDATE keywords that define the table modification operation, upon execution of which the trigger will be activated;
- WITH APPEND this option is only required if set level compatibility does not exceed 65 and is used to create additional triggers;
- NOT FOR REPLICATION indicates that the trigger is not activated when a table is modified during replication;
- AS keyword that specifies the beginning of the trigger definition;
- SQL_statements in T-SQL a trigger can contain any number SQL statements, if they are enclosed in operator brackets BEGIN ... END ;
- IF UPDATE (column) for operations of adding and updating data, you can define additional conditions for a specific table column; when specifying multiple columns, they are separated by logical operators;
- IF (COLUMNS_UPDATED()) We showed above how you can use the IF UPDATE (column) construct to determine which columns are affected by changes. If you need to check whether one specific column is changing, this construct is very convenient. However, when constructing difficult conditions, which includes many columns, this design is too cumbersome. The IF (COLUMNS_UPDATED()) construct is intended for such cases. The result of the COLUMNS_UPDATED() function is a set of bits, each of which corresponds to one table column; The least significant bit corresponds to the first column, the most significant bit corresponds to the last. If the operation that caused the trigger to fire attempted to change a certain column, then the corresponding bit will be set to 1;
- bit_operator bitwise operator that defines the operation of allocating the desired bits obtained using COLUMNS_UPDATED() . Typically the & operator is used;
- bit_mask in combination with the bitwise operator, the bitmask allows you to highlight the bits of interest to the developer, that is, determine whether the columns of interest were changed in the operation that caused the trigger to fire;
- comparison_operator And column_bitmask The COLUMNS_UPDATED() function gives the set of bits corresponding to the columns being updated. Using a bit mask and a bitwise operator, a transformation is performed on this set of bits and an intermediate result is obtained. The comparison operator compares this intermediate result with the column's bitmask. If the result of the comparison is true, then the set of SQL statements that make up the body of the trigger will be executed, otherwise it will not.
Let the table have the following structure:
CREATE table mytable (a int, b int, c int, d int, e int)
Five columns correspond to five bits, of which the least significant one corresponds to column a, the most significant one corresponds to column e. Let the operation that fires the trigger modify columns a, b, and e. Then the columns_updated function will give the value 10011. Let us not be interested in changing columns b and d, but we are interested in changing all other columns (a, c and e), that is, the mask will be 10101. Recall that at the time of writing the trigger we do not know which columns will be affected by this or that modification or insertion operation, that is, what result will the columns_updated function give. By specifying the bitwise comparison operator at runtime, we get 10011 & 10101, which results in 10001, which in decimal notation is 17. Comparing this value using the comparison operator and the column bitmask will tell us whether the change/insert operation satisfies the required conditions. So, for example, if business logic requires that the trigger fire when all the columns we are interested in change (a, c, e), then, naturally, the parameters bitmask and column_bitmask must have the same values, and the comparison operator must be an equal sign. Thus, for our example, the entire structure will look like:
IF(columns_updated & 17) = 17
If it is required that at least one of the columns we are interested in changes, the construction will be as follows:
IF (columns_updated & 17) > 0
Using bit operations, you can achieve great flexibility in composing such constructions.
You can also create triggers using SQL Server Enterprise Manager.
- Start SQL Server Enterprise Manager.
- Right-click the table for which you want to create a trigger and select Task > Manage Triggers from the context menu. As a result of these actions, a dialog box will appear in which you can enter the trigger text and assign a name to it.
- Once you've finished typing, you can check the syntax and click OK to save the trigger to the database.
Limitations when creating triggers
- The CREATE TRIGGER statement can only be used on one table.
- A trigger can only be created in the current database, but it can reference external objects.
- In one trigger creation statement, you can specify several actions to which it will react.
- Cannot be used in trigger text following instructions: ALTER DATABASE, ALTER PROCEDURE, ALTER TABLE, CREATE DEFAULT, CREATE PROCEDURE, ALTER TRIGGER, ALTER VIEW, CREATE DATABASE, CREATE RULE, CREATE SCHEMA, CREATE TRIGGER, CREATE VIEW, DISK INIT, DISK RESIZE, DROP DATABASE, DROP DE FAULT, DROP PROCEDURE, DROP RULE, DROP TRIGGER, DROP VIEW, RESOTRE DATABASE, RESTORE LOG, RECONFIGURE, UPDATE STATISTICS.
- Any valid SET operation only works while the trigger is alive.
- You cannot execute a trigger that examines the state of a binary large object (BLOB) of data type text or image in the INSERTED and DELETED table columns, regardless of whether the procedure is logged or not.
- You should not use SELECT statements that return result sets from a trigger for a client application that requires special result set management, whether it is done in a stored procedure or not.
- You cannot create INSTEAD OF UPDATE and DELETE triggers on tables that have foreign keys with the cascade update or delete options set, respectively.
2. Examples of using triggers
Example 1: Insert and Update Triggers
These triggers are useful because they can enforce referential integrity conditions and ensure that data is correct before being entered into the table. Triggers are typically used to update time columns or to check data in specific columns against a required criterion. Triggers should be used when the test criterion is more complex than the declarative integrity condition.
In the example below, the trigger runs whenever a row is inserted or modified into the Sales table. If the order date is not within the first 15 days of the month, the row is not entered into the table.
CREATE TRIGGER Tri_Ins_Sales
ON Sales
FOR INSERT, UPDATE
AS
/* Declare the necessary local variables */
DECLARE @nDayOfMonth TINYINT
/* Find information about the added entry */
SELECT @nDayOfMonth = DatePart(day, i.ord_date)
FROM Sales, Inserted i
WHERE s.stor_id = i.stor_id
AND s.ord_num = i.ord_num
AND s.title_id = i.title_id
/* Check the failure criterion and, if necessary,
send error message */
IF @nDayOfMonth > 15
BEGIN
/* Note: Always rollback first. You may not know
what kind of processing error occurred that could cause
unreasonably long blocking time */
ROLLBACK TRAN
RAISERROR("Only orders submitted on the first
15 days of the month", 16, 10)
END
If we now try to insert or update a record in the table, if the specified condition is not met, we will receive a corresponding error message.
Note that the code snippet accesses a new table, and this table is not in the list of database tables. IN in this case the Inserted table contains a copy of each row, which will only be added if the transaction completes successfully. This table and its values are used when performing any comparison operation to verify the validity of the transaction.
The Inserted table columns are exactly the same as the worksheet columns. The comparison can be done on a column-by-column basis, as in this example, where the columns in the Sales table are compared to verify that the sales dates are correct.
You can also create triggers that only perform work when a specific column is updated. To decide whether to continue processing in a trigger, the IF UPDATE statement can be used:
IF UPDATE(au_lname)
AND (@@ROWCOUNT=1)
BEGIN
END
The code inside the block is executed only if the au_lname column is updated. Always remember that the column being updated does not change in all cases. If any changes are necessary, many applications, including most enterprise systems, simply update the entire row.
The UPDATE operation affects both system tables. The Inserted table stores new values, and the Deleted table stores old values. Therefore, you can use both of these tables when analyzing changes.
It is often necessary to replace some values with undefined values. This is done with a simple assignment operation, for example:
NUM_READER = NULL
Example 2: Delete Triggers
Delete triggers ( delete triggers) are typically used in two cases: preventing the deletion of rows that might cause data integrity problems, such as a row used as a foreign key to other tables, and performing cascading delete operations on child ( children) lines main ( master) lines. This trigger can be used to remove all order information from the main sales line.
Triggers consider the total sum of all rows affected by the requested operation. Thus, they must be able to work with different combinations of information in the table and return the required data. For example, when executing a DELETE FROM Authors statement, the trigger must consider that the statement will delete all rows from the table.
In the following example, using the @@ROWCOUNT variable prevents more than one row from being deleted. This trigger runs whenever a user tries to delete a row from the Stores table. If the information is related to sales, then the trigger prevents the request from being completed.
CREATE TRIGGER Tri_Del_Stores
ON Stores
FOR DELETE
AS
/* Check the number of modified lines and prohibit deleting more than one line at a time */
IF @@ ROWCOUNT > 1
BEGIN
ROLLBACK TRAN
RAISERROR ("Only one row can be deleted at a time.", 16, 10)
END
/* Declaration of a temporary variable to save destroyed information */
DECLARE @ StorID char (4)
/* Get the value of the row to be deleted */
SELECT @StorID = d.stor_id
FROM Stores, Deleted d
WHERE s.stor_id *= d.stor_id
IF EXISTS (SELECT *
FROM Sales
WHERE stor_id = @storID)
BEGIN
ROLLBACK TRAN
RAISERROR ("This information cannot be deleted because there is a corresponding entry in the Sales table.", 16, 10)
END
Note: Using RAISERROR is the simplest way to send detailed and specific error information to the calling process or user. RAISERROR makes it possible to specify the message text, danger level, information status and combine all this for the user into a descriptive message. This instruction also makes it easier to write common error handling blocks in client applications.
This example also uses several transaction control statements to stop operations from running. Note that the code snippet accesses a new table. This table is not in the list of database tables. In this case, the Deleted table contains a copy of each row, which will only be added if the transaction completes successfully. This table and its values are used when performing any comparison to verify the validity of the transaction.
The columns in the Deleted table are exactly the same as the columns in the worksheet. The comparison can be done on a column-by-column basis, as shown in the example where the columns of the Deleted table are compared with the columns of the Sales database. This will ensure that the information to be deleted does not include sales data.
Example 3. INSTEAD OF triggers
INSTEAD OF triggers differ from regular (AFTER) triggers in that they are executed not after the operation that led to its firing, but instead, with all the ensuing consequences, for example, such as the possibility of using them in conjunction with integrity constraints. The Inserted and Deleted system tables are used in them in the same way as in AFTER triggers. The body of a trigger may duplicate the operation that caused it to fire, but it does not required condition. In other words, if we define an INSTEAD OF DELETE trigger, then nothing prevents us from performing a DELETE operation on it, which deletes all rows that should have been deleted in accordance with the operation that called the trigger, but we don’t have to do this.
Let's give an example of using the INSTEAD OF trigger.
The Jobs table has a 1:M relationship with the Employees table, so it is not possible to delete a job if it already has employees assigned to it. Let's create a trigger that, when a job is deleted, will check whether employees are assigned to it or not. If assigned, the work will not be deleted. Due to the fact that there is an integrity constraint (DRI), the AFTER trigger cannot work together with it. That is, you can create a trigger like this:
FOR DELETE
AS
IF EXISTS (SELECT * FROM Employee e JOIN Deleted d ON e.job_id=d.job_id)
BEGIN
ROLLBACK TRAN
END
By the way, note that unlike example 2, this trigger allows you to delete several rows at once. However, such a trigger can only work correctly if the connection between the Employees and Jobs tables is broken so that DRIs are not processed before the trigger is executed.
But you can create an INSTEAD OF trigger:
CREATE TRIGGER Check_Job ON Jobs
INSTEAD OF DELETE
AS
DELETE FROM Jobs FROM Jobs j JOIN deleted d on d.job_id = j.job_id
WHERE j.job_id NOT IN (SELECT DISTINCT Job_id FROM Employee)
Such a trigger will not have conflicts with DRI and will be executed.
The DRI check is performed immediately upon execution of the operation, that is, before the execution of the AFTER trigger. When using an INSTEAD OF flip-flop, the operation is essentially not performed and control is transferred to the flip-flop, so DRI will not be executed.
As already mentioned, the Inserted table contains added rows, and the Deleted table contains deleted rows. It is easy to guess that when performing an update operation, both the Inserted table and the Deleted table will be used. In this case, the old values will end up in the Deleted table, and the new ones in the Inserted table. By combining them by key column(s), it is not difficult to determine which values were changed.
3. Using nested triggers
Triggers can be embedded within each other. 32 levels of nesting are allowed. If nested trigger operations are not desired, SQL Server can be configured to disable them.
Note: The nesting level of a trigger can be checked at any time by polling the value set in the @@NESTLEVEL variable. It should be in the range from 0 to 32.
Nested triggers can lead to recursion. There are two types of recursion: direct and indirect. Direct recursion occurs if the firing of a trigger leads to changes that cause the same trigger again. Indirect recursion occurs when the firing of a trigger causes changes that cause another trigger to fire, which in turn leads to changes that cause the first trigger to fire. Of course, this chain can also consist of more triggers.
Direct recursion can be disabled (and enabled) using the RECURSIVE_TRIGGERS database option. You can disable (and enable) indirect recursion, as well as nesting of triggers in general, using the nested triggers server option. This option determines the possibility of nesting triggers not for one specific database, but for the entire server.
It should be noted that INSTEAD OF triggers by their nature are not subject to direct recursion.
When you create a trigger, SQL Server cannot independently recognize that some nested construct is causing an infinite loop. Such a fact can only be established during the execution of this trigger.
Let's assume that Table_A includes a trigger, trigger_A , which is executed when an update to Table_A occurs. When executed, trigger_a causes Table_B to update. This table includes a trigger_b that runs when Table_B is updated and causes Table_A to update. Thus, if the user updates either of these two tables, the two triggers continue to cause each other to execute indefinitely. When this situation occurs, SQL Server closes or cancels execution of the trigger.
Let's imagine that the Sales table includes one trigger, and the Stores table includes another. The following shows the definition of two nested triggers that are executed when a delete operation occurs on the Sales table:
/* The first trigger destroys rows in the Stores table,
if rows of the Sales table are destroyed */
CREATE TRIGGER Tri_Del_Sales
ON Sales
FOR DELETE
AS
PRINT "A delete trigger is running for the Sales table..."
/* Declaration of a temporary variable to store deleted information */
DECLARE @sStorID char(4),@sMsg varchar(40)
/* Get the ID value of the row to be deleted */
FROM Deleted
/* Delete a line */
SELECT @sMsg = "Store " + @sStorID + " deleted"
PRINT @sMsg
DELETE FROM Stores
WHERE stor_id = @sStorID
PRINT "End of trigger execution for Sales table"
GO
/* The second trigger destroys rows of one table,
if the rows of another are destroyed */
ON Stores
FOR DELETE
AS
/* Declaration of the trigger to be executed */
PRINT "A delete trigger is running for the Stores table..."
/* Declaration of a temporary variable to store information
destroyed from the table */
DECLARE @sStorID char(4), @sMsg varchar (200)
/* Get the destroyed value */
SELECT TOP 1 @sStorID = stor_id
FROM Deleted
/* Deleted is an auxiliary table that SQL Server
used to store destroyed records */
IF @@ROWCOUNT = 0
BEGIN
PRINT "There are no matching rows in the Stores table"
RETURN
END
/* Delete an entry */
SELECT @sMsg = "Deleting store-specific discounts" + @sStorID
PRINT @sMsg
DELETE Discounts
WHERE Stor_id = @sStorID
PRINT "Number of discounts removed: " + CONVERT(VARCHAR(4), @@ROWCOUNT)
PRINT "End of execution of trigger for Stores table"
If a DELETE statement is executed on the Sales table, as shown in the following example, the trigger fires, which in turn causes the Stores table trigger to execute.
Let's do:
DELETE FROM Sales WHERE stor_id = "8042"
Result:
A delete trigger is running on the Sales table...
Store 8042 removed
A delete trigger is running on the Stores table...
Removing discounts related to store 8042
(1 row(s) affected)
Number of discounts removed: 1
End of trigger execution for the Stores table
(1 row(s) affected)
(4 row(s) affected)
End of trigger execution for Sales table
Pay attention to the order of the messages displayed. First, the trigger is fired on the Sales table. It removes a row from the Stores table, thus firing a trigger on it. Moreover, in fact, neither the Sales table nor the Stroes table has been deleted yet (deletion is in progress) this is evidenced by the absence automatic message server (N row(s) affected), which appears when deleting from any table and shows how many rows were deleted.
Once launched, the trigger on the Stores table removes related rows from the discounts table (Discounts), which displays the message (1 row(s) affected). It then prints the appropriate messages and finishes its work. As soon as it has finished its work, the row from the Stores table is deleted, the deletion of which caused it to work. Next, since this row is deleted, the trigger on the Stores table returns to work. This trigger issues its last exit message and exits. Once it has completed, the message (1 row(s) affected) is displayed, indicating that a row has been deleted from the Stores table. And only after this are the rows finally deleted from the Sales table.
Note: Triggers and declarative referential integrity generally cannot work together. For example, the previous example shows that before executing a DELETE statement, you must first delete the condition on the FOREIGN KEY value in the Discounts table. Wherever possible, either a trigger or a referential integrity condition should be used. However, as already mentioned, INSTEAD OF triggers appeared in MS SQL Server 2000. They can be used in conjunction with declarative integrity mechanisms, but you cannot use cascade operations in connections for the same operation for which the INSTEAD OF trigger was created. For example, if an INSTEAD OF DELETE trigger is created, then you cannot use the ON DELETE CASCADE construct in relationships in which this table is a subordinate table.
Example 2
Now let's give an example of direct recursion in triggers. Let's create a trigger that, when deleting an employee, would also delete those employees who have the same last name or first name as the one being deleted. Moreover, when employees are deleted by a trigger, the same trigger is triggered again for this deletion and again deletes people with the same last name or first name, and so on.
CREATE TRIGGER Del_Empl_Tr ON Employee
FOR DELETE
AS
IF EXISTS (SELECT * FROM Employee e
JOIN Deleted d on e.lname = d.lname OR e.Fname = d.fname)
DELETE FROM Employee
FROM Employee e JOIN Deleted d on e.lname = d.lname OR e.Fname = d.fname
There are no employees with the same last name or first name in the pubs database, but you can add such employees yourself and check what happens if you remove one of them. Let, for example, let the following employees be in the database:
If you now follow the instructions:
DELETE FROM Employee WHERE Fname = "Ivan" AND Lname = "Ivanov"
then the trigger that will be launched when deleting, in addition to Ivan Ivanov, will also delete Ivan Sergeev and Mikhail Ivanov. After this removal, the trigger will be launched again and will search for all Ivanovs and Mikhails, as well as Ivanovs and Sergeevs. As a result of his work, Petr Sergeev will be removed. Then the same trigger will delete Peter Vasiliev. After this, the trigger will look for Petrov and Vasilyev, but since they are no longer in the table, the execution will end there.
Note that the IF EXISTS check must be done here. If this is not done, then when it comes to deleting Peter Vasiliev, the DELETE instruction will be executed and, although it will not actually delete anyone, the newly called trigger will call itself again (again without actually deleting anyone), etc., until exceeding maximum level nesting 32. After reaching nesting level 32, an error will occur and all actions will be canceled.
Example 3. Indirect recursion
Let's change example 1 so that if a row is deleted from the Sales table, then the store in which the deleted sale was made would also be deleted. Since the relationship between these tables is 1:M, there can be many sales in the store being deleted, and not just the one we are trying to delete. Therefore, the chain should be as follows: delete the sale → delete the store in which it was made, → delete all other sales made in this store, → delete all discounts associated with this store. In addition, we will implement these triggers in the form of INSTEAD OF triggers so that there is no need to break connections between tables.
CREATE TRIGGER Tri_Del_Sales
ON Sales
INSTEAD OF DELETE
AS
DELETE FROM Sales FROM Sales s JOIN Deleted d on d.ord_num = s.ord_num
IF EXISTS (SELECT * FROM Stores s JOIN Deleted d ON d.stor_id = s.stor_id)
DELETE FROM Stores FROM Stores s JOIN Deleted d ON d.stor_id = s.stor_id
GO
CREATE TRIGGER Tri_Del_Stores
ON Stores
INSTEAD OF DELETE
AS
DELETE FROM Discounts FROM Discounts di JOIN Deleted de on di.stor_id=de.stor_id
IF EXISTS(SELECT * FROM Sales s JOIN Deleted d on d.stor_id = s.stor_id)
DELETE FROM Sales FROM Sales s JOIN Deleted d on d.stor_id = s.stor_id
DELETE FROM Stores FROM Stores s JOIN Deleted d on d.stor_id = s.stor_id
To check, you can run the command:
DELETE FROM Sales WHERE ord_num = "P723"
As a result, not only the row with the order code "P723" will be deleted from the Sales table, but also three other rows related to the same store (code 8042). The store 8042 itself and the discount associated with it will also be deleted.
In the example above, among other things, all message outputs are removed and calls to DELETE statements are changed since there are no message outputs, there is no need to generate the value of the local variable @sStroID . The use of this variable in the DELETE statement somewhat limited the applicability of triggers. Thus, the triggers in example 2 were designed to delete records for only one store, and when deleting records related to several stores at once, they did not work correctly. Now there is no such restriction, since all records associated with records in the Deleted table are deleted (that is, with all the rows that are actually deleted).
One might ask: why use recursion? Wouldn’t it be easier, when deleting from the Sales table, to delete in a trigger on it all records from itself that relate to the same store as the deleted sales row, then delete the row from the Stores table, and in a trigger on the Stores table delete related records only from the Discounts table? Yes, this can be done, but only if we always give the deletion command specifically from the Sales table (as was done above during the check). However, we can issue a delete command from the Stores table, for example:
DELETE FROM stores WHERE stor_id = 8042
And in this case, we also want the command to work correctly. If the trigger on the Stores table, as suggested in the question, does not include deletion from Sales, then if there are sales for the store being deleted, then such deletion will result in an error. Our example allows us to solve this problem. Well, if the trigger on Stores includes a command to delete from Sales , then in the trigger on Sales there is no need to include the deletion of sales in the same store as the one being deleted, since this will be automatically performed through recursion.
Note 1: To prevent triggers already created in previous examples from interfering, you need to delete them using the instruction DROP TRIGGER trigger_name.
Note 2: Once again, please note that in order for recursion to work, the appropriate database and server options must be set.
Example 4
In the last example, consider the case of defining several triggers for one table modification operation:
CREATE TRIGGER trig_del_l ON Authors FOR DELETE AS
PRINT "Delete trigger #1"
GO
CREATE TRIGGER trig_del_2 ON Authors FOR DELETE AS
PRINT "Delete trigger #2"
GO
CREATE TRIGGER trig_upd_l ON Authors FOR UPDATE AS
PRINT "Update trigger #1"
GO
CREATE TRIGGER trig_upd_3 ON Authors FOR UPDATE AS
PRINT "Update trigger #3" "
GO
CREATE TRIGGER trig_upd_2 ON Authors FOR UPDATE AS
PRINT "Update trigger #2"
GO
Now let's try to change some entry in table:
UPDATE Authors
SET au_fname = "Yuri" WHERE au_lname = "Tikhomirov";
All three update triggers will work:
Update trigger #1
Update trigger #3
Update trigger #2
Pay attention to the execution sequence of triggers: it is determined by the order in which they are created. If we now delete the trigger trig_upd_3 and then create it again, then when updating the table we will get the following result:
Update trigger #1
Update trigger #2
Update trigger #3
Multiple triggers are quite actively used during replication.
4. Display trigger information and change trigger
To find out the purpose of a table's trigger, you must display information that describes any trigger that the table owns. There are several ways to obtain information about a specific table's trigger. One of them is SQL Server Enterprise Manager, the other is the sp_help and sp_depends system procedures. To view the trigger text through Enterprise Manager, follow these steps:
- In Enterprise Manager, select the server and database you want to work with.
- Open the table in design mode with the Design Table command and in its window, click the Triggers button on the toolbar.
- The Create Trigger dialog box will appear, where you can view the text of any of the installed triggers.
The system stored procedures sp_help and sp_depends have already been described in the topic “Stored Procedures”.
To change the functionality of a trigger, you can either delete it and create a new one with the appropriate changes, or change an existing one. In order to change an existing trigger in T-SQL, there is the ALTER TRIGGER command. Its syntax is similar to that of the CREATE TRIGGER command, except that it uses the ALTER keyword instead of CREATE.
You can also change the trigger using Enterprise Manager. To do this, after logging into Enterprise Manager, you just need to make changes and apply them.
5. Removing triggers
Sometimes you need to remove triggers from a table or tables. For example, when you move an application to production, you might want to remove triggers that provided high-quality processing but greatly reduced performance. You can simply remove triggers to replace them with more new version. To remove a trigger, use the DROP TRIGGER statement:
DROP TRIGGER [owner.]trigger_name [, n]
Deleting a trigger is optional if the new trigger replaces an existing one. When you drop a table, all objects associated with it are automatically destroyed, including triggers.
Example of removing the Tri_Dei_Autnors trigger:
DROP TRIGGER Tri_Del_Authors
6. Pausing and resuming triggers
It is often necessary to disable a trigger for a period of time without actually deleting it. This can be achieved using the design ALTER TABLE<имя_таблицы>DISABLE TRIGGER<имя триггера> to disable the trigger and ALTER TABLE<имя_таблицы>ENABLE TRIGGER<имя триггера> to resume its work.
Assignments for independent work
Before we start executing tasks, let us remind you that triggers are system stored procedures that are associated with a specific table. To call the trigger editor, you need to select the table by right button context menu go to section All tasks > Manage triggers, and you are taken to the trigger editor (Fig. 1).
Rice. 1. Initial state of the trigger editor when creating a new trigger
Task 1. Develop a trigger that would delete a record about a book if the last copy of this book is deleted. What table will you write this trigger for? When writing a trigger, remember that we have the “Authors” and “System Catalog” tables associated with the “Books” table. However, they are related by a many-to-many relationship, for which linking tables are used. You cannot delete data about a book if it has links in these linking tables. Consider deleting data from linking tables first. Check the operation of this trigger.
Task 2. Develop a trigger that would not allow deleting a book instance if this instance is in this moment is in the reader's hands. To cancel the delete command, use the ROLLBACK transaction rollback command.
Check the operation of the trigger in independent mode by trying to delete not the last copy of the book that has a mark indicating that it is in the reader’s possession.
Try to remove a copy of the book that is not in the reader’s hands.
Check the operation of the two triggers by trying to remove the last copy of the book that is in the reader’s hands.
Task 3. Develop a trigger that would control the issuance of books to a reader and, if the number of undelivered books on hand exceeds three, would not allow another book to be issued to this reader.
Task 4. Develop a trigger that would add one instance when a new book is entered. Indeed, we have determined that books are present in our catalog only if they are in our library, therefore, when entering a new book, one copy of this book should be added to the “Copy” table.
Task 5. Develop a trigger of type INSTEAD OF for the “Readers” table. This trigger should check whether there is information about at least one of the phones for quick communication with the reader, and if there is no such information, then do not enter data about the reader.
Task 6. Develop a trigger that, when the value of a field symbolizing the presence of a book copy in the library, for example YES_NO, changes from “1” to “0”, would automatically replace the values in the “Issue date”, “Return date” and “Library card number” fields "to the indefinite.
Task 7. Develop a trigger that does not allow you to delete a reader if he has at least one book from the library.
Task 8. Develop a trigger that, when a copy of a book is deleted, would check how many copies of this book are left in the library, and if only one copy remains, then it would increase the price of this book by 15% as rare and valuable.
print version
The SQL Server platform supports ANSI core functionality with the addition of INSTEAD OF triggers and column change checking. This platform does not support REFERENCING and WHEN clauses. The syntax is given below.
(CREATE | ALTER) TRIGGER trigger_name ON table_name
(FOR | AFTER | INSTEAD OF) ( [,] [,] )
[…]] block_code
(CREATE | ALTER) TRIGGER trigger_name
Creates a new trigger named trigger_name or modifies an existing trigger trigger_name by adding or changing properties of the trigger or code block. When you modify an existing trigger, the permissions and dependencies of the existing trigger are preserved.
ON table_name
Declares the table or view on which the trigger depends. Views can define INSTEAD OF triggers as long as the views can be updated and do not contain a WITH CHECK clause.
WITH ENCRYPTION
The text of the CREATE TRIGGER statement is encrypted as defined in the syscomments table. This option is useful for protecting intellectual property. The WITH ENCRYPTION clause prevents the trigger from being used in a SQL Server replication scheme.
FOR | AFTER INSTEAD OF
Specifies when the trigger should fire. (The FOR and AFTER keywords are synonymous.) The AFTER clause indicates that the trigger is fired only after the successful completion of the data modification operation (and other cascaded actions and constraint checks). The INSTEAD OF trigger is similar to the ANSI BEFORE trigger in that the trigger code can completely replace the data modification operation. This fires the trigger instead of the modification operation that fired the trigger. Triggers of type INSTEAD OF DELETE cannot be used if the deletion causes cascading actions. Only INSTEAD OF triggers can access TEXT, NTEXT, or IMAGE columns.
WITH APPEND
An additional trigger is added to a table or view existing type. Support for this proposal is provided for backward compatibility with more earlier versions product, and this clause can only be used with FOR triggers.
NOT FOR REPLICATION
Prevents a trigger from firing during a data modification operation initiated by the SQL Server built-in replication system.
IF UPDATE (column) [(AND | OR) ROATE(column)] […]
Allows you to select a specific column to fire the trigger. Column-specific triggers fire only on UPDATE and INSERT operations, and not on DELETE operations. If an UPDATE or INSERT operation is applied to a column that is not in the list, the trigger does not fire.
The SQL Server platform allows you to use multiple triggers for a single manipulation operation on a table or view. This way, you can use three UPDATE triggers on one table at once. You can use multiple AFTER triggers on a table. The order in which they are executed is uncertain, but the first and last trigger can be specified explicitly using the spsettriggerorder stored system procedure. You can only use one INSTEAD OF trigger per INSERT, UPDATE, or DELETE statement on any table.
In SQL Server, you can define any combination of triggers in a single trigger statement, separated by commas. (This runs the same code for each instruction in the combination definition.)
The SQL Server platform implicitly uses the ANSI standard FOR EACH STATEMENT form for triggers.
When a trigger fires, SQL Server writes values to two important pseudo-tables: deleted and inserted. They are respectively equivalent to the before and after pseudo-tables described earlier in the General Rules section of the ANSI standard. These tables are identical in structure to the table in which the trigger was created, except that they contain the old data before the modification operation (deleted) and the new values available in the table after this operation (inserted).
Specifying an AS IF UPDATE (column) clause checks whether the INSERT or UPDATE operation has been performed on this column or columns; This sentence is similar to the ANSI standard's s/РШschschistoln construction. You can specify multiple columns by adding individual clauses (UROL column). If you follow the AS IF UPDATE (column) clause with a Transact-SQL code block BEGIN...END, you can perform multiple Transact-SQL operations in a trigger. This clause is functionally equivalent to the IF...THEN...ELSE statement.
In addition to the interference with data modification operations shown in the ANSI SQL example, the SQL Server platform allows other types of operations to be performed during data modification operations. In the following example, we have decided that the sales_archive_2002 table is no longer in use, and anyone who tries to insert data into it will be notified of this restriction.
The SQL Server platform does not allow the following statements to be used in a Transact-SQL trigger code block: ALTER, CREATE, DROP, DENY, GRANT, REVOKE, LOAD, RESTORE, RECONFIGURE, and TRUNCATE. In addition, DISK instructions and the UPDA TE STA TISTICS command are not allowed.
The SQL Server platform allows you to run recursive triggers by using the recursive triggers parameter of the sp_dboption system stored procedure. Recursive triggers trigger themselves as a result of their execution. For example, if an INSERT trigger on table T1 performs an INSERT operation on table T1, it can perform a recursive operation. Because recursive triggers can be dangerous, they are disabled by default.
SQL Server also allows you to use nested triggers, up to 32 levels of nesting. If any nested trigger performs a ROLLBACK operation, subsequent triggers are not fired. Example of nested triggers: A trigger in table T1 starts an operation on table T2, which also has a trigger that starts an operation on table TZ. Triggers are canceled if an infinite loop occurs. Nested triggers can be enabled using the nested triggers parameter of the sp_configure stored procedure. If nested triggers are disabled, recursive triggers are also disabled, regardless of the corresponding sp_dboption stored procedure parameter.
In the following example, we want to redirect user actions on the people table, especially update-related transactions, so that changes to rows in the people table are written to the peoplejreroute table instead. (A more complex form of the people table is shown in the SQL Server section of the CREATE/ALTER TABLE Statement section.) Our update trigger will capture all changes to columns 2, 3, and 4 of the people table and write them to the peoplejreroute table. The trigger will also record which user performed the update transaction and at what time.
Note that SQL Server CREATE statements allow the use of deferred name resolution. This means that the command is processed even if it refers to a database object that does not yet exist.


