How to make an on-screen keyboard on a laptop. Screen keyboard
The Windows 8 on-screen keyboard is a special feature of the operating system. It is available on all versions of Windows, including G8. Why is it needed? The fact is that there are cases when there is no keyboard on the computer, but you still need to type some text. Of course, doing this with a mouse on the screen is less convenient than on a full keyboard, but still in certain situations we have no choice.
The Windows 8 virtual keyboard has the same capabilities as the regular keyboard. That is, you can switch the layout on it, use all the standard functions, and so on. It can only be used with the mouse.
It is worth noting that this tool was present in previous versions of the OS, however, in the G8 they approached this issue more carefully. The fact is that Windows 8 was developed not only for computers, but also for tablets, smartphones, and so on. And if on a PC such functions are used very rarely, then on mobile devices they will work constantly.
The on-screen keyboard for Windows 8 was developed by an entire department. The main goal of the developers was to bring the tool to perfection and make it as convenient and functional as possible. Of course, on mobile devices such tools open automatically at the right moments. But how to open it on a computer with Windows 8?
On-screen keyboard in Windows 8: Video
Where is the virtual keyboard located?
This function is located in the “Special Features” section. You can find this service in the control panel. There are actually two options for how to launch the virtual keyboard:
- Through search.
- In the management console.
Launch via search
The first option is to hover your mouse over the top right corner of your desktop or Metro menu. In the menu that appears, open the search. In the line, write the name of the tool you want to open. Next, simply select the desired option from the search results.

Launch via management console
The second way to enable the on-screen keyboard in Windows 8 is to find it in the Control Console. You can launch the Control Panel using the Start + X key combination. After clicking them, a menu will open in which select the appropriate item.

Now you have two options for further action. First, you can go to the Accessibility section. Next, go to the “Special Features” item. A window will open showing additional functions, among which you can find the on-screen keyboard.


Secondly, in the control panel you can use the search bar. It is located in the upper right corner. Write the appropriate phrase in it. In the results, you will see the “Accessibility” section and the “Enable on-screen keyboard” sub-item. Click on it.

Hot keys in Windows 8. Hot keys Windows 8: Video
Setting up the virtual keyboard
It's not enough to just run the tool. It's important to know how to use it. In addition, it can be customized to improve ease of use. First of all, you should know how to change the layout. In a normal situation, this is done by simultaneously pressing two keys – Alt+Shift or Ctrl+Shift. However, we won’t be able to press at the same time on the screen. To change the language, first press Alt. It will light up. After this, click on the Shift key, which should also be highlighted. Now again on the Alt button. After these steps, the layout will change.

In order to go to additional settings, you need to press the “Options” key. It is located in the bottom row on the right side of the keyboard. Here you can configure some functions.

For detailed information about the tool's functionality, click the Help button.

It is worth noting that if you are not satisfied with the built-in virtual keyboard for Windows 8, then you can download a more advanced version with additional functions for working on the Internet.
The keyboard does not work in Windows 8: Video
Today, there is probably no person who does not use the Internet, does not go to social networks, or does not have a mailbox where information that is important to him is stored. However, all logins and passwords, as well as entering bank card numbers that allow you to pay for a particular product in online stores, are not safe using a regular keyboard that is connected to a computer via USB.
In order to protect your data from spyware, through which it falls into the hands of attackers, you need to use a virtual keyboard.
What is a virtual keyboard?
The virtual keyboard is a standard component of Windows operating systems. Its use is possible not only when entering confidential information, it will also become a convenient tool for people with disabilities and in cases where, for some reason, a regular keyboard has failed, and something urgently needs to be done on the computer.
The main purpose of the virtual keyboard is to protect confidential information from intruders. Users who work on their computer using the following web browsers are under reliable protection:
- Mozilla Firefox 15.x – 17.x;
- Internet Explorer 8 – 10;
- GoogleChrome 9.x – 12.x.
In the case when personal data is entered through a virtual keyboard when the site is hacked, the information will not be protected, since it directly goes to the scammers.
Switching methods
You can open the virtual keyboard in several ways:

Almost everyone knows how to enable a virtual keyboard from the keyboard. To do this, press the following keys simultaneously: CTRL + Alt + Shift + P.
Enabling the virtual keyboard through a web browser window is as follows: you need to open the browser window and click on the button in the toolbar with the mouse.

You can enable the virtual keyboard directly through the context menu of the program icon by right-clicking on the program icon and selecting “Virtual Keyboard” in the context menu.

You can launch the virtual keyboard in Windows 7 as follows:
Review of virtual programs - keyboards The virtual keyboard is a standard component of Windows operating systems. However, if for some reason you are not satisfied with it, such a keyboard can be easily downloaded on the Internet.
- Of all the virtual keyboards existing today, the most popular are:
- ComfortOn-ScreenKeyboard 5040 (interface Russification is present, volume – 3.63 MB, OS – Windows 2000 and higher);
- FlorenceVirtualKeyboard 0.5.0 (no Russification of the interface, volume – 1.89 MB, OS – Linux);
- GreatisVirtualKeyboard 1.1 (Russian interface available, volume – 560 KB, OS – Windows 98/ME/XP);
- JitbitVirtualKeyboard 2.22 (Russian interface, volume – 539 KB, OS – Windows 2000 and higher);
- KeymanDesktop 8.0.3 (there is no Russification of the interface, volume – 7.65 MB, OS – Windows 2000 and higher);
- Klava 4.0 (there is no Russification of the interface, volume – 22 KB, OS – Windows 2000 and higher);
- VirtualKeyboard 32.1.56 (there is no Russification of the interface, volume – 440 KB, OS – Windows 2000 and higher).
How to turn on your computer using the keyboard
It happens that the system unit from the computer is located in a hard-to-reach place, for example, hiding it from small children or simply freeing up space in this way. And then many people ask the question “how to turn it on via a computer keyboard?”
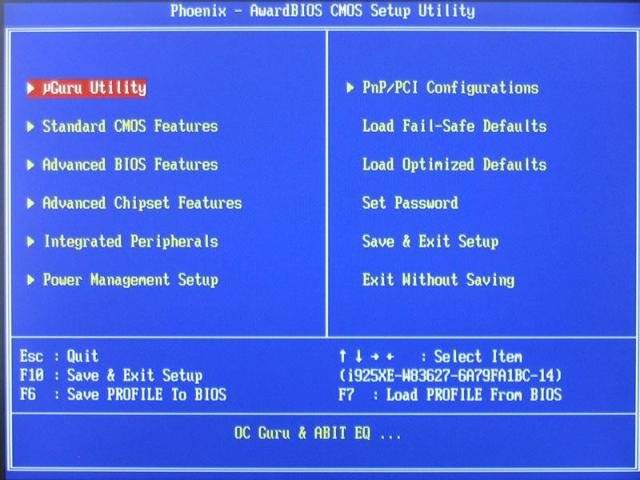
In order to start the computer without pressing the “Power” button located on the front case of the system unit, you need to make special settings in the BIOS that will allow you to turn on the PC via the keyboard.
To do this, you must continuously press the Del key when you turn on the computer. If suddenly this method does not help you enter the BIOS, then you can try pressing the Esc, F2 or F10 button. As a result, the BIOS interface will appear on your monitor screen, the menu of which must be navigated using the up/down, right/left arrows, and the Enter key is used to edit or select parameters.
So, in order to make settings in the BIOS, you need:

After the manipulations have been completed, the computer should reboot. That's all, now your computer will turn on using the key combination that you selected in the BIOS settings. To turn off your PC using the keyboard:

There is another option to turn off the PC using the keyboard: the Alt + F4 key combination. Next, a window will appear in which you need to select the “shutdown” item and press the “Enter” key.
Well, if your keyboard is broken and your PC gives an error when you turn it on, then you will probably have the question “how to turn on the computer without a keyboard.” If you have the opportunity to borrow a keyboard from someone, then you need to go into the BIOS, find the “Set UP-ehalt” section and replace the value “on errors” with “no errors”. Thus, turning on the PC will occur without a keyboard.

The keyboard allows you not only to turn on/off the computer, but also to turn on/off the sound and adjust its volume.
How to turn on sound on a computer using the keyboard? Everything is very simple. To do this, press the F10 key and use the F11 and F12 keys to adjust the volume.
On-screen keyboard in operating systems
The on-screen keyboard in Windows 7 and Windows 8 operating systems looks different and some functions may only be available in certain operating systems.

This is necessary not only for the on-screen keyboard to be successfully installed on the PC, but also in order to “fully” use its functions.
What to do - the keyboard does not work
If the keyboard does not work, you need to determine the cause of its failure. The reasons why a keyboard may break are divided into two types:
- software;
- hardware.
If the cause of the breakdown is the hardware of the keyboard, it will be very problematic to correct the current situation without certain knowledge and skills. It's easier to replace the old keyboard with a new one. But first, check the cable through which the keyboard is connected to the PC. It may have come loose or become damaged. If the cable is intact and does not come out, try restarting the computer. Maybe there was a glitch while it was working. If restarting your PC was unsuccessful and the keyboard still does not work, try launching the Start panel with the mouse and going to Control Panel, and then to Hardware and Sound.
If there are problems with the keyboard, it will be marked in the system with a yellow color and an exclamation mark.
Using the mouse, select the keyboard and click “Delete”, and then close all tabs.
Video: what to do if the keyboard on your computer does not work
>Next, open the “Hardware and Sound” window again and select “Add a device.” After the OS search, the keyboard will be found and installed.
If after these manipulations the keyboard does not work, then you will need to replace it with a new one or use a virtual keyboard. A keyboard and mouse are little valued these days, but these components are an essential part of making a PC work properly. A virtual or on-screen keyboard is also an important element of computer operation, because only they can secure your social networks from hacking and protect your personal data, bank details or passport from intruders. A virtual keyboard, also called an on-screen keyboard, was created to enter information by clicking on the symbols with the cursor. This is a great option for those who have
original keyboard broke
or you are simply afraid of keyloggers, i.e. keyloggers. Keylogging was extremely popular among cybercriminals 10–15 years ago. Such software could read the data you entered, after which the attackers used the victim’s credit cards and hacked it
The on-screen version of the keyboard can partially replace the “full-fledged analogue” one, but the keyboard shortcuts do not work here, since you can only press 1 button at a time.
Search for an application
First, let's find the program on the PC. Download the on-screen keyboard for windows 7 It will only be required if the OS build you have was created in a homemade environment.
In other cases, it is already preinstalled in the system. All that remains is to get there. There are 2 ways to do this:
- Quick search;
- Standard search.
Method 1
The quick search process is extraordinary. Click “Start”, after which in the line “find programs and files” we write either the full phrase or simply the word “screen”.
2 results will be displayed. Select the one that is highlighted and activate the program.
Method 2
In the case of standard search, we do almost the same. Click “Start” and click on “all programs”.

A ton of folders will be displayed. We are looking for the one called “standard”.

Scroll down the mouse slider until you find the “accessibility” folder.

We open it and find the desired keyboard. Click on the icon to launch the application.

If you use the program systematically, despite the working standard keyboard, then the activation process can be simplified. Again, there are 2 methods available:
1) shortcut on the desktop;
2) keyboard shortcut.
Method 1
We do all the same manipulations as in the second search method, but right-click on the desired shortcut. A context menu will appear.
We do the same as in the screenshot.

Now you have a shortcut that will allow you to launch the software much faster.
Method 2
We need program properties. We perform the same operations as in the second search method, and again click with the right button instead of the left.

Properties are displayed. We are interested in the selected fragment. Instead of a combination, it should say “No”.
To assign launch keys, simply press any button on your keyboard. Ctrl+Alt will be substituted automatically.

Note! Let's say you selected Ctrl+Alt+B. We save the changes, and then simultaneously press this combination of buttons. If everything is done correctly, the on-screen keyboard will be activated.
Launch and settings
Now you need to enable the on-screen keyboard Windows 7. The procedure is described above. A standard set of buttons will appear, as on a material “analog”.

Some noticed that it is small and there is also no number pad. All this can be changed in the parameters.

Here you can do the following:

1) sound notification of pressing;
2) activation of the digital block;
3) button pressing method.
You can independently adjust the sounds when pressed. If you are annoyed by the characteristic click, uncheck the box.
Advice! If you don't want to press a button with your mouse, switch to scanning. Use the slider to select the speed at which the program will read the position of the mouse cursor on the on-screen buttons. Point the arrow at a letter or number, wait from 0.5 to 2 seconds (depending on the settings) and move on to the next letter.
Switching the language on the on-screen keyboard is as easy as on a regular keyboard. The only difference is the order in which the buttons are pressed.
If on a mechanical device you had to press Shift while holding Ctlr or Alt, then there is a different algorithm.
Let's say that in the settings the Alt+Shift combination is responsible for switching. Activate the virtual assistant and click first on Alt and then on Shift. They should turn white.

Then press Shift again. The buttons will change color to black, but the layout will become either English or Russian.
Hotkeys on the Windows 7 on-screen keyboard are activated using the same principle.
To, for example, use the combination Ctrl+Z (cancel action), press Ctrl and then Z. Just don’t forget to turn on the English layout.
Turning off the on-screen keyboard in Windows 7 is very easy. Click the “cross” in the upper right corner and that’s the end of it.

The virtual assistant for the on-screen keyboard is no different from the standard one. The buttons and other attributes here are the same as on a regular keyboard.
On the one hand, screen projection will not replace a full-fledged keyboard, since writing speed is reduced by several orders of magnitude, and the algorithm for activating keyboard shortcuts leaves much to be desired.
Changing the layout is also implemented as on a standard device, although the developers could easily add a separate button, as on mobile devices.
On the other hand, if you are not inclined to have your data systematically fall into the hands of attackers or often spend time in Internet cafes, then it is more advisable to use a virtual keyboard instead of a regular one, since its actions are not tracked.
And of course, this is a good alternative way of working if you have broken your main keyboard and don’t yet have enough money to buy a new one.
You have to use what you have.
Of course, you can’t play games, but the basic functionality is quite passable and suitable for performing most tasks.
On-screen keyboard in Windows 7
Enter data without using a keyboard. If your keyboard suddenly stops working, you can always use the on-screen keyboard.
Windows 7 on-screen keyboard: launch, setup, shutdown
The on-screen keyboard is a tool for writing text, adding numbers and other characters that are found on a similar physical input device. Typically, users are interested in a virtual instrument when they have reinstalled Windows and something went wrong or when a regular separate keyboard does not work.
It is also believed that entering text in this way helps to protect your data - there are so-called spy programs that read the information you type. To protect passwords or access codes from unauthorized persons, it is recommended to write them using just such a system component.
And, of course, such a tool will be useful for those who use touch screens on laptops, computers or tablets. We will look at how to enable the virtual keyboard on different versions of the Microsoft operating system.
This is what the on-screen keyboard looks like in Windows 7
Enable the virtual keyboard on Windows 7
There are several ways to launch it, so choose the one that is most convenient for you. So, we recommend doing the following:
- Go to Start.
- Select the folder with programs, then - “Standard” - “Accessibility”

Start-Standard command

Standard-Special
- In the list you will see the “On-Screen Keyboard” item - open it, after which the component will launch on the display.

- You can also simply enter the word “on-screen” in the search bar in the start menu, and the corresponding program will be displayed for you.
If you do not find it in the “Standard” folder, correct this situation using the following steps:
- Open Control Panel.
- Click on “Programs and Features”, after “List of installed components” in the left menu.
- A window will appear in front of you where you can activate or deactivate individual tools. In our case, check the box next to the “Tablet PC Components” folder.
- The input tool should then appear in the menu.
If you use such a keyboard very often, you can set a key combination for calling it so that you don’t have to turn it on through Start every time. This is done like this:
- Find the line of this component in the list of applications, right-click on it.
- In the context window, open Properties.
- Select the Shortcut tab.
- Click on the "Shortcut" field and enter the combination with which you want to call the keyboard in the future. For example, it could be Ctrl+Alt+T.
Attention! Before installing a combination, check it on your computer by first minimizing all windows - if another command does not start, then this key combination is free.
We use the input tool on Windows 8, 8.1
Now let's find out how to call the virtual keyboard in this version of the software. Note that it should be present by default; if it is not, you have a stripped-down platform. It is better to install a full-fledged shell so that in the future there will be no other problems with the lack of necessary utilities.
- Go to Start, scroll through all applications.
- In the list, find the “Accessibility” section - that’s where the on-screen keyboard is located.
- As with the previous software, you can simply enter the word "display" in the Start search bar if that's more convenient.

This is what the keyboard looks like in Windows 8
In case you want such an input tool to always appear when you log in, you can enable this function like this:
- Go to Control Panel, Accessibility section.
- Open the menu for using your computer without a mouse or physical input.
- Check the box next to “Use on-screen keyboard.”
- In the left menu, open the “Change login settings” section and specify the use of it when logging into your account.
Activation on Windows 10
In the latest version of Microsoft software, you can run the same input tool as in previous releases of the system, or use its new version, improved in appearance.
To enable the regular version, follow these steps:
- In Start, start typing the text “display…” in the search bar, after the component is found, launch it.
- Or use the Win+R combination, enter “osk” in the line field, execute the command.

To enable another, newer version, do the following:
- Click on the corresponding icon in the notification area. If it is not there, right-click on the taskbar and select “Show touch keyboard button” in the context window.
- Or go to your computer settings and open the accessibility menu. In the "Keyboard" section, enable the display version.
- You can also always enable a similar input tool through the “Accessibility” icon that you see when you log in.
If you don't like the standard program that comes with the software, you can always find other applications for writing texts from the display - just download any of them you like via the Internet.
That's all - now you know how to enable the virtual keyboard on a laptop, computer, tablet, regardless of what version of Windows you use. The procedure itself is quite simple and does not require special knowledge.
This guide will tell you in detail how to use the on-screen keyboard on Windows.
How to enable and call the on-screen keyboard in the operating system Windows XP, 7, 8/8.1, 10?
Method 1. How to enable and call the on-screen keyboard on Windows via Search?
- Step 1. Click the button "Start" and click on the field "Find programs and files".
- Step 2. Enter "Screen keyboard" to search. As a result, you will get a result similar to the one in the picture below.

Step 3


Method 2. How to enable and call the on-screen keyboard on Windows via Run?
- Step 1. Open the window "Run". You can open the window "Run" Win+R.


- Step 2. Enter the command "Control"(without quotes) and press "Enter".

- Step 3. Click the button


- Step 4. Now click on the inscription "Enable on-screen keyboard" so that an on-screen keyboard appears on your PC screen.
 Figure 6. Click on Enable on-screen keyboard.
 Step 5. A visual keyboard will appear on the desktop. If necessary, change the size of the keys by simply dragging any edge of the window.

 Figure 7. Displaying the on-screen keyboard on the Windows desktop.
 Method 3. How to enable and call the on-screen keyboard on Windows via Start?
So, below we have provided the instructions that will allow you to enable the on-screen keyboard on Windows:
- Step 1. Click the button "Start" and click on the inscription "All programs".
 Figure 1. Click All Programs.
 - Step 2. Now go to the section "Standard" > "Special abilities", and click on "Screen keyboard".
 Figure 2. Click on On-Screen Keyboard.
 - Step 3. A keyboard will appear, use it in any application or document. If necessary, change the size of the keys by simply dragging any edge of the window.
How to configure the on-screen keyboard in the operating system Windows XP, 7, 8/8.1, 10?
It's worth noting that the on-screen keyboard provides you with regular, function, and other keys just like a physical keyboard. You can also get various functions that can be configured by clicking the button "Options". You can bind the keyboard to the taskbar. This way, the next time you start your PC, you just need to click on the keyboard shortcut in the taskbar.
- Step 1. To configure the on-screen keyboard, click the button "Options".
 Figure 1. The on-screen keyboard is configured through the Settings button.
 - Step 2. In the window "Options" You can optionally enable the numeric keypad if your work on a PC involves numbers. You can also customize how you use the keyboard: by clicking on the keys with the mouse pointer, or by hovering or scanning the keys with the mouse pointer.

 Figure 2. Settings for how keyboard keys are used.
 How to disable or remove the on-screen keyboard in the operating system Windows XP, 7, 8/8.1, 10?
In order to disable or remove the on-screen keyboard, you need to use the instructions below:
- Step 1. Open the window "Run". You can open the window "Run" by pressing the keys simultaneously Win+R.
Figure 3. Open the Run window. - Step 2. Enter the command "Control"(without quotes) and press "Enter".
Figure 4. Enter the Control command. - Step 3. Click the button "Ease of Access Center"
Figure 5: Click on Ease of Access Center. - Step 4. Now scroll the wheel down and find the inscription "Using a computer without a mouse or keyboard" and then tap it to turn off the on-screen keyboard.

 Figure 6. Click on the inscription shown in the picture.
 - Step 5. Here you need to uncheck the box "Use on-screen keyboard", then press the button "Apply" And "OK".
 Figure 7. To disable the on-screen keyboard, uncheck the item, as in the picture above.
 How to change or switch the language on the on-screen keyboard in the operating system Windows XP, 7, 8/8.1, 10?
So, if you want to change or switch the Russian language to English on the on-screen keyboard, then below are the methods that will allow you to do this.
How to change, switch the on-screen keyboard to English?
To switch Russian to English, click Shift + Alt or Shift + Ctrl.

 Option 1: Switch and change the language on the on-screen keyboard to English.
 Option 2: Switch and change the language on the on-screen keyboard to English.
 How to change, switch the on-screen keyboard to Russian?
To switch English to Russian, click Shift + Alt or Shift + Ctrl. The keys for switching the language on the keyboard and their purpose depend on the system setup.


