What you need to connect Wi-Fi at home. How to connect a laptop to a Wi-Fi network. Why Wi-Fi may not work on a laptop
There are several ways to connect to Wi-Fi from a mobile phone (Android and iOS) or from a computer. In the instructions, we will also look at what problems you may encounter and how to solve them. We will also consider in detail the issue of setting up a network connection through the interfaces of the router itself and Windows.
How to connect Wi-Fi on your phone
Every modern smartphone has a Wi-Fi module in its hardware. Typically, you can connect your device to Wi-Fi in just a few steps. Use the quick access menu or connect through your phone settings. These steps for devices running iOS and Android will be described in more detail below.
On iPhones
Modern versions of the iOS operating system have a quick access menu, which is called up by swiping up. If your phone automatically connects to your home network, then you can safely turn on Wi-Fi through the lower toolbar. Press the wireless connection indicator until it lights up and becomes active. Afterwards, you will automatically connect to a known network.
If this is your first time connecting to a home or public network, you must complete the following steps:

Now you know how to connect Wi-Fi on any iOS device.
Possible problems and solutions
There are situations when a phone or tablet does not connect to Wi-Fi. The first and most common problem is a password-protected access point. You need to enter it in the appropriate field when connecting.

If the point does not have a password, but you cannot connect, take the following steps:
- check your Internet connection to see if the network is accessible from a computer or other device;
- make sure you are close enough to the router;
- make sure that automatic IP address distribution is enabled (DHCP function);
- reboot the router;
- reboot your mobile gadget;
- reset your router.
If other devices connect to your wireless network without problems, this means that the problem is with a specific mobile phone. We recommend taking it to a service center for diagnostics.
On Android devices
Despite the differences between Android and iOS, fundamentally connecting to Wi-Fi follows the same principle. To access the quick menu, swipe down on the unlocked screen, and then tap the corresponding Wi-fi icon.

Users can activate Wi-Fi through settings:
- Go to your phone settings.
- In the wireless networks section, click on WLAN (or Wi-Fi).
- Move the slider to the activated state, and among the available networks, click on the desired one.
- Enter your password if the system prompts you for one.
If you encounter problems, follow the same steps as described in the troubleshooting section for iOS.
If the connection to the router is hidden
When devices are connected to Wi-Fi, a corresponding icon appears at the top. However, in some situations, you cannot connect to a wireless network because it is hidden. The user will not find it in the search list. To connect to a hidden wireless access point, follow the instructions:

If all parameters are entered correctly, the phone will automatically connect to the hidden network. Make sure you are within its coverage area.
When DHCP is disabled
When trying to connect to the router, the user may see a persistent “Obtaining an IP address” message. Each device connected to the router receives its own IP address. DHCP (Dynamic Host Configuration Protocol) is responsible for the function of distributing addresses. It may be disabled on some routers, so you must enable this protocol manually.

To activate DHCP, you need to go to the router settings. How to do this is described in detail in the subsequent paragraph “Access via the web interface”. Once you are in the settings, find the DHCP (or equivalent) section, and then select the Settings sub-item. Enable should be checked in it. Click "Save" and reboot your device.

DHCP may be disabled due to a problem in the router. Try a hard reboot. Press the button on the back of the router that says reset, and then hold it down for more than 5 seconds. Your password settings will be lost, but this will allow you to restore DHCP functionality.

Connecting Wi-Fi on a laptop
If you are connecting to a wireless network via a laptop, follow these steps:
WPS technology allows you to connect to the router quickly and easily. Using it, you do not have to enter a password on your computer or laptop. To do this, go to point 3 of the previous instructions. As soon as the password entry window appears, find the button on the router that says WPS, and then click on it. The laptop will automatically connect to the network.

WPS is often disabled by software. You can activate it in the router's web settings. Go to the WPS section, and then click the “Enable WPS” button. If necessary, you can add a new device through the web interface by clicking the “Add device” button.

Now you know how to connect to Wi-Fi with a password.
Enabling on the case or using a keyboard shortcut
On some laptops, Wi-Fi is disabled by hardware. It must be turned on before connecting to a wireless network. The first way is to press a special button. Some manufacturers place a similar key on the keyboard or on the side of their devices.

You can also connect your laptop to Wi-Fi using key combinations. On many models, there is a button among the functional ones (F1-F12) to activate Wi-Fi. It must display the appropriate icon. To activate Wi-Fi, you need to press it together with the Fn key.

These are current ways to connect your laptop to Wi-Fi using buttons.
Take this opportunity and invite a specialist who will help you connect to the Internet. If this is not possible, read the material: “how to connect a laptop to wifi” and carry out the steps yourself.
To configure a wi-fi access point yourself, follow the instructions:
- Go to “Start” and enter the phrase “Command Prompt” in the search.
- Left-click on “Run as administrator”.
- A window will open to create your own access point, enter a special command netsh wlan set hostednetwork mode=allow ssid=My_virtual_WiFi key=12345678 keyUsage=persistent.
- Further actions: go to “Network and Internet/Network connections”, the system will show the new device that has appeared.
On a note. The meaning of the command word ssid is the name of the new network; you can come up with it yourself and write it in Latin letters after the “=” sign. The key command is a unique password that you also need to come up with yourself and enter after the “=”. It will be used by group members who connect to the new access point.
You must come up with a password, otherwise the Internet will become public.
Checking and installing the driver for Wi-Fi
If you can't connect to Wi-Fi, you probably need to install a driver. To do this, download and install the program manually. In newer versions this issue is easier - for example, version 10 of the software independently installs all the necessary drivers.
So, to check the driver, follow these steps:
- Right-click on the computer icon.
- Go to “Properties”, then go to “Device Manager”.
- Click on “Network adapters”, in which we look for the presence of a driver for connecting to WiFi. If the driver is not installed on your device, the device will be shown with an exclamation point in a yellow icon instead of programs. This means that the laptop does not recognize the existing adapter because there is no driver.
If there is no connection to the wireless Internet, then the adapter is not recognized. The next step is to install the driver. The required program can be selected on the official website of your laptop manufacturer, in accordance with the model of equipment and the operating system that is installed on it.
The program is downloaded in archive format, you need to run it. When the installation is complete, reboot your laptop. Then search and run the driver again.
Connection via Network and Sharing Center

To establish a connection this way:
- In the laptop settings menu, go to the “Network and Sharing Center” section. You can open this section in the same way you opened the command line - through the search line in “start”.
- Next you need to switch to the advanced settings tab. At this point, enable the “network discovery” and “password protected sharing” commands. Then save the changes and return to the “Network Center” section.
- The next step is to configure the adapter settings. To do this, go to the settings section of the same name. In the window that opens, connect to an available network: select the device that the laptop found, right-click, select the “Properties” tab. In the “Access” tab, check all the boxes. Now you need to select the desired network in the “home group connection” item.
How to connect a laptop to WiFi with Windows 7,8,10
To connect your laptop to the Internet via WiFi (home router, access point in a cafe), just click on the network symbol in the lower right corner of the screen and select an available network without password protection. Otherwise, you will have to work a little harder.
First of all, let's look at the connection on a laptop with Windows 7:
- Go to the Internet network settings section.
- Click “Set up a wireless network” and click “Next” at the bottom.
- In the special field, write the name of the network, and in the “security type” item, select WPA2-Personal.
- Create a password to connect to the network. It must have at least 8 characters. Then you can enable "Save". We turn on “Next” and wait for the connection to occur.
- If in the future you need to distribute the Internet to other devices, go to “Enable sharing”. Select the “Close” button.
On a note. On a laptop with the XP version, you must select WEP in the security section.
In version 8 you can try using the same method as in Windows 7. But in some cases they may not work.
Then we use the command line window method:
- the code should be like this: netsh wlan show drivers
- if the answer in the text “Protection of management frames” is “Yes”, write a command with a created password and the name of the Internet point: netsh wlan set hostednetwork mode=allow ssid=”network-name” key=”connection-password”
- The code for creating the installation is similar to version 7. netsh wlan start hostednetwork
You can connect from any existing laptop or computer.
In the case of version 10, connecting to the network has become much easier. The driver is installed by default, there is an easy panel to connect and disconnect WiFi.
It is worth mentioning just a few details that will greatly facilitate the task of familiarizing yourself with the connection in version 10:
- By clicking the network icon, we check for the presence of an adapter. If it is simply turned off, a red cross will light up, and if it is turned on and sees available networks, a yellow asterisk will appear.
- To turn on the adapter, simply click on the icon with a red cross.
- The adapter will then calculate available networks. Select the one you need and connect.
Important! If you select the “No authentication” option in the security settings, you can connect to the network without a password.
Possible connection problems
Most often, the connection problem lies with the driver. It may be incorrectly configured or absent altogether.

A more serious reason may be incorrect operation of the entire system on the laptop in general or infection of the system with viruses. Whether this is true or not, other problems in the operation of the laptop will help to understand, for example, incorrect operation of various programs, the appearance of advertising and even file corruption.
To check for viruses, just run an antivirus program. If the result turns out that there really are viruses, they need to be removed. Most often, after this, connecting the laptop to the wifi router and other problems resolve themselves.
When you turn on your smartphone, each resident of an apartment building can see many wifi connection points. Particularly inquisitive people have a desire to use someone else’s network, but how to find out the password for Wi-Fi.
Each router has its own IP address, through which you can view all the data of the neighboring device.
WiFi is an IEE802.11 standard network. The transmitter is installed in almost every apartment. You can find out the name and address of the router from the network mask, which people often forget to change during the initial installation of the device. You can connect to Wi-Fi if the owner of the network broadcasts it without a password at all.
You can find out the type of wifi device by the name of the network displayed in the list of available ones. You can use the network unlimitedly if the device itself was able to connect without a password.
Your actions are invisible when the traffic load is low. You can detect something is wrong if your neighbor looks at the list of connected devices. And he will do this through the laptop browser, where the corresponding router address is entered.
You can go into the router settings through a browser by entering the address 192.168.1.1. By default, the nickname is set to admin and the same password.
But before that, the laptop needs to be connected to wifi. By quietly correcting the data, you can annoy your neighbor and interrupt the connection. After that, it will reset the settings to factory settings and change the access codes.
The wifi password and ip address are easy to find out using special hacking programs, but the latest versions of routers provide this feature and block automatic connections.
It is convenient to have a neighbor connection point for the following purposes:
- No need to pay a monthly subscription fee;
- WiFi allows you to use several devices at once, unless your neighbor sets a limit on the number of connected devices;
- Your identity will not be established for illegal connections.
Hacking someone else's wifi is an illegal act, which results in criminal liability.
Whether or not to hack someone else’s router is up to everyone personally, but why not try? The IP address of the device is indicated on the back cover of the wifi transmitter. It can be viewed at a computer hardware store.
Ways to solve connection problems

To connect to most wifi networks you will have to crack the password. A simple way to solve Internet access is to purchase your own router and get your own IP address for the devices.
But an inquisitive mind is always drawn to complex tasks. The first step is to find information about the new network and whether there is a Wi-Fi password on the router.
You can find out after viewing the details of the current wifi. Open the “Control Panel” and find the Internet network item and go to the “Network Control Center”. We need to open the “Network Connection” item.
At this point you can see:
- Complete list of available wireless networks;
- Broadcast signal level;
- Access to Wi-Fi. If it is open, then you are very lucky, use free wifi.
You can hack wifi using programs to find a suitable password. They run on your laptop and try possible variations until a connection is made.
It should be remembered that no amateur hacker can use the neighbor’s Wi-Fi completely unnoticed. The IP address is calculated instantly if you connect the device to the network.
A list of all current connections is displayed in the router itself. It is always available on a PC connected to it locally via a wire. But rarely does anyone control their network while the transmitter is operating stable. One extra neighbor on the “wire” will not make a difference; the speed drops significantly with a huge list of wi-fi “freeloaders”.
What hacking programs are there?

Applications do not guarantee 100% wi-fi hacking results; you will have to connect using several programs. Finding out the password is possible with a probability of up to 90%.
Here is a list of programs available on the Internet:
- WifiSidejacking - the program interface is entirely in English, but a detailed manual helps you connect to Wi-Fi in a few minutes;
- Aircrack-ng is a set of tools for competently searching for not only wifi passwords, but also helps determine the IP address of connected subscribers;
- AirSlax - works with wifi in 6 simple steps: scanning the network, selecting a target, capturing packets, disconnecting the client, guessing the password and saving the finished result;
- Wifipirate 13 is a powerful application that provides passwords of all surrounding wireless broadcast points;
- CommViewforwifi - used to analyze networks, search for new connection points and neighbor activity time.
Aircrack-ng includes a software package of applications for decrypting intercepted files, creating encrypted signals, recovering Wep keys in Windows. It includes a tool for converting files with the ivs extension.
There is also the ability to monitor the current connection and determine the wi-fi network traffic.
Through a remote IP address, the Airserv-ng application provides access to the laptop's wireless card. Allows you to solve problems with drivers and make changes to the operating system. The program hacks wi-fi networks: Wep, searches for WPA-PSK keys, WPA/WPA2. All operations are carried out automatically without the participation of the owner of the magic code.
No programmer can predict the password selection time; it all depends on the following factors:
- Password complexity, presence of letters and numbers;
- Wi-fi device type;
- Has the IP address changed?
- Distance from the transmitter, device load.
- The selected utility and scanning method.
How to hack a hotspot on Android?

Finding a password for a smartphone’s wi-fi transmitter is even more interesting. Often neighbors use the Internet through their cellular operator. Based on the results of the selected password, it is possible to determine the IP address of the subscribers.
There are software applications for scanning networks:
- Wifi Password break;
- To control wifi use the Wifikill program;
- Wibr+ - serves as an assistant for hacking wi fi without any special hacking skills;
- WiHackmobile is a simple program for finding passwords of surrounding networks;
- Wi-Lomster is a popular application for working on a smartphone;
- WifiRouterkeygen - quickly finds Wi-Fi passwords to connect to a neighbor. The interface is intuitive and does not require familiarization with the operation of the utility.
The listed utilities can identify the most attractive network for hacking.
You won’t be able to connect quickly if your neighbor has taken care of wi-fi protection:
- Saved a long and complex password;
- Changed default logins;
- Purchased the latest version of the provider's router;
- Turns off the transmitter when not in use;
- Controls connections and has introduced restrictions on the number of devices;
There is no chance of hacking networks with a reliable level of encryption using any utility.
If the router turns off during scanning, the procedure will have to start over.
Connecting your device is half the battle, but you need to carefully hide your IP from your neighbor. When he realizes that his wi-fi network has become public, he will wonder who used the router. The problem will develop into a scandal if he comes to you.
The Wifikill utility helps you find intruders using your router. With one click, it will block a user by IP address. But he can change it, so it’s better to set restrictions on the number of connected devices. It’s better to create a list of allowed devices.
Greetings, dear seeker. If you have landed on this page, it means there is a question “how to connect Wi-Fi”. And this is where you will get the answer to your question. You have probably already noticed that in our world we are surrounded by a great many wireless networks and one of the most popular now is Wi Fi. Now Wi-Fi is available almost everywhere: at work in shopping malls, cafes, restaurants, shops. Everything so that we have constant access to the Internet. Also, many people now connect Wi-Fi routers at home to have their own small wireless local network. So why is WiFi so popular? Firstly, it is easy to use (no need to run a bunch of wires), this network is also high-speed, and many modern gadgets now work via Wi fi, such as: telephone, tablet, laptop, e-reader and PSP set-top box. Connecting all these devices is almost automatic, but there are some little things. In this article I’ll tell you about these little things.
How to connect wifi on a laptop
Technical part
Before you get ready to connect to Wi-Fi, check whether your wireless network card is enabled on your laptop. Many laptop models have a button with a WiFi icon and an indicator that should light up if you have turned on the “network card” (the indicator can also light up in different colors. Usually, if the network card is disabled, the color is red, if it is enabled, the color is white or green). But there are still cunning manufacturers who hide the Wi-Fi switch at the end of the laptop; switch it to the “on” position (it should be clear from the small pictures next to the switch).
Software part
For those who use Windows XP. follow the action: Start → Control Panel (click “Switch to classic view”) → Network connections. In the window that appears, there will be a “Wireless network connection” icon; it must be active. Right-click on it and select “View available wireless networks”
After this, you will be taken to a window where there will be a list of wireless networks:

Here we select the network you need. If it has a password, enter it twice in the form that appears:

After this, the laptop will connect to the access point and you will have access to the Internet.
If you have Windows 7 OS. There will be an Available Connections icon in the lower right corner near the clock.

Click on it and see a list of connections.

Select a network from the list, if it requires a password, enter it in the window that appears.


Often, users who have purchased a laptop or netbook encounter difficulties when turning on and setting up wifi. The procedure itself is quite simple, but in some cases there are various snags and unforeseen difficulties, and sometimes you need to configure the router before you start connecting Wi-Fi to the laptop. In this article we will look at both the standard connection and options for solving such problems.
How to enable WiFi on a laptop
Usually, to turn on wifi, it is enough to perform 2-3 simple operations. Which ones exactly depend on the model and manufacturer of the laptop. Here are the options for enabling a wifi network on beeches from the most popular manufacturers:
- On an ASUS laptop, you need to press the combination of the FN and F2 buttons.
- On Acer and Packard bell, hold down the FN button and press F3 at the same time.
- On HP laptops, wi-fi is activated by touch button with a symbolic image of an antenna, and on some models by the FN and F12 key combination. There are also models that have a regular button with an antenna design for this purpose.
- To turn on wi-fi on Lenovo, hold FN and press F5. There are models that have a special connection switch for wireless networks.
- On Samsung laptops, to turn on wi-fi, you need to hold down the FN button and press either F9 or F12, depending on the model.
To connect Wi-Fi, laptops of different models and different manufacturers can use their own original key combination. A detailed description for a specific model can be found in the article on how to enable WiFi on a laptop by hardware, or look in the user manual that came with the laptop. The FN button is found on almost all models of modern laptops. With its help, you can connect various functions and connect the beech with other devices. If the laptop does not have an FN button, then a special button or switch is used to turn on the wireless network. As a rule, it is indicated by one of these drawings.
If you don’t find it on the keyboard, examine the ends of the laptop; perhaps the switch is on the side. Also, take a close look at the bottom of your laptop. There are models in which the switch is located on the bottom cover. Moreover, manufacturers make this button barely noticeable. It practically merges with the body and may not be visible at first glance. It may be signed Wireles or Wlan. Have you turned on wifi using the required button or combination, but it doesn’t work? You should set up Wi-Fi on your laptop.
Example of a hidden WiFi switch
.
Attention: It is worth saying that such switches can be located in the most unexpected places, even on the back cover of the laptop. So if your WiFi is not working, carefully inspect your laptop for a switch.
How to set up WiFi on Windows 10
And so let's figure out how to set up WiFi in the Windows 10 operating system. By following simple steps you can do this with ease, you just need to exactly repeat the instructions presented below. If they don't help, you can always ask for advice in the comments.
Connecting to WiFi on a laptop
Let's immediately look at how we can connect to a wifi network if everything is in order with the laptop settings. Let's do simple steps, the first thing we need to do is in the lower right corner of the screen on taskbar find the icon in the form of network divisions (Wi-Fi antennas). Don't forget that this icon can be hidden behind the up arrow. Click on it and fields with WiFi networks available for connection will appear. And click on the connect button.

After which, if the network is protected, you will need to enter a password.

If the password is entered correctly, a window will appear asking you whether you want your computer to be visible on the network. I won’t go into details, but if you are connecting to your home Wi-Fi network, then click on the button YES.

After these simple steps, you will successfully connect to the WiFi network.

Let's check if your WiFi adapter is turned on on your laptop
Now let's look at one of the most common connection problems. So you moved your glance to the lower right corner to find an icon in the form of network divisions (Wi-Fi antennas). But it wasn’t there; instead, there was an icon in the form of a monitor with a red cross on it. This means that your Wi-Fi adapter is disabled and you need to reconnect it. To do this, right-click on the icon in the form of a monitor, and select the item in the pop-up menu Network and Sharing Center. In the window that opens, click on the item in the left menu Changing adapter settings.

After which a window will open Network connections. In it if you enter the icon Wireless network, and under this inscription it is written Disabled. Then you just need to turn it on; to do this, right-click on it and select Turn on. And make a connection.

If, when opening the window Network connections, nothing type icons Wireless network not found, this may mean that your Wi-Fi adapter is disabled by hardware. You need to look for the WiFi power button on the laptop body, as I described above.
Let's check whether the WiFi driver is enabled and whether it works properly
Now let's consider the option that we checked our laptop and are 100% sure that the laptop's WiFi adapter is connected to the hardware. And the icons Wireless network no, or everything is there, but where available wifi networks should appear there is nothing, or you see that something strange is happening with the Wi-Fi adapter. Most likely there is a problem with the laptop's wifi adapter drivers. You will need to go to Device Manager and check what is happening with your wifi drivers.
Click anywhere (empty) on the lower taskbar with the right mouse button, and select Settings from the drop-down menu.
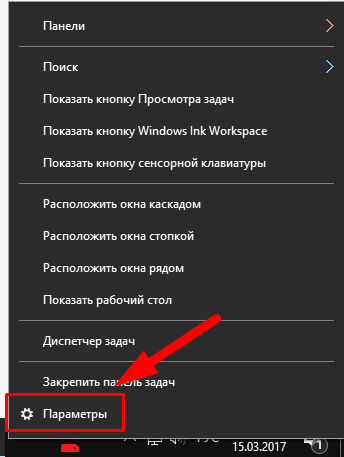

On the page that opens, at the very bottom, select device Manager.

Now in the window that opens, expand the tab Network adapters, The driver for the WiFi adapter should be displayed there; usually its name contains the inscription “Wireless”.

So what could be wrong with your wifi adapter drivers? First of all, pay attention to the icon next to the name of your adapter, if there are any extraneous icons on it such as “Exclamation mark” or “Circle with a dot”. This means that the driver is installed but does not work correctly; to fix the problem you need to update or reinstall the driver. Also if in tabs Network adapters, there is no driver in which the words “Wireless” are present, this means that the driver for your adapter is not installed. If so, then in the general list device Manager there will be an inscription “ Unknown device". It will look something like this:

The solution to this problem will also be to install new drivers. If there is no inscription “ Unknown device" and there is no driver in which the words " Wireless". This may mean that your wifi adapter is disabled, faulty, or simply missing.
How to set up WiFi on a Windows 7 laptop
Before setting up, you need to check the availability and connection of drivers. Checking drivers Checking the driver is to find out whether they are on your device at all and whether it is currently in use. So, in Control panels select an item device Manager, which can be hidden inside the item Equipment and sound.

A window opens in which we find Network adapters. There must be two items: Ethernet and Wi-Fi. One of them should have the word “Wireless” in its name. This is your adapter.

If there is no entry for the wi-fi adapter, or there is an icon with an exclamation mark on a yellow background next to it, this means that you have a problem with the drivers. If there is no entry, it means that the drivers are not installed and you will have to install them from the disk that came with the laptop. Or find it on the manufacturer's website. Without them, wi-fi will not work. If there is an entry, but there is a yellow exclamation mark next to it, right-click on this item. In the window that appears, select “Engage”. The reason for connection difficulties may lie in the fact that the adapter is set to a power saving mode. To disable it, right-click on it, then Properties - Power Management, now you need to uncheck the box “Allow the computer to turn off this device to save energy.”

Now the driver is fine. Enabling the adapterwi— fi . To do this through Control Panel→ Network and Internet go to Network connections. Here we find Wireless network connection. This is the wi-fi adapter. Right-click to open the dialog box and select “Enable”. Connect to an access point. All that remains is to connect the laptop to the access point. Make sure the access point is active. Find the wi-fi icon in the lower right corner of the screen on the taskbar. When clicked, a network management window will open, select the desired network, click “Connection”.

If the network is protected by a password, the system will ask you to enter it (if you have forgotten the password for your network, you can find it out). Only after entering the required password will you be able to use the Internet. If the network is open, the connection will occur automatically. That's all. Enabling and setting up Wifi on a laptop completed. If you have set up Wi-Fi once, you won’t need to do this again, as they will automatically be saved in the laptop’s memory. You will only need to turn it on with the appropriate button or key combination. Remember that connecting wirelessly takes a lot of power from your device, so the battery will be used quite intensively. Pleasant and simple connections without incident!
.


