Opencart 2.3 category menu in the side column. OpenCart main menu: how to add or remove an OpenCart top menu item
I am faced with the task of removing and adding a menu item from the main menu of the store. I show how to do this, first telling you about the main menu of the OpenCart store.
About the OpenCart main menu
IN boxed version OpenCart management system, you can create the main menu (aka top menu) of the store, only from the categories of parent categories.
Child categories of a parent category will drop out of the menu items of the parent categories automatically. In the menu settings, you can set how child categories are shown. Namely, indicate the number of columns of child categories, their order and status (show/hide).
In this article I will not show the code edits for another main menu setting. However, I note that editing the menu code is done in the files:
- /catalog/view/theme/default/template/common/header.twig
- /catalog/controller/common/header.php
Please note that the main menu is adaptive and takes up the entire screen of the device on which you are viewing. On small screens, the menu collapses into a button. In the photo you can see what the menu looks like on mobile devices.


How to add a new main menu item
Let's get into practice and see how to add new item main menu in the demo menu of the boxed version (for example).
- Go to the “Categories” tab;
- Select the parent product category and click the “Edit” icon in the line of the selected category;

- On the category rector’s page, on the “Data” tab, select the “Main Menu” checkbox (1 in the photo);

- Below we indicate the number of columns for child categories (2 in the photo). The value "0, zero" will correspond to one column, the value "1";
- Don't forget to indicate the sorting of this category in the main horizontal menu (3).
Remove a menu item from the main menu
To delete any item top menu OpenCart needs:
- Select the parent product category and click the “Edit” icon in the selected category line;
- On the category rector’s page, on the “Data” tab, uncheck the “Main Menu” checkbox;
- Don't forget to save.
Conclusion
Agree, in the boxed version the main menu of OpenCart is very easy to configure. In my opinion, it is too simple and too limited. If you compare the OpenCart menu settings with the menus of other CMSs, it clearly loses.
However, the OpenCart code is simple and you can always customize the system menu to suit your needs. More on this in other articles for advanced users. Subscribe to blog updates.
Error 500 after installing the module means that something happened critical error in php.
To identify the problem you can:
1. Open the logs/error.log file on your server. At the end of this file there will be all the latest critical errors.
2. Open Tools > Error Logs in the admin panel - errors are displayed here, but not always.
3. Enable output php errors to the screen - add the following code to the end of the .htaccess file:
Php_value display_errors 1
php_value display_startup_errors 1
php_value error_reporting E_ALL
Possible reasons:
1. If you have not downloaded modules in the archive through the admin panel before -you need to install free modification according to the instructions and then reinstall the module
2. It’s possible that the module being installed is missing own page settings and accordingly it will not be in the list of Modules
Two solutions:
1. If this error occurs when installing the module from the admin panel, you need to install the free one. It will install without problems through the same add-on installer, just after installation, do not forget to update the modifications and then you can start installing any modules on Opencart 2.
2. You can also solve this error in another way: register access to FTP in the admin System > Settings > Store > FTP tab.
If you see the message " Access is denied! You do not have permission to access this page. If you need it, contact your administrator." - you need to give administrators rights to manage the module or page.
Solution: in the Opencart 2 admin panel go to System > Users > User Groups > Administrators and here we click “Select all” below both blocks, then Save.
Another reason for this error to appear may be correct installation module - the files were not loaded into place. Upload the module files manually to the server or install the fix and reinstall the module.
If the module is one XML file, then its extension should be .ocmod.xml
If the module is an ocmod.zip archive, then you do not need to unpack it, but install it as is. Such an archive must have an upload folder (can be empty), and there may also be modification files: install.xml, install.php, install.sql. There should not be any other files in the root of the archive.
This error means that you are trying to install a modifier that is already installed or perhaps one of your modules has the same ID.
To solve this error, you need to remove before installing old version modifications in the Modules > Modifications section.
If you don’t have such a module, but the ID is the same, then you need to change the value of the parameter in the installed XML modifier, make this parameter unique by adding several characters.
This error means that you are trying to install too volumetric xml modifier.
The number of characters in the ocmod.xml file should not exceed 65535 .
To solve the error, you need to split the modification xml file into several parts, the main thing is not to forget to set each unique value in , you can add the numbers 1,2,3... to the current value as part identifiers.
Another solution is to change the type in the fields where modifications are stored in the “oc_modification” table of the database. You need to run the following SQL query:
ALTER TABLE oc_modification CHANGE xml xml MEDIUMTEXT CHARACTER SET utf8 COLLATE utf8_general_ci NOT NULL ;
Find the relevant code snippet. You can see the wishlist code in the screenshot below (highlighted in grey). Remove the code as well as the tag

Let's change the menu item names Registration(Registration) and Basket(Shopping cart). Unzip the template package, go to the folder themeXXX. Unzip the file with extensions. Open TemplateMonster_header .ocmod .xml in the editor.
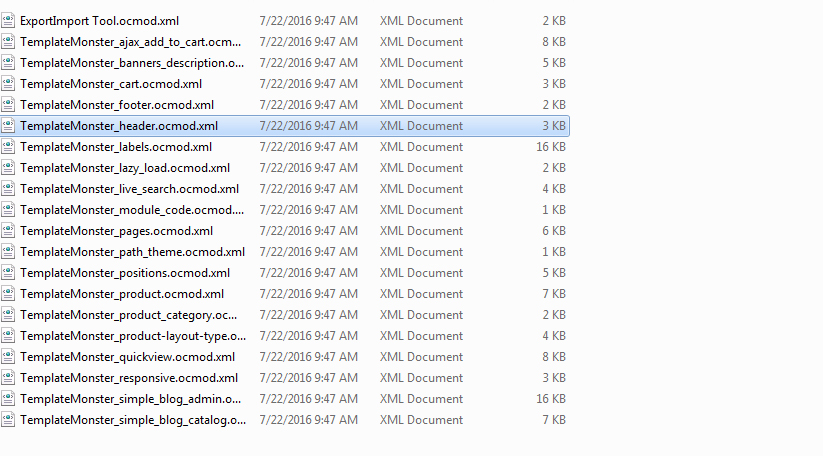
Check if the file contains the header you want to change. You can use the search function in the editor to find relevant text. The name “Registration” is indicated in the modification. Changes must be made directly to the modifications. Alternatively, you can make changes to the file (en-gb is the language folder).
We have changed the name Registration(Registration) on Test Registration(RegistrationTest). Save the changes you made to the modification. The same changes need to be made in other languages.

Go to the tab Extensions -> Modifications(Extensions -> Modifications). Find a modification TemplateMonster header and select it. Remove modification.

Go to Extension Installer(Extension Installer). Download the modification with the updated header.

Update modifications(Refresh modifications) in section Extensions -> Modifications(Extensions -> Modification).
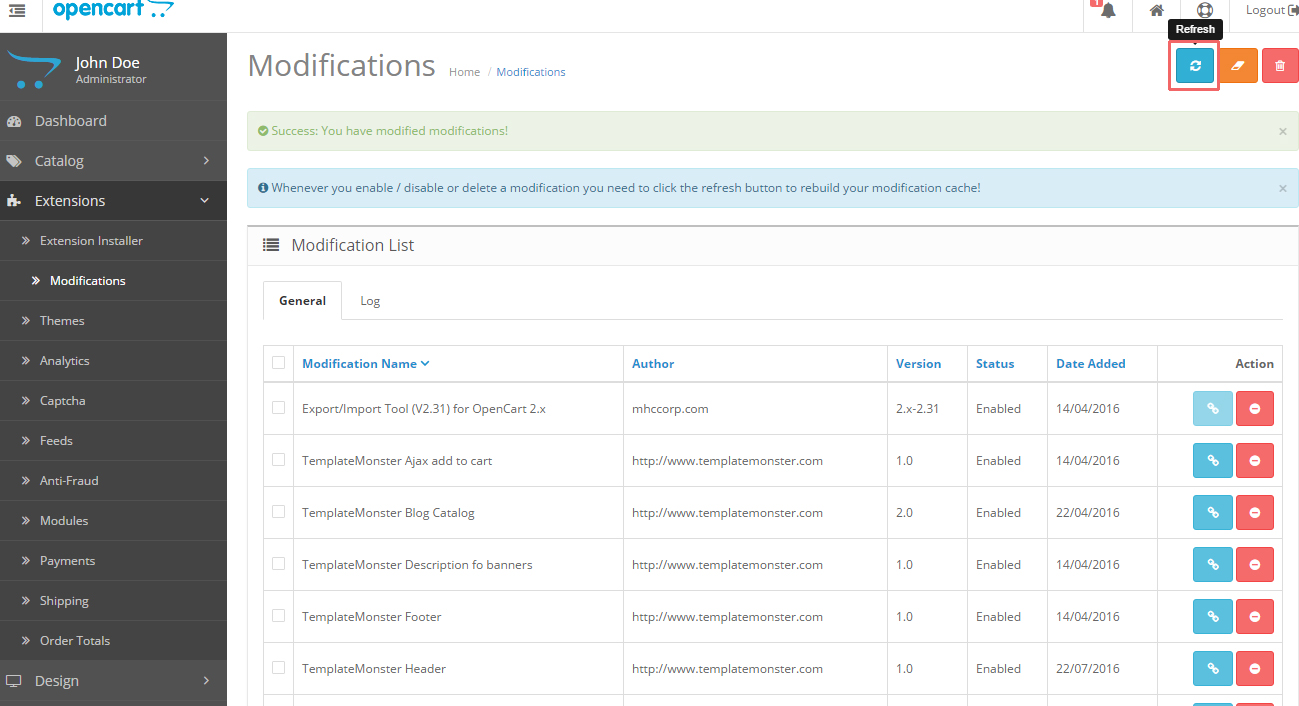
Refresh the page. We have successfully changed the name for the menu item Registration(Registration).

In our case the text Basket(Shopping cart) can be changed directly in the language file. Open the file \catalog\language\en-gb\common\header .php(the file path depends on the language) in your editor. Change the text. Save your changes and upload the modified file.

Go to the tab Extensions -> Modifications(Extensions -> Modifications) and update the modifications. Refresh the page.
We have changed the name Basket(Shopping Cart).

Let's remove the menu item A wish list(Wish List). Open the file \catalog\view\theme\themeXXX\template\common\header .tpl in your editor. Find code with a structure similar to this:

You can also check out the detailed video tutorial below.


