Replacing a DVD drive with an additional HDD or SSD. Installing an SSD drive in a laptop instead of a hard drive
Hello admin! ? I bought a solid state drive SSD Kingston SSDNow V300, came home and opened a beautiful box, and in it only the SSD itself, no screws, no adapter bracket from 2.5 to 3.5 inch form factor to install the SSD in the hard drive bay my system unit! I called the store where I bought the solid-state drive, they said that in fact this bracket needs to be purchased separately, I had to go again, I don’t know why they didn’t tell me right away.
I secured the SSD in this bracket similar to a simple sled, but the first time it was wrong, I couldn’t connect the power cable and data cable to the SSD. The SSD solid-state drive must be secured in the sled in such a way that the power and interface connectors protrude slightly from the bracket, only then can the power cable and SATA data cable be connected to them.

In the end, I still won and installed the SSD into the system unit correctly. But after a couple of days I found out that it was possible to simply secure the SSD to the side of the system unit using ordinary vinyl clamps. In short, I thought everything was simple, but it turned out to be difficult.
But that’s not all, you will laugh, but I had to go to the computer store for the third time to buy a SATA III interface cable (up to 6 Gbps) and only then did I install an SSD drive in my system unit and transfer my Windows 7.
It would be nice to have a small instruction with pictures on your website so that users don’t ride like I did.
That's right, friends, in some cases, solid-state drives are sold without a special adapter bracket from a 2.5- to 3.5-inch form factor, then you need to buy it separately. All this must first be clarified with the seller before purchasing an SSD. If your SSD does not come with an adapter, you need to buy it separately, it costs around 150 rubles and they will sell it to you in a special bag, which will also have special screws for attaching the SSD to the bracket itself, and attaching the bracket with the SSD to the basket for hard drives of the system unit.
And in some cases, solid-state drives are sold with a special adapter bracket, for example Kingston HyperX 3K 120 GB, and HyperX 3K costs a little more, for example, the same SSDNow V300.
On many new computer cases, manufacturers have recently specifically provided space for mounting a 2.5 SSD solid-state drive. That is, no adapter is needed - a bracket from 2.5 to 3.5-inch form factor, for example, in one of the new Zalman cases there is such a cozy place on the back of the case for a solid-state drive.


So, after purchasing an SSD drive, we get this nice box.
On the box we see information about the read and write speed characteristics of our SSD and the highest speed SATA III interface (up to 6 Gb/s). A worthy manufacturer of the SandForce solid-state drive controller is also indicated.

We open the box, inside there is another box made of foamed polyethylene, it contains the drive itself

We take the SSD out of the box. The Kingston HyperX 3K SSD has a metal case with dark plastic inserts. The SSD bears the HyperX inscription indicating that it belongs to the flagship line.


And on the reverse side there is a bracket for installing an SSD in the 3.5-inch form factor of the hard drive cage of the system unit.

There are two sets of screws, the first for attaching the SSD to the 2.5 by 3.5 bracket, the second set of screws for fixing the bracket itself along with the SSD in the hard drive cage of the system unit. The screws are different sizes, do not mix anything up.

So, friends, you and I have almost everything to install our solid-state drive in the system unit, we only lack the SATA III interface cable (up to 6 Gbps), but I didn’t have to purchase that separately, since it was in the box from mine bought a year ago.

So, we attach our SSD to the 2.5 by 3.5 bracket with four screws


On a switched off computer We insert our bracket or, simply, a slide with our SSD solid-state drive into the hard drive cage of our system unit and secure it with four screws, two screws on each side. Please note that the basket already contains a simple SATA hard drive with the operating system, which I will transfer later to the SSD.


We remove another side cover of the system unit and secure the bracket with the SSD on the other side.

Connect the high-speed SSD SATA III solid-state drive (up to 6 Gbit/s) to the motherboard correctly, to the SATA III connector (up to 6 Gbit/s), otherwise it will not reveal all its capabilities (read our article)

And of course, the AHCI mode of hard drives must be enabled in the BIOS.


Well, we installed our SSD. If the SSD is new, then .

Friends, you can install the operating system on the SSD again, or you can. In other words, whatever you want, all the information you are interested in is on the site.
On the Internet you can find the opinion that you always need to install Windows on a solid-state drive again, but you cannot transfer a ready-made and stable operating system from a regular HDD to an SSD, since when Windows is installed on the HDD, accordingly, all its services are started for the HDD to work . But if you transfer such a system to an SSD, then many services will not only not help you work faster, but in addition will contribute to the rapid wear of the new SSD (for example, defragmentation).
I think this is not entirely correct, because the notorious defragmentation can be disabled, and I don’t want to spend several days on a clean installation of a system with hundreds of programs. And why then do SSD manufacturers themselves release utilities for transferring an operating system from HDD to SSD, are they illiterate?
I personally have transferred finished Windows to an SSD many times, for example, on my work computer I transferred Windows 8 (I have it as a traveler) from an HDD to an SSD (60 GB capacity) two years ago, then I transferred the same Windows to another drive SSD (capacity 120GB) everything works so fast for me that I don’t need it faster.
In the future, when, of course, we will install the new operating system on the solid-state drive again.
Every year, users resort to using optical drives less and less. USB drives and cloud storage services, due to their convenience and mobility, have almost completely replaced CD/DVD drives. Many users are unhappy that the drive in their laptop takes up space that could be used for something more useful. Fortunately, there is a way to do this. Indeed, instead of an unnecessary disk drive, you can install an additional SSD disk, onto which you can transfer the operating system, and store all your files on a regular HDD. This approach is very practical and convenient. In this article we will take a closer look at how to install it instead of DVD in a laptop. Let's figure it out. Go!
Installing an SSD and HDD on a laptop is not as difficult as it seems
In online stores and regular stores that sell computer components, you can purchase a special Slim DVD adapter that allows you to install a hard drive instead of an optical drive. It works as follows. The HDD of your computer is inserted into the adapter, then the disk along with the adapter is mounted instead of the drive, and an SSD is installed in the place where the computer’s hard drive was previously installed. Agree, it sounds quite simple. In reality, everything is not so complicated either.
Let's get started. You need to start, of course, by purchasing a Slim DVD adapter. Adapters, like disk drives, come in two types: 12.7 mm and 9.5 mm. Depending on what kind of drive you have, buy the appropriate adapter, otherwise the hard drive simply cannot be placed in place of the optical drive. If you have already purchased it, then you can proceed to installation.
The first step is to remove the necessary components. This is not difficult to do, because you do not have to completely disassemble the laptop, but you will only remove some of its components. It’s worth noting right away that if your computer is under warranty, then such modifications will void the warranty. Despite the fact that this whole procedure is not very complicated, it should be taken with the utmost seriousness and responsibility. Therefore, if you are not confident in your own abilities, it is better to entrust this work to a master.

First, remove the battery, but if your laptop cannot be easily removed, then disconnect it from the motherboard to avoid possible problems and malfunctions. There is no need to remove the entire bottom. It is enough to unscrew a couple of screws to remove the HDD. It's the same story with the optical drive. You can easily find detailed disassembly information for each laptop model on the Internet (since they are all different). See how to remove the floppy drive and hard drive from a specific laptop model. After you have removed the appropriate covers, remove the HDD. To do this, you need to pull the special silicone tab. Since the HDD is mounted on special skids, they must be removed by unscrewing the corresponding screws.
Now you need to install the drive into the adapter. As a rule, everything needed for installation is included inside the box with the adapter, namely: a screwdriver, screws, a plug, a spacer and instructions. Please note that you need to remove the special fasteners located on the sides of the drive and screw them to the adapter. Install the HDD into the adapter and insert it into the SATA connector. Then install the spacer. The HDD itself still needs to be secured with a screw on the other side of the Slim DVD. To do this, you will need a thin screwdriver, which comes with the kit. Then remove the fastener from the other side of the optical drive and attach it to the adapter. Place a plug. All. Now you can insert the drive into place of the drive.
Hi all. Today I want to tell you how to independently install an additional SSD drive in place of the CD drive in an Asus X550L laptop. First, you need to familiarize yourself with the technical characteristics of your laptop in order to understand what components you need to purchase in order to start installing an SSD drive. I’ll say right away if your laptop model is different from the model I’m considering in my post, don’t be upset. Almost all modern laptop models that have a CD drive can install an additional HDD.
Before we start, we need to make sure that we have everything we need.
- New SSD HDD. Your new SSD must have a 2.5″ form factor.
- A set of tools for disassembling a laptop (small Phillips screwdriver). The heads of all screws that you will unscrew are the same size.
- A plastic pick for opening laptop cases or a bank card.
- Pocket for replacing a laptop CD/DVD drive with a 2.5” HDD/SSD.
Here I will tell you in more detail. The thickness of the adapter should be 9.5 mm. since the thickness of the installed DVD drive in the laptop model in question is 9.5 mm. and for successful installation of the adapter you need exactly this thickness, otherwise you simply will not be able to install the adapter. For this laptop model I purchased an adapter Espada SS95 Alu SATA 3 (SATA CD/DVD 9.5mm to SATA 3). You can buy it. The cost of such an adapter today is 300-370 UAH.
Included with the adapter is a screwdriver (for one use), screws for fastening the HDD, and a plastic cover that is installed on the adapter to close the hole that is formed after removing the DVD drive and installing the adapter. We don't need this cover, but first things first.
Now the fun part :).
First we need to open the laptop. We take our laptop and turn it off. We check that our laptop has successfully turned off, turn it over and remove the battery.

After removing the battery, we need to remove our original hard drive. To do this we need to unscrew the cap on the opposite side of the battery.

In the screenshot above, I indicated with arrows where the screws need to be unscrewed.
After you have unscrewed the screws you need to remove the cover. To remove the cover, you need to pull it slightly towards you and lift it (provided that the laptop is lying in front of you as shown in the screenshot).
Under the cover you will see the hard drive and memory modules. We need a hard drive. We must remove the hard drive because we will install an SSD drive in this place. You may ask why here and not instead of a DVD drive. I'll explain. If the speed of the bus to which the hard drive is connected is faster (SATA 3 for hard drive, SATA 2 for optical), then the SSD is placed in this place.

In the screenshot above I showed the mounting locations for the hard drive. You need to unscrew the screws and slide the hard drive to the left, after which the drive can be removed.

Please note that the screws are of different sizes and you need to remember where you removed them from.
When you unscrew all the screws, the pick comes into play. You need to separate the top of the laptop from the bottom.
Please pay special attention that all screws are unscrewed, otherwise you may damage the case.
You need to separate the top of the laptop from the bottom.

Be extremely careful when opening the case as these models have very flimsy latches on the case and they can break off.
Insert the sharp edge of the pick into the gap between the bottom and top of the laptop and slowly turn it to release the latches inside the case. You need to start from the front of the laptop where the indicator lights are located. Thus, you need to walk the pick along the entire perimeter of the body.
When the top cover is separated from the bottom, do not lift it sharply to the top since the top and bottom of the laptop are connected by cables. This can be seen in the screenshot.
I also advise you to watch a video recorded by a kind person with the nickname danythe007. This video shows how to disassemble this laptop model.
I want to say right away that I did not disconnect the cables to remove the top cover because I was able to remove the DVD drive without disconnecting the top part of the laptop (this saved my time).
Let's return to our sheep. Now we need to unscrew the DVD drive. In order not to disconnect the cables, I used a short screwdriver to unscrew the screw that secures the drive to the laptop.

The screenshot shows where the screw is located that needs to be unscrewed to remove the DVD drive.
After we have removed the drive, we need to work on our adapter. We need to install our old hard drive into the adapter. We immediately remove the old disk from the mounting frame and install our SSD in the frame instead of the old disk and put it aside. We'll come back to it a little later.


There are small instructions on the adapter that tell you how to attach the disk. After installing the disc, we need to remove the plastic cover from our DVD drive.
In order to remove the cover from the drive, you need to open it. For this we need a needle or paperclip. There is a small hole on the front panel of the drive; you need to insert a needle into this hole and press a little; the drive carriage should come out of the housing. You now have access to the bottom of the drive to separate the plug from the drive carriage.
The laptop is all assembled. We received two installed hard drives, one installed in the adapter and a new SSD installed in place of the old drive.
Also, after you have assembled your laptop, you need to enter the BIOS. There you will see two hard drives. It is necessary to set the AHCI mode to Enchanced if this has not already been set. This parameter will allow us to work with the new drive as a full-fledged SATA device.
Now you ask, what to do with the installed operating system? How to transfer without losing the functionality of the OS?
Since I knew that I would be installing an SSD drive in the future, I created a 95GB system partition in advance. After installing the hard drive, I transferred the system partition and all related records to the new SSD drive using Acronis Universal Restore. If you want me to describe how I did this, write in the comments and I will write a new post with a more detailed description of transferring the OS to a new disk.
I'll show you how to change a HDD hard drive to a high-speed SSD drive. I bought a 250 GB Samsung 850 Evo SSD. and installed it on my laptop. Then I installed Windows and all programs on the new SSD drive.
I bought my SSD drive Samsung 850 SSD EVO 120 GB SATA III on AliExpress . At first I wanted to order this Samsung 750 SSD EVO 120 GB SATA III (it is 120 GB and cheaper), but in the end I ordered 250 GB, although I could have done with 120 GB. The Samsung 850 EVO SSD arrived after about 12 days (the fastest product that came from AliExpress).
The parcel is well packed and sealed with polystyrene foam. Inside the box is plastic, and in it is an SSD drive.

Here are the specifications of this SSD drive. My reading speed tests, notes at the bottom of the page.

1. Copy all the information you need from your disk
If you, like me, have only one hard drive space in your laptop, then first copy all the information from your hard drive to your external drive or to another computer. Or buy . So that you can then connect your removed HDD drive via USB and download everything you need from it to your new SSD drive.


Here is a visual video of this adapter.
2. Remove the hard drive and install the SSD
Turn off the laptop, unplug the laptop from all wires, turn it over and remove the laptop battery. Now on the back cover of the laptop, find the inscription HDD - this is the place where your hard drive is installed. On my Samsung NP-R560 laptop it is on the bottom left. The hard drive is closed with a cover with two screws.

We unscrew these two screws securing the laptop hard drive.

Remove the cover covering the hard drive. There should be arrows on it showing in which direction you need to pull to move the cover.

Here is the hard drive of my laptop. It has an aluminum lid to help dissipate heat and has a pull tab to make it easier to remove. Simply grab this tab and pull it to the left to disconnect the hard drive from the connector.

Done, the hard drive is disconnected from the laptop and connectors. We lift it and put it aside.

This is what a laptop looks like without a disk.

Now insert the SSD disk in place of the HDD disk.

Carefully insert it in place of the old HDD drive. I also installed an aluminum plate from the old HDD on the new SSD.

Close the hard drive cover.

Tighten the screws of the lid.

Ready. Now we turn the laptop over, insert all the wires into it, put the battery back and turn on the laptop.
3. Install Windows on the new SSD
There is nothing on the new SSD drive and there is no OS (Windows) either, so now you need to install Windows on it. You will receive this error when you try to boot from a new SSD drive that does not yet have a Windows operating system.
Partition table invalid or corrupted. Press any key to continue…

You need to insert your bootable USB flash drive and boot from it.

If you don’t have a bootable USB flash drive yet, it’s time to make one.
Here is a video on how to configure the BIOS to install Windows from a bootable USB flash drive.
Now that we have a bootable USB flash drive and boot from it, we install Windows on the new SSD. We select our SSD, it will be marked as “Unallocated space on disk 0” and click “Next” and install Windows.

The copying of Windows files will begin, then preparation for installation, installation of components, installation of updates, completion. The computer will restart several times. After the first reboot, you can remove the bootable USB flash drive.

If you have never installed Windows via BIOS, then you will find a video on this topic.
After installing Windows on a new SSD drive, change the boot priority in the BIOS so that the Windows bootloader is first looked for on the SSD drive. Although if everything loads and works, then you don’t have to change anything. I'll go to BIOS, Boot - Boot Device priority.

And using the F5 or F6 key I will move the SSD disk to the very top, so that the boot sector on the SSD disk is first searched, and then on the other disks, if it is not found on the SSD.


4. Comparison of SSD speed with HDD and USB drives
Using the CrystalDiskMark 3 program, I measured the writing and reading speed of my HDD drive even before removing it and replacing it with an SSD. The reading speed from it was approximately 100 MB/sec. when reading and writing sequentially.
Unable to bear the constant lags of my laptop any longer, I finally decided to replace the hard drive in it with a brand new high-speed SSD. Hard drive “fatigue” is one of the main reasons for the decline in laptop performance, which I have already written about in more detail.
For 3,000 rubles, I bought the cheapest 60GB SSD available at Citylink (2,300 rubles) and an adapter for connecting a 2.5″ HDD instead of a DVD drive (700 rubles).
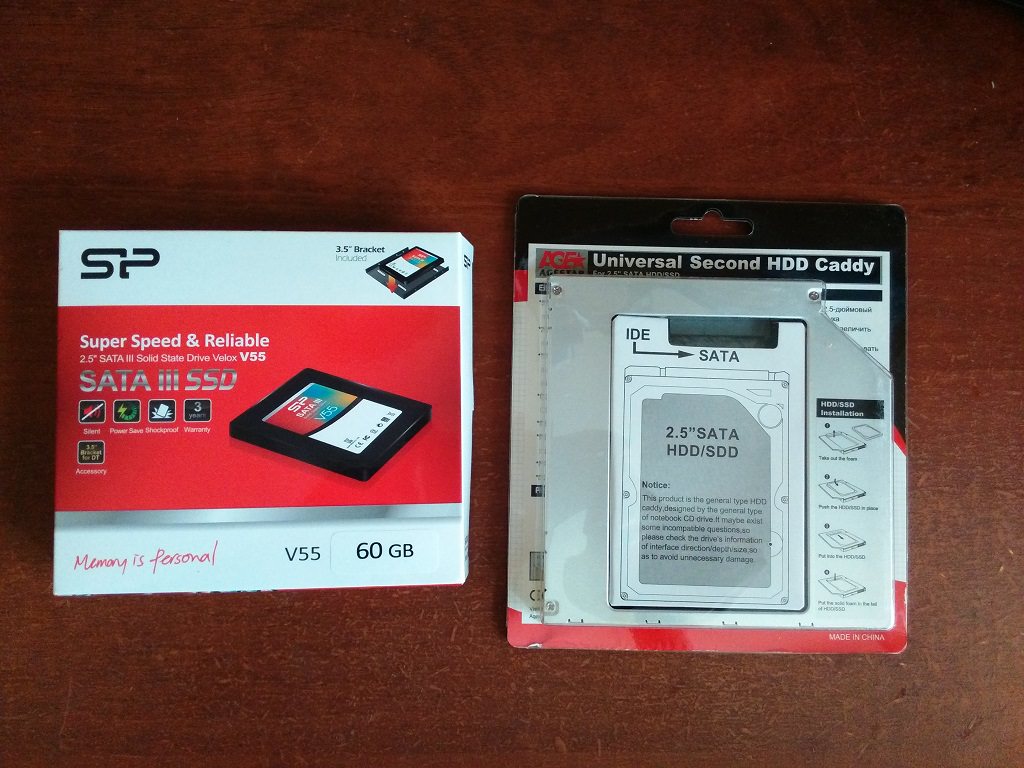 Despite the cheapness, the manufacturer provides a 3-year warranty on the drive.
It's easy to get to the laptop's original hard drive. Typically, access to it and the RAM dies is closed with a separate, easily removable cover, so you don’t have to completely disassemble the laptop to replace it. In my case this was the case.
 Here it is, the original HDD, installed on a special slide. Let's get him.
 We unscrew the hard drive from the slide and screw the new SSD onto the slide.
 Installing an SSD in a laptop.
 Actually, that's all. The SSD is installed and ready to go.
Installing a native laptop HDD instead of a DVD drive
Installing an SSD is half the battle. You need to connect your own hard drive to use it as file storage, because 60GB of solid-state drive capacity is just enough to install the operating system, a basic set of software and have 10-20GB of free space for updates.
To install an HDD in a laptop, you need to remove the DVD drive and connect a hard drive in its place using a special adapter. Getting to the DVD drive is already much more difficult; manufacturers usually do not provide the possibility of quick replacement, and therefore you will have to open the laptop case.
But first we attach the disk to the adapter, and..
 Bummer. It turned out that I bought an IDE-SATA adapter, and in my case I need a SATA-SATA adapter. Those. The hard drive is inserted into the adapter, but the adapter itself cannot be connected instead of a DVD drive, the connectors do not match. In the next few days I will try to return the unsuitable adapter back to Citylink and buy the correct one instead, after which I will write a continuation.
UPD: I submitted the adapter to Citylink, but decided to refrain from purchasing the correct one and installing the HDD for now. Perhaps in the future I will return to this idea.
conclusions
I installed pirated Windows 7 on a clean SSD and immediately. There are no lags in work. With familiar tasks that were previously always accompanied by annoying slowdowns (Firefox with 15 open tabs, an open Word or PDF file, a running book reader, a video player with a movie on pause), the system now flies. Which confirms my conclusion that the hard drive is the weakest point in the laptop. Therefore, if you want to give a new life to an old slow laptop, feel free to replace the hard drive with an SSD. It's inexpensive compared to the cost of a new laptop, but the result is obvious. Naturally, after that upgrade, the laptop will not run the latest games (if it didn’t run them before), but it will be quite suitable for home and office use and will last a long time.


