Copy contacts from your phone to your computer. Transfer your contact book and data from your cell phone to a new Samsung smartphone or computer. Transfer contacts from Android to Android using Google synchronization
The presence of synchronization on Android devices allows you to save all created contacts in storage on Google servers. At any time, these contacts can be transferred to another device or edited using the Gmail mail system interface. But even in this case, no one is safe from loss of contacts. Therefore, we recommend keeping a copy on your computer. How to copy contacts from Android to a computer and what do you need for this? This procedure is so simple that even a child can handle it - read the details in our review.
Local saving of contacts
The easiest way to save contacts is local. To do this, you need to go to your phone book and visit the settings item. Here you will find tools to export contacts in vCard format. Sometimes this item becomes available and visible after selecting one or more records. Having selected the recordings you want to save, you need to save them in the built-in memory, on a memory card, or send them by email. There are other ways to send contacts, but they are not of interest to us.
After you save your contacts, you need to connect your smartphone to your computer and copy the files to your hard drive. But the hard drive doesn't last forever, either, so we recommend creating another copy on more reliable media, such as a CD or USB drive (or cloud storage). Having several copies in several sources at once will allow you to be calm about the safety of your phone book.
We recommend copying contacts from Android to a computer at least once a month, since the data in subscriber phone books is periodically updated - new phones appear in them, and already recorded information changes.
If for some reason your phone does not have a function for exporting contacts (the manufacturer installed obviously clumsy software), then third-party “dialers” will help you cope with this task. Also in Playmarket you will find a huge number of programs that allow you to create backup copies of phone books. Some of them save data in the same vCard format (.vcf files), and some - in their own format. The resulting files can be saved on your computer or transferred to any other device.
Remotely saving contacts
You can transfer contacts from Android to your computer without using a smartphone. For this we can use a Google account. Saving is carried out in several stages:
- We go to the website of the Gmail mail service (from here it is convenient to access the Google Contacts service);
- Go to the “Contacts” section;
- Select “More – Export”.
Next we are transferred to the old version of the Google Contacts service, where we can select the required records and export them as vCard. Thus, we will have at our disposal a backup file with all the necessary telephone records.
The same service also offers the reverse operation – importing contacts from a vCard file. It can come in handy when adding contacts to a new account or after editing files on your computer.
Working with a vCard file
Copying contacts from Android to computer is not that difficult. But what to do with this file next? If you want to edit your contact list, use appropriate editors such as vCardOrganizer. Also, vCard format files can be imported into some email programs, such as Microsoft Outlook, The Bat and Mozilla Thunderbird.
Almost all users trying to work with vCard files on computers running Microsoft Windows are faced with the problem of incorrect encoding. The Android operating system generates files in UTF-8 format, while Windows uses the Windows-1251 encoding. As a result, the files you open may contain incorrectly displayed data. In this case, you need to change the encoding using one of the text editors. How to change the file encoding?
To do this, you will need the universal text editor Notepad++. It can work with many types of files and can change their encodings. Open the resulting contacts file in Notepad++, find the encoding change option in the top menu and select Windows-1251 encoding there. Next, save the file and try to open it with a program for working with vCard. If everything went well, the data will be displayed in Russian.
A typical sign of incorrect encoding is the correct display of English-language entries and incorrect display of Russian-language entries (names, surnames and other data written in Cyrillic are displayed incorrectly).

Thanks to a special application from Google, you can copy selected contacts to other devices via email. This method is most suitable for transferring contacts between devices that you do not want to associate with a common account.
Contacts in the form of a single VCF file will be attached to the letter. The recipient can save this document on their computer or smartphone. To add the entries stored in the file to the phone book of another Android device, just open the received VCF document using the Contacts application.
Method 1: Using a computer

The web version of Google's Contacts app allows you to save selected contacts on your computer as a single file, which you can use to copy them to any iOS or Android device. It is not necessary to link devices with a common account. But this method will be convenient only if you have a computer at hand.
- Launch a browser on your computer and open “Contacts”.
- Log in to the account to which the desired contacts are linked.
- In the menu on the left, click “More” → “Export”, and then “TO OLD VERSION”.
- Mark the contacts you need, then click on the “More” button and select “Export”.
- Complete the process using system prompts.
As a result, a document with contacts in the form of a VCF file will be downloaded to your computer.
- Contacts ".
- Contacts » on the iCloud website using the Apple ID to which you want to copy the entries.
Method 2: Using a Google Account


By connecting a new Android smartphone or iPhone to your Google account, you can immediately copy all the contacts linked to this account on your old device to the gadget. Unlike the previous method, you cannot choose which contacts will be copied. But you don't need a computer for this.
First, open the settings on the source smartphone, find the connected Google account and make sure that contact synchronization is activated.
If you are copying contacts to an Android smartphone:
- Go to the settings of the target device and open the section dedicated to accounts.
- Go back to the accounts section in settings and select Google.
- Open the added account and sync its contacts with your device.
If you are copying contacts to iPhone:
- Go to your iPhone settings and tap Contacts → Accounts → Add Account → Google.
- Add a Google account to which the necessary contacts are linked.
- Open the added account and sync its contacts with iPhone.

The Contacts web app lets you save selected contacts to your macOS or Windows computer as a single file that can be copied to any iOS or Android device. There is no need to link smartphones with a common account. But this method will be convenient only if you have a computer at hand.
- Launch a browser on your computer and sign in to “Contacts” on the iCloud website using the Apple ID from which you want to copy the entries.
- Select the desired contacts in the list.
- Click on the gear in the lower left corner and select “Export vCard”.
The selected contacts will be saved on your computer as a VCF file.
If you are copying contacts to iPhone:
- Launch a browser on your computer and sign in to “Contacts” on the iCloud website using the Apple ID to which you want to copy the contacts.
- Click on the gear in the lower left corner and select “Import vCard”.
- Specify the path to the contacts file and confirm the import.
- Open the Contacts mobile app on the target iPhone and refresh the contact list by swiping from top to bottom.
If you are copying contacts on Android:
- Send the file to the target device, for example via email.
- Open the received document using the Contacts application.
How to copy contacts from iPhone to another iPhone
Method 1: Using the Contacts mobile application


The Contacts app allows you to share selected contacts via instant messengers, SMS and other services. This method is most suitable for copying single contacts to devices that you do not want to associate with a common Apple ID with the source device. You don't need a computer for this.


By connecting a new iPhone to your Apple ID, you can copy to the gadget all the contacts associated with this Apple ID on your old iPhone. Unlike the previous method, you cannot choose which data will be transferred. But this method copies the entire phone book at once.
- Make sure the same Apple ID is connected to both devices.
- Go to settings on the source device and click on the profile name at the very top.
- Select iCloud and make sure that the switch next to “Contacts” is green.
- Scroll down and click “iCloud Backup” → “Backup.”
- Make sure that in the iCloud settings on the target iPhone, the switch next to “Contacts” is also green.
- Launch the Contacts app on the target iPhone and update the data by swiping from top to bottom.
- Please wait a few minutes for the synchronization to complete.
How to copy contacts from an Android smartphone to a SIM card or vice versa
You will most likely find options for importing from a SIM card and exporting to it in the contacts application preinstalled on your device. If not, then install the Contacts program from Google. Select “Export” or “Import” in its settings depending on your purpose and follow the prompts on the screen.
If for some reason you are unable to copy contacts using the pre-installed program and application from Google, look for alternatives on Google Play. For example, try the application “SIM cards and contacts. Broadcast".
How to copy contacts from a SIM card to iPhone
- Insert the SIM card into the iPhone.
- Go to settings and click “Contacts” → “Import SIM contacts”.
- Wait for the import to complete.
Unfortunately, you cannot copy contacts from iPhone to SIM card without jailbreaking iOS.
Most users keep a phone book on their smartphone and accumulate a large number of contacts there over time. In order not to lose all these contacts along with your smartphone, you need time to transfer them to your computer. In this article we will look at two ways to transfer contacts from an Android smartphone to a computer.
Transfer contacts from Android to computer using export
The easiest option for transferring contacts from an Android smartphone to a computer is by exporting contacts from the Contacts application. By exporting contacts in this way, you will receive a file in vcf format, which can then be imported into any application for working with contacts, both on another phone and on a computer.
Exporting contacts is quite simple. First, you need to launch the Contacts application on your Android phone. After that, open the context menu in this application (this is done using the on-screen or touch key under the screen).
After that, select “Import/Export” in the menu that appears.

As a result, a menu will appear on the screen with several options for transferring contacts. Here you need to select the “Export to VCF file” option. In some cases, this option may be called "Export to internal memory" or "Export to SD memory card."

After this, the Contacts application will transfer all contacts from its database to a file with a vcf extension, which will be saved in the internal memory or on the SD memory card, depending on which transfer option you chose.
In the future, you can use contacts from the vcf file as it is convenient for you. The Vcf file can be imported into an email program (for example, Outlook or Mozilla Thunderbird), into another phone, or into an email service.
Transfer contacts from Android to computer using Google
You can also transfer contacts from Android to your computer using the Google Contacts service. For this transfer method to work, your Android contacts must be synchronized with your Google account.
To make sure that your contacts are synchronized, go to Android Settings and open the “Accounts - Google” section. This settings section will contain a list of everything that is synchronized with your Google account. Find the “Contacts” item there and make sure it is enabled.

If the contacts synchronize normally, then you can start transferring them. To do this, use your browser to go to the Google Contacts service, which is available at , open the “More” section there and select “Export”.

After that, you will be prompted to open the old version of the Google Contacts interface. Agree and wait until the old interface loads. In the old interface, you need to click on the “More” button and select “Export” from the menu that appears.

As a result, a window with export settings will open in front of you. Here you first need to indicate which contacts you want to transfer. You can select some individual contacts, a group of contacts, or all contacts.

After this, you need to select the format for export. There are three formats available here: Google CSV (for transferring contacts to another Google account), CSV format for Outlook (for transferring contacts to Outlook), vCard (for transferring contacts to the Apple Address Book or another program). In most cases, the vCard format will be optimal, since it is quite universal and supported by most programs.

After selecting contacts and format, you just need to click on the “Export” button and download the resulting file. In the future, using this file, contacts can be transferred to another phone or to another program.
A computer and a telephone are two devices without which no modern person can imagine life.
Many people have problems with mobile devices, or more precisely with the contacts that are saved there. There are people who value not so much the phone itself as the notebook in it.
How to copy contacts from phone to computer? We decided to give detailed instructions on this issue so that you can solve this common problem once and for all.
Even if the device is lost in the future, you can easily restore your contact list, and this is easy and simple to do.
Copy contacts from phone to Andorid
Smartphones running this operating system allow you to transfer contacts from your phone to your computer without any extra steps.
If you have already connected on a mobile device through your Google profile (and this is required there), then all you need to do is synchronize.
Let's not talk about it for a long time, Let's show you what to do:

Now all the data has been transferred and you can log into Gmail from your computer at any time to view the desired contact. If you want to save a book with contacts in a separate file, open it on your phone and press the menu button.
There you need to select import/export, then click “ Export to SD memory card»:

After completing this action, a new file will appear on your flash drive in which all the numbers are saved. Now connect your phone to your computer and transfer this file (you can send it to yourself by email, it’s more convenient).
Copying contacts from a regular phone
Is your phone outdated and doesn't have Android? This is not a problem, you just need to find a special program.
If you still have a disk from your phone, install the software from there and run it. If it is not there, look for a client on the Internet. I had an old Nokia that required Nokia PC Suite to be installed. After launching the software, the following menu appears:

Here you need to click on contacts, after which a new window will open. In it, select all contacts ( you can press Ctrl+A) and then click on the save button, you will be prompted to specify the folder to save:

The data is saved in CSV format, and it is opened through regular Excel. You can use it later to transfer numbers to another phone.
One of the first questions that arises is how to transfer contacts from Android to Android, because manually transferring all the numbers from one Android device to another takes too long, especially if you have a lot of contacts in your phone book.
Below we will talk about several ways that will help resolve this issue in a matter of minutes.
Using a SIM card or flash drive (SD card)
If phone numbers are not stored in the SIM card memory, then we must first copy them to it. To do this, go to “ Contacts» (“Phone book”) and open the section settings (on different smartphone models this can be a virtual button at the bottom of the display or three vertical dots or lines at the top of the screen). In the settings menu that opens, click “ Import Export", then select the item from where you want to copy the contacts.
If the contacts are saved in the phone memory, click " Import from internal memory", and then select " Export to SIM card"(i.e. the point where we will copy):

If the contact numbers were saved in different places, for example, not only in the device’s memory, but also on the SD card, then we first copy the data from the smartphone, and then in the same way from the SD, and then export it to the SIM card.
After selecting the storage location, a list of contacts will open, from which you will be able to save the ones you really need, then press the button “ OK"and this completes the transfer procedure. Now we move the SIM card into the new gadget and, if desired, transfer the data to the internal memory of the new phone in the same way or activate the display of contacts saved in the SIM card in the phone book. What you need to do for this: go to “ Contacts", open the settings (see above), click the contact filter and select the item " SIM card»:

To transfer contacts from one Android to another using an SD card, we perform the same steps, only instead of a SIM card we select a flash drive (SD).
Through synchronization with Google account
Most owners of Android devices have a Google account. This is necessary for downloading applications in the Play Store, but not only. Having a Google account, you can set up synchronization and save not only your contacts, but also other important data - various media files, messages, etc. This is very convenient if you need to restore important information if your phone is lost or broken.
To activate synchronization, go to the main settings of your smartphone, in the “ Personal data"find the item " Accounts", click and select your Google account, go in, and in the list that opens, mark the data to be synchronized, after which the selected information will be synchronized automatically and saved in your personal mailbox:

If synchronization has not been configured, then we will need to copy our contacts to the account. This is done in exactly the same way as copying from a SIM card: “ Notebook", Further " settings", then " import Export", select the source from where we will copy the contacts, and then click on the line with your account.
Now, to transfer saved phone numbers to a new Android smartphone, open a browser from it, turn on the full version and go to the website mail.google.com click on the inscription in the upper left corner of the display Gmail and in the list that opens select “ Contacts", and then " All contacts»:

The pop-up window will display a complete list of numbers in the phone book. Select " All contacts"(or maybe "Select all") and click the line " More».
Now select " Export", and in the window that opens we indicate Google CSV(where CSV is the file format in which the contact list will be located). After this, all contacts will be saved on the device from which you logged into your account, in this case on a new smartphone.
If for some reason you were unable to log into your Google account from your new phone, then, and then.
*Note: if your smartphone model allows USB debugging to be enabled to transfer contacts using this method, do not forget to enable this option first:

There is another way in which your contacts will always be at hand on any device from which you can create an account with Google. To do this, after synchronization, all phone numbers must be saved in your Google account. For example, when creating a new contact, when the system asks where to save it, from three options - phone memory, SIM card memory or Google contacts, select the latter, and then you just need to log in to the new device and all contacts will automatically go to it:

Export contacts from Android to Android via Bluetooth
To use this method, all contacts must be in the phone's internal memory. If some of them are on the SIM card or on external media, then they need to be copied to the smartphone using the method described above.
We connect both Android devices and establish a Bluetooth connection on them: select in the settings and turn on the “Visibility to other devices” option. Then, on the old phone, through the Bluetooth settings, we find a new Android device.
In both gadgets (if necessary), we enter a single password, which should confirm that we are connecting via Bluetooth. Now we activate the “Transfer” option and wait for the process to complete.
Watch the video for more details:
Exporting contacts using third-party software
If for some reason you were unable to use the described methods or simply do not want to synchronize your contacts, you can use special applications that easily solve such problems.
For example, application MCBackup - My Contacts Backup will make a quick backup of the necessary information and send the file in the format .vcf to your email. All you need to do is just log into your email client from a new device and open this file:

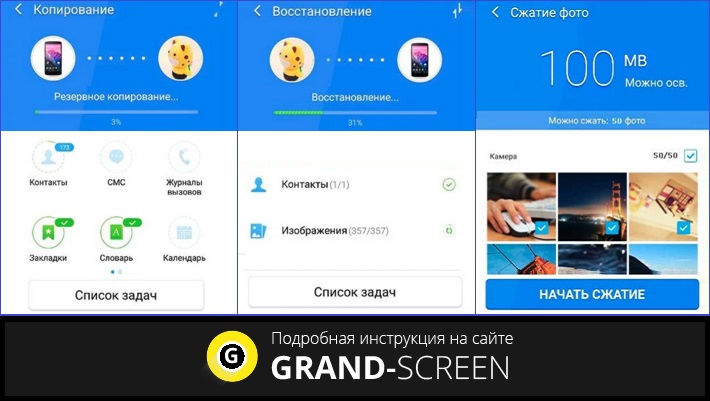
Another application - SM Backup - Secure Cloud will backup all your data (SMS messages, photos, calendar, etc.), including your phone book, and provide 5 GB of free space in cloud storage with the ability to restore it on the desired device:
With this, we believe that the question of how to transfer contacts from Android to another Android device is closed. There are plenty of ways to solve the problem, choose any one that is convenient for you. Good luck!


