How to write an active image to a flash drive. Programs for burning an image to a Linux flash drive
Greetings to all readers. It's about recording ISO image on USB flash drive, not just recording, but also loading from a USB drive with the function BOOT. Because just unpack ISO image and copying to a flash drive is not difficult. To do this, it is enough to have a program WinRAR, because ISO image partially considered an archive file. Well, the most important question is - why on a USB drive? The answer to this question is very simple - a USB drive does not scratch like a disk, lasts longer with constant use of the device, capacity in a small pocket and other little things.
Method one:
In this method, the most important thing is that ISO image there must be a file bootmgr(without any extension). To do this, just open ISO image any archiver (for example WinRAR). To do this, use the context menu with the right mouse button (if there is no file association for this extension) and select nm item " To open with" Further " Select another application", or select from an existing list or by clicking the " button Review" (alternative - More app > Find another app on this PC, everything depends on Windows OS) and selecting the path to the software (in our case WinRAR) press the button " Open"(see Windows 10 pictures).
 |
 |
 |
 |
 |
We see that such a file exists.
Download the simplest recording utility ISO image to a USB drive and open it. In the window that opens, click the button " Yes" and selecting ISO image and press " Open"

Don't forget to insert the USB drive into the appropriate slot and press the " Installation". After which formatting will begin in a certain format, and then copying of files to the USB drive will begin.

After completion, the utility will not inform you about this, but will simply close the process of copying files, and the utility will remain open. Press the button " QemuTester"and we see that our flash drive is working.

Method two:
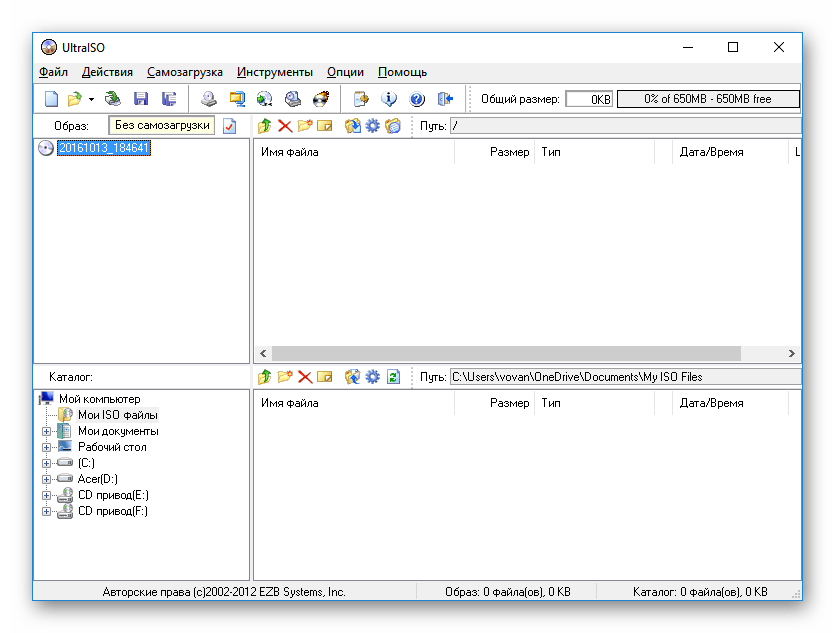
This method must also contain the file bootmgr V ISO image, without it, as we understand, the BOOT function will not work. Open the program, select from the menu File > Open... and choosing our ISO file press " Open".
In the first upper part we have files and folders with the name of the image. Go to the Boot menu > Burn Hard Disk Image...

In the window that appears, select our flash drive, set the recording method USB-HDD+ and press the button " Write down"

We are warned that all data on the USB drive will be erased, so if there is important information, copy it to the computer and agree with the appropriate button.
The recording process is not that fast, so you can calmly drink your tea.

The recording is complete, the flash drive is ready. Unfortunately, UltraISO does not have testing like the utility in the first method, so to check it we will need to restart the computer or use the USBboot Installer++ utility.
Method three:
In this method we will use the utility and will not look to see if the file exists bootmgr V ISO image.
Download (pictures may differ depending on the version).
We unpack the archive to a place convenient for you.

We go to the unpacked folder and launch it, depending on the bit depth of the OS, and in the window that opens, select our flash drive and click .

Check the boxes as shown in the figure and click " Prepare disk".

After which the command line will open and prepare your flash drive, after completion the command line will close itself.

In the same window, click " Install Grub4DOS".

A window will appear with installation information install grub4dostoMBR.

We agree with the " YES".
The bootable USB flash drive is almost ready. Now let's copy our ISO file to the root of the flash drive and create a text document (with any name for now), open it and paste the following text
title Start WXPOEM RU
map --unmap=0:0xff
map --unhook
root(hd0,0)
map /WXPOEM_RU.iso (0xff)
map --hook
root (0xff)
configfile /grub4dos.lst || chainloader (0xff)
map --unmap=0:0xff
Where you just need to know" title Start WXPOEM RU" is the name of the boot image (displayed in the boot menu, title do not wash). " map /WXPOEM_RU.iso (0xff)" way to ISO image, i.e. you just need to change the name ISO file.
Now we rename the text document with the name menu and change the extension txt on lst, it should work menu.lst.

Return to , check the box Test in QEMU and press the button GO.

Testing our bootable USB flash drive. A window will appear with a test download and with only one inscription " Start WXPOEM RU"

Click " Enter"As we can see, everything worked out.

Often when your computer breaks down you have to use a bootable flash drive. With its help, you can get to the recovery partition, launch the command line or edit the registry even if the system itself does not start or does not respond. In this way, you can solve many startup problems and avoid reinstalling the system, and if this does not help, then the same flash drive will be useful for reinstalling the OS. So it doesn’t hurt to have a bootable flash drive at home in reserve.
Usually, bootable flash drives are made from an iso image. This is a file that represents copy of optical drive. You can unpack it using conventional archivers and work with it, you can use special programs that can emulate the operation of optical drives and work with the file through them, there are also many applications that will allow you to write the image to another medium, which will be discussed in this article.
Preparing a flash drive
For starters, it's worth transfer from flash drive all information, because during the recording process, all data will be deleted. If you don’t mind losing information, you can leave it on the drive; in most cases, the programs themselves will delete it during operation. You can also format the flash drive, this is required to record some images, it is worth finding out what type of file system is required, ntfs or fat32, and re-encoding the flash drive to it.
Third Party Applications
This section will list the utilities that are best used to create a bootable drive.
Ultra ISO
It is better to download the program from the official website; others may contain versions with malware or with additional files, link to the page https://www.ultraiso.com/. After downloading, you will need install file, there is nothing complicated about it, all actions are performed using the usual installation wizard. After starting the program, you should click on the file - open, and then specify the path to the downloaded image. Then, a complete list of files will appear in the window. Next you need to click on Bootstrap - Burn a hard disk image.
After which a window will open in which you should select drive, and then all you have to do is click on record and wait for the process to complete.
Rufus
It is also better to download this program from trusted sources; you can download it from the link https://rufus.akeo.ie/?locale. Unlike the previous utility, this one specializes only in creating boot and multiboot drives. In the top line you should select the drive to which recording will be made, in the next paragraph you need to specify partition scheme, which will depend on the system being installed. In the bottom block you should definitely note “ Create a boot disk", indicate the downloaded iso as the source. 
The remaining parameters can be left as default.
WinSetupFromUSB
You can find the utility at http://www.winsetupfromusb.com/downloads/. The program itself is quite easy to understand and use. All you need to do is indicate the drive, check the box below it if this is the first image to be recorded, then check the box for the required system version and indicate the path to the downloaded element.  Further required click ongo and wait for the process to complete.
Windows 7 USB/DVD Download Tool
The official utility, which can be obtained directly from the developer’s website https://www.microsoft.com/ru-ru/store/b/home?rtc=1. The program is easy to use, in the first window you need to specify the file, in the next you need to specify the drive, and then you just have to wait for the recording. 
Daemon Tools Ultra
This application has many options for working with virtual drives and disk images; you can download it on the official website https://www.daemon-tools.cc/rus/products/dtultra. After installation, all you have to do is click on tools, then on burn image, after which you will only need to specify the flash drive, image and select recording options that you can leave with default settings.
UnetBootin
A utility for creating bootable flash drives based on Linux, you can download it at https://unetbootin.github.io/. Here you should indicate the version of the system, after which the program will download it, or the path to the image, as well as the drive on which the recording will be made. 
WinToFlash
You can download the program at https://wintoflash.com/home/ru/. In the first window, which is called the transfer wizard, you need to press only on further, and in the second indicate the image file and the path to the flash drive. 
Possible faults
Some utilities refuse to work without NET Framework, usually, it is installed on every computer because many applications require it to work. If the user does not have it, then the latest version can be downloaded from the Microsoft website, but the rest will have to be searched. The problem may also be a mismatch between versions; 64-bit systems may refuse to write to a flash drive if the action itself is performed in a 32-bit environment. In this case, you should try using a different image or another utility.
Since almost no one uses CDs and DVDs these days, it is logical that it is best to burn the Windows image for further installation onto a USB drive. This approach is indeed much more convenient, because the flash drive itself is much smaller and is very convenient to store in your pocket. Therefore, we will analyze all the most efficient methods for creating bootable media for further installation of Windows.
For reference: creating bootable media means that an operating system image is written to it. From this very drive, the OS is subsequently installed on the computer. Previously, when reinstalling the system, we inserted a disk into the computer and installed it from it. Now you can use a regular USB drive for this.
To do this, you can use proprietary Microsoft software, the already installed operating system itself, or other programs. In any case, the creation process is not difficult at all. Even a novice user can cope with it.
All the methods described below assume that you already have a downloaded ISO image of the operating system on your computer, which you will write to a flash drive. So, if you haven't downloaded the OS yet, do so. You must also have suitable removable media. Its volume should be sufficient to accommodate the image you downloaded. At the same time, some files may still be stored on the drive; it is not necessary to delete them. All the same, during the recording process, all information will be irretrievably erased.
Method 1: Use UltraISO
There is a detailed description of this program on our website, so we will not describe how to use it. There is also a link where you can download it. To create a bootable USB flash drive using Ultra ISO, do the following:

If any problems or errors appear during recording, most likely the problem is in a damaged image. But if you downloaded the program from the official website, no difficulties should arise.
Method 2: Rufus
Another very convenient program that allows you to very quickly create bootable media. To use it, follow these steps:

It is worth saying that Rufus has other settings and recording options, but they can be left as they are originally. If you wish, you can check the box "Check for bad blocks" and indicate the number of passes. Thanks to this, after recording, the installation flash drive will be checked for damaged parts. If any are detected, the system will automatically correct them.
If you understand what MBR and GPT are, you can also indicate this feature of the future image under the inscription “Partition scheme and system interface type”. But doing all this is completely optional.
Method 3: Windows USB/DVD Download Tool
After the release of Windows 7, developers from Microsoft decided to create a special tool that allows you to make a bootable USB flash drive with an image of this operating system. This is how a program called . Over time, management decided that this utility could well provide recording for other operating systems. Today, this utility allows you to record Windows 7, Vista and XP. Therefore, for those who want to make media with Linux or another system other than Windows, this tool is not suitable.
To use it, follow these steps:

Method 4: Windows Installation Media Creation Tool
Microsoft specialists have also created a special tool that allows you to install on a computer or create a bootable USB flash drive with Windows 7, 8 and 10. The Windows Installation Media Creation Tool is most convenient for those who decide to record an image of one of these systems. To use the program, do the following:

In the same tool, but for Windows 10, this process will look slightly different. First, check the box next to the inscription "Create installation media for another computer". Click "Further".
But then everything is exactly the same as in the Windows Installation Media Creation Tool for version 8.1. As for the seventh version, the process there is no different from that shown above for 8.1.
Method 5: UNetbootin
This tool is intended for those who need to create a bootable Linux USB flash drive from Windows. To use it, do this:

Method 6: Universal USB Installer
Universal USB Installer allows you to burn images of Windows, Linux and other operating systems to drives. But it is best to use this tool for Ubuntu and other similar operating systems. To use this program, do the following:

If you want to create a bootable USB flash drive or burn a distribution kit of some utility/program onto it, you need the appropriate software. This article will present several of the most convenient and easy-to-use programs and utilities. All that remains is to choose the most suitable one for yourself.
The first solution is the official program from Microsoft, called Media Creation Tool. Its functionality is small, and all it can do is update the current version of Windows to the latest 10 and/or write its image to a flash drive.

The advantage is that it will save you from searching for a clean and working image, thanks to the fact that it will record the official distribution kit on a USB drive.
Rufus
This is a more serious program that has all the necessary functions to create a full-fledged bootable USB drive. Firstly, Rufus suggests formatting before burning the distribution. Secondly, it carefully scans the flash drive for damaged sectors so that you can replace the media if necessary. Thirdly, it offers two types of formatting: quick and full. Of course, the second will delete information more efficiently.

Rufus supports all types of file systems and is portable. By the way, thanks to the Windows To Go feature, you can burn Windows 8, 8.1, 10 to a flash drive and run this system on any PC.
WinSetupFromUSB
The next solution is Win Setup From USB. Unlike the previous program, this utility is capable of recording several images at once, creating multiboot media.

Before you start using it, it suggests making a backup copy of all information on the media, as well as setting up the boot menu. However, the utility is not Russified, and the menu through which control takes place is quite complex.
SARDU
This program will save you from having to search for the necessary distributions on the Internet, since you can select the ones you need directly in its interface. She will download everything she needs from official websites and record it on the required media. The created image can be easily tested for functionality through the built-in QEMU emulator, which was also not the case in previous software solutions.

There were some downsides too. The fact is that most images can be downloaded via the SARDU interface for subsequent recording on media only after purchasing the PRO version, otherwise the choice is limited.
XBoot
This program is easy to use. All that is required to get started is using the mouse to drag the required distribution kits into the main program window. There you can distribute them into categories and create a description for convenience. In the main window you can see the total size of all distributions loaded into the program in order to select the media of the required size.

As in the previous solution, you can download some images from the Internet directly through the XBut interface. The choice, of course, is small, but everything is free, unlike SARDU. The only negative of the program is the lack of Russian language.
Butler
This is a utility created by a Russian developer, which is not very different from previous solutions. With it, you can record multiple images and create unique names for them so as not to get confused.

The only thing that distinguishes it from other similar programs is the ability to choose the design of the menu of your future bootable media, but you can also select a regular text mode. One bad thing is that Butler does not provide the ability to format a flash drive before recording.
UltraISO is a multifunctional program for burning images not only to a flash drive, but also to CDs. Unlike some previous programs and utilities, this one can create an image from an existing disk with a Windows distribution for subsequent recording on another medium.
Another good feature is creating an image from an operating system already installed on the hard drive. If you need to run a distribution, but don't have time to burn it, there is a mount function that allows you to do this. In addition to all this, you can compress and convert images to other formats. The program has only one drawback: it is paid, but there is a trial version for testing.
UNetBootin
This is a simple and portable utility for burning images to a flash drive. As in some previous programs and utilities, the functionality of YunetButin is limited to recording an existing image on media and the ability to download what you need from the Internet through its interface.

The main disadvantage of this solution is the inability to simultaneously record several images on one drive.
PeToUSB
Another free, portable utility for creating bootable media. Among its capabilities, it is worth noting the formatting of a USB drive before recording, which is clearly lacking in the same UNetBooting. However, the manufacturer has long stopped supporting its brainchild.

It supports writing OS images to a flash drive with a capacity of no more than 4 GB, which will not be enough for all versions. In addition, the utility is not yet Russified.
WinToFlash
The selection is completed by a functional program for recording images – WinToFlash. Using it, you can burn several distributions at once and create multi-boot media, unlike Rufus. As with UltraISO, through this program you can create and burn an image of an existing disk with a Windows distribution. It is also worth noting the function of preparing the media for recording - formatting and checking for bad sectors.

Among the features there is also the function of creating a bootable USB flash drive with MS-DOS. VinTuFlash provides a separate item that allows you to create a LiveCD, which may be necessary, for example, to restore Windows. There are also paid versions of this program, but the functionality of the free version is quite enough to easily create a bootable flash drive or disk. In fact, WinToFlash combines all the useful features of the previous software solutions we discussed above.
All the programs and utilities listed in this article allow you to create a bootable USB flash drive, and some even a CD. Some of them are modest in terms of functionality, while others offer a range of features. You just need to choose the most suitable solution and download it.


