Recovering data from internal memory of Android. How to recover deleted data and files on Android. PC programs
- Tutorial
Nowadays, more and more smartphones come without an SD-card slot, and information has to be stored on the built-in memory with access to it via MTP. This connection mode does not allow using standard means to restore phone data after a wipe or accidental deletion.
Today, using the example of a combination of Xiaomi Mi2s and Windows 8.1, I will try to tell you how you can recover lost data. For those interested, welcome to the cat.
It should be noted that if you mistakenly formatted the internal memory of your smartphone/tablet/smartpad, then you should not be upset, and most importantly, in no case should you write anything to the device’s memory, this way you will be able to recover more data.
The MTP protocol does not allow the computer to recognize the connected device as a USB drive and recovery programs cannot scan such a device and save the data, so we will need to copy the entire internal memory partition as a system image.
Preparing your Android device
You will need root and USB debugging enabled.PC preparation
In order to copy the system partition, we need:- Drivers for your device (in case of problems);
- ADB (adbdriver.com or developer.android.com);
- FileZilla server.
VHDtool
We create a folder with the address C:\cygwin64\000 (the name does not matter, just don’t use letters other than Latin), our image will be located here. Copy it to the VHDtool.exe folder.FileZilla
During installation, we agree to all standard settings.After installation, FileZilla will start automatically, but you need to exit the program and run it as Administrator.
When you start FileZilla it will ask for the server name, leave everything as it is.
Listen on those ports 40
timeout settings - the default is 120, 60, 60, and we set 0 everywhere and click OK.
Go to edit - users. In the users window, create a new user. In my case this is the qwer user.
Click Add - write the name - password pass - click OK.
Next, in the same Users menu, select the Shared folders tab on the left. We go there and add the folder into which our block will be uploaded. Click Add and add the folder C:\cygwin64\000. The path to this folder will appear in the window. If there is no letter H to the left of the inscription C:\cygwin64\000, then you need to click Set as home dir. Then, highlighting the line C:\cygwin64\000, you need to check the Read and Write rights. Then click OK.


A.D.B.
We will need the following files:- adb.exe
- AdbWinApi.dll
- adb-windows.exe
- AdbWinUsbApi.dll
- fastboot.exe
You can download them at.
Or extract the Android SDK from the distribution kit.
Copy them to the folder C:\cygwin64\bin
Checking ADB operation
We launch the console from the folder C:\cygwin64\bin; to do this, just enter cmd in the address bar of Explorer
Enter the command:
The list of connected devices should not be empty; if after the line List of devices attached is empty, then you have not installed USB drivers or have not enabled USB debugging.
When everything goes well, the console looks like this:

20352f2c – my Xiaomi Mi2s
USB modem mode
We will need to connect the device via USB to your PC and enable USB modem mode. I use CyanogenMod 11 and this mode is located at: Settings > Wireless networks > More... > Modem mode > USB modemScreenshot

Now we need to find out what IPv4 address your computer received.
Using the ipconfig command on the command line
or
We follow the path: Control Panel\Network and Internet\Network and Sharing Center

Click on the inscription 'Local Area Connection', then Details and copy the IPv4 address.

In my case it is 192.168.42.79
Important! Each time you reconnect the USB cable and turn on/off the IPv4 modem mode will change.
What memory block do we need?
All the memory in your device is divided into logical blocks, we don’t need to download everything, just understand which section contains the erased information.Now we need to look at the list of memory blocks, to do this we enter the following commands line by line:
Adb shell su find /dev/block/platform/ -name "mmc*" -exec fdisk -l () \; > /sdcard/list_of_partitions.txt
Hint: if you are too lazy to manually rewrite commands or are afraid of making a mistake, then you can use copying, but pasting a line into the console in the usual way will not work, so you need to right-click on the console window, then select Edit > Paste.

After which the file list_of_partitions.txt will appear in the internal memory, which we need to copy to the PC and study.
You can copy it to our 000 folder using a simple command (it should be executed in a separate command line window):
adb pull /sdcard/list_of_partitions.txt C:/cygwin64/000
My file looks like
Disk /dev/block/platform/msm_sdcc.1/mmcblk0p27: 25.6 GB, 25698483712 bytes 4 heads, 16 sectors/track, 784255 cylinders Units = cylinders of 64 * 512 = 32768 bytes Disk /dev/block/platform/msm_sdcc.1 /mmcblk0p27 doesn't contain a valid partition table Disk /dev/block/platform/msm_sdcc.1/mmcblk0p26: 3758 MB, 3758096384 bytes 4 heads, 16 sectors/track, 114688 cylinders Units = cylinders of 64 * 512 = 32768 bytes Disk /dev/block/platform/msm_sdcc.1/mmcblk0p26 doesn't contain a valid partition table Disk /dev/block/platform/msm_sdcc.1/mmcblk0p25: 402 MB, 402653184 bytes 4 heads, 16 sectors/track, 12288 cylinders Units = cylinders of 64 * 512 = 32768 bytes Disk /dev/block/platform/msm_sdcc.1/mmcblk0p25 doesn't contain a valid partition table etc...
The internal memory in my device is 32 GB. Therefore, I am looking for the largest partition, in my case it is mmcblk0p27 with a size of 25.6 GB, in yours it will most likely have a different name, or will not have a p** at all. Of course, no one guarantees that the largest partition will be the one on which just recently your photos, videos, documents, etc. were stored, but in 90% of cases this turns out to be exactly the memory partition that we need. Otherwise, you will have to copy all the images in order and check each of them.
Copy the memory partition to the PC.
If you have already closed the cmd window, then launch it again.
Enter the commands line by line:
Adb shell su mkfifo /cache/myfifo ftpput -v -u qwer -p pass -P 40 192.168.42.79 mmcblk0p27.raw /cache/myfifo
Don't forget to make appropriate adjustments to your code!
Let's decipher what is written:
Qwer – account name in FileZilla (you have your own if you changed it)
pass – password for your account in FileZilla (you have your own if you changed it)
40 – FileZilla server port
192.168.42.79 – FileZilla server address (you have your own)
mmcblk0p27.raw – memory block to be copied (you have your own)

Open a second command line window and enter the commands:
Adb shell su dd if=/dev/block/mmcblk0p27 of=/cache/myfifo
We look at the FileZilla window and see that the downloading of mmcblk0p27.raw to the C:\cygwin64\000 folder has begun, now you can close the cygwin windows and take a tea break.

Convert and restore
Are you back? Did you download the file? Great. Turn off the phone, connect the Internet. Launch Cygwin.bat and enter the following commands.Cd C:/cygwin64/000/VhdTool.exe /convert mmcblk0p27.raw
Don't forget to correct mmcblk0p27 to your block number!
The conversion took me a couple of seconds. The output is the same mmcblk0p27.raw file in the C:\cygwin64\000 folder, but slightly different. This converted file can be mounted as a virtual disk, or, for example, through R-studio, data can be restored directly from our image. That's what I did.
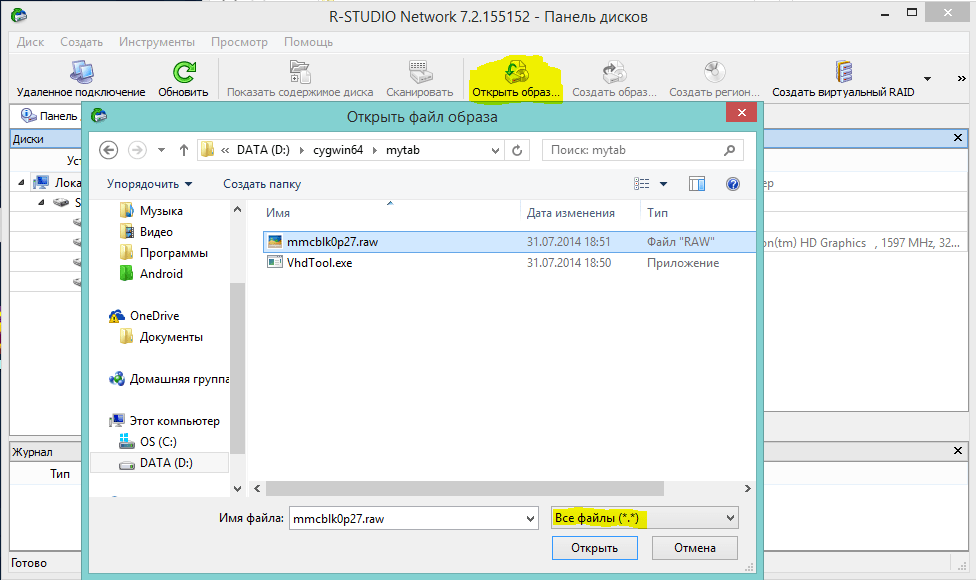
Hint: important points are marked in yellow.
Results
My goal was to explain in popular language how to copy a system partition from an Android device to a PC. Perhaps some will blame me for the difficulties associated with a USB modem and ftp, and will say that it was probably easier to pull out the image. I’ll answer this: I tried other methods described on 4pda and xda-developers, it didn’t work out for me, but with ftp it worked on the second try, and when writing the article everything generally went like clockwork.I was able to recover all the lost photos without loss of quality, and even those that I had not even thought of recovering. During the restoration, photographs were discovered that I took in August last year, when I just bought the phone and tested the camera.
In conclusion, I would also like to mention another small utility that recovers data -
Almost all users of any electronic gadget have encountered the accidental deletion of necessary information on their mobile device. If the deleted data was not too important, then you can live with it. But it still happens that the necessary information is lost, sometimes this also happens due to resetting the settings to the original state of the gadget. What to do? How to recover deleted files on Android? Still, there are ways to eliminate this unpleasant situation.
Using a special program on a PC
This method will partially help answer the question of how to recover deleted files on Android. To return lost information, the 7 Data Android Recovery program, as well as the 7 Data Android Recovery Suit, are suitable. It recovers all types of files: photos, images, music, etc. Complete confidentiality of the program is guaranteed by the developers personally.
Step-by-step guide to using the program:
We will talk about how to recover deleted files on Android below:
- Install the program on your personal computer. It can be found freely available. It is suitable for systems with Windows 8.1; 8.7 and Vista. Therefore, most owners will be able to easily work with it.
- Connect your phone to the PC via USB cable.
- You must enable snooze mode in Settings on your mobile device.
- On your PC, open this program (7 Data Android Recovery) and in the window that opens, click “next”.
- You will be asked to select a storage device (built-in memory or memory card). You need to select the drive on which the necessary information was deleted.
- Select a location to save the files. To be on the safe side, save all files on your PC.
This program is not difficult to use. It does not take up a lot of space on your PC and allows you to quickly and efficiently figure out how to recover deleted files on Android.

Utility for recovering data on Android on a computer
Also, another special program called Dr. will help answer the question of how to recover deleted files from an Android phone. Fone. The quality of this program is at a high level, since the developer is Wondershare. This program is provided as a utility. It is distributed on a paid basis, but there is an opportunity to try it out in the demo version.
Instructions for the program:
- Install the demo version on your PC (usually its use period is 30 days).
- Connect the phone to the PC via a USB cable and in the “settings” enable debugging mode when connecting to the PC via USB.
- Next, press the “start” button to process the information on the mobile gadget.
- The files will appear in the open program window. It is necessary to mark the data that needs to be restored and click on the “recover” button.
- Finally, choose a location to save the data.
This program is perfect for Android phone users.
This way you can recover deleted files on Android via your computer.

Phone application for data recovery
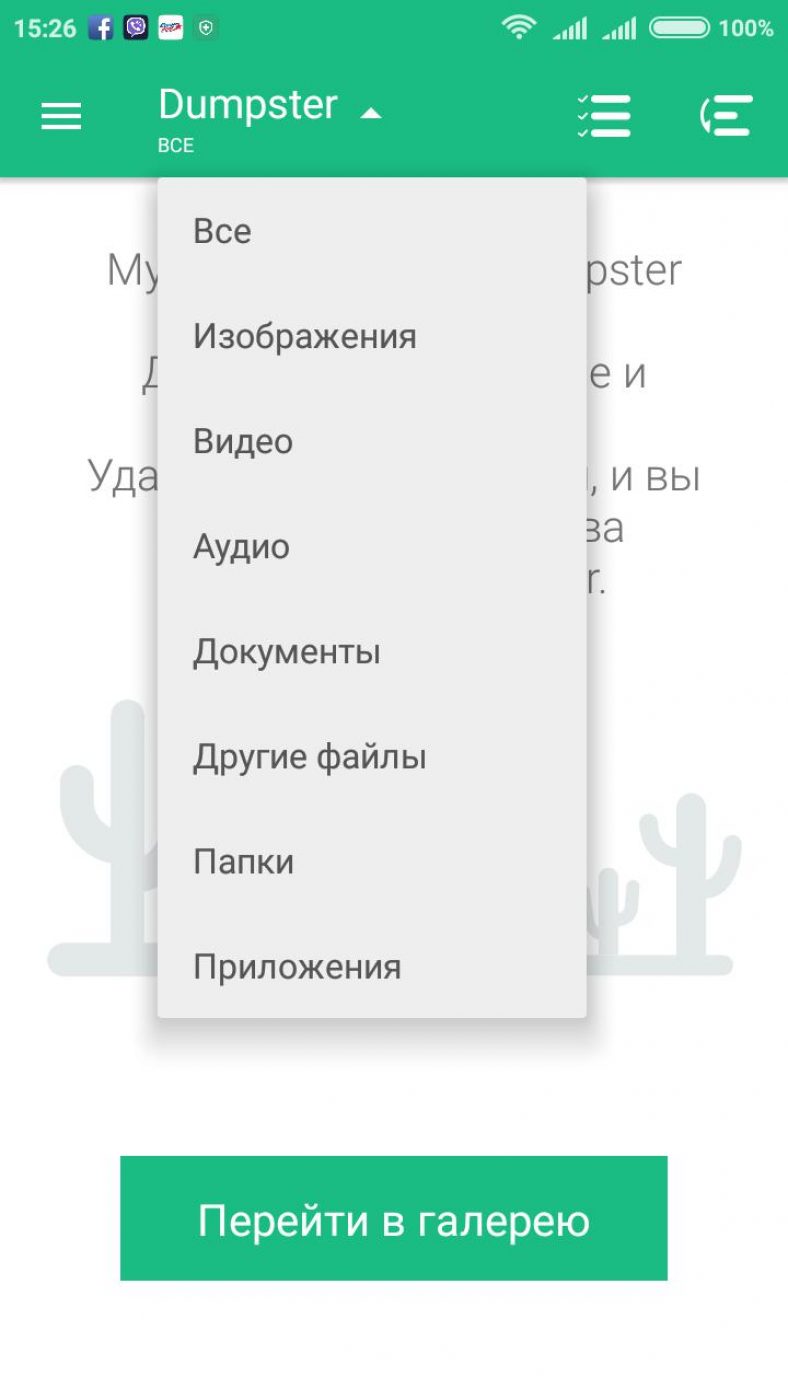
How to recover deleted files on Android (Samsung, as well as many other models) phones. The existing Dumpster application can handle this issue. It is made using the example of a “basket” on a PC. How does this method work?
Detailed instructions:
- Download the Dumpster application to your phone from the Play Market.
- Install this application and configure it for your personal convenience. Accidentally deleting a file on Android does not mean that you have to save it. It will only take up phone memory. Therefore, it is advisable to select in the program settings only those files that the application will save when deleted.
- Specify the time interval for finishing the file deletion job.
- Next, the process of processing and scanning the phone information will begin.
- Recovering and completely deleting data in an application is not very difficult. To do this, you need to select files and press a couple of necessary buttons.

Undeleter app
How to recover deleted files on Android? The reliable Undeleter application will help us answer this question. It is available for download on Google Play and is available in two copies: paid and free versions.
The free version can only recover images, while the paid version can recover all types of data, both from a flash drive and from the built-in memory. This application has fairly simple controls:
- After selecting the required folder, scanning begins and a list of files that can be recovered is displayed.
- Next, you need to select the necessary data from this list, they are restored to the same place where they were stored before the deletion process.
The only drawback of the application is the need for Root for Undeleter to work.

Titanium Backup Program
If the user accidentally deleted files from his phone (Android), the Titanium Backup application will help restore it. This application helps in recovering not only regular data, but also system files.
This program works in “recycle bin” mode, but still has more extensive functionality and can recover: photos, videos, software, contact numbers and SMS. Just to return numbers from the phone book, they must be saved on a memory card in advance. The recovery data is saved in the Titanium Backup folder on the flash card.

Recovering files using GT Recovery
This application works on all types of phones that run on the Android platform.
It is available for free and can be found in the Google Play online application store.
The program recovers files of any format: photos, videos, etc. Reviews about the application are good and imply fast and high-quality data recovery in a short time.
The disadvantage of this application is that it requires Root rights to use it. This is easy to do if you have instructions from your mobile phone, but there are also versions of the program that do not require special rights (GT Recovery no Root).

Useful Photorec program for recovering photos on a mobile device
You can recover deleted files from Android using the useful Photoret application. It operates according to its own unique system, working exclusively with sublayer data, based on this, it behaves effectively even if the files were damaged or completely formatted.
To find formatted pictures from an electronic gadget, the application first attempts to find a block of information and determines the size of the clusters. If the system was in order, without any damage, then various main blocks or boot files may be read. We can say that this software scans or otherwise reads the media, looking for the first 10 files in all sectors of the mobile device, on the basis of which the size of the block or cluster at their location is calculated. That is, where they are. As soon as the size of the above-mentioned structures is determined, the program scans each block. All blocks are included in the "signature" database.
So, Photorec determines whether it is possible to recover deleted photos from a mobile device.
The developer of this application also says that it is able to recover about four hundred files of various types (that is, not just photos). The program can recover archive files (rar or zip), various videos, etc.
Some users may not like the interface and design of the application. But, despite such a non-unique design, it does its job, showing excellent results.
As we can understand from the above, the question of how to recover deleted files from an Android phone is not that difficult. And here we can talk not only about Android, but also about other, no less well-known platforms. The main thing is to be confident in your abilities and strictly follow the established instructions.
It happens that files on a phone with the Android operating system are “randomly” deleted as a result of user actions or glitches of the phone itself, and there is no copy left on the computer. Files can be for various purposes: audio, documents, etc. And it’s a shame to lose them forever. What to do in this case? Read our article.
Phone recovery programs
Read also: TOP 20 Best launchers (graphical shells) for Android gadgets | 2019
Most users prefer to safely download and install applications on Android.

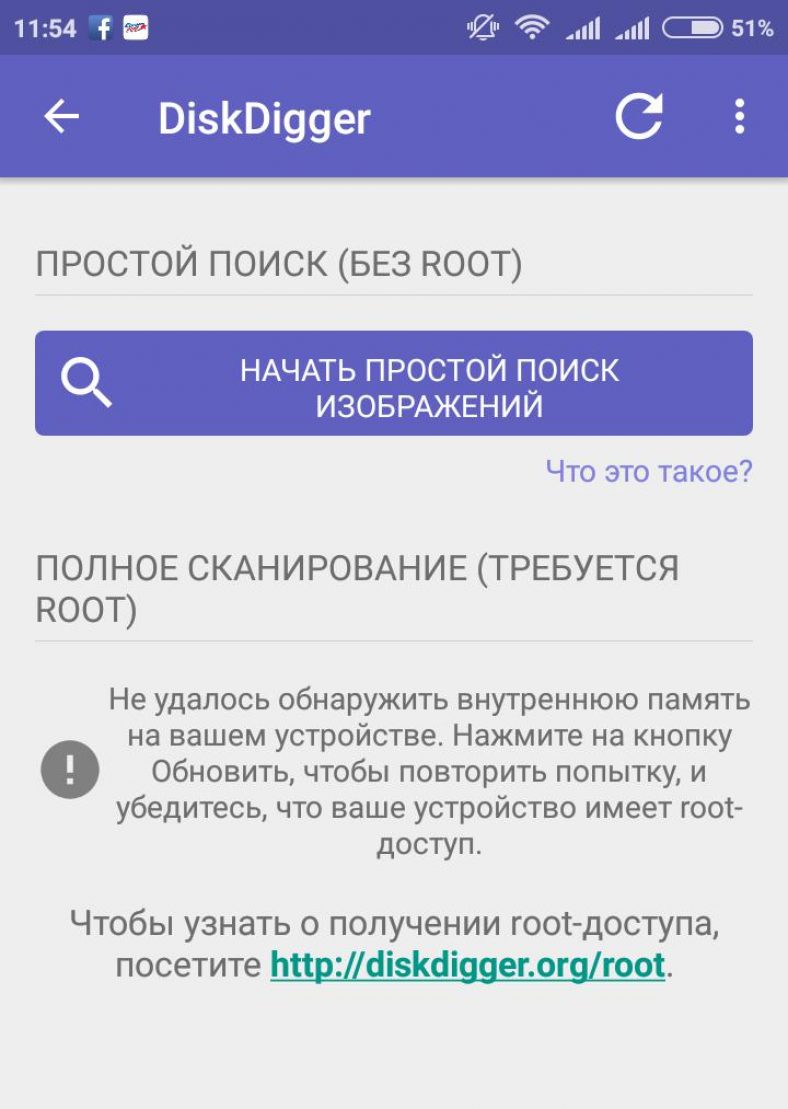
This is a highly targeted application that restores data, both deleted before loading DiskDigger and after.
It works the same way as most applications with similar functions. Because they offer, in essence, waste baskets from which you can then return them after a certain time or an indefinite period. DiskDigger is able to work after removal.
Another advantage that plays a very important role is very small volume of the application itself.
It downloads easily and quickly, takes up little space, works properly and is quite fast.
In order to use the program, you must:
1 Go to the application, that is, touch its icon on the screen of your mobile phone.
3 This right makes it possible to search for those photos and pictures that are large in size. The simplified option provides only miniature versions of large images.
5 When using the first search method, the purple button is pressed, then search occurs. At the same time, the bottom panel displays information about the speed of data processing, as well as the number of elements found.
6 From the very beginning, the user can check off those images that he would like to restore in the end.
7 Upon completion, you are supposed to click “restore” on the top panel; next to this button there will be a symbolic download image (down arrow).
The result has been achieved, photos and pictures that seemed to have disappeared forever are now again at the owner’s disposal.
DownloadDumpster
Read also: Where is the clipboard on the phone? Instructions for all popular Android gadgets | 2019

Dumpster Recycle Bin app knows how to recover deleted files from an Android phone.
The developers guarantee that its use is absolutely free. They say that this can be useful for people who accidentally delete files from time to time.
When this program is installed, you can download the most important data to your phone and not be afraid that it will be lost for some reason.
Here you can restore your photos or audio by logging into your trash account and clicking “recover.”
We can say that this is a kind of cloud for storage, which helps free up memory space, only for this function you will have to pay a symbolic amount.
It is also a big plus that you can work with fourteen languages here, which is very convenient if you want to learn English or German.
It is installed so that there is a maximum probability of returning information again.
Only if you have a Dumpster recycle bin can you have access to deleted data after some time, with free content, as well as use it as a garbage cloud if you have a paid subscription.
As shown in the figure, a list of file types is provided that, after getting rid of them, remain accessible thanks to this service.

To restore the necessary files, you need to go into the application, find in the curtain the item with the symbol of a trash can.
There you will need to click on the button in the middle, then choose the position that matches the type you are looking for.
This will lead to a list of deleted items will be shown on the central screen.
It is enough to touch the one that is still needed. Then a curtain will open on the right with information about this filler:
- location;
- size;
- date and time when deleted.
It is worth noting such a setting as auto-cleaning. Here you can adjust the period for which garbage remains in this basket. That is, the period is set to: 1 week, 1 month, 3 months.
DownloadRecover all my files
Read also: How to remove a virus from Android on your phone: Instructions 2019
How to recover deleted files on an Android Samsung or a phone from any other company? You can use the “Recover all my files” service.
Judging by the interface and capabilities, it focused specifically on searching for images and screenshots.
This is very convenient in terms of the fact that they are sorted into groups and topics. All the little things are taken into account there, including large files that were once opened.

To install, click the green rectangle. Then the download and installation line will appear.
By clicking on the open button, the user sees the first page with groups in which photos, pictures, screenshots, etc. are sorted at once.
In order to understand in more detail which images are in the group, you need to touch the desired square once.

The picture shows one of those groups that are shown on the original page. You need to touch the ones you want to restore, place them in the gallery, then just touch the pink “restore” button at the top of the screen.
In order to check the results of saving, you need to find the gallery icon on the desktop of your mobile device, then click on it and find the folder called “restored pictures”.
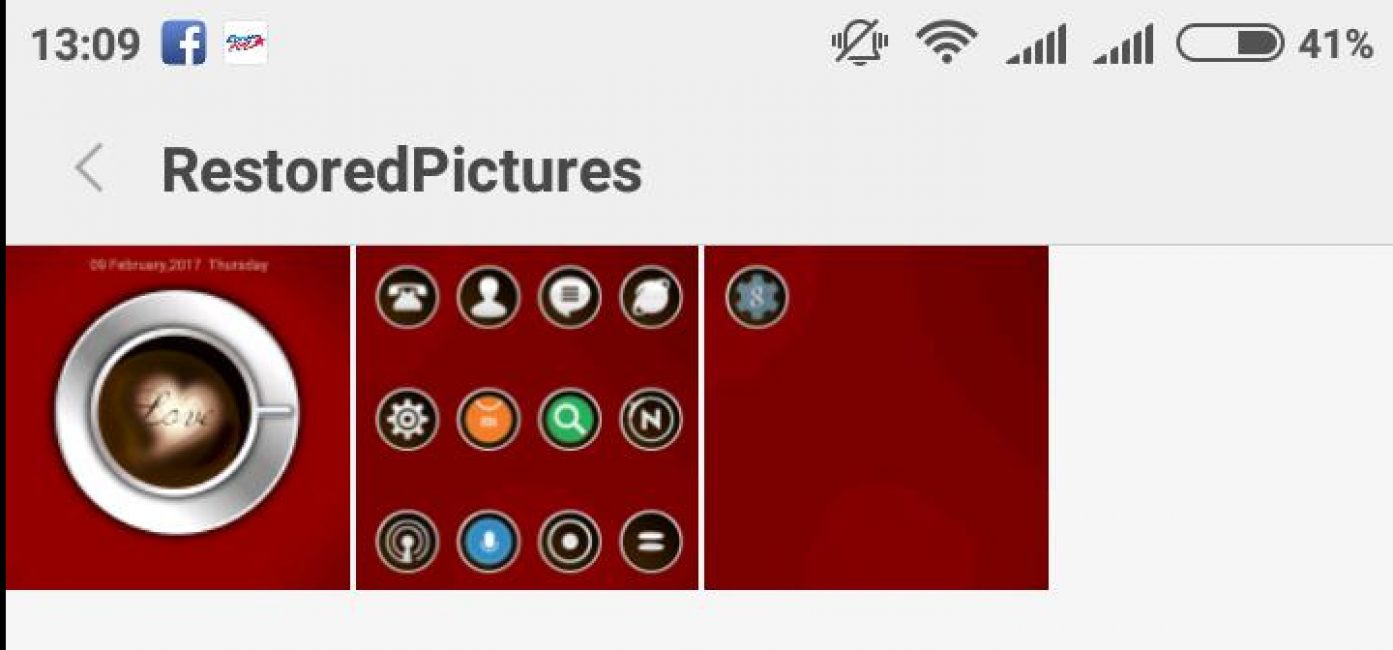
“restored pictures” - folder with saved restored images in the “restore all my files” application
DownloadRead also: TOP 15 Best free browsers for Android devices: review of the fastest and safest surfing programs | 2019

This is a prominent representative of “basket” applications. Here the developers decided to make them narrowly focused. That is, they created separate basket services for storing SMS, images, videos, etc.
Services that claim to recover all data from a phone often do not work as expected. They may request money to open content. It happens that they sell keys to expand such capabilities, but this function is either not fully developed, or is generally a scam.
Here the emphasis is placed on the motto: less, but better. There is only one condition for a more universal version of the application. It is indicated in the description: the presence of root rights, which is easy to obtain.
DownloadRead also: TOP 10 File managers for Android: choosing the best one for yourself | Review of English and Russian versions

In order to download it, you need to visit PlayMarket. Follow the directions to open after installation.
There A list of those SMS messages that can be restored will be immediately provided. You can view them and click the appropriate button to make a return.
Here you can also configure the time the data remains in the trash or completely disable automatic deletion.

I wonder what here you can also search by date of receipt or by date and month of deletion.
This can be done by touching three vertical dots on the top panel in the right corner. There you will be given a choice of settings or search.
So, if you deleted files from your Android phone, you now know how to restore them if they are texts from incoming SMS messages.
It often happens that you regret deleting data and files from your smartphone or tablet running Android, or have you lost them? Then today's instructions are especially for you!
There is no need to be upset, since they can be restored, but to do this you will have to install and work with some additional Android applications, and in some cases connect a PC.
An excellent program for recovering lost data on Android is 7-Data Android Recovery. You will find detailed operating instructions in the article:.
To prevent data loss next time, check out the following articles:
Now let's get back to data recovery. Thanks to the Undelete for Root Users program, Android device users will be able to recover data on their smartphones and tablets. A guarantee of successful file recovery is the prevention of further data being written to the media after its previous deletion.
After installation Undelete for Root Users for Android will scan the memory card and display a list of all deleted files. After clicking the “Restore” button, the necessary data will be restored. From the name it is clear that the application only works on rooted smartphones and tablets. Read about receiving them in the posts: and.
If you are a prudent user, then take care in advance about the safety of your personal data. Therefore, especially for you, there is an excellent shopping cart application on Android - Dumpster: Recycle Bin (link to the article at the beginning of the post), which performs functions identical to the Recycle Bin on a PC. That is, after deletion, the file is not completely erased, but ends up in the trash, from where it can be easily restored.
If the data was on a memory card, then you can return deleted files using wonderful PC utilities, of which there are a lot. Among the best I can highlight Restoration or UnDelete Plus. After installing one of the programs, you need to insert the SD card into the card reader slot and press the button to start scanning. After this, the found files can be restored and used again.
Sometimes after a complete factory reset on Android, there is a need to restore files, folders or data that were deleted. Sometimes data recovery may be necessary if the user accidentally deleted it from his smartphone. It’s especially a shame for the rare photographs and music.
Therefore, if you are looking for a simple and effective way to recover lost or deleted Android files, then after reading this article YOU will become a real expert in this matter.
Don’t rush to get upset and despair; fortunately, there are special programs that will solve the problem of deleted files in a couple of clicks. We will look at one of them in detail - 7-Data Android Recovery is one of the clear leaders.
How to recover deleted data on an Android system
As we mentioned above, information recovery will be carried out using the 7-Data Android Recovery program, at the time of writing it was completely free, perhaps in the future the developer will introduce a certain fee, but let’s not talk about sad things for now :)
7-Data allows you to easily recover most deleted files both in internal memory and on an external SD card.
You can download the program from our server using this link.
Then we follow the standard procedure. Unpack the archive and run the 7data-recovery-suite application file. Following the installer's prompts, we perform a complete installation of the program on your personal computer or laptop.
After successful completion, open 7-Data Android Recovery:
Before starting the recovery, you need to enable USB debugging of the device and connect the smartphone to the computer using a USB cable, to do this:
1. Go to the settings of your smartphone – Developer options – USB debugging (check the box);
2. Connect the USB cable to the smartphone and then to the computer;
3. In the 7-Data Recovery window, click on the green “Next” button. A window with a list of memory cards should open in front of you, you need to select the one you need and click the “Next” button.

4. The device scanning window will appear. Here you just need to wait a little while the program completely scans the device and displays a list of files that can be returned.

5. Upon completion of the scan, a structured “tree” of folders and files of the device is displayed.

6. We go through the list and mark those that are subject to restoration. Click the “Save” button.
Important! The data you are recovering must be saved in a separate folder on your PC; do not save it to the memory card again. You use the program at your own peril and risk; it does not provide a full guarantee that everything will be restored efficiently.
As you can see, the procedure does not require deep knowledge, and even a beginner user will be able to recover most of the seemingly irretrievably lost files and data of their Android.


