Download Android Emulators on PC (Windows). Android emulators for PC
Before purchasing a smartphone, many users want to become more familiar with Android. In order to understand whether a smartphone with this operating system is suitable for them or not. Fortunately, this can now be done using a computer. After all, you can install Android on your PC and explore its capabilities.
In this article, we will look at the entire process of installing Android on a PC in as much detail as possible. Starting from downloading an ISO image with the Android operating system and ending with its installation on a PC.
In order to install Android on a regular PC, you first need to do some preparatory work. First, you need an Android ISO image that is ready to run on x86-based PCs. This ISO image can be downloaded from the Internet. For example, you can download ISO images from Android version 4.3. If you need a more modern version of Android, then at the moment you can download Android version 6.0 there.
After the ISO file with the operating system image is downloaded, it needs to be written to a CD or flash drive that will be used to install Android on a PC. You can use various programs for recording. In this article we will demonstrate how this is done using the UltraISO program as an example.
Launch the UltraISO program on your computer and using the “File – Open” menu, open the previously downloaded ISO image with Android. After this, you can start burning the ISO image. If you want to burn an ISO image to a CD, then press the F7 key or the button on the UltraISO toolbar.

If you want to make a bootable USB flash drive with Android, then this can also be done in UltraISO. To do this, you need to open the ISO image in the program and use the menu “Boot - Burn Hard Disk Image”.

After this, you need to select the flash drive that should be used to install Android on your PC and click on the “Burn” button.

As a result of the above steps, you should have a bootable CD or bootable USB flash drive with installation files for the Android operating system.
Installing Android on PC
After completing the preparatory stage, you can proceed directly to installing Android. To do this, we reboot the computer, enable booting from a flash drive or disk in the BIOS, insert a boot disk or flash drive into boot the PC from this drive.
As a result, a menu should appear on your PC screen asking you to boot into LiveCD mode or start installing Android on your PC. Select the installation option and move on.

After this, the process of installing Android on your PC will begin. At the first stage, you will need to select the partition on which you want to install Android. Please note that the partition you select will be formatted, so make sure you don't lose any data before proceeding.


After this, we allow writing to the system directory.

And wait until the process of installing Android on your PC is completed.

When the installation of Android on your PC is completed, you will see a proposal to immediately launch Android or restart your PC. Select reboot.

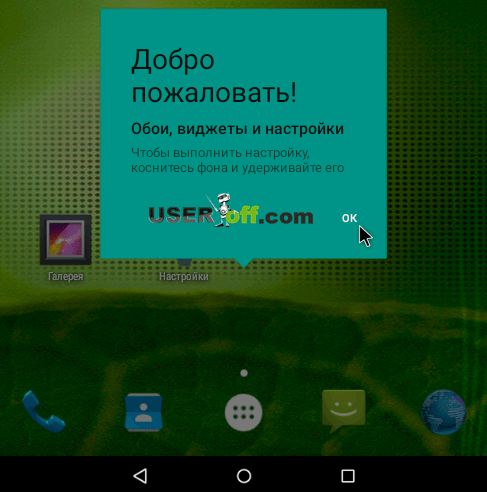
After restarting the PC, disconnect the bootable USB flash drive or disk and boot from the newly installed Android. When you launch Android for the first time on your PC, a menu will appear for the initial setup of the operating system.

You will need to select the operating system language and also configure some other options. After this, the Android desktop will appear on your PC screen.
Well then. We have come to the most important part of the review, but can we choose an emulator that we can call the best without any twinges of conscience? Let's think about it.
- Firstly, it is worth noting that most of the presented software are solutions from Chinese developers who quickly “cool” towards the project and stop “supporting” it. Actually, therefore, not everyone supports Android versions higher than 4.4, and the same software testing should be carried out on several versions of the OS.
- Secondly, it is impossible to name the best of the best for one simple reason - different software is designed for different categories of users. Let's try to distribute it wisely.
BlueStacks, Andy, Nox, MEmu– popular emulators, free, approximately equal in capabilities, functions, with similar implementation. All of them are designed for ordinary users, which need to install, run, press a button and get the result. Here you won’t have to set up anything for a long time - virtual reality will load immediately, and the user interface will delight you with its intuitiveness.
Looks good compared to its peers Nox App Player. The application player installs quickly, works stably, and supports all modern games. provides the most convenient control and is not demanding on PC resources. It’s nice that the computer program is equally convenient for both gamers and ordinary users, and also does not bother you with advertising, unlike some popular alternatives. Another plus is that you don’t need a Google account to install “computer games” from a company store!
And a few more words about BlueStacks. The developers offer a fairly high-quality product with a package of essential services. For example, video streaming on Twitch.tv, as well as access to adapted versions of games with controls modified for PC. Among other things, BlueStacks performs very well in games. The emulation is of quite high quality, and there are minimal brakes, since the creators of the program removed unnecessary processes in the OS, reducing the load on the computer’s RAM and central processor.
Windroy is our winner in the “simple emulator” category. Its undemanding nature deserves special honor and praise. But if Windroy allows a maximum of “throwing birds”, then Droid4X you will pass demanding games that once migrated to Android from PC without discomfort. With this emulator you will want to conquer all the tracks in Asphalt, destroy all the enemies in Gangstar, and, of course, feel nostalgic for Infinity Blade, but on a personal computer. Root access for using cheats is included.
There are three emulator options on our list that are suitable for professional testing: BlueStacks, Genymotion And LeapDroid. The first contender got here for the quality of execution. The second is for the variety of images - almost any top-segment cell phone is emulated, and the third is for the number of settings.
notice, that Genymotion And LeapDroid do not contain the virtual machine engine, but simply create images for VirtualBox. But Genymotion clearly does it better. The program database contains profiles of several dozen smartphones and tablets on different OS, up to Nexus on Android 7 Nougat. Moreover, the set is constantly updated - this is suitable for developers and testers.
As for LeapDroid– this is software for geeks and advanced users. If you want to spend a lot of time, but use trial and error to configure the emulator to work perfectly, we recommend downloading it for free. Support for opengl (hardware virtualization technology) will undoubtedly be an advantage when choosing among analogues. However, the development environment is not enabled. The product is more household than specialized. It’s too early to include it in the best Android emulators.
P.S. advanced users will probably ask, where is the youwave emulator, which is so praised on other sites? The answer is that we have not tested products based on ICS and older versions of the operating system. We will say the same thing if you came to download the Android emulator on your Computer Amiduos or Koplayer - the applications are clearly outdated and have not been updated for a long time.
Today we will talk about how to install android on laptop or netbook. This topic will be of interest to all fans of this lightweight operating system from Google, which was developed specifically for compact devices. So I was interested in the question: “Can I use free Android on my outdated laptop, with the same success as on a smartphone?” It turns out that this is quite possible! I already wrote about , another free product from Google, although that article talks about installation in the VirtualBox environment. As stated earlier, in the future Google may combine Android and Chrome OS into a single operating system, but for now these are just plans.
I think there is no need to talk for a long time about the popularity of Android smartphones and tablets in the mobile device market. About competition with the iOS operating system, pre-installed on the iPhone and iPad mobile devices of the famous Apple corporation. Such information is considered banal nowadays, everyone knows about it! Well, okay, especially for those who still don’t know, I’ll give you some statistics :-) The Kantar company has released a report that describes the behavior of the mobile industry market in various countries around the world. According to these latest statistics (2014) on the distribution of operating systems in the world, Android is the leader in all countries, albeit with different percentages. The issue of android leadership is not even discussed in this report. But before 2013 there were slightly different statistics:
| Platform | 2007 | 2008 | 2009 | 2011 | 2012 | 2013 |
|---|---|---|---|---|---|---|
| Nokia (Symbian OS) | 62,3 % | 52,4 % | 47,2 % | 20,9 % | 2,4 % | - |
| BlackBerry (BlackBerry OS) | 10,9 % | 16,5 % | 20,8 % | 14,9 % | 5,3 % | 2 % |
| Apple(iOS) | 5,2 % | 9,6 % | 15,1 % | 15,7 % | 13,9 % | 14 % |
| Microsoft (windows mob, phone) | 11,9 % | 13,9 % | 8,8 % | 5,5 % | 2,4 % | 4 % |
| Google (Android) | - | 0,5 % | 4,7 % | 39,5 % | 72,4 % | 80 % |
| Samsung (Bada) | - | - | 0,1 % | 1,9 % | 3,0 % | - |
| Others (Linux, Palm OS) | 9,6 % | 7,2 % | 3,4 % | 3,5 % | 0,97 % | 0,3 % |
 The main feature of Android is that it is free and open source, which means that this operating system can be freely downloaded and installed on any compatible device. It is also absolutely legal to download and install any modifications of this operating system on your device. And the most interesting thing is that we don’t have to buy a smartphone to get acquainted with Android; this system can even be installed on a netbook or laptop.
Instructions for installing Android on a laptop or netbook
Installation usually requires an Android Live CD or Live USB image, which can be burned to a disk or flash drive. Next, we will mean creating a Live CD. From such a “live” disk you can boot and try the system without installing it on a computer, in our case a laptop or netbook. You can also install the system from the same disk.
- We go to the Android-x86 Project website. This is one of the Android builds ported to any computer with an x86 processor architecture.
- On the website we need to download an ISO file - an installation disk image with the latest version of the system on board.
- Burn the downloaded ISO image to disk using the Ultra ISO program or any other program for burning images to disk.
- We place the recorded disk in the CD/DVD drive of the laptop, and in the case of a netbook, in an external drive, set the parameters in SETUP/BIOS to boot the computer from our disk and start the system.
- During the process of starting the system, we will see a boot menu with several options, the first item is to launch Android on the computer without installation, and the last one is to directly install this operating system on the hard drive of a laptop or netbook.

How to make bootable Android Live USB?
We must admit that the era of CD/DVD drives has passed; it is much more convenient to use a flash drive to install a new system, however, I would recommend a slightly different way of creating such a bootable flash drive.
- Download android-x86-4.3-20130725.iso from this link
- Download and install LinuxLive USB Creator (LiLi) from this site
- In the program itself, first select a flash drive pre-formatted in FAT32.
- Then select the downloaded boot disk image, or simply an ISO file.
- We skip the third point.
- Leave the “Allow LinuxLive USB to run on Windows” checkbox if you don’t want LiLi to download and install on a VirtualBox flash drive.
- In the fifth point, click on the lightning bolt and wait for the program to create a bootable USB.
- We perform the following steps by analogy with points 4-5 of the previous instructions.
But remember, no one is immune from the lack of full hardware support for your particular laptop or netbook model. For example, the system may not work correctly with the Wi-Fi adapter integrated into your device. Individual problems can be fixed by installing a patch, but if your configuration is not widespread and not popular among the general public, then finding a solution on the Internet will be much more difficult.
That's all, I hope you find my instructions useful! Subscribe to the blog, add yourself on social networks, I’ll be glad to chat in the comments!
How to install Android on a laptop or netbook? was last modified: March 3rd, 2016 by Admin
Read the article on how to download Android to your computer and install it. Android emulators on Windows will help us with this, or for the smart ones, a clean installation.
Despite being a mobile operating system, more and more users are installing it on their work computer. This is done for a variety of reasons: launching games or applications that are developed exclusively for this OS, testing any programs, and so on.
And just looking at how Android will behave on a big screen is quite interesting. In addition, the mobile OS is less demanding on computer resources, so it can be an excellent solution for users who have an old laptop lying around.
Why Android on a computer?
As already noted, the most common reason for installing Android on a full-fledged PC is the launch of popular programs and games that are developed exclusively for this operating system. If you look at the top of Google Play, you will be surprised at the number of downloads of particularly unremarkable games, such as Clash of Clans. Many people want to play anywhere and install Android on laptops and PCs.
In addition, by downloading Android to your computer, you can install programs or games that do not run on your smartphone due to lack of performance or an outdated system. As a rule, the power of a modern, even not too expensive, computer is enough to run any mobile games.
Almost every application developer on Google's OS has Android on his computer so that he has, so to speak, a test sample at hand. Android on a computer allows you to more accurately test developments, as well as identify various types of errors.
There are even users who, having tried Android on a PC, prefer this system over Windows - the capabilities of the mobile OS are quite enough for them. In addition, the capabilities of Android are expanding every year.
How to install Android on a computer: methods
There are two ways to install Android on a personal computer. Firstly, using emulators. What is this?
Emulators are special programs that are installed and launched directly from the operating system preinstalled on the computer. That is, no special knowledge is required from you. Emulators, as the name suggests, emulate the operation of the hardware used in Android devices. Already using the emulator program you launch the image of the desired version of Android.
What are the benefits of Android emulators?
- Very easy to use - downloaded, installed, launched the desired version of the system
- They do not affect the preinstalled system in any way - you can even test viruses in the emulator, nothing will happen to your any Windows
- There are many of them, they are free - on the Internet you will find a bunch of emulators, many of them aimed at different users (developers, game lovers, ordinary users)
We already have an article, so let's move on to the second method.
Install Android as an OS on your computer

The second method is to directly install the Android OS instead of (or next to) the main operating system. As a result, you get a full-fledged system that will start when you turn on the computer, using its hardware.
The Android x86 project is transferring the Android OS for installation on a computer, which offers distribution kits for downloading. The fact is that it is impossible to run the original version of Android, developed for smartphones, on a PC - different processor architectures.
Where to download Android to your computer
We will not focus on emulators (their installation is done in a few clicks, and we have already written about the list of the most current ones with explanations for each of them).
I would like to take a closer look at a clean installation of Android on a PC, since with this method everything is somewhat more complicated. But don’t worry, there are no extreme difficulties here, and those who have reinstalled Windows at least once will figure it out in no time.
Download the Android distribution in Russian
So, first we need to download the Android distribution. You can choose the best Android in Russian using the link http://www.android-x86.org/download. It leads to the Android x86 project, which we mentioned a little higher, or rather, directly to the list of versions available for download. Here you can choose both universal and special versions suitable for certain laptop models. Just read the description for each of them.
Create a bootable USB flash drive to install Android
After downloading Android, we need to create a bootable USB flash drive (you can also burn the installer onto the disk, of course, if you have one and your laptop or computer has a disk drive). To record, you need to download an additional utility. There are a lot of them, many of them are really high quality, we recommend UltraISO - a small program that is available for free. Next we have two developments:
- Writing to disk
- Creating a hard disk image
However, the creation process is approximately the same:
- Connect a flash drive or insert a disk (they should not contain important files; during the recording process, the drives are formatted and everything is deleted)
- Launch UltraISO by selecting “Trial period”
- Select “File” - “Open” and specify the path to the downloaded version of Android (files will appear in the central window)
- If we are creating a bootable flash drive, select “Boot” - “Burn hard disk image”
- In the Disk Drive drop-down list, select the desired flash drive
- Click “Record” and wait for the process to complete
5.1 If we are burning a disc, select “Tools” - “Burn CD image”
Create a disk partition for installing Android

To install Android on your computer, you will need a separate partition on your hard drive.
If you start the installation without creating a separate partition, you will replace your pre-installed Android system. Therefore, be careful.
You can also use a separate hard drive for the system if you have one lying around and there is room for it in the system unit or laptop. Otherwise, we move on to creating a separate section in which the “green robot” will live.
- You can create a partition on a hard drive using third-party programs (Acronis Disc Director Suite, pwhe8 or others) or using standard tools - in both cases the process is similar
Since there are a great many programs, we will analyze the creation of a partition using standard Windows tools.
- Go to the “Management” section (Right-click “My Computer”)
- From the list on the left, select “Disk Management”
- A list of hard drives and partitions will open in front of you.
- Select the disk and partition from which we will take memory for installing Android
- Right-click, then “Shrink Volume”
- Now you need to select the volume for the new partition in the “Size of compressed space” line (at least 5 GB, preferably 10 GB)
- Click “Compress”
A new section has appeared in the list, but the process is not over yet.
- Right-click on it and select “Create simple volume”
- In a new window, in megabytes, indicate the size of the volume to be created (select the maximum)
- In the next window you need to select the letter of the new volume (to your personal taste)
- Next, we move on to formatting the volume, simultaneously specifying a label for it (you can set a name)
- Click “Finish”
The preliminary preparations are completed, let's move on to installing Android on the computer.
The process of installing Android on a computer. Instructions
In fact, the hardest part is over. What we do next:
- Go to BIOS by rebooting the computer
To enter the BIOS immediately after turning on the computer, press the button (depending on the specific device model and BIOS version). As a rule, the F1-F12, DELETE buttons are used.
- It is necessary to set the priority of booting the computer from the drive on which we recorded the Android distribution kit (so that the computer does not boot into Windows)
This is done in the “Boot” tab (switch with the arrows - the mouse, as a rule, is not active in the BIOS). The available hard drives and other drives will be displayed in front of you; select the one you need (from Android), move it to the first position using the F6 key.
After installing Android, return the HDD to the top line so that later your computer does not load the distribution kit.
- Exit the BIOS through the “Exit” tab, confirming the saving of the changes
- The computer will start loading the distribution on the flash drive or disk
- A window will appear in which you need to select “Install Android-x86 to harddisk” (that is, installing Android on your hard drive) - select using the arrows, confirm with the “Enter” key
- Next, a window will appear with available partitions in the form sda1, sda2 and so on
- The main thing here is not to make a mistake with the choice; select the desired partition (which was created for installing Android) based on the specified volume
- In the next window we will be asked to format the partition to bring it to the desired format (we recommend choosing EXT2 or EXT3)
- A window will appear in which the system will prompt you to install a special bootloader, select “Yes” (without it you will not boot Android)
- Then the system will conduct another check - it will find previously installed operating systems
- In the window that appears, click “Yes” so that in the future, when you start the computer, you will be asked to choose which system to boot into – Windows or Android
- Finally the installation begins
Once the Android installation is complete, you will need to reboot. Then we perform the initial setup. Everything is simple here: language, time, and so on. Well, after that you will see the familiar interface of the mobile operating system.
Let's imagine that you have come to the conclusion: you simply need the Android operating system on your computer, be it a desktop PC, laptop or netbook. I think you understand that today we will discuss how to install Android on a computer. The need for Android on, say, devices not intended for it, can be due to many factors:
- The “bank” of applications on Android contains an incredible number of programs for any area of life and activity, be it business, sports, the hobby of electronic cigarettes or jogging - for everything there are a dozen or even a hundred applications of varying degrees of convenience. And despite the fact that the most popular Windows OS is older and has already acquired a sufficient amount of software, in some aspects Android wins. In addition, for the latest OS there are more offers in the free software niche, which cannot but please users.
- You have an insufficiently powerful netbook that is pointless to sell, it would be a pity to send it to scrap, and it is useless to install Windows, since it will work very slowly. Moreover, programs are now being developed that are simply not suitable for weak computers. The Android system is less demanding on device resources. Even the simplest smartphones work very well with the Android system.
- There is an application (most often a game) on Android, which has no analogue for Windows, why not install Android on your PC as a second OS. By the way, it is not necessary to install the OS; you can run it on your computer in Live mode. I will talk about this below.
- The level of data synchronization in Android OS is excellent. Contacts, calendar data, tasks and much more - it will be very easy to “make friends” with your Android PC.
- There are no viruses or malware on Android OS. All the “malware” that exists for Android can only do the most it can do - send a paid SMS message. But we install the OS on a PC, which means that the ability for scammers to steal money from us via SMS is simply physically absent, since very rarely a PC is equipped with a GSM module.
Should I choose an emulator, installation or LiveCD?
So, the decision has been made - you need Android on your computer. How to install it? To begin with, I suggest you decide which format for using the Android OS on a PC is most suitable for you. Here are three options you can use:- Android emulator. The most “safe”, if you look at it from the perspective of the average user. There is no need to go into the BIOS and shake for fear of accidentally destroying the system. Everything is quite simple: install the application, launch it, and you’re done. Disadvantages of this solution: all currently available and more or less tolerable emulators are demanding on computer resources; you will need to allocate the resources of your computer for everything to work as it should. After all, running another operating system inside Windows OS means an additional load on the RAM and processor. You should also take into account that you must allocate space on your hard drive for the new system. Suitable for powerful PCs.
- Running Android in LiveCD mode. Something in between the first and third options, does not require installation. A fairly simple launch algorithm. The PC is not demanding on resources, as I said earlier. The negative side: every time you start you get a “disposable” operating system, all data and settings of which are erased when you reboot. Therefore, this option is suitable, for example, for a one-time check of an application. For regular use, the third option is suitable.
- Installation of a full Android OS. The leader of all three options in terms of reliability. It doesn't require a lot of resources, but the only thing additionally required is some hard drive space for installation. You are not picky about the performance of a computer or laptop - the device must be no weaker than a regular smartphone (that is, any weak netbook will do). An excellent solution for permanent use of the Android OS as the main or additional operating system (for example, along with Windows).
Android Emulator
Installing Android emulators will not be discussed in detail in this article. Firstly, due to some inferiority of each of them (somewhere there may be problems in setting up manipulators, in others there may be “jambs” in the operation of graphics in applications). Secondly, if you really want to try this option, installing the emulator should not be any difficulties - it is no more difficult than installing any other application under Windows.
I can only list some emulators that you can pay attention to due to their fairly simple installation and relatively decent performance: Droid4x, Bluestacks and Genymotion. From my own experience, I can also say that the first one was suitable for my purposes, but I will make a reservation that I had specific goals.
To help users who decide to use emulators a little, I decided to add a video that will help you understand the installation principles:
How to download Android installation file
You can download different versions of Android here, for example, version 5.1 or 6. Here I cannot tell you which version is better to choose, since I don’t know why it is needed. Of course, you can test 2 versions and then make a decision. The site presents images (archives) of two types - .iso and .img; I will explain their differences a little later. To download a particular file from the site, click on “View”. After this, the file will begin downloading. I recommend downloading versions in iso files.
By the way, at the end of the article I will tell you about another version of Android that may suit your needs.
Creating a Bootable Android USB Flash Drive
In order to run Android on a PC, we need a boot disk. The era of CDs is ending, so I’ll tell you how to make a bootable USB flash drive. To create a bootable USB flash drive from an iso image (file), you can use the Rufus program. If you do not have this program, here is a link to the official website where you can download it.
The program is simple, download it, run it, and see the program window. In the window we enter the following parameters (the picture with the settings is below):
- “Device” - select our flash drive, which will act as a boot drive.
- “Partition scheme and system interface type” - leave it as is.
- "File system" - FAT
- "Cluster size" - default.
- “New volume label” - it doesn’t matter what you name your disk.
Specify the remaining parameters as in the screenshot above. And of course, you need to indicate the image that you will download from the site, the link to it was given above. To do this, click on the disk icon, which is located to the right of the inscription “Creating a bootable USB flash drive.” Now click on the “Start” button to start creating the flash drive.

After that, select “Burn in ISO image mode (Recommended).” Next, the program will remind you that all files will be deleted from the flash drive, but you already know this and so just click “OK”.

Now we just have to wait for the final result.
Another option for creating a bootable USB flash drive is using the UNetbootin program. Download the program and run it (the flash drive must already be connected to the PC). Select “Disk Image”, click on “…” and indicate the downloaded distribution. In the “Media” drop-down list, you need to select your flash drive. Click “OK”, and when finished click “Exit”.

Well, I’m sure you didn’t have any difficulties, and now the bootable flash drive is ready.
A little about the image with the img extension. In the case of EFI boot, use the Win32 Disk Imager program to create a bootable USB flash drive. Its interface is no more complicated than Rufus's, so you can handle it.
Booting Android OS from a USB flash drive
First, you need to set the BIOS to boot from a flash drive. This is done simply - just go to the BIOS (when turning on the PC at the very beginning, press the "Del", "F2" or "Esc" key) - after which the BIOS will open with settings. BIOS versions may vary, we need to find the “Boot” - “Boot Device Priority” section at the top (can be on the left or right), and select a flash drive as the value of the “First boot device” parameter (the device from which to boot first) .
Typically, moving to Bios is done with the Up Arrow and Down Arrow keys. The mouse rarely works in Bios, so all actions there must be performed using keys. In one of my articles, I talked about how to set the BIOS to boot from disk. This information will be very useful to you if you have not previously configured the BIOS. I’ll note that I’m talking there about how to set up booting from a disk, but you need to select a flash drive instead of a disk.
Then exit the BIOS and save the changes (“Save and exit” - “Yes”). In almost all BIOS versions, the F10 button is used to save settings. We reboot the PC, the bootable flash drive should be in one of the USB ports of the laptop or computer.
Download Android without installation
After a few seconds of loading we will see the following menu:
Attention: If the boot does not occur, it means that you have not configured the settings in the BIOS so that you can boot from a flash drive. I will now describe everything step by step, but you should understand that at the moment the installation is what it is, but after, for example, 6 months, it may be slightly different. In any case, the steps that I will describe will be useful to you so that you understand what needs to be done and where.
As you can see, you can either install the OS or run it in LiveCD mode. We are now interested in the last option, select the appropriate line - “Run Android-x86 without installation”.

As a result of the download, a language selection will first appear (the language selection is done using the arrows on the keyboard, after selecting, click on the yellow arrow to go to the next menu):
And then there will be the initial settings of the Android OS. There is no point in going into too much detail and setting it up, since, let me remind you, starting the OS in LiveCD mode stores all the settings until a reboot.
Then you will be asked to connect to Wi-Fi:
You can specify your Google account if required, or click “Skip”:
Then they will write to you what this account is for:
You can set the date and time or click “Next”:
In the next window you can enter your data, I click “Next”:
After specifying all the settings, you will have a completely real Android OS in your hands, with which you can do whatever you want. Experiment and check functionality, install applications. By the way, it is worth noting that Google Play services are not installed by default.
Preparing a disk partition for Android
If you need to install Android on your computer, you will first need to partition your disk to make room for the new system. Windows has a built-in tool for managing disk partitions. To launch it, press “Win” + “R”, write “diskmgmt.msc” and click “OK”.

In the window you need to select the drive from which you want to take space for the Android system. In other words, you need to create a disk on which you want to install the system. There is an article on the site that describes in detail how to do this in Windows 7: "". But this article is also relevant for other versions of Windows: 10 and 8.1. Therefore, follow the link and study the article. Now I will describe this procedure for Windows 10. Select the disk that you want to split into parts and right-click on it. After this, select “Shrink volume” (you will have to wait a little while the system performs the analysis):

In the next window, in the “MB compressible space size” field, you must indicate the size that you are allocating for your new disk. For example, you can specify "10000". Now click "Compress".

After a while, on the right side you will see an area of the disk that is not allocated. Right-click on this part and select “Create a simple volume...”. Then a window will open where you need to specify the disk parameters and then click “Next”. And in just a couple of minutes you will have a disk ready on which you can install the necessary system.
IMPORTANT: to install Android OS you will need a partition of approximately 10 GB in size. If you have a disk that does not have the necessary information or is empty, right-click on it and select the “Delete volume” line. After this, the entire volume of the disk will become unsold, from which you can make a partition for the Android OS - an alternative option with which you can create a disk for Android. But I recommend using another method, which is described just above. Let me remind you that I provided a link to an article where I described this process in detail.
You can also use programs for working with hard drives, for example, Acronis Disk Director and others.
Installing Android OS from a USB flash drive
If, when starting the PC, you select “Install Android-x86 to harddisk” in the bootable flash drive menu, a full installation of the operating system will start.
IMPORTANT: if the PC is “clean”, all the necessary files are saved, and Android will act as the main operating system, then you can continue with a clear conscience. If you plan to install Android as an additional OS, then you first need to allocate a disk partition for it. How to do this is described above. If the partition for Android has been created, we can now continue the installation from the flash drive.

Next we will see a suggestion for installing the GRUB bootloader. You will need it if, in addition to Android, other operating systems are installed on your PC, for example, Windows. We answer (“YES” - “Yes”, “Skip” - “Skip”) and move on.
If other OSes are installed, the program will notify us about this in the next step, and will also clarify whether to add them to the boot menu. We select “Yes” if we need the ability to launch them from time to time, and “No” if we plan to use only Android and do not want to clutter the boot menu with unnecessary OSes.
After this, the long-awaited installation of Android-x86 will finally begin. When it is finished, you will see the Android OS launch menu, in which you can immediately select to start the OS or restart the computer or select the operating system from the list.
Congratulations, a full-fledged Android OS is installed on your PC. I am sure that you will cope with the initial system settings without any problems.
Advanced version of Android – Remix OS for PC
There is another option for using Android on your computer - Remix OS. This operating system is based on Android OS, but is more advanced. It was released at the beginning of 2016, and is a kind of Android OS with aspirations for Windows functionality: a multi-window interface with the ability to minimize windows, a taskbar and Start menu, as well as a notification area similar to Windows. In addition, it is more adapted for use on PC compared to Android-x86.
The process of creating a bootable flash drive with Remix OS on board is no different from writing an Android-x86 image to a flash drive. After booting from the newly created flash drive, we will be greeted by a similar menu, where we can choose to install the OS on the hard drive (“Resident mode”) or boot in LiveCD mode (“Guest mode”).
You can download the distribution kit for creating a bootable USB flash drive for Remix OS using the link: . By the way, a utility for creating bootable disks is also available there.
To summarize, I will say that installing Android on a PC is not difficult, you just need to follow the instructions outlined above. Easy installation and pleasant use of the new operating system.
Video that will show how to install Android on a computer or laptop:


