Windows 10 Defender does not turn off. Turn Windows Defender on and off. Disabling using the Windows Registry
The operating system should not only be as functional and productive as possible, but also well protected. In Windows, such protection is provided by a comprehensive security system, an important part of which is Windows Defender– a built-in anti-virus program from Microsoft, designed for automatic and manual search, detection and removal of virus threats. In addition, built-in Windows 8/10 Defender can monitor and prevent suspicious changes in real time in specific OS segments.
However, the vast majority of users prefer third-party antivirus products to it, and for good reason. Tests conducted by independent laboratories have shown that the protection provided by Windows Defender in both the eighth and tenth versions of the system is very conditional, significantly inferior in many respects to popular antivirus programs. It is not surprising that more and more users are wondering how to disable Windows Defender 10 at least temporarily, and even better permanently.
Disabling Defender via Settings
In theory, when installing third-party antivirus software, Defender should turn off automatically, but you can do this manually. The easiest and most obvious way is to disable Windows 10 Defender through the Settings application settings. So, open Settings, go to Update & Security, switch to the Windows Defender category and turn the Real-time Protection switch to Off.
Be aware, however, that this method cannot in any way be considered reliable, since after some time the system itself will re-enable the protection.
Using the Local Group Policy Editor
But how to disable Windows 10 Defender permanently so that it never turns on again? This is quite possible, only this time you will have to change the settings at a higher level. Team gpedit.msc in the “Run” window, open the local group policy editor and go to the path in the left column Computer Configuration – Administrative Templates – Windows Components – Endpoint Protection.

In the right part of the window, find the “Disable Endpoint Protection” policy, double-click on it and activate the “Enabled” radio button in the window that opens.

After this, Defender will be disabled permanently, and whenever you try to start it in the usual way, the system will generate an error.
Via Registry Editor
Disabling Windows 10 Defender is also possible through the Registry Editor. In this case, the result will be similar to the previous one. Team regedit open the registry editor and expand the branch in the left column HKEY_LOCAL_MACHINE/SOFTWARE/Policies/Microsoft/Windows Defender. On the right side of the editor window, create a new 32-bit DWORD value and name it DisableAntiSpyware and set its value to 1.

If the setting is already present, simply change its value from 0 to 1. Close Registry Editor and restart your computer for the changes to take effect.
Windows 10 Defender Service
In previous versions of the system, the Windows Defender service could be disabled in the Services snap-in. In Windows 10, this cannot be done because the corresponding option is locked for editing, and if you open its properties, you will see that all service controls are grayed out.

Use the methods given above or below to disable the built-in antivirus.
In the Task Scheduler
There is another way to deactivate Windows Defender. We will now show you how to disable it. This time we will use the Task Scheduler. Run it with the command taskschd.msc and go to the left column along the path Task Scheduler Library - Microsoft - Windows - Windows Defender.

In the middle column, find the “Windows Defender Scheduled Scan” task, double-click on it, switch to the “Conditions” tab, check the “Run task when the computer is idle” checkbox and set the value to 1 day.

Alternatively, on the “Action” tab, you can replace the path to the Defender executable file. Just keep in mind that these methods are ineffective.

Third party utilities
We have discussed the main ways to disable Defender using the system, now let's see how to disable Windows 10 Defender using third-party utilities. The most commonly used ones are NoDefender, Win Updates Disabler and Destroy Windows 10 Spying.
NoDefender
The NoDefender utility is the simplest. It does not require installation, and disabling Defender in it is reduced to pressing one “Disable Windows Defender” button. True, using the program has some peculiarities. So, before disabling Defender itself, you need to open its settings in the Settings application and deactivate the Real-time Protection, Cloud Protection, and Automatic Sample Sending functions.

 Win Updates Disabler
The Win Updates Disabler utility was originally developed as a means of disabling updates, but it can also disable Defender. The program is distributed in regular and portable versions and supports the Russian language. It is extremely simple to use. Launch it, check the “Disable Windows Defender” checkbox, and click the “Apply Now” button. After making changes, you will need to restart your computer.

Destroy Windows 10 Spying
Destroy Windows 10 Spying works in a similar way. After launching this utility, you will need to switch to the “Settings” tab, enable professional mode and check the “Turn off Windows Defender” checkbox.


The changes will take effect after a reboot.
Complete removal of Windows Defender 10
By and large, that’s all with Defender stopping; all that remains is to answer the question of how to remove Windows 10 Defender forever and whether it can be done. This is possible, but why violate the integrity of the system by forcibly removing a component if you can simply disable it? When disabled, Defender does not consume system resources and certainly does not take up any significant disk space.
If you still really want to get rid of it, follow these steps. Using any of the above utilities, disable Defender, make sure it is also disabled in the Local Group Policy Editor, then go to the C:/Program Files location, unlock (change owner) the Windows Defender folder and delete it and all its contents.

Also you will need to delete the registry key HKEY_LOCAL_MACHINE/SOFTWARE/Microsoft/Windows Defender, having previously obtained access rights to it.
If you can’t delete a folder from a running system, boot from any “live” disk with a built-in file manager, for example, Dr. Web LiveDisk. Locate the directory on the disk (most likely it will be in the location /win/e:/Program Files) and force delete it.

Windows Defender or Windows Defender is a built-in tool from Microsoft that is a software solution for managing PC security. Together with a utility such as Windows Firewall, they provide the user with reliable protection against malicious software and make your Internet experience safer. But many users prefer to use another set of programs or utilities for protection, so it often becomes necessary to disable this service and forget about its existence.
You can deactivate Windows Defender using the standard tools of the operating system itself or special programs. But if in the first case, disabling Defender will go without any problems, then you need to be extremely careful when choosing third-party applications, since many of them contain malicious elements.
Method 1: Win Updates Disabler
One of the simplest and safest methods of deactivating Windows Defender is to use a simple utility with a user-friendly interface - Win Updates Disabler. With its help, any user can easily solve the problem of disabling the defender in just a few clicks without having to delve into the operating system settings. In addition, this program can be downloaded both in a regular version and in a portable version, which is certainly an additional plus.
So, to disable Windows Defender using the Win Updates Disabler app, you need to go through the following steps.

Check whether the antivirus has been deactivated.
Method 2: Standard Windows tools
Next, we will talk about how you can deactivate Windows Defender without resorting to using various programs. In this method, we will look at how to completely stop Windows Defender, and in the next one, how to temporarily suspend it.
Local Group Policy Editor
This option is suitable for all Tens users except the Home edition. This version does not contain the tool in question, so an alternative will be described for you below - "Registry Editor".
- Open the application by pressing the key combination Win+R by entering gpedit.msc in the field and clicking Enter.
- Follow the path "Local Computer" Policy > "Computer Configuration" > "Administrative Templates" > "Windows Components" > "Windows Defender Antivirus".
- In the main part of the window you will find the option "Turn off Windows Defender Antivirus". Double-click on it with the left mouse button.
- A settings window will open where you can set the status "Enabled" and press "OK".
- Then switch again to the left side of the window, where use the arrow to expand the folder .
- Open the parameter "Enable behavior monitoring" by double-clicking on it.
- Set State "Disabled" and save the changes.
- Do the same with the parameters "Scan all downloaded files and attachments", “Monitor the activity of programs and files on your computer” And "Enable process checking if real-time protection is enabled"- turn them off.


Now all that remains is to restart the computer and check how successful everything was.
Registry Editor
For Windows 10 Home users and all those who prefer to use the registry, this instruction is suitable.
- Click Win+R, in the window "Run" write regedit and click Enter.
- Paste the following path into the address bar and navigate to it:
HKEY_LOCAL_MACHINE\SOFTWARE\Policies\Microsoft\Windows Defender
- In the main part of the window, click LMB twice on the item "DisableAntiSpyware", give it a value 1 and save the result.
- If such an option is missing, right-click on the folder name or on the empty space on the right, select "Create" > "DWORD value (32 bits)". Then follow the previous step.
- Now go to the folder "Real-Time Protection" what is in "Windows Defender".
- Set each of the four parameters to a value 1 , as you did in step 3.
- If the folder and settings do not exist, create them manually. To create a folder, click on "Windows Defender" RMB and select "Create" > "Chapter". Name it "Real-Time Protection".

Inside it, create 4 parameters with names "DisableBehaviorMonitoring", "DisableOnAccessProtection", , "DisableScanOnRealtimeEnable". Open each of them one by one, give them a value 1 and save.


Now restart your computer.
Method 3: Temporarily disable Defender
Tool "Options" allows you to flexibly configure Windows 10, but you cannot disable Defender there. There is only the option of temporarily disabling it until the system is rebooted. This may be necessary in situations where the antivirus blocks the download/installation of a program. If you are absolutely sure of your actions, do the following:
- Right-click to open an alternative "Start" and select "Options".
- Go to the section "Update and Security".
- On the panel, find the item "Windows Security".
- On the right side of the window, select "Open Windows Security".
- In the window that opens, go to the block "Protection against viruses and threats".
- Find the link "Manage Settings" in the subtitle "Protection settings against viruses and other threats".
- Here in the settings "Real time protection" click on the toggle switch "On". If necessary, confirm your decision in the window "Windows Security".
- You will see that the protection is disabled and this is confirmed by the message that appears. It will disappear and Defender will turn on again after the first reboot of the computer.


In these ways you can disable Windows Defender. But you shouldn’t leave your personal computer unprotected. Therefore, if you do not want to use Windows Defender, install another application to manage the security of your PC.
16.05.2018 18:19Instructions for disabling built-in protection in Windows 10 temporarily or permanently in various ways.
What is Windows Defender for?
Built-in system protections, called Windows Defender, are required to protect the OS from various real and potential threats (viruses, rootkits and other malware). This is a utility built into Windows that performs the functions of antivirus software on users' computers. If another anti-virus scanner is installed, then the functioning of the defender stops, and another software product (Dr.Web, Kaspersky, etc.) comes into play “defense from enemy attacks”.
Recent research has shown that in Windows 10, security programs have been significantly redesigned and have become a more reliable tool in the fight against viruses. They have a level of protection comparable to many free antiviruses. If you have a question which is better: Windows 10 Defender or Antivirus, then we can say that the results of their actions are unambiguous.
But sometimes there are situations when you need to disable this tool temporarily or permanently. For example, if you need to install some game or program, but the defender does not allow you to perform all the actions correctly.
Disable Windows 10 Defender temporarily
In order to disable the protection utility for a period of time until the next restart of the computer, you must complete several steps.
By following this sequence of actions, you can easily disable the defender for a short time (until the next reboot of the computer). But what to do if you need it to be disabled forever or how to remove Windows 10 Defender?
How to disable Windows 10 Defender permanently
Using the Group Policy Editor:

Disabling Defender using the Windows Registry:
To completely disable the defender. It is necessary to additionally carry out a number of preventive measures and change the value of the Windows registry.
To provide additional reliability and for security purposes, it is recommended to back up the registry (before making changes to the operating system). To do this, in the Registry Editor, select the File menu item, and then Export.
If the DisableAntiSpyware item is missing, then you need to create it. To do this, in the registry editor, find the Edit item in the top menu, then Create and look for the Dword parameter in the menu. In the parameter name, enter: DisableAntiSpyware.
Sometimes users ask: how to remove Windows 10 Defender completely? You should be aware that all this will not completely remove the protector, but will disable it until it is needed again. In very rare cases, various errors may occur, for example - 577.
Windows 10 Defender - error 577
There are situations in which Windows 10 Defender does not turn on and error 577 appears. Most often, this error occurs when a third-party antivirus product was uninstalled improperly (for example, the folder with the program was deleted not through the uninstall utility). In this case, some files associated with the program may become damaged, which ultimately prevents the software from working correctly.
The easiest way to restore the operating system is to “roll back” to the last restore point (before the actions that damaged the system):

Also, one of the ways to troubleshoot problems can be to use the FixWin10 utility, where in the “System Tools” menu item you need to select “Repair Windows Defender”.

How to enable Windows Defender 10?
When Windows 10 Defender is disabled by group policy, this means that all the above steps can be turned on in the reverse order and the defender will work.
To understand how to enable Windows 10 Defender using the registry, you need to know some nuances, which we will consider below.
- Press Win+X and select “Run”;
- You should enter the word regedit there and click OK;
- We look in the registry (as in the case of shutdown) for the line “Windows Defender”.
- On the right side of the window, double-click on the “DisableAntiSpyware” parameter and enter the value “0”;
- If there is one in the list of parameters such as Real Time Protection, then you also need to double-click on it and enter the value “0”;
- Close the editor and reboot, the defender will be enabled.
The built-in antivirus in the Windows operating system can provide sufficient protection against viruses and other online threats, and you can disable it using one of the methods described in this article. The only thing that is quite difficult to do is remove it from the system (this utility is a built-in component of the system).
If you still need to disable Windows Defender, then you should not disable it for a long time. If you still need to do this, take care of the safety net, i.e. about a third-party antivirus product. Otherwise, your computer may be at risk of infection, which means it may become inoperable in the future.
Views:
Microsoft has integrated Windows Defender antivirus into its OS for a reason: this tool protects the system from malware from the moment it is first launched. Therefore, Defender is a useful feature that most users need.
If you prefer a third-party one, then “Defender” may conflict with it. Usually the built-in antivirus is disabled after installing a new one, but sometimes this does not happen and the protection tools begin to interfere with each other: they slow down the system or see unwanted software in each other.
In such cases, you can disable Windows Defender and rely entirely on a third-party antivirus.
How to disable Defender in Windows 10 and 8
1. Launch Windows Registry Editor. To do this, press the Win + R keys and enter the command in the “Run” window regedit and press Enter.

If a parameter named DisableAntiSpyware is not displayed for you, create it yourself: right-click on an empty area of the window, select “New” → “DWORD Value (32 bits)” and give it an appropriate name.

Then double click on it, change the value to 1 and click OK.
4. Restart your computer. After this, the Defender should turn off.
To enable it, open the registry editor again and change the DisableAntiSpyware value to 0.
How to disable Defender in Windows 8, 7, Vista and XP
1. Launch the manager. To do this, use the key combination Win + R, enter in the “Run” window services.msc and press Enter.
2. In the list that appears, find the service “Windows Defender” or a similar name and double-click on it.

3. When a new window opens, in the “Startup type” field, select “Disabled” and click OK.

4. Restart your computer for the changes to take effect.
To enable protection, find Windows Defender in the service manager again and change the startup type to Automatic.
How to quickly disable Defender in any version of Windows
If for some reason you are unable to disable Defender using standard means, try the free Win Updates Disabler program. It is compatible with all versions and allows you to disable protection in two clicks.
After launching the utility, check the “Turn off Windows Defender” option and click “Apply now.” After this, restart your computer to apply the changes you made.

To enable protection, launch Win Updates Disabler, go to the “Enable” tab, check “Turn on Windows Defender” and click “Apply now”.
Windows Defender is a set of modules from Microsoft designed to monitor suspicious changes and eliminate potentially dangerous components. The program has various settings available and the ability to disable it if not needed. This method is identical on all versions of Windows.
Windows Defender Basics
Defender takes over the functions of the antivirus in the event of its absence. In practice, the application in question guarantees protection only from the so-called. "Trojans". To combat other malicious products, you need to install third-party antiviruses. The developer of the defender additionally notifies the owner about this.The product arsenal is quite rich. Defender allows you to do the following:
monitor autostart;
control security settings;
monitor applications that are activated with IE;
control browser settings;
regulate the operation of various files and add-ons that start with the browser;
monitor the functioning of drivers and services;
regulate the actions of installed and already installed programs;
monitor files and add-ons for registering and launching various software products;
control the order of updating OS modules.
The list of functions may vary depending on the version of Defender and Windows itself.
Enabling Defender
To turn on the product and check that it is working correctly, go to Start.
The screenshot shows the window of the product in question. In all current versions of the OS, the menu has almost the same appearance.

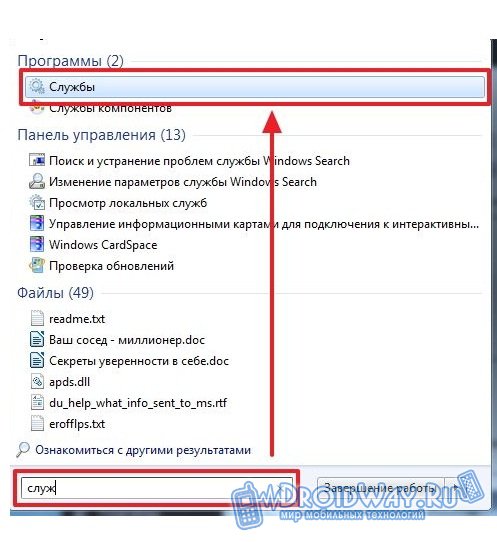
If the defender does not turn on, activate it yourself. Find the “Services” program through the search bar in “Start” and go into it.
Open the defender service. Go to the Startup type tab, select automatically (delayed launch) from the drop-down list and turn on the defender by clicking on “Run”.

Defender will be activated.
Disabling Defender
If necessary, the defender can be turned off directly from its settings.In Control Panel, turn on Small Icons and then look for Windows Defender.

Open the "Programs" item.


2. Open the branch: Local Group Policy Editor -> Local Computer Policy -> Computer Configuration -> Administrative Templates -> Windows Components -> Windows Defender or ( Endpoint Protection) -> Real-time protection and in the right window select Turn off real-time protection


