How to create a virtual computer in Windows 10. Advantages of a virtual machine. VM creation and launch process
Users of operating systems such as Windows 10 Pro or Enterprise, may not be aware that these versions have built-in VM support Hyper-V. This means that the PC has everything necessary to install any OS on a virtual machine (VM).
Ordinary users probably have no idea what a VM is and what it is used for. " Virtual machine", in essence, this is a separately launched PC with any OS, which has its own installed system settings, files, local drives, etc. This is what the VM window looks like on Windows 10.
Just like a regular, familiar operating system, you can install various programs and operating systems on a VM, conduct experiments with the content, and, which is very convenient, the main OS will not suffer from this. You can even launch a virus, but nothing will happen to the main OS. Moreover, you can save the current state of your virtual OS by taking a “snapshot” that will help return it to the state you want.
Its main purpose for the average user can be: testing programs that do not work on your operating system, the ability to install any OS without changing the current one, or to use the VM as a server for any of your tasks. These, of course, are not all methods of using them.
The main thing to understand is that the main Windows 10, like and similar VMs, consume the memory of one PC, so it is important that the computer is quite powerful.
If you are wondering how to install a virtual machine, you just need to follow the instructions. There is nothing complicated here, everything is intuitive, especially since there is plenty of information about it now.
Standard virtual machine
Previously, the use of a hypervisor was limited to use only in server operating systems. The virtual machine is named Hyper-V, because it is based on a hypervisor that supports virtualization for 64-bit OS. This technology allows you to generate a virtual machine for installing almost any operating system into it.
Hyper-V is intended only for 64-bit versions of Windows 8, 10 Pro and Enterprise, and for server OS. The user of these versions no longer needs to install additional virtualization programs on the PC, such as VirtualBox.
It is worth noting that the hypervisor was originally created only for server operating systems, so the capabilities Hyper-V in Windows 10 are a bit limited:
- Sound cards are not supported;
- you cannot directly copy and paste files from a virtual OS to a real one and vice versa;
- There is no ability to record CD/DVD.
You should know that if your computer is quite weak, then you should not even install this VM, since it requires quite a lot of memory for optimal operation. When using a virtual OS, you should not use resource-intensive applications in order to avoid slowing down your computer.
Enable Hyper-V
It was previously said that Windows 10 has built-in support for VMs Hyper-V. True, in this OS its components are disabled. To do this, let's figure out how to enable Hyper.
In order to use the services of the VM, you must enable the components Hyper-V:

Some components may be inactive. Presumably, due to the fact that your OS is 32-bit or your PC contains less than 4 GB of RAM, or virtualization is not supported, although almost every modern PC or laptop has it.
The installation is complete and now you need to open “” through the search.

On Windows 10 it is located in the " Administration Tools».

Preparing the VM
This requires:

Now you should install the VM and install Windows OS into it. In principle, it is possible to install Linux, although according to many experienced and advanced users, its performance is limited Hyper-V is terrible, so the best option should be considered choosing VirtualBox.
Installing a virtual machine on Windows 10
To install the VM Hyper-V You need to do a number of simple steps:

The VM has now been created and can be seen in the Hyper-V virtual machine management list.
The photo shows how virtual machines are managed.

Starting the virtual machine
It’s easy to launch a newly created VM by simply double-clicking on it or clicking “ Turn on" When creating, you must indicate that the download will come from an ISO image or disk in order to immediately install the OS. If the image was not specified, then this is done in the line “ Media» connections to the VM.
As a rule, after installation the VM boots from the virtual HDD, as this happens automatically. You can also configure the download if it does not work as expected from the HDD. To do this, you need to hover the mouse cursor over the name of the VM in the Hyper manager, right-click, then select the line “ Options…", followed by the line " BIOS».

In the settings you can also change the size of the allocated RAM, the number of virtual processors, add additional HDDs and change other VM settings.
It is clear that this algorithm is brief and cannot fully accommodate all aspects and features of the process of creating and installing virtual machines V in Windows 10. Close attention should be paid to the following points: creating recovery points, connecting physical disks to the OS installed in the VM, etc. Further.
Exporting a Hyper-V virtual machine
Export occurs in the background and is not fast, as it takes up a small amount of system resources and, thus, allows you to work with the VM in peace.
Let's look at how to export a virtual machine:

Let's figure it out: how to install Windows 10 on VirtualBox
Installing Windows 10 on VirtualBox does not affect the operation of the main OS, recovery system and programs. It should be said that there are disadvantages: it is difficult to use all the capabilities of the hardware and relatively low performance. Installing Windows 10 on a virtual machine for evaluation does not require large resources and, therefore, these shortcomings are not at all critical.
Several companies produce virtualization software. Our needs are fully satisfied by a free program from a well-known organization Oracle - VirtualBox. You need to download and install a new version of the product. And you will need Windows 10 images.
Installing the VirtualBox utility
In order to install VirtualBox Let's look at the sequence of actions:

So, we have successfully installed a virtual machine on Windows 10, now all that remains is to configure it.
Setting up a virtual machine
Let's look at the setup procedure:

The VM setup process is complete, let’s start.

How to install Windows 8 on a virtual machine
This installation is done in the same way as for Windows 10.
Bottom line
Thus, in this article we tried to tell you in more detail how to install Hyper-V on Windows 10, as well as how to install Windows 10 on a VirtualBox virtual machine. Now, with the help of these machines, you can solve any tasks that were impossible or dangerous to carry out on the main operating system.
Video on the topic
Using virtualization systems is a great way to test a new operating system build, program, or setting with questionable results. Most users download ISO
- a system image from an official or unofficial resource, and then install Windows on a virtual machine created in the appropriate program. The procedure takes some time, but for those who always lack it, we can recommend a slightly faster method.
On the official Microsoft website you can download a ready-made virtual machine image, so all you have to do is connect it to your virtualization system. Currently available for download Windows 7 32 -bit with IE 8-11 , Windows 8.1 32 -bit with IE 11 And Windows 10 64 -bit with the current version MS Edge, stable and insider build for a wide range of people.
Select OS version from the menu "Virtual machine", V.M.-platform - in the menu "Select platform" and get a download link in the archive ZIP. Available from virtual machines , Vagrant, VMware And Parallels. Archives can be password protected "Passw0rd!", it is listed right there on the download page. On Macs, to unpack the archive, use utilities that support ZIP64, For example, The Unarchiver.
Here is an example of connecting a virtual OS to , because everything is not so usual here. After unpacking the archive you will receive an image file OVA. It cannot be connected directly to VirtualBox; it must be exported. Select from menu "Import configurations".

And specify the path to the unpacked file OVA .


The virtual machine file will be unpacked into the default storage in a compatible format VMDK .

After which the virtual Windows, ready to launch, will appear in the main program window.

Unfortunately, for some reason the developers excluded from the list 32 -bit Windows 10, you won’t find the latest insider builds for a narrow circle in it either.
Please also note that the operating life of such virtual machines is 90 days, since they are provided exclusively for testing.
Alternative- Either become a member of the Windows Insider Program or look for images on third-party resources. It would also be nice if Microsoft added speed; for example, we have an archive with an image 4.2 GB it took almost 40 minutes to download, whereas downloading the same image from torrent it took half as much time.
Tags: ,
On July 29, 2015, the era of Windows Embedded, a separate family of operating systems used in software and hardware systems, ended. It was replaced by Windows 10 IoT - an embedded operating system...
Virtualization technology allows you to create several virtual computers with their own operating systems on one physical computer. Guest operating systems will use the resources of the real PC allocated to them within the established limits. In this case, there is no need to partition the disk and there is no danger of damaging the bootloader. The user's personal data is not affected and is safe. If you are interested in these opportunities, stay tuned. Today we will tell you how to enable virtualization in Windows 10.
A Microsoft-developed hypervisor called Hyper-V is included as an optional component. It can only be used in x64 bit OS Windows 10 Enterprise or Pro. In a corporate environment, Microsoft even recommends specific HP and Lenovo laptops. This option is not available to users of the Home edition and all x32 bit systems.
- You can quickly find out the parameters of your installed Windows using the keyboard shortcut Win + X. In the expanded menu, select the item marked with a frame.

- The window that opens contains two blocks of information. In the first, we look at the amount of installed memory and bit depth. Hyper V requires at least 4 GB of RAM. In the second block we pay attention to the OS release.

- According to system parameters, the computer is suitable for installing and running a Microsoft VM. Additionally, Hyper-V requires the processor to support nested SLAT paging. Intel implemented it in the Core i3/5/7 line, and AMD since the first 64-bit Opterons. The processor model is indicated in the device characteristics, so there is no need to check it in the BIOS or UEFI. We can verify the support of Hyper technologies using the command line. Enter the “systeminfo” command and look for the data block indicated in the screenshot.

As you can see, all the necessary requirements have been met and we performed the check without going to the BIOS. Having made sure that the hardware configuration is suitable for using the virtual machine, we can proceed to installation.
Installation
Hyper-V is a component of the operating system. It cannot be downloaded and installed separately. You can only enable use in a Windows environment. Let's look at several options for connecting Microsoft Virtual Machine.
Graphics mode
Let's start by using the graphic mode, as it is the most familiar to users.
- Using the Win + R key combination, open the “Run” dialog box and enter the “control” command in the text field as shown in the screenshot.

- The result of our actions will be the appearance of the classic Windows Control Panel. We look for the specified item and open it.

- In this window we will use the navigation menu, which is responsible for working with operating system components.

- Turn on Hyper-V. Expand the “Hyper” branch and make sure that all its components are checked. We complete the work in this section by clicking the “OK” button.

- Windows internally searches for and installs the ordered components.

- After completing changes to the software configuration, the system will prompt you to reboot.

This completes the installation and the PC is ready to use the built-in virtualization tools.
Command line
You can also install hypervisor components using command line capabilities.
- Open the Power User menu and launch PowerShell or CMD shell as administrator.

- Enter the following line in the window that opens:

- Windows processes the received command to install additional components.

- Finally, we will be asked to confirm the changes made and reboot. Enter the English letter “Y” in any case.

The computer will immediately exit graphical mode and display the standard update window. The system will start with Hyper-V enabled.
The last method involves using the Windows Image Deployment and Management Tool.
- Launch the command line with administrative rights. Enter the following line:

- After installing the components, DISM asks for confirmation.

Entering the letter "Y" immediately reboots the PC, during which the initial setup of Hyper-V is performed.
Usage
Once the installation is complete, you can begin creating a new virtual machine.
- The new component is located in the Administrative Tools section of the Start menu.

- Hyper-V Manager is a standard Windows management console. Enabling and configuring operations is done in the Action area. Select the marked item to launch the wizard.

- A three-item selection menu will open. Select the one indicated by the frame.

- The first window is informational. By placing a checkmark in the specified place, you will no longer see it during subsequent launches. To create a machine with your own configuration, select the button marked with a frame.

- Here we give the name of the machine being created and can change the storage location for its files.

- The generation should be selected based on the bit depth of the OS to be installed. For 32-bit versions we leave the first, but modern distributions belong to the second.

- The size of the allocated memory depends on the physical capabilities of the PC. The simplest solution would be to allocate 2 GB (2048 MB). This is the minimum amount required to run 64-bit Windows. It is enough to install any version of Linux.

- In the network settings, open the drop-down menu and select the specified option. VM Manager will automatically configure the connection for the virtual machine using your current Internet connection.

- The disk size that will be used for installation can be limited to 32 GB. This is enough to run a guest OS with a set of programs.

- We agree with the proposal to install the guest system later. This can be done using DVD media or an ISO image.

The virtual machine is ready. To disable Hyper-V and remove guests, you must disable this Windows feature in Control Panel.
Alternative
Windows Home owners who do not have access to Hyper-V can use a free alternative solution from Oracle. Unlike the Microsoft product, the VirtualBox application runs on 32-bit systems, has more features and is less resource intensive. It does not require a special set of processor instructions.
Almost all existing operating systems will run in VirtualBox, which cannot be said about Hyper-V. In it, the choice is limited to several versions of Windows, and more recently also Linux.

Finally
To use virtual machines comfortably, do not forget that they consume physical computer resources. Ideally, a PC should have 8 GB of memory to ensure simultaneous operation of the current and guest OS with running applications.
Video
To help users who want to better understand Windows 10 virtualization settings, below are links to videos.
To have several operating systems with separate workspace and applications at hand, you don’t need to buy a second (third, fourth, etc.) computer. Because it all fits into your single PC. How? Thanks to virtual machines (VMs) - special programs that create (emulate) imaginary (virtual) computers inside the main operating system.
A virtual PC is almost like a real one. It has its own processor, memory, hard drive, network adapter and everything else. Of course, these are not physical devices, but they are made in such a way that operating systems consider them to be just that - real.
Several virtual computers can work simultaneously on one physical computer. Exactly how much depends on the hardware resources: the faster the processor, the larger the RAM, the more spacious the storage, the more. A typical average-performance home PC running Windows 10 can handle three to five lightweight operating systems simultaneously (for example, Windows XP, Android and Lubuntu + the main system). Or two or three relatively heavy ones (for example, the main Windows 10 + virtual Windows 7 and Mac OS X). As you already understand, virtual computer emulator applications allow you to install and run a variety of operating systems on them.
General purpose virtual machines (as opposed to specialized ones, such as the Java VM) use:
- To run applications that the main system does not support.
- To protect the system from potential harm from untested programs.
- As an additional barrier against viruses when visiting dubious web resources.
- To create an isolated environment for studying the activities of malware.
- As a testing ground for debugging your own developments.
- To master network construction technologies.
- For double authorization on some gaming portals and much more.
And of course, virtual machines are widely used to distribute server work resources.
Today we will not touch on the industrial use of VMs, but will only consider what can be useful to home users of Windows OS.
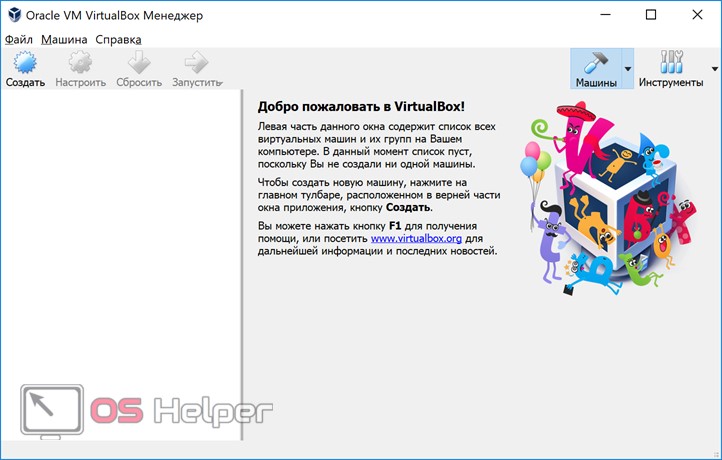
Oracle Virtualbox
Let's look at the process of creating a new virtual machine and starting to install Windows 10 on it.
- Click the “Create” button in the top panel.

- In the first window of the VM creation wizard, we will indicate the name of the OS (it will be displayed in the list of guest systems), its type (Windows, Linux, etc.) and version. In our example, this is Windows 10 32 bit (you can also install 64 bit, but it will require more resources). To move to the next step, click Next.

- Next, we will indicate the size of the VM RAM. By default, Windows 10 x86 is allocated 1 GB, but you can increase this amount by moving the slider to the right. If your PC does not have a lot of RAM, do not give the VM more than 2-3 GB, otherwise the main system will slow down due to lack of memory.

- Next we create a virtual hard disk. If you are installing the system for the first time, select the “Create new” option.

- Leave the virtual disk type as default.

- A storage format is an area on your computer's physical drive that is allocated to a VM. It can have a constant or dynamically expanding volume within the limits that you define further. To save space, we will choose a dynamic format.

- Next we indicate the name of the volume (virtual disk C) and its size. The default is 32 GB.

- After clicking the “Create” button in the last window, a new virtual machine will appear in the list. Its parameters are shown in the frame on the right.
- To proceed to installing Windows, click the “Run” button in the top panel.

- In the window that opens after this, the “Select boot disk” window will appear. Click on the folder icon and specify the path to the system distribution. This can be an image in .iso format or physical media (DVD, flash drive). After selecting your distribution, click Continue.

- The further course of installing the OS into a virtual machine is no different from installing it on a physical computer.

Some VM and guest system settings
Clicking on the virtual machine window will capture the mouse cursor (i.e. it will only move within the virtual screen). To return the cursor to the main OS, press the Ctrl+Alt combination.
To access the full range of features of the guest OS, you need to install special add-ons. Go to the "Devices" menu, click "Mount Guest Additions Disk Image" and follow the further instructions.

To connect a folder to the guest system for exchanging files with the main one, click the “Shared Folders” item in the “Devices” menu. Click on the “folder+” icon in the window that opens and use the “path to folder” field to specify it in Explorer (it shows the directories of the main system).
If you want the setting to work permanently, check “Auto-connect” and “Create permanent folder”. The shared folder will be accessible from the virtual machine explorer as a network folder.


To change the order in which boot devices are polled (for example, to boot a virtual machine from a DVD), shut down the guest OS, open its settings (in the main Virtualbox window) and go to the first tab of the “System” section. In the "Load Order" list, select the desired media and press the arrow buttons to move it to the top.

VMware Workstation Pro
Some Hyper-V virtual machine options
To take a snapshot of a running guest OS, open the top menu of its Action window and click Checkpoint. Or press the combination Ctrl+N.
Access to the settings of an individual virtual machine is opened from its context menu in the list of the main manager window and hidden behind the “Settings” button.
Other features of the program are also very simple and can be mastered without much difficulty.
Among the top three leaders in the software market for virtualization of operating systems – VMware, VirtualBox and Hyper-V – the latter hypervisor occupies a special place. This special place is due to the fact that Hyper-V is a standard component of Windows server systems and some versions of Windows for desktop PCs. While inferior to VMware Workstation and VirtualBox in functionality, cross-platform, and partly in ease of use, Hyper-V, however, is not without its advantages. And the main thing is higher performance of guest operating systems.
Below we will talk about activating Hyper-V in Windows 10 and creating a virtual machine using this hypervisor.
1. Hyper-V - standard hypervisor from Microsoft
The Windows 10 system inherited the standard Hyper-V component from versions of Windows 8 and 8.1, and in them the hypervisor migrated from Windows Server. Both Windows 8.1 and Windows 10 include optional Hyper-V in the Pro and Enterprise editions. The hypervisor can only work on 64-bit systems.
For a long time, Hyper-V did not support any guest operating systems other than Windows. However, relatively recently, Microsoft took care of hypervisor support for Linux guest OS. And today, using Hyper-V, you can test some Linux distributions, in particular the popular Ubuntu.
2. Requirements for running Hyper-V
The minimum amount of RAM on a physical computer to run Hyper-V is 4 GB.
The computer processor must support SLAT technology (Intel EPT or AMD RVI). Almost all modern processors meet this requirement.
Another requirement for the processor, also provided for by many modern models, is support for hardware virtualization technology and, accordingly, its active state in the BIOS. In the BIOS of motherboards for Intel processors, this technology (depending on the version) can be called differently - Intel-VT, Intel Virtualization Technology, Intel VT-x, Vanderpool or Virtualization Extensions. AMD's hardware virtualization technology is called AMD-V or SVM (Secure Virtual Machines). For example, in AMI BIOS version 17.9, the AMD processor hardware virtualization function can be found under the path Cell Menu – CPU Feature – SVM Support.

AMD processors usually have hardware virtualization enabled by default. Whether a specific processor model supports hardware virtualization can be found out on the websites of Intel and AMD.
3. Activation and launch of Hyper-V
Hyper-V is optional with Windows 10 Pro and Enterprise. Initially, the standard hypervisor is disabled. It is turned on in the “Programs and Features” section of the control panel. The fastest way to get there is an internal search.

Run “Turn system components on or off.”

In the small window that appears, check all the sub-items of the Hyper-V item. Click "Ok".

The system will apply the changes for a couple of seconds and ask to reboot. After the reboot, look for the shortcut to launch the Hyper-V Manager. You can immediately pin the Hyper-V Manager shortcut to the Windows 10 Start screen by finding it in the Start menu Administrative Tools.

The Hyper-V Manager shortcut can also be accessed using an in-system search.

Launch Hyper-V Manager.
4. Setting up network access
In Hyper-V Manager, the network is configured in a separate step, and first you need to create a virtual switch - the parameter that provides access to the network. Click on the name of the physical computer, and on the right side of the window select “Virtual Switch Manager...”.

The virtual switch creation wizard will launch, where the first thing you need to do is select the network type. There are three of them:
- External – This type uses the network card or Wi-Fi adapter of the physical computer and connects the virtual machine to the same network as the physical computer. Accordingly, this is a type of network that allows a virtual machine to access the Internet;
- Internal - this type provides a network between the physical computer and Hyper-V virtual machines, but does not provide their access to the Internet;
- Private - this type allows you to create a network between Hyper-V virtual machines, but there will be no physical computer on this network, nor will there be Internet access.
In our case, virtual machine access to the Internet is necessary, so we will choose the first type - an external network. Click “Create a virtual switch.”

In the properties window of the virtual switch, give it a name; it can be any name, for example, “Network card 1”. If necessary, you can add a note to the virtual switch. If a physical computer has both a network card and a Wi-Fi adapter on board, the specific device through which the virtual machine will connect to the network can be selected from the drop-down list in the “Connection type” column. After making the settings, click “Apply” at the bottom of the window.

5. Create a virtual machine
Now you can proceed directly to creating a virtual machine. On the left side of the Hyper-V window, the selection should still be on the name of the physical computer. In the top right corner, click “Create”, then click “Virtual Machine”.

In the welcome window of the launched wizard, click “Next”.

Give the virtual machine a name; You can also change its location on the disk of a physical computer by specifying the desired disk partition and the desired folder using the browse button. Click “Next”.

One of the relatively new features of Hyper-V is the choice of virtual machine generation. In our case, generation 2 was selected.

What does it mean? Generation 1 are virtual machines that support 32- and 64-bit Windows systems. Generation 1 is compatible with previous versions of Hyper-V.
Generation 2 – new format virtual machines with built-in UEFI-based software. Such virtual machines support a number of new features and can provide a small performance increase. On generation 2 virtual machines, only 64-bit versions of Windows 8.1 and 10, as well as server versions of Windows Server 2012, Server 2012 R2 and Server 2016 are installed as guest operating systems.
The UEFI platform imposes another requirement for using Generation 2 virtual machines - UEFI boot media. This point needs to be clarified by downloading an ISO image with a Windows distribution from third-party sources on the Internet. But it’s still better to download Windows distributions from official Microsoft sources. Thus, the Media Creation Tool utility, which downloads Windows 8.1 and distribution kits from the Microsoft website, creates a bootable ISO image that supports the UEFI environment.
If you install Windows 10 as a guest OS, this is the recommended method for obtaining an ISO image of the system. Windows 10 includes a lazy-input installation process. In our case, Windows 8.1 will be installed as a guest OS, and its official distribution, obtained using the Media Creation Tool utility, requires entering a product key during the installation process. The TechNet Trial Center website can help you support the UEFI environment and take advantage of the free opportunity to test Windows 8.1. On this site you can download the English edition of 64-bit Windows 8.1 Enterprise and test the system for free for 3 months. The problem with the lack of support for the Russian language after installing the system can be solved separately by installing a language pack and setting Russian as the main language of the system.

We return to the virtual machine creation wizard. In the memory allocation window, leave the preset parameters if the physical computer has no more than 4 GB of RAM. If it is more than 4 GB, you can increase the amount allocated when starting the virtual machine. For guest Windows XP, the RAM indicator can, on the contrary, be reduced to 512 MB. Click “Next”.

In the network settings window, select the previously created virtual switch from the drop-down list. Click “Next”.

In the virtual hard disk connection window, give the virtual machine a name, indicate the location on the physical computer’s disk, and indicate the size. These are the options for creating a new hard drive. The second point of this wizard step is used when the computer already has a virtual hard disk, in particular, with a guest OS installed. If you select a Generation 2 virtual machine, the virtual hard disk file must be in VHDX (not VHD) format, and the guest OS must support the UEFI boot environment. Click “Next”.

If in the previous step of the wizard you selected the option to create a new virtual hard disk, the next step will be to specify the path to the Windows distribution. Generation 2 virtual machines no longer allow booting from a physical CD/DVD drive. The only sources for downloading the guest OS distribution can be the network and ISO image. In our case, this is an ISO image. Click “Next”.

The final stage of the wizard is to click “Finish”.

6. Connecting a virtual machine
Having created the virtual machine, return to the Hyper-V Manager window. Now you need to connect it. To do this, there is the “Connect” command, among other commands in the context menu called on the virtual machine. The “Connect” command is also present on the right side of the Hyper-V Manager window. To connect, you can also double-click with the left mouse button on the preview window of the selected virtual machine.

In the connection window that opens, click the green start button.


The normal Windows 8.1 installation process will follow, just as it would on a physical computer.

As soon as the installation files begin copying, you can close the virtual machine connection window and do other things.

Closing the connection window will free up some resources of the physical computer to perform other tasks, while the virtual machine will continue to work in the background. Its performance will be displayed in Hyper-V Manager.

You can connect to the virtual machine as needed to perform actions in it.
That's it - Windows 8.1 is installed. You can turn off, pause, save a virtual machine, or reset its state using commands in the Hyper-V manager and buttons on the top panel of the connection window.

7. Boot priority
In order to avoid wasting time on the boot window from a CD/DVD when starting a virtual machine in the future, you need to open the settings window when it is turned off and remove the path to the ISO file with the distribution kit. This is done in the DVD drive tab of the virtual machine hardware settings.

An alternative option is to raise the hard drive in boot priority above the DVD drive (but not above the “bootmgfw.efi” file). This is done in the “Firmware” tab of the hardware settings.

In both cases, the changes made are saved with the “Apply” button at the bottom.
8. Bypass Hyper-V connection window restrictions
The Hyper-V hypervisor focuses on the performance of virtual machines, not functionality. Unlike its competitors - VMware and VirtualBox - Hyper-V virtual machines do not work with connected flash drives, do not play sound, and interaction with a physical computer is carried out only by inserting text copied into the main OS inside the guest OS. This is the price of performance of Hyper-V virtual machines. But this is if you work with the usual Hyper-V connection window.
Full integration of a physical computer and a virtual machine can be achieved using the standard remote desktop connection utility.

This utility allows you to flexibly configure connection parameters, in particular, to make available within the virtual machine not only USB drives connected to the physical computer, but also individual hard drive partitions.

Connecting to a virtual machine in this way will provide audio playback and two-way file transfer in the guest OS.
Have a great day!


