Instructions: Installing the Linux operating system on an Android smartphone (tablet). Launching full OS on Android
Linuxsoid! my friend Yuri Geruk
The second part is about how to install Ubuntu on your Android smartphone or tablet on this platform.
Good day, users of the Linuxsoid site! Yesterday an article was published about installing the Linux Ubuntu operating system for a smartphone or tablet, this was only the first way I was able to do this. I would like to say again that I did not delete the Androd system, but launched a second one on top of the other. I wouldn't take any further interest or even try to install it for myself until my friend Yuri Geruk He gave me a good idea for installing the system and only after that I became interested and started my work.
Warning! The site administration and the author of the material do not bear any responsibility if, while performing the described manipulations, your device stops working! You do everything that is written in the instructions at your own peril and risk. Perhaps there will be failures, as happened with me and then I could not turn on my smartphone for a long time. There is no rush, we do everything carefully by reading these instructions!
In the first part (Method No. 1) I wrote how to install the system through a program called Complete Linux Installer. The full procedure for working with this program was described, what to download, how to install and everything else. Today I wanted to bring to your attention the second method (Method No. 2). We will install Linux Ubuntu on a device running Androd through a mobile application called Linux Deploy. The application is also available to you for free on Google Play Market, where absolutely any user can download it.
In this application you do not need to register and activate; after installing it on your device, you will need to launch it and close it again. What do we need to run the system via Linux Deploy. ?
- A smartphone and a computer with Internet access (preferably using Wi-Fi) the better the connection, the faster the download will occur.
- USB cable (to connect your device to your desktop or laptop)
- The battery should preferably be 100% charged, but not less than 50%
- Let's begin our task! To prevent it from getting too long, I will skip the points that were indicated in method No. 1. The first and simple step for us will be to obtain root rights on the device; in the previous article I showed in detail how this is done.
- Anyone who has Root rights can proceed to the next step, namely enable USB debugging on their device (the previous article also described how to achieve this). We pick up our smartphone and go to the official Play Market store, where we have to download an application called Linux Deploy. If you have an account set up, you can follow the link with the name of the program and install the application using your computer. After installation, open the application and look further!
- As we can see in the screenshot above, we are shown a program with a simple and not complicated interface. When we first launch the program, it shows us a little help, a list of how to start using this program. After meeting these requirements, we begin configuration. To set up our program, you need to translate it into Russian (we do it for those who have not automatically translated the program) Put the Russian language and check the box next to the item Do not turn off the screen.
Look as shown in the figure below:
After setting the language and checking the box to keep the screen on, we smoothly move on to the next action, namely:
- Let's create a new profile for our new Linux account. To do this, you need to return to the main screen of the program, and precisely the one that shows help for further actions and click on the program header (where the penguin is drawn). After this, you will be automatically transferred to a new window, where you are required to click on the plus sign and create a profile. As a copycat example, I created a profile called Linuxsoid.com. You can call it whatever you want!
- When you have written the profile name, click OK. After that, simply select the desired profile.
- After all this, I fold up the bench and go to bed, and you can do whatever you want from there, of course I was joking! We minimize the application and return to the Play Market and download Es Explorer (from anyone worth downloading again, you don’t need to, and you won’t be able to do it :-D). Open Explorer and create a folder called Ubuntu. After you create the folder, you need to find out the path to it. For me it will be a memory card like yours, I don’t know.
- When creating, click on the yellow plus sign, after which you will see a pop-up window where you can see the creation of the folder and smoothly flow into the name of the folder (it is better to write in English, you should not tempt the fate of your smartphone, one thing I will say is that this will not lead to good things, proven by my own experience ). When finished, I click on the history log and look at the path to our folder. I got it like this: /sdcard/ubuntu/.
Was the initial setup of the program successful? Then we proceed to downloading and installing the distribution kit on our devices, in a newly created folder. To do this, you need to open the Linux Deploy application and click, as if on an arrow similar to a download, where you should be transferred to a new window with the information we need. What do we see there? The program offers us to install the system, but to do this we need to select it. In this window, click on the distribution and you will see all the available selection of systems (which may be installed on your device). I choose Linux Ubuntu. After I have chosen, click on install and the installation (download) should begin, it takes about one hour. so it’s better to power your smartphone to charge!
- Once the installation is complete, click on the start button and you should be connected to the required servers. The beauty of this application is that it does not need to additionally register a terminal and give commands; the application will automatically register the necessary commands. When finished you will see as shown in the picture! This is the case if everything went smoothly for you and no other errors appeared.
- After such inscriptions, you need to download and install an additional application called VNCViewer on your device, as in the first installation method. In the server, we create a new connection where we write the address as localhots and enter any name in the name and click connect. The application will connect and if successful, it will ask you for a password! The password on all servers is always the same (changeme), but if you connect via a computer, the password will be different, I can’t tell you it because I don’t know it.
When all this is done, you should end up with something like this:
That's all, if you have any problems, write them in the comments and we will help you eliminate them as far as possible. The material was prepared by Alexander Makarenkov for the website Linuxsoid.com.
Running Linux on Android is possible! And you don’t need a device with root rights for this: all the necessary software is available in the official Google Play store. In just 10–15 minutes you can get an operating system that differs from Android in advanced functionality.
Note: if you follow our instructions, Linux OS will be running in a virtual environment. Android will still be running in the background. To call such a system complete would be incorrect. Nevertheless, it copes well with a list of standard tasks.
Before installation, close all unnecessary applications and clear the RAM of your Android device.
1. From the Google Play Store, install GNURoot Debian and XServer XSDL.
2. Before you start installing Linux, make sure your device is connected to a stable Wi-Fi network. Launch GNURoot. The required environment packages will begin downloading.
Installation takes from 30 seconds to several minutes depending on the speed of your Internet connection. Ignore the tickers until the following message appears:
root@localhost:/#
For those familiar with the concept of “”, don’t let this line scare you: the application will not cause any harm to the device, since it works in a “sandbox”.
3. Enter the following command:
apt-get update
Wait until the packages are downloaded. This will be indicated by the line Reading package lists...Done.
4. Now enter another line:
apt-get upgrade
To the question “Do you want to continue?” enter the English letter Y and press Enter. The installation of packages will begin.
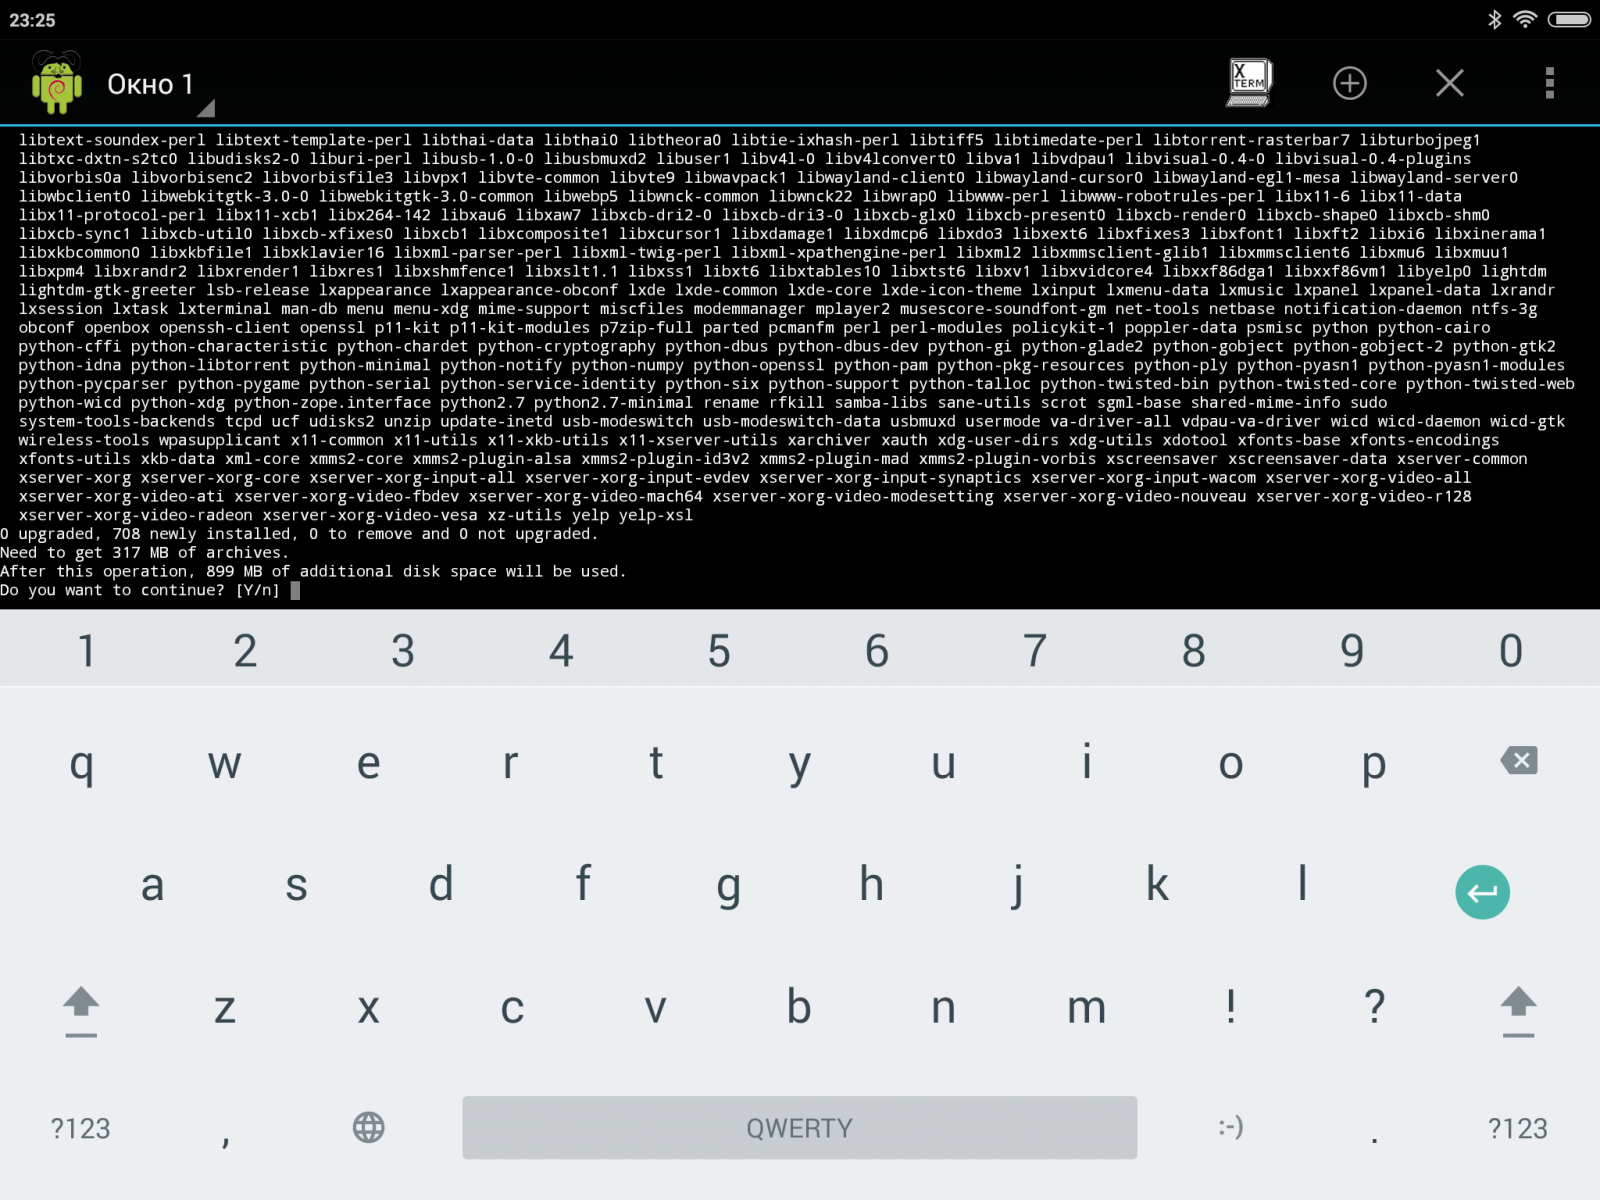
This time the installation procedure will take a little longer. Wait patiently for the installation to complete until the coveted line appears:
root@localhost:/#
The Debian Linux environment is installed, and now you can proceed to deploy the graphical shell.
5. Installation of all Linux distribution packages is performed with the following command:
apt-get install lxde
There is also an option to install the system kernel using the line:
apt-get install lxde-core
Confirm the installation by re-entering Y and pressing Enter. The package download process will begin.
During installation, make sure that all files have successfully downloaded, and that when unpacking, your device does not run out of free space. Otherwise, the system startup will fail.
6. To complete the installation of the operating system, you must download three additional utilities:
- XTerm - to access the terminal from the Linux graphical shell;
- Synaptic Package Manager - for managing apt packages and downloading applications;
- Pulseaudio - for installing sound drivers.
All three utilities are installed using one GNURoot terminal command:
apt-get install xterm synaptic pulseaudio
Approximately 260 MB of data will be downloaded to the device.
7. Now minimize the GNURoot application and open the previously installed XServer XSDL. Agree to download additional fonts. After the installation is complete, tap on the screen several times (the application will ask you to select the resolution and font size - it all depends on your preferences) until you see a splash screen with a blue background and white text.

Re-launch GNURoot and enter the following two commands one after the other:
export DISPLAY=:0 PULSE_SERVER=tcp:127.0.0.1:4712
startlxde &
The sequence for further restarting the system (when you want to open Linux again) looks like this: start XServer XSDL and wait for the blue screen to appear, open GNURoot and enter the two commands above, return to XServer XSDL.
If the terminal complains about an invalid command, return to step 5 of these instructions and try installing a bare kernel. Check the memory status of your Android device.
8. Now open XServer XSDL, wait a few seconds, and you'll have Linux ready to go.

To install applications, in the lower left corner, open the Start menu and select Run. Type Synaptic and press Enter.

In the window that opens, use the search and install the necessary applications. This could be the Firefox browser, the GIMP image editor, the Libre office suite, and other Linux-compatible programs.


Of course, this option for installing Linux cannot be called a full-fledged launch of the operating system on Android. Virtual Linux has several limitations, but if you use a wireless mouse and keyboard (possibly connecting with an OTG adapter and a USB hub), you can turn your smartphone or tablet into a laptop with the functionality of an adult OS.

Many modern computer or mobile device users have at least heard about an operating system such as Linux. But few people know that the popular mobile phone is also based on this system, famous for its security. Naturally, inquisitive minds had a question - is it possible to install Linux on a tablet? Or on a smartphone? You will be surprised, but it is possible.
Why is it needed?
First, let's figure out why you might need Linux on a mobile device. The average average user probably doesn’t need this much, but there are also specialists, for example, developers, administrators and others. Of course, as a main working tool, this is a rather controversial decision. But if we consider it as a mobile assistant that will help out on the road or somewhere far from the main computer, this option has a right to life.
Yes, it may also be useful for the average Linux user. It is always more convenient to have full-featured versions of software on hand, for example, office applications, a client for torrent networks, and many others. In addition, let’s not forget that this is practically the same operating system as on a computer, therefore, the whole variety of software for Linux, in most cases, will install and work on a tablet without any problems.
If you are already interested, then now you are wondering how difficult it is to install Linux on a mobile device. You've probably heard about how bearded admins in knitted sweaters configure their machines at night and think that only a select few can handle this process, but this is not so. Firstly, every year Linux becomes more and more user-friendly (apparently, to popularize the system, and this partly works), and secondly, many auto-installers and detailed instructions have been created specifically for installation on mobile devices. And while an inexperienced user may well have a problem with the latter, with the former, most often everything goes like clockwork.
How to install and what is needed for this
So, you still decided to install Linux on your tablet. What you will need for this:
- the device itself (the firmware kernel must support loop devices, the clock frequency is at least 1 GHz - all this data can be easily found either in the documentation for the device or on the network);
- root rights obtained on it;
- about 4 gigabytes of free memory;
- Ext2 file system support.
It should be noted that most tablets meet these specifications, so you shouldn't have any problems.
After you are sure that your device meets all the requirements, you need to download the system image and installation script. There are quite a few of them, we recommend using Ubuntu Installer as one of the simplest and most intuitive. And Ubuntu itself is quite friendly even to completely inexperienced users.

There are two versions of Ubuntu images for tablets - a trial version, with a minimum amount of pre-installed software, and a maximum version, focused on everyday use (with an already installed office suite, torrent client, email program, development tools for several popular programming languages, etc. ).
In addition to the image and script, you will also need a terminal emulator for Android and VNC Viewer. Also, do not forget to enable it in the system settings.

The algorithm is very simple - launch the terminal emulator and enter three commands:
- cd /sdcard/ubuntu
- sh ubuntu.sh
After which the script will ask you for a resolution (for example, 1024x768 or another) and, if you downloaded the maximum image, the graphical shell in which you want to work. You have a choice between Gnome and LXDE, on mobile devices it is better to choose the second option.
It remains to answer a couple more requests: login/password (ubuntu/ubuntu), IP address (localhost) and port (5900). Done, before you is a full-fledged Ubuntu with the LXDE shell.

The advantage of this installation method is that it requires the least number of actions from the user and does not install Linux instead of Android, but imitates it. Of course, there are ways to install Linux as a second system or even replace the “green robot”, but to get started and get acquainted with the possibilities, the method described above is more than enough.
Today, two operating systems occupy leading niches in the mobile segment - iOS and Android. Many manufacturers are closely involved in creating their own mobile systems. Some attempts were successful. The result was, at best, a few devices that never achieved market success. Ubuntu Touch was announced in 2013.
The phones are equipped with a mobile version of the Linux system - Ubuntu Touch.
It had some interest from users. Ubuntu Touch, which can still be installed on a smartphone today, offers the user not only a new interface. It will be of interest to enthusiasts, as well as all fans of the Linux OS. And just for those who are tired of the monotony of mobile platforms.
The Ubuntu Touch mobile platform appeared 4 years ago. It gained quite wide popularity - this was facilitated by the well-known desktop “mother” of the new mobile system. But Ubuntu did not become a popular version for phones. The reason for this was low stability and a large number of bugs. Devices running this OS were often rebooted, and the shell did not represent the height of design thought.
The press has returned to the topic of this operating system many times. There were all sorts of rumors - both about the freezing of the platform and about a complete cessation of work on it. You can’t trust all of them, but as a fact, Ubuntu Touch appears quite rarely on smartphones. Recently, information has been released about significant updates to the platform, and this gives all fans of the mobile OS hope that Canonical has not forgotten about the promising product.

As part of the Ubuntu mobile version project, there are two separate global versions - for smartphones and for tablets. They are called Phone and Tablet respectively. They are practically the same for the end user, and the differences are aimed, rather, at supporting the hardware platform.
Key Features
The desktop version of the OS uses the Unity graphical interface, which is loved by non-professional Linux users. In the mobile phone, the manufacturer moved away slightly from it - only the side and top panels remained unchanged.
All main actions in the new OS are performed using gestures. For example, if you drag between the edges of the screen, the multitasking menu will appear on it. For Android users, this solution will be somewhat inconvenient, but innovative and unusual.
In addition, Ubuntu has a Terminal on your smartphone! This is still an inferior version of it, and it is still far from the functionality of the desktop one. However, some functions are still there, and the techniques work.

How to install Ubuntu on Android?
To install Ubuntu on your phone instead of Android, you need to have basic skills in working with the Android system. The installation will not remove your “native” system; it will be performed on top of an existing distribution.
IMPORTANT. You perform all actions at your own peril and risk.
- You will need the Android application - Linux Deploy. You can find it on Play Market.
- Launch the program and explore the on-screen help menu. You should see a suggested course of action.
- If necessary, go to “Settings” and select Russian interface language.
- Create a new profile for your Linux account. To do this, in the main screen of the program, click on the “Linux” line. It is located at the top.
- Click OK. All that remains is to select the desired profile.
- Now you need a File Manager. It's best to use ES File Explorer. Open it. In the root directory, create an Ubuntu folder. It is very important to write down the name in English. The OS files will be installed in this folder.
- Write down the folder path in a separate place. It will still come in handy.
- Run Linux Deploy again. In the options, select “Distribution” - “Ubuntu”. After this, Ubuntu should begin downloading to your smartphone.
- When the installation is complete, click on the “Start” button. You will see service messages. They say that the OS deployment process is underway.
- Download and install the VNCViewer application. You will need it to obtain additional data. The default account password is changeme.
- That's all! You now have a fully functional copy of Ubuntu installed on your smartphone or tablet!
Installing Ubuntu Phone
We looked at installing a full-fledged Ubuntu on a mobile device. Installing Ubuntu Mobile on a smartphone is an easier task. It can be performed from the desktop version of this operating system.
It is very popular, especially among system administrators and software developers. A huge number of different devices work under its control. Unfortunately, there are virtually no mobile devices, such as a tablet, that support Linux natively. At the moment, only one model has been released that runs on Ubuntu. But buying it may not be so easy, since it is not available in every country.
If desired, you can install Linux on your tablet, replacing Android.
Naturally, many may wonder whether it is possible to install Linux on a tablet that originally runs Android instead of this OS. Officially, both Android and Linux have the same kernel, but, unfortunately, Linux will not work fully on an Android tablet. Developments are underway in this direction, and many programmers are actively working to solve the problem, but the reality today is that you need to be sophisticated to run a Linux distribution on an Android tablet.
In this material, we will provide an overview and step-by-step steps on how to install a Linux distribution on your tablet. We will tell you what conditions need to be met, how to prepare your device, and also tell you about the features of the procedure.

What you will need:
- Android tablet.
- SD card with a capacity of 3.5 GB or more.
- root access
- a complete backup of all data for one hundred percent certainty of a safe outcome. You move large files and perform a lot of operations, so this is a must.
IMPORTANT. DENIAL OF RESPONSIBILITY. Despite the fact that this process does not cause any damage, the site editors are not responsible if something happens to your Android device during the installation or launch of Ubuntu.
Make sure you have superuser rights. On almost every device you can do this by checking if you have the Superuser app. If you don't have root rights, you can get them. To do this, find out the instructions specific to your device.

BusyBox libraries will help you interact with the Android system. You can download the installer from the Play Store (or Android Market) by going here (https://play.google.com/store/apps/details?id=stericson.busybox) and downloading it. Go to the BusyBox Installation tab and click the Install button. Once the utility is installed, you can move on to the next step by installing a terminal emulator.
Step 2: Install the terminal emulator and check that it works correctly.
The most popular terminal emulator for Android is on this page (https://play.google.com/store/apps/details?id=jackpal.androidterm) in the Play Market. By following the link, download it, install it on your tablet and run it.
After the application window opens, enter the word “su”. The utility will ask you to provide root access, and you must give it because the utility runs system scripts that we will later use to start Ubuntu.

To check if the BusyBox terminal and libraries are working correctly, enter the command “busybox arping –help”. If the terminal gives you a text with a lot of options, such as -f -q -b, everything works. If not, check if your phone is rooted, if BusyBox was installed correctly, and if the terminal has permissions. If everything is in order, you can continue.
If you have completed all the necessary steps in steps 1 and 2, there is no need to worry. The next few steps are very simple. Start by connecting your phone to your computer. You must enable the USB drive, which will allow you to open your SD card on your computer (most of you will know this when you have moved music and other files from your computer to Android).
Next, you need to create a folder called “Ubuntu” on the SD card. Then you should download this one (https://sourceforge.net/projects/linuxonandroid/files/Ubuntu/10.10/ubuntuV5-image.zip/download) and this one (https://sourceforge.net/projects/linuxonandroid/files/Ubuntu /10.10/ubuntuV5-script.zip/download) files. These are ZIP files that contain 2 important things: the startup script and the Ubuntu file system. If you open the first ZIP archive, you will find the IMG file, and if you unzip the second file, you will find the SH file.

Unzip both archives and move the files to the “Ubuntu” folder. You should now have two files in the folder. Most of the necessary processes have been completed.
Step 4: Start Ubuntu System
Go back to your terminal application and type "su" again, then write "cd/mnt/sdcard". To make sure everything works, try typing "ls" and see if you can recognize your folders (you should be able to find the Ubuntu folder too).
To start your Ubuntu, type "cd /ubuntu" followed by "sh ubuntu.sh". This will cause many processes to run that will try to install your system. Next, the utility will ask you to select a screen resolution. Enter it in the width x height format, for example, 1280 x 720. For better performance, so that the tablet does not slow down, choose a lower resolution. Now everything is done.
The Ubuntu system is working, but we cannot see it. To see the GUI, you need to use the VNC protocol client. We can download any of them from the Play Store.


