Yota USSD commands and how to use them. How to activate a Yota SIM card, as well as configure some access points
After purchasing a SIM card from the Yota mobile operator, almost every subscriber has the same question: how to set up a Yota SIM card on the phone?
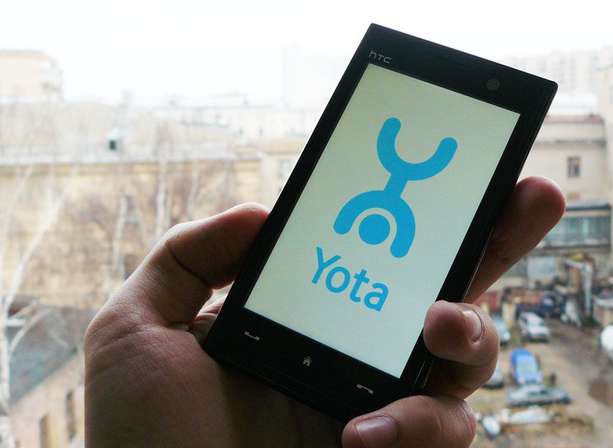
Setting up a Yota SIM card
In the vast majority of cases, setting up a Yota SIM card occurs automatically. This means that in order to start using the operator’s services, you need to install a SIM card in the slot and reboot the device. Once turned on, you will see the name of your selected mobile operator on the screen. So, after recognizing the SIM card, you need to launch the proprietary yota application, which is precisely responsible for activation. Here you can select the appropriate tariff as follows:
- in the window that appears after launching the application, you need to select the “Select connection conditions” option, after which tariff variations will appear;
- From the options that appear, you need to choose the most attractive one for you.
Now you know how to set up a Yota SIM card. After setting up, the question immediately arises of how to set up yota Internet on your phone. Let's look at this issue below.
Setting up yota internet on your phone
 Yota mobile Internet settings are mostly done automatically. There are times when this does not happen. In such situations, you can enter the settings yourself. To do this, you just need to correctly indicate the access point, since the remaining fields do not require filling out. Modern smartphones have different software, so this setup process will differ for different devices. Let's look at yota ways to set up the Internet on your phone for today's most popular operating systems, such as:
- Android;
- Windows Phone;
Settings for Android
To register an access point for a given operating system, you must perform the following steps one by one:
- go to the settings of your gadget;
- select “More”, then “Mobile network”;
- Now you need to create a new entry in the “access points” section, specifying the name Yota, and in the APN line enter: internet.yota.
Yota settings for Windows Phone
 In order to independently register the settings for the yota Internet in this case, you need to:
- From the gadget settings, go to “Access points”;
- Click on the “+” icon to create a new entry;
- now you need to set a name for the point and write it in the line with the address: internet.yota;
- click “save”.
After saving the new entry, you must select it again and wait for the “Active” status to appear. Now we can assume that setting up yota on your phone is completely completed. Other fields also do not require filling out.
Settings for iOS
To configure a mobile phone on this OS, you need to follow the algorithm:
- in the mobile phone settings you need to select “Cellular”;
- then go to “Cellular Data”;
- In the line with the address write: internet.yota.
This way, you can independently create access points in your mobile device and start using the Yota Internet.
As you know, the share of mobile devices running the Android operating system is the most impressive on the modern market. And even such a giant as Apple Corporation is not able to “compete” with its competitor. And among the clients of the Yota operator, the lion’s share of subscribers are users of devices under the control of the “Green Robot”. Therefore, today we will pay attention to questions about how to set up Yota on Android phones.
Initial setup of Yota on Android
Each electronic device into which a SIM card of any mobile cellular network is installed requires a little configuration for further use without any problems and correct operation in the company’s network. The same condition applies to working with Yota operator cards. However, it is worth understanding that not every user knows how to do this correctly and is able to configure it independently.
That is why companies implement automatic distribution of the necessary configurations via SMS. It is initiated immediately after the initial installation of the SIM card into the device and its subsequent switching on. That is why, when using a smartphone under Android OS control for the first time, users do not need to do anything, the maximum is to apply the settings received from Yota in a text message.
How to set up 3G/4G Yota mobile internet on Android
It is worth noting that in some situations the automatic SIM card activation procedure may not occur. In such cases, subscribers will need to independently set up Yota Internet on Android. Luckily, the setup procedure is quite simple and can be completed in less than 1 minute. To successfully complete the configuration, you must do the following:
- Enter the main navigation menu of your Android device.
- Go to the "Settings" directory.
- Go to the "More" category.
- Select the "Mobile Network" subcategory.
- Open the "Access Points" section.
- Click the button to create a new access point.
- Enter the following parameters in the appropriate fields:
- Yota – in the “Name” field;
- Internet.yota – in “APN”;
- Default,supl – in “APN TYPE”.
Leave the remaining fields blank.
- Save your changes and exit the settings menu.
After rebooting the device, the configuration procedure can be considered complete, and the Internet, as well as other services of the Yota operator, should work properly.
Video instructions for setting up Yota Internet on Android
How to set up a Yota Wi-Fi access point on Android
We just have to look at information on how you can set up a Wi-Fi access point on your Android device in order to be able to share an Internet connection via a wireless network from your gadget with a Yota SIM card.
Note that this procedure is quite simple:
- Go to the "Settings" menu.
- Go to the "Mobile network" section.
- Find the "Wi-Fi Hotspot" button and click on it.
- Turn the Wi-Fi switch to on.
- Specify the data for connecting to the point: its name and access password. The data is selected by the user and can be anything.
After making these configurations, the Android device will turn into a small modem that will distribute an Internet connection to other devices via Wi-Fi.
Note that the Yota operator carefully monitors attempts to spread Internet connections through access points on mobile devices, and if detected, limits the Internet speed to 128 kilobytes per second. If you want to distribute the Internet at a higher speed, it is recommended to connect the appropriate service to remove the speed veto for 2 hours or for a day for 90 or 190 rubles, respectively. Connecting the option is available in your personal account, as well as in the official Yota application for Android.
Not long ago, a new participant appeared among Russian telephone network operators - Yota. A nice feature and the main difference from competitors is high-speed unlimited Internet, reaching up to 10 or 11 Mbit per second. Actually, the company’s work is aimed at users of smartphones and tablets.
This arrangement will definitely appeal to everyone who wants to have fast Internet at hand and does not want to count every bit spent. It is convenience, flexibility in configuration and focus on gadget owners that comprise an unusual approach to how to activate a Yota SIM card on Android.
How to set up a SIM cardYota onAndroid
The SIM card is activated through the Yota application. This requires only a few simple steps from the user. The first is to install a SIM card in your phone or tablet and enable data transfer. The device itself recognizes it. Sometimes you have to do everything manually. Then the action plan will be like this:
How to set up internet iota on Android
You need to go to " Settings» to the « tab More" and select there " Mobile network».
Select from the list - " Access Point (APN)» ( on some phone models, the path to these options may differ, for example on LG, the mobile network settings are located in the “Shared modem & Networks” section).


When creating an access point, in the line " Name" - enter the word " YOTA" (without quotes), and in the line " APN" - enter " internet.yota"(without quotes).
The remaining fields should be left blank. The next step is to launch the application (or install if it has not been installed previously). The application activates the card and selects a user-friendly tariff plan.
Useful Yota application for Android.
In order not to be tormented by the question of how to set up a Yota SIM card on Android, for the convenience of users, an official application from the Yota company was created for owners of gadgets on the Android platform. Application "Mobile operator for Android" ( download by clicking on the link), convenient and easy to use, performs the main functions:
- It allows you to quickly contact online support.
- Change your number and link your bank card.
- Set up a tariff plan, traffic status and available minutes or SMS.
- Receive regular information about the conditions of your connection.
- And also top up your account.
During the first login to the application, the user can customize the tariff for himself, selecting the number of minutes for calls to subscribers of other operators and setting up unlimited messages. You can change this later in the application. Considering the ease of this action and truly flexible tariffs that allow you to customize everything “for yourself,” this is a serious advantage of Yota over other operators.
In the online chat directly in the program, you can contact specialists who will solve the problems that arise, if any. Such quick help is a big plus. This will be noticed by anyone who has ever contacted support via the hotline of other mobile operators and was forced to wait a long time for an answer.
A nice bonus will be the ability to top up your account directly from the application. To do this, just connect the program to your bank card and problems with finding a terminal will become a thing of the past.

To summarize, we can say with confidence that Yota has established itself as an innovator, ahead of many other operators and providing quality services. Speed and convenience definitely appeal to those who want to get fast Internet without overpaying. And the Mobile Operator application makes access to operator services more accessible.
The relatively new operator Yota distributes its SIM cards in two ways - direct sale to the client at the service office and delivery of a pre-ordered SIM card by mail. There are no problems with the purchase, but with activation the situation is completely different. If with an operator such as Megafon, activation is carried out by simply dialing a combination of numbers on the phone, then with Yota everything is completely different.
In addition, it is necessary to note the company’s special policy, which provides for different SIM cards for different devices. For example, a subscriber will not be able to use a SIM card purchased for the Internet on a smartphone in his tablet and vice versa. There are three types of SIM cards produced by Yota: for smartphones, tablets and for a USB modem. Therefore, let’s look at how to activate the Yota SIM card on different devices.
Contents of the article
Activation on Android smartphone, Windows Phone and iPhone
So, let's assume that you have already issued a SIM card through the application, and the courier delivered it directly to you. Now, in order to activate it, you need to:
- Make the first advance payment to your new SIM card number. Please note that the payment amount must correspond to the cost of the selected tariff that you plan to use.
- Now install the SIM card in your phone and turn it on.
- Please note that the name of the current operator should appear on the display. If everything goes well, then the SIM card has completed registration in the network and is already working. As a rule, registering a card takes no more than 1-2 minutes.
- Now we open the mobile application for managing Yota services, and if you don’t have it installed yet, now is the time to download it. And we adjust the parameters of our tariff plan.
- For successful activation, the smartphone must independently connect to the data network (2G, 3G or 4G), this can be tracked by the icon that appears on the smartphone screen. If the network type is determined, activation can be considered successfully completed.
- If the icon does not appear, you will need to manually configure the access point (APN). Such problems most often arise due to a poor signal from the operator’s cell towers or when the phone is unstable.
- If your phone has an Android operating system, APN can be configured by going to “Settings”, select “More”, then "Mobile network" and look for the “Access Point” item there. If you are using an iPhone, then to configure go to “Settings”, then “Cellular” and "Cellular Data". For Windows Phone users, APN settings are found in the menu "Settings - Access Point".
APN for any operating system - internet.yota
Activation on Android tablet and iPad
If you are using an Android tablet, then to activate you will need to perform the same steps as for activation on a smartphone. First, we put the SIM card in the tablet PC and wait for the registration process on the network to complete, after which you need to configure the access point, if necessary.
On Android tablets, all the necessary settings are located in the same place as on an Android smartphone. To configure tariff options, download the application from Google Play.
On Apple iPad, first install the SIM card in the device and wait until it successfully registers with the network. If necessary, you can configure the access point yourself through the appropriate menu; this is done in the same way as on the iPhone.
Activation on PC
- If you bought a SIM card in order to use it in a Yota USB modem, the first thing you need to do is install the drivers. First, we insert the modem with a SIM card into the PC and wait for the modem to complete the driver installation, after which the device will automatically be registered in the operator’s network.
- If possible, connect your modem to a USB port that uses the USB 3.0 standard, as this will significantly increase the speed of mobile data transfer through the modem.
- Now you need to activate and create a profile. To do this, you need to open any page in an Internet browser. A redirect should occur that will open the service page.
- To create a profile, use the prompts that will appear on the page in your browser.
- After all these steps, you will activate the SIM card and the service will issue a login with a password to access your profile settings.
Problem solving
- If you suddenly encounter any difficulties with activation, then you should contact Yota technical support by calling this number 8-800-550-00-07.
- You can also ask your question to support using the online chat, which can be accessed through the operator’s official portal. There you can also find answers to all your questions by using the help section on the Yota website. There is also a list of all service offices that you can contact in case of problems.
The Yota SIM card requires registration by installing it into a device - tablet, modem or phone. In this article you will learn ways to activate a SIM card on a tablet, computer, Android smartphone or iPhone.
Why do you need to register a Yota SIM card?
For full functioning in the Yota operator network, the purchased SIM card must be registered in it; this procedure is called activation. Without it, there is no way to make calls or have access to the Internet.
In addition, tariff options and its conditions can be selected only after completing SIM registration.
Registering a SIM card automatically
Usually, after purchasing a SIM card and adding funds to your balance, you can start using the new card. To do this, you should install it in a special slot and wait for the SIM to register in the Yota operator network.
Often, SIM card registration is automatic.
After a few seconds, the display shows the name of the operator and the network indicator, after which you can use communication services. To manage connected services, you can download a mobile application that will allow you to manage services and view your balance from the screen of your device.
Activation of sim Yota on a tablet
To register a Yota SIM card on your tablet, you need to install it in the SIM slot and wait for registration in the operator’s network. After the device shows the coverage indicator, you can go online and use network services.
If the device is not connected to the Internet, you should enable mobile data and check for the presence of an APN point in the section: Settings - Mobile Communications - APN points - the name "Yota" - in the APN section it should be written: internet.yota. There is no need to enter any other data; in the APN type section, select the default value. 
How to connect a SIM card through a computer
To activate the Yota SIM card, which is used in a modem or router, through a computer, you need to install the SIM in the modem and connect it to the PC.
After completing the installation of modem or router drivers, open the installed program and wait for the SIM to register in the Yota network. Next, you need to connect to the Internet and load any website, which will result in a redirect to the Yota registration form.
Upon completion of the registration process, the system will assign you a login and password, which you can enter to access your personal account and manage services.
Method for registering a Yota SIM card on an Android smartphone and accessing the network
When purchasing a Yota SIM card for use in a phone, it is recommended to install it in a smartphone and wait for registration in the network, upon completion of which the name of the network and a signal indicator will appear on the smartphone display. As a result, when making the first call or accessing the network, the card will be activated in automatic mode. 
If the wireless network is unavailable, you can check whether mobile data transmission is enabled on your smartphone and check the operator’s access point: “internet.yota” .
Ways to check if the Yota SIM card has been activated?
- On phone/tablet. To check your card registration, you can use the services of an operator: make a call, check your balance, or go online. If the device does not display a network indicator and there is no access to communication services, you should repeat the activation procedure or check the functionality of the device;
- On the computer. To check the registration of the card in the operator’s network, you can go to the Internet and check the status of communication services in your personal account - using the login and password received during registration. If there is no connection or there is no access to your personal account, it is recommended to contact the operator’s service department.
User Questions
Is it possible to activate a SIM at the operator's office?
Activation of a Yota SIM card is possible in the operator’s service department - you can ask a department employee to make the initial settings and check the functionality of the operator’s services.
If there is no access to communication services, the most common options are: a defective SIM or a non-working device. To check, you can put the card in another device and, if there is no network, contact Yota employees to issue a new SIM.
How to activate a Yota SIM card on an iPhone
Registering a new Yota SIM card for an IPhone is similar to other devices - you need to place the card in a special slot and wait for the coverage indicator status to appear. Then turn on data transfer and check the availability of voice services.
If you do not have access to the Internet, you need to set up an access point through the Settings menu – Cellular data – APN: “internet.yota”, check if mobile data is enabled and reboot the device.
When purchasing a new iPhone, you will first need to activate the device itself via a Wi-Fi wireless network, then register the SIM operator.
Is it possible to activate a Yota SIM on a Windows tablet?
A number of tablets run Windows; when working with this OS, activation will also be required. To get started, install the purchased SIM in a special slot, turn on data transfer and wait for the network to appear.
After registering the card, you need to open any Internet page and check the functionality of the Internet connection. If mobile data is not available, you will need to specify the access point in the tablet settings on Windows through the menu Settings – Access points – Add – enter: “internet.yota". After which you need to reboot the tablet, wait 1-2 minutes and go online, after which the operator will automatically redirect the user to the registration form, upon completion of which a login and password will be assigned to enter your personal account.
Since the mobile account exists only for devices running Android and iOS, you can use your personal account on the Yota website to manage services and tariff plan, which will be available upon completion of registration in it.


