A program to increase the speed of the cooler on a laptop. How to increase the speed of the cooler on an HP laptop? Video - How to easily increase the speed of the cooler on a laptop
By default, laptop coolers operate in automatic mode. But cases may arise when you have to intervene in the process and regulate the speed of their rotation. For example, the cooler began to spin too quickly for no apparent reason, or, conversely, when there was obvious overheating, the cooling efficiency dropped.
Increased noise may indicate wear and tear on the plastic parts from which the fan is made. If the sound changes gradually, increasing over time, most likely the cooler will have to be replaced.
Sometimes removing dust with a vacuum cleaner helps. The nozzle that sucks up dust should be brought to the ventilation holes of the laptop; if the dust has not yet had time to “fix” itself in the case and there is not very much of it, then there is a chance that the debris will be transferred inside the dust collector.
Important! In other cases, you will have to open the case. This is best done in service workshops. If the laptop is not under warranty, then you can open the case yourself, but at your own peril and risk.
In cases where there is no dust, but for some reason the speed still needs to be increased, you will have to use software methods.
Most laptops have the ability to make various settings in the BIOS Setup program. To enter the BIOS initial setup program, you should:

Important! In BIOS Setup, you can set a password, without which an unauthorized person will not be able to make changes to the settings.
Video - Setting the cooler speed in the BIOS
Changing cooler speed using programs
Speedfan
A small program for Windows, distributed free of charge. Needed to monitor the temperature of the internal components of the PC and the speed settings of the coolers (if there are several of them).
The latest version of the program is Speedfan 4.52. Compared to previous versions, device support has been improved, bugs have been fixed, and the list of supported systems has been expanded.
- Download the program from a reliable site by following the link: http://www.almico.com/sfdownload.php.

- Click on the program name in the text.

- Left click on the downloaded file.

- We accept the terms by clicking on the “I Agree” item.

- In the open window, click on the “Next” option.

- You can leave the path for storing the file or change it by clicking on the “Browse” button, then click on the “Install” button.

- After completion, click on the “Close” button.

- Right-click on the Speedfan shortcut and run as administrator.

How to install Russian language

Setting up the cooler using the Speedfan program
The program itself works simply:
- the section indicating “Fan1”, “Fan2…Fan5” provides information about the fans available in the system and the actual speed of each of them. There is only one working cooler in the picture - “Fan1”, its speed is approximately 1762 rpm, units of measurement are revolutions per minute;

- To the right of this section is information about the temperature of system components, such as hard drives and processors. Data is constantly updated;

- to manually adjust parameters, the “Auto fan speed” option must be disabled, that is, the checkbox must be unchecked;

- You can change the speed manually using the “Pwm1…Pwm3” section.

Important! Fans should not be turned off completely as this may cause overheating and damage to processors or other hardware components.
Video - Review of the Speedfan program for beginners
Amd Overdrive and Rivatuner
AMD has developed a program for its devices with which you can not only overclock the processor, but also monitor the temperature conditions of the boards. The Amd Overdrive utility allows, in particular, to control the speed of system fans.

On the “Video” tab, you can change the fan speed of the integrated video card using the slider, but to activate manual mode, you should check the “Enable manual fan control” box, after which you will be able to set a value other than the automatic parameter (20%).

Riva Tuner– a more universal utility that allows you to manage AMD and NVidia devices, created by Russian-speaking programmers.
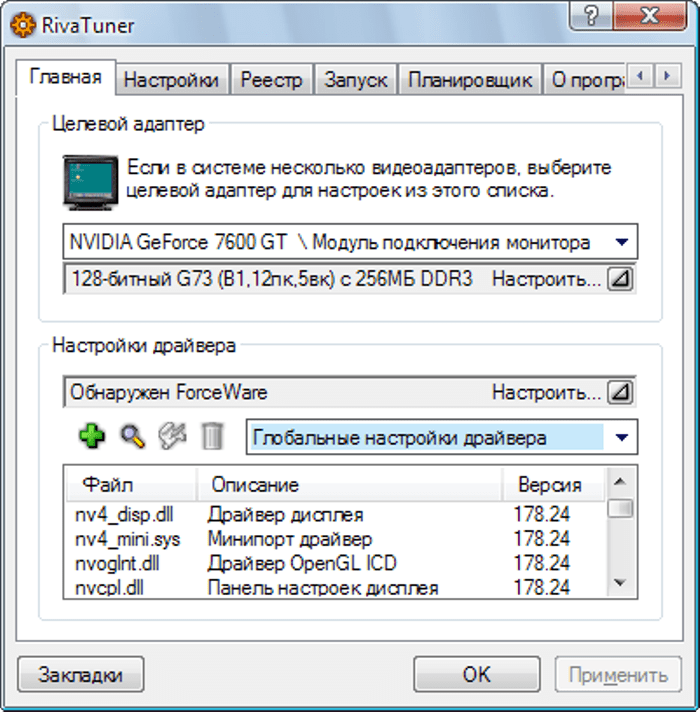
Allows you to control the video card cooler by setting its rotation speed to a constant speed, or by setting it as a percentage, depending on the system load.

In addition, it is possible to create fan operation profiles that will be connected by the user based on specific situations.

In what cases can you not increase the cooler speed?
Many BIOS versions will not allow you to manually change the fan speed settings. For clarification, you should read the documentation of your PC (laptop).
If in the BIOS Setup settings the “Speed Fan” item is set to “Auto”, you need to try changing it to “Manual”, that is, manual, then press “F10” and save the settings.

It happens that some laptops offer different options for setting up coolers:

You should be very careful about cooling your laptop, since several devices can fail at once, which will make repairs pointless, due to its high cost, and as a result you will have to purchase a new computer.
Mechanical cleaning
If the PC still overheats and nothing helps, you will have to remove the bottom cover of the laptop and remove the dust manually.

Attention! If the laptop is not yet out of warranty, then any internal tampering will result in loss of warranty.
To open it you will need small screwdrivers, usually Phillips.

Important! Before disassembling, you need to remove the media (CD or DVD) from the drive, turn off the laptop and remove the battery.

Video - How to easily increase the speed of the cooler on a laptop
Good day, dear friends, readers, visitors and other individuals. Today we'll talk about the program SpeedFan, as is clear from the title.
I think that you all remember the article "", which told you a lot of useful information about heating the contents of your iron friend and a few words about how to deal with this heating, namely, for example, by or.
But what to do if everything is more than normal with temperatures, and the computer is buzzing like hell? The answer is simple: you need to somehow regulate the fan speed, because they are the cause of noise in most cases. Just how to do this will be discussed in this article.
Introductory information about computer cooler speed
Let's start with how the adjustment generally occurs, if it exists at all.
Initially, the rotation speed is determined and set based on the temperature indicators and settings specified in.
The motherboard, in turn, does this by changing the voltage/resistance and other nuances, intelligently controlling the speed ( RPM), based on the settings you have specified, as well as the temperature of the computer components as such and inside the case in general.

However, not always, despite all sorts of smart adjustment technologies ( Q-Fan and others like them), it clearly does its job, and therefore the knobs are either driven too hard (often this is what happens), which creates an illusory noise, or too weakly (rarely), which increases the temperature.
What should I do? Option, at least three:
- Try to set everything up BIOS;
- Use specialized programs;
- Either physically tinker with something with the power supply (or by buying all sorts of rheobass and other physical devices).
Option with BIOS, is not always justified, because, firstly, such technology is not available everywhere, secondly, it is not nearly as intelligent as it seems, and, thirdly, it may be necessary to change everything manually and on the fly.
Additional information on speed

You can, of course, buy a reobass (like the one below), to which you connect everything and enjoy life, but this, again, costs money, and reaching for the body every time you need to change the rotation speed can be lazy.
Therefore, in connection with the above, for many the option of using specialized programs will be relevant, fortunately they exist and they are free. In this article, I will talk about an old and very famous utility called SpeedFan.
How to reduce or increase the fan speed in a SpeedFan computer

Those Q-Fan pregnant Enable includes automatic control based on specified parameters in BIOS, A Disable disables this option. Depending on type BIOS, as you can see in the screenshots above, this parameter can be located on different tabs and look different. It is also possible that you need to switch CPU Fan Profile With Auto on Manual or vice versa.
Unfortunately, it is impossible to consider all the variations, but one way or another, this tab is necessarily present on any computer (except, perhaps, laptops) and you can find it there. In particular, it is not always called Q-Fan, it could be something like CPU Fan Control, Fan Monitor and in a similar manner.
In a nutshell, something like this. Let's move on to the afterword.
Afterword
Something like this. I won’t talk about all sorts of deep settings and other tabs within the framework of this article, since they are not particularly needed. The remaining tabs are responsible for overclocking, information and other useful data (more on that later).
As part of the next article in this series, I told in detail how to adjust the speed, because they have their own BIOS and a fan, powered not from the motherboard or power supply, but from the card itself, and therefore control them through SpeedFan or the motherboard will not work.
As always, if you have any questions, thoughts, additions, comments, etc., please feel free to comment on this post.
A fan or cooler (as it is also called) is designed to cool computer parts that heat up during operation. However, it happens that overheating of parts is not observed, but the cooler works too actively, causing too much noise. The opposite situation also happens: when the PC is heating up, but the fan does not want to work at all. In this article we will figure out how to increase or, conversely, decrease the rotation speed of the cooler on a laptop.
You can increase or decrease the fan speed programmatically
The fan speed itself is determined by the motherboard based on the settings in the BIOS. It just so happens that these settings are not always optimal, and this, in turn, leads to the fact that the laptop either makes noise as if it is trying to take off, or gets so hot that you can get burned. You can solve this problem directly in the BIOS or using third-party programs. Let's consider all the methods.
Setting up through the BIOS may not seem very convenient, since this method does not always work as well as we would like. And if you need to configure everything manually, on the fly and quickly, then the BIOS is not a help at all. If you do not have a laptop, but a desktop computer, then the cooler may not be connected to the motherboard, which makes configuration via the BIOS completely impossible.
The most convenient option is to use special software to adjust the fan speed. There are plenty of similar software products, there are even plenty to choose from.
A simple, good, and most importantly, free program, Speedfan, perfectly solves the problem; in this article we will analyze this utility in more detail because of its convenience and popularity. Its interface is quite simple to understand, and therefore even the absence of Russification is unlikely to create any difficulties when working with it.
The Speedfan installation is standard, we won’t dwell on it. Immediately after installation, the utility will collect all the necessary information about the fans installed on the computer and show it to you in the form of a list.

Areas that you should pay attention to are highlighted in red. The top block indicates the rotation speed of each cooler in RPM (revolutions per minute), and the bottom block shows their parameters, which can be adjusted. As for the top block, CPU Usage shows the processor load level (a separate scale for each core). If you check the Automatic fan speed checkbox, the rotation speed will be set automatically. It is not recommended to use this function due to its ineffectiveness. In the end, the program was installed not for automatic, but for manual configuration. The window may also look like:

If the fan is connected not to the motherboard, but to the power supply, then the values will not be displayed. This is not your fault, it was done this way by default. If you want the parameters to be displayed and all coolers to be detected, you will have to reconnect them to the motherboard.
You can adjust the rotation speed of each fan in the Speed parameters block. Just use the arrows to set the percentage values. It is highly not recommended to turn off any coolers, as this can lead to overheating and damage to the laptop.

In the event that you do not know which cooler is working incorrectly, you need to change the Speed value for each until you notice the difference by ear. Please note that the percentage value you set will be constant, that is, it will not change depending on the load level.
A separate story is the video card fan. It is this part of the laptop that often heats up the most, which means that the correct operation of the cooler is especially important here. The MSI Afterburner program is well suited for setting up the fan on a video card. It works with all video cards, which makes it very convenient. This utility has automatic speed adjustment enabled by default. This feature should be disabled.
Instructions
First of all, check the fan settings using the motherboard firmware. Turn on your computer. After the first boot menu appears, press the Delete key and wait until the BIOS menu opens.
Go to the Advanced Chipset menu. It is important to note that in certain board models this menu may have a different name. Find the item that displays the parameters of the fans installed in the system unit. Please keep in mind that not all coolers are customizable. Some models always rotate at a certain, constant speed.
Make sure Always Fan is enabled. If your firmware allows you to set a specific fan speed, select 100%. Set this value for each available cooler.
Press the Esc key several times to return to the main BIOS menu. Use the arrow keys to highlight the Save & Exit Setup field and press Enter. Click Ok. Wait while the operating system loads.
In situations where the functionality of the firmware is very limited, use the Speed Fan application. Install this program and run it. Wait a while until you are presented with information about the status of the available fans.
Deactivate the functions of automatically changing the rotation speed of coolers. Set the rate to 100% for each device. When working with a mobile computer, it is wiser not to activate maximum speeds. This will extend the life of the laptop without connecting a power source.
If you want the program to automatically regulate the operation of coolers, activate the “Auto fan speed” function. Please note that after closing the Speed Fan application, the speed of the coolers will return to its original value.
Sources:
- how to install a cooler correctly
If the system unit of your computer makes a lot of noise, and after turning it off, silence in the room immediately becomes noticeable - this is not a normal situation. The noise from the computer should not exceed acceptable standards, and certainly should not interfere with your sleep or hear what your neighbor is saying to you.
You will need
- - computer
- - SpeedFan program.
Instructions
Perhaps your system unit is clogged with dust (this happens to almost all personal computers over time) - clean it carefully with a vacuum cleaner. If it's clean, you may just need to adjust speed fan rotation. Launch your browser and enter the program name in the search bar - SpeedFan. Follow one of the first links and download the program to your hard drive. You can download the program on one of the software portals www.softportal.com. Install the program by running the installation file.
Launch the program. You will need to wait a little while the program analyzes the operating system. If you have difficulty navigating the language, click on the Configure button and change the language on the Options tab. Now you need to enable hardware support for fan speed control on the motherboard. Click on the “Configuration” button, then the “Advanced” button. Change the value to Software controlled and click OK. If your motherboard is detected by the program, then this value will be set immediately.
SpeedFan is a utility that will describe in detail the condition of your PC or laptop. In particular, the application can give you information in real time. Statistical information is provided on all vital parameters for the computer: power supply operating mode, processor and video card temperature, cooler rotation speed, RAM load and many other data).
In addition to all the above parameters, the SpeedFan program will detect whether there are errors in your system, which it will try to correct if possible (for example, it will increase the speed of the cooler to lower the processor temperature).
Well, the main feature of the SpeedFan utility, as you may have guessed, is the ability to either reduce or increase the speed of the cooler on a laptop or PC, which will undoubtedly please those users who believe that their fans do not cool the system very well - in this case, it’s better increase their rotation speed.
When you start the program, the first thing that will open is the “indicators” insert. It will collect and display all the basic information about your system. The Speedfan program has a warning algorithm that signals if the equipment is operating outside the normal temperature range of the processor - overheating is detected or, on the contrary, sudden cooling is noticed.
Such events are marked on the monitor screen with a special label in the form of a light, which should draw the user’s attention if the equipment operates in non-standard temperature conditions.
But you should not be wary of such alerts, since the equipment tends to heat up, and the SpeedFan program will highlight the changes that have occurred even if it deviates from the norm by one degree.

In such cases, look at the data sheet of your device and find out what temperature is considered normal for the processor, so that you can be completely calm and not worry when the normal temperature of the processor changes.
If you want to analyze the condition of the hard drive, then for this purpose SpeedFan has a diagnostic function using S.M.A.R.T technology. This type of test has 2 operating modes - extended and short. Upon completion of the hard drive diagnostic process, a corresponding column will appear with errors (if any are found), which are displayed in the form of icons: green, orange and a “STOP” icon with white bricks.
What each label means is clear on an intuitive level - the first is all good, the second is working at the limit, and the third label indicates the presence of malfunctions.
The SpeedFan program can be downloaded in Russian for free, the only thing you have to do is switch the language from English to Russian, if English is installed by default.
The main purpose of the free SpeedFan program is that the utility carries out detailed monitoring of system cooling, and this program is used in cases where there are serious suspicions about overheating of the chips. In any case, if it detects overheating problems, it will try to increase the speed of the cooler on the laptop or PC.


