Sata connection via usb. Connecting a hard drive via USB: methods and tips
Then you know it takes a lot of time. You need to turn off the computer, remove the side cover, secure and connect the hard drive. And if the hard drive is connected only for a short period of time (for example, to copy files), then you don’t want to do that much work.
Fortunately, this problem can be solved using a USB interface. In this article you will learn how to connect a hard drive via USB.
Method No. 1. SATA-USB adapter.
The simplest and cheapest way through the interface is a special adapter. This adapter looks like a USB cable with a small box at the end. On the side of this box there is a connector for connecting a SATA drive.
When choosing a SATA-USB adapter, you need to pay attention to whether additional power is used from an external adapter. Because if the SATA-USB adapter is powered only via USB, then it will not be able to work with large drives.
Method number 2. Hard drive pocket.
The hard drive pocket is a small case into which you can insert your hard drive. There is a connector inside this case and a USB interface outside. HDD pockets give them some protection, but they are not as compact as SATA-USB adapters. Plus, they cost significantly more.

Other than that, the pockets limit you to the form factor of the hard drive you can attach. In other words, if you have a pocket for 2.5-inch hard drives, then you won’t be able to use it to connect a 3.5-inch drive.
Method number 3. Docking station for hard drives.
Another option is a hard drive docking station. A docking station is a stationary device that is used to connect hard drives to a computer. Docks differ from pockets in that they have an open design. Thanks to this, connecting a hard drive to a docking station is much easier than connecting to a USB pocket.

In addition, docking stations are more versatile; in most cases, they can be used to connect both 2.5 and 3.5 inch hard drives. There are also docking stations for multiple hard drives.
Hello, we continue to figure out how to connect hard drives and other IDE and SATA devices. Today I got my hands on the AGESTAR FUBCP USB controller. As has already become clear, it is designed to connect devices via a USB interface.
This method is perfect for those who often have to work with hard drives and copy information.
I suggest you take a closer look at this cunning device and figure out how it works.
The adapter kit includes:
- the usb - sata/ide adapter itself;
- 12V power supply with molex connector;
- cable for power supply;
- Warranty card, instructions, driver disk.
In total, the adapter has 3 interfaces: SATA,IDE 40 pin(for connecting IDE drives 3.5″), IDE 44pin(for connecting IDE drives 1.8″/2.5″).
For greater clarity, I suggest looking at the photo below. Click on the picture to enlarge.

Below is a photo of the adapter from the back side, where you can see the power button and power connector.

The instructions included in the kit are completely in Russian, so it’s quite easy to understand. The entire process of connecting hard drives can be divided into 2 sections:
HDD connection 2.5″
For such disks, you need to connect the USB adapter to the corresponding connector and connect the black USB wire to the computer. In most cases this will be enough.
In rare cases, when the hard drive requires more than 0.5 mA power, you will also need to connect the red additional power wire.
HDD connection 3.5″
With 3.5 inch HDDs things are a little more complicated. The difference is that they do not have enough power via USB. This is why the adapter comes with a separate power supply with a molex connector. So, if there is a need to connect a SATA drive, then we must connect it to the SATA connector of the controller, connect the USB cable and be sure to plug the power cable into the adapter.
For a 3.5″ IDE HDD you need to do the same, but the power cable must be connected directly to the hard drive. It was with this disk that I carried out all the tests.
In general, the diagram for connecting an IDE hard drive to a computer via USB will look like this:

The HDD is detected in the system without installing any drivers. Judging by the instructions, which I read from cover to cover, installing drivers is only necessary if you have Windows 98.)) After a few seconds and a couple of familiar Windows windows, I could use the hard drive as a regular flash drive.
Backup
I can't help but say about the backup system, which is also provided by this adapter. The most observant readers may have noticed the small black button “ backup" on the device body (see photo with captions above). So, clicking on this button allows you to launch a utility for copying files from your computer to a connected hard drive. Of course, before this, the program must be installed from the disk that comes with the kit.
To install, you need to run the “Setup.exe” file from the “PCCLONEEX_LITE_2_01_31_JMICRON/PcCloneEx” folder. The following is a completely standard installation process, which I will not dwell on.
After the program is installed, you need to click on the “backup” button. A window appears asking you to select files for backup.

After checking the files or folders, click on the adapter button again and confirm your action in the pop-up window. When copying is complete, the program will display a corresponding message. Later, when the program is minimized, double click on “backup” starts a backup of previously selected files in the background.
To be honest, the advantage of such a copying system is very doubtful, but it’s still nice that the developers have provided for it.
Yes, by the way, the cost of this USB adapter is about 600 - 700 rubles. Only you, dear readers, can judge whether this is a lot or a little, but I don’t even question the usefulness and convenience of this device.
That's all for me, rate it, share with friends, write in the comments. ?
Perhaps you have an unwanted hard drive, removed from an old computer or laptop, that's sitting around collecting dust. If so, it will cost very little to turn it into a removable, portable USB 2.0 or 3.0 drive. Find out how.
An old drive from a laptop or desktop computer is not very suitable for connecting to new equipment - of course, it does not reach the speed and capacity of the new drives that are connected to the computer. However, you can insert the old disk into a special case (adapter) and turn it into a portable USB drive.
Hard drive adapter
A special adapter is not just a piece of plastic - it includes a set of corresponding inputs and is an adapter for USB. Thanks to it, the hard drive, which is designed to be connected to the motherboard via the appropriate connectors (IDE or SATA), can be connected to a USB port, that is, make it portable.
The prices for adapters are quite reasonable, on average about 1000 rubles. Also, the cost depends on the USB interface - an adapter with USB 2.0 will be cheaper for USB 3.0 (the difference is in data transfer speed).
Types of hard drives by interface
The adapter itself is not universal and you need to select the appropriate model for a specific drive. You should pay attention to the size of the drive (2.5″ or 3.5″), as well as the cable and power cable (ATA/IDE lub SATA).
2.5″ drives are much thinner and are mostly used in laptops. They can be connected via an ATA/IDE cable or a SATA cable.
3.5″ drives are slightly thicker and are usually installed in a desktop computer. Also divided into ATA/IDE and SATA. 
Sometimes certain combinations can arise - the new connector can be connected via the controller to the "old" motherboard (SATA / IDE). Determining the hard drive is a key point, because you need to select the appropriate pocket (adapter) for the given size and interface of the drive.
How to choose the right adapter
When choosing an adapter, you should study the properties and find the right model that matches the method of connecting the hard drive and its connector. Below is an example of randomly selected USB adapters for various types of hard drives.
- 2.5″ SATA: NATEC Rhino 3.0;
- 2.5″ IDE: Logilink 2.5;
- 3.5″ SATA: ITEC MySafe Advance 3.5;
- 3.5″ IDE/ATA: PRO-TECH 3.5;
- 3.5″ IDE / SATA: Tracer 731.
Installing a hard drive into the adapter
Installing a hard drive into the adapter is not difficult. Depending on the model, it may vary slightly and usually takes no more than a minute. Place the drive into the adapter housing, and then connect the wires to the appropriate connectors.
Connection features
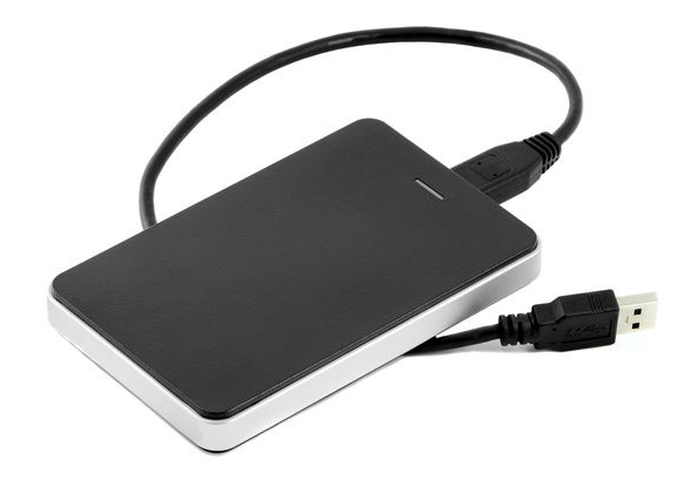
Depending on the adapter model, interface and type of hard drive, there may be one or two USB cables on the outside. A USB cable is used to connect to a computer port, and a second one may be required for additional power.
When connected via a USB cable, the hard drive should be immediately detected by the system and available for data transfer.
InstComputer.ru
How to connect a hard drive via USB
To install a hard drive in a computer, you need to carry out a number of procedures to install it, but connecting a hard drive via USB is quite simple, which in turn is an advantage, it is as simple as inserting a USB flash drive.
There are several ways to connect a hard drive to a computer via USB and like this:
Method number 1. Connecting a hard drive using a SATA-USB adapter.
In my opinion, this is one of the simplest and most convenient ways to connect. This adapter looks like a USB cable with a small box at the end that contains connectors for connecting a SATA drive to a computer. 
When choosing this adapter, you should pay attention to the fact that it has additional power from an external adapter. Otherwise, if the SATA-USB adapter receives power only via USB, then it will not work with large drives.
Method No. 2. Use an external HDD box 2.5 inches or 3.5, depending on your drive.
An external HDD box is something in the form of a case for your hard drive; inside it has a SATA connector, and on the outside there is a USB interface for connection. Although the external box provides some protection for the hard drive, it is still not very convenient to use due to its size, unlike a SATA-USB adapter, and it costs much more. 
In addition, this adapter limits you in using the size of your drive, that is, if you have an external HDD box for a 2.5-inch drive, then you will not be able to use a 3.5-inch hard drive in it; for this you will have to purchase another one.
Method number 3. Using a docking station for HDD.
A docking station for HDD is a stationary device for connecting a hard drive to your PC. It has an advantage over the external box in that it has an open design. Connecting your hard drive to the docking station is easy by simply inserting it into the device. 
In addition, you can purchase a universal docking station that allows you to connect 3.5-inch and 2.5-inch drives, which is very convenient. Also, a docking station for HDD can be used for several disks at once.
I also bring to your attention a video from one of the site’s readers on how to connect a hard drive via USB
seohotmix.ru
How to connect a hard drive via USB?
To access the contents of your hard drive via USB from a PC or laptop, you will need a special device - an adapter. The connection is not complicated, the main thing is the presence of a special device. There are several types of devices that allow you to connect the hard drive (hard drive, HDD) of a desktop computer or laptop to USB and open its contents. Here are the two most popular: a universal USB controller (for example, AGESTAR FUBCP) or a case adapter (SATA External case, ITEC MySafe Advance and others).
Which one should you choose? Depends on the goals you have in front of you. If opening the hard drive is a one-time operation and is only necessary to copy valuable information, then you can use the first option. For those interested, read about where the space on the hard drive disappears.
In China you can buy the following devices that are built-in instead of a laptop disk drive:

There are also combined options with a complete set (adapter, cord, power supply).

You can buy and see the description at this link: ru.aliexpress.com/adapter
The advantages of the first one are that such a device is cheaper than a case adapter, and often supports several types of connections (SATA, IDE). However, using a regular hard drive as a portable drive with it is problematic, since it will not be protected by anything.
The second option is a case adapter, which is specifically designed to turn a hard drive into a portable memory device with a sufficiently large capacity, since the case will reliably protect it from dust and mechanical damage. But at the same time, the versatility of the device suffers: before purchasing, you will have to decide which connector the purchased adapter will support.
Using a hard drive in a cased version is a fairly simple procedure, so let’s look at how to connect and open a hard drive via USB using a universal adapter (using the example of AGESTAR FUBCP).
Connection procedure
The first thing you need to do is determine the type of HDD connector that you plan to connect via USB. Plugs come in the following types:
SATA (a more modern connector, used in newly built PCs and laptops);
IDE (can be found mainly in “experienced” PCs).

We will consider the connection using the example of AGESTAR FUBCP, since it supports both “old” and modern HDDs. The average cost of such a device in Russian electronics stores is about 1,500 rubles.
The device is equipped with three interfaces (plugs):
- SATA (7-pin plug).
- IDE 40pin (40-pin plug, for IDE 3.5″).
- IDE 44pin (respectively, 44-pin plug, for IDE 1.8″/2.5″).
Description of AGESTAR FUBCP connectors below.

Step-by-step connection of HDD to computer
So, we have determined the connector of the connected hard drive; now it needs to be connected to the corresponding connector on the device. After that, insert the USB connector for data transfer (black) into the USB port of your computer or laptop. If we are working with a laptop hard drive (2.5”), we can turn on the adapter, and the HDD should appear in the list of computer drives. Sometimes, with such a connection, the hard drive may not have enough power and will not be detected by the system. In this case, turn off and connect the red USB connector of the adapter to any of the computer ports and turn on the adapter again.
If the connected hard drive was previously installed in a PC (3.5” format), the power supply from your PC’s USB will not be enough for it. The AGESTAR FUBCP comes with a power supply for 3.5" hard drives. To open the hard drive via USB, first connect it to the appropriate connector (IDE/SATA), then insert the black USB cable into one of the USB ports of the computer, then connect a power supply that operates on 220 V to the adapter (plug it into a power outlet) .

After all cables are securely connected, turn on the adapter. The connection is complete, the hdd will be detected by the computer, and you can work with it.
it-increment.ru
How to connect an external hard drive to a laptop - simple, detailed and accessible instructions for everyone.
How to connect an external hard drive to a laptop
External hard drives, otherwise known as external HDDs, have long proven themselves to be a good help for new or outdated laptops. They have an impressive amount of memory and a solid transfer speed, which helps you store data in a safe place, keep everything at hand, share it or copy content from other media. So, if the “native” hard drive is small or busy, purchasing an external one, for example, a terabyte, will fully justify the investment. However, not every owner of this device knows how to connect an external hard drive to a laptop so that it functions with maximum productivity. Let's consider the important nuances of connection.
A little theory
If you have not had to connect external media before, then before practical implementation, familiarize yourself with the theoretical part of the process. The hard drive can be connected to a TV, computer or laptop directly. When connected to a TV, it only supports the viewing function.
The first thing that is required from a user who owns an external hard drive is the ability to disassemble and assemble gadgets, and an understanding of the purpose of all available connectors located on the motherboard of a laptop or PC. If you do not know how to connect a hard drive to a laptop, then it is better to entrust the task to a more experienced user. Otherwise, you may accidentally damage the device. If you have minimal knowledge, it will take no more than 15 minutes. Using the contacts for connecting power (on the motherboard), we identify the type of interface available - IDE, SATA or another. The more up-to-date the interface, the better the data transfer speed. Next, we determine which adapters will be needed for connection, for example, SATA-IDE, SATA-USB or the IDE-USB option. It is necessary to take into account that many laptop models do not have external connectors for connecting hard drives, and they must be connected exclusively via a USB port.
Let's look at the available connection types
So, how to connect an internal hard drive to a laptop? The ubiquitous HDD connection interfaces are IDE and SATA. They differ in the speed of information data transfer - IDE provides only 133 Mbit/s, the more productive and modern SATA - about 6 Gbit/s, while SATA Express will provide all 16 Gbit/s. There are other, more rare interfaces for transmitting information, for example, Thunderbolt for Apple. Let's look at how to connect an ide hard drive to a laptop. IDE or Integrated Drive Electronics is a parallel interface for connecting storage devices (optical drives, hard drives), and has almost disappeared from the computer technology markets. But, although it is rare, it still occurs, it is necessary to mention it. The IDE is connected to the motherboard using a wide IDE cable.
If the ide hard drive cannot be connected directly to the laptop motherboard, then this is done with an adapter. You can buy an IDE-SATA connector in specialized stores. When purchasing, you need to make sure that the kit includes two cords - a USB cable, a power adapter, a disk with the drivers necessary for the outdated operating system, the adapter itself with connectors and instructions. If a suitable connector is not available, then it is done using USB ports.
Now let's move on to how to connect a sata hard drive to a laptop. SATA or Serial ATA is the so-called serial interface for exchanging information between drives. SATA is considered a more relevant analogue of the ATA (IDE) interface. In principle, it is slower than parallel (ATA), but due to the use of higher frequencies, the SATA interface operates faster than the IDE standard. It is connected to the motherboard using a SATA cable. It connects to the laptop either directly to the motherboard, or using an adapter. Each SATA device has its own connector, so there will be no Slave/Master conflict, and several devices can function at the same time.
USB connection
 Let's figure out how to connect an external hard drive to a laptop using a USB port? First, we find the parameters of our drive, which are indicated on the case. We connect the 3.5-inch drive to the USB port of the device on one side, and to a power outlet on the other. The problem is that often the power supply of a computer or laptop is not enough to promote a given hard drive. Therefore, connecting to the mains makes it possible to transfer data to a PC at a good speed.
A 2.5-inch HDD must be connected to the hard drive on one side, and to the USB connector on the other. But if the USB port does not “produce” the required 5 V, then the second end of the Y-shaped cable should also be connected to the PC. Then the external drive will receive the missing power and work without failures. The USB port itself also affects the transfer speed. If in the very first USB 1.0 it did not exceed 12 Mb/s, then in USB 2.0 ports data was already transferred at a more serious speed - 480 Mb/s, which was a pretty good result. And USB 3.0 generally offers super speed - about 5 Gbps.
Connection interfaces can be very different. For example, if the laptop is American, then you can use the Firewire or, for example, eSATA interface, which will make this type of HDD universal. When the laptop “sees” the external HDD, it should be tested. On the desktop, you need to create a regular document and drag it with the mouse onto the newly connected external hard drive. If all ports are functioning normally, this process will last a couple of seconds. If you need to install drivers, use the disk or update the drivers via the Internet, and the hard drive will work like a flash drive. Don't forget to assign a drive letter to your new drive.
Connecting regular and removable hard drives
How to connect a regular hard drive to a laptop was partially written above. When you have selected a suitable adapter, it is connected to the PC hard drive using a suitable connector. If you have an IDE interface, you will need a connector with a wide input, and if SATA, then with a narrow one. Then we take the USB connector coming from the adapter and connect it to the USB controller of the portable device. Then the hard drive will begin to function as a simple storage device from which information will be received or transmitted. Important: the adapter has a built-in LED indicator. Watch the signals it gives: it blinks while transmitting information. Then you can start transferring data.
All that remains is to find out how to connect a removable hard drive to a laptop. We take out the USB cable that comes with the hard drive. You can use the cord from any other gadget. We insert one end of it into the side connector on the hard drive box, and the other end of the cable into the USB connector on the side panel of the laptop or PC system unit (behind or front). Click on the “My Computer” shortcut. There, among all the drives, a removable hard drive icon will appear. Double-click on it to open it. Important: to turn off a removable hard drive, you must first close it and click on its icon in the “my computer” manager. Then open the menu with the right mouse button and select the “Eject device” command. Only then do we remove the wire from the connector and put the hard drive in the case.
If you need to constantly use an external hard drive, then you need to purchase a container with an adapter for it. This will prevent accidental damage to the device.
Good day everyone.
A fairly typical task: transfer a large number of files from a computer’s hard drive to a laptop’s hard drive (or, in general, you just have an old drive from a PC and you want to use it to store various files, so that HDDs on a laptop are usually smaller in size) .
In both cases, you will need to connect the hard drive to the laptop. This article is just about this; let’s look at one of the simplest and most universal options.
Question No. 1: how to remove a hard drive from a computer (IDE and SATA)
It is logical that before connecting the disk to another device, it must be removed from the PC system unit ( The fact is that depending on the interface for connecting your drive (IDE or SATA), the boxes that will be required for connection will differ. More on this later in the article...).
Rice. 1. Hard drive 2.0 TB, WD Green.
Therefore, in order not to guess what kind of disk you have, it is best to first remove it from the system unit and look at its interface.
As a rule, there are no problems with extracting large ones:
- First, turn off the computer completely, including unplugging the plug;
- open the side cover of the system unit;
- remove from the hard drive all the plugs that are connected to it;
- unscrew the fastening screws and remove the disk (as a rule, it goes on a slide).
The process itself is quite easy and fast. Then take a close look at the connection interface (see Figure 2). Nowadays, most modern drives are connected via SATA (a modern interface that provides high data transfer speeds). If your drive is old, it is quite possible that it will have an IDE interface.
Another important point...
Computers usually have “large” 3.5-inch disks (see Fig. 2.1), but laptops have smaller disks - 2.5 inches (1 inch is 2.54 cm). The numbers 2.5 and 3.5 are used to denote form factors and indicate the width of the HDD case in inches.
The height of all modern 3.5 hard drives is 25 mm; this is called "half-height" compared to much older drives. Manufacturers use this height to accommodate one to five wafers. In 2.5 hard drives, everything is different: the original height of 12.5 mm has been replaced by 9.5 mm, which includes up to three plates (thinner drives are also now available). The 9.5mm height has actually become the standard for most laptops, however, some companies sometimes still produce 12.5mm hard drives based on three platters.
Rice. 2.1. Form factor. 2.5-inch drive - top (laptops, netbooks); 3.5 inches - bottom (PC).
Connecting the drive to the laptop
For direct connection you will need a special BOX (box, or translated from English as “box”). These boxes can be varied:
- 3.5 IDE -> USB 2.0 - means that this box is for a 3.5-inch drive (and these are the ones found in PCs) with an IDE interface, for connecting to a USB 2.0 port (transfer speed (actual) no more than 20-35 MB/s );
- 3.5 IDE -> USB 3.0 - the same, only the transfer speed will be higher;
- 3.5 SATA -> USB 2.0 (similar, the difference is in the interface);
- 3.5 SATA -> USB 3.0, etc.
This box is a rectangular box, slightly larger than the size of the disc itself. This box usually opens from the back and the HDD is inserted directly into it (see Fig. 3).
Actually, after this you need to connect power (adapter) to this box and connect it via USB cable to your laptop (or to a TV, for example, see Fig. 4).
If the disk and box are working, then in “ my computer"you will have another disk that you can work with like a regular hard drive (format, copy, delete, etc.)
If suddenly the disk is not visible in my computer...
In this case, 2 steps may be required.
1) Check if there are drivers for your box. As a rule, Windows installs them itself, but if the box is not standard, then there may be problems...
To get started, run device Manager and see if there are drivers for your device, if there are any yellow exclamation marks anywhere ( as in fig. 5). I also recommend that you check your computer with one of the utilities for auto-updating drivers: .
Rice. 5. Problem with the driver... (To open the device manager, go to the Windows control panel and use the search).
2) Go to disk management on Windows ( to go there, in Windows 10 just right-click on START) and check if there is a connected HDD there. If it is, then most likely for it to become visible - it needs to change the letter and format it. By the way, I have a separate article on this subject: (I recommend reading it).
Rice. 6. Disk management. Even those drives that are not visible in Explorer and “My Computer” are visible here.
The time has come when one hard drive in a computer is no longer enough. More and more users decide to connect a second HDD to their PC, but not everyone knows how to do it correctly themselves to avoid mistakes. In fact, the procedure for adding a second disk is simple and does not require special skills. It is not even necessary to mount a hard drive - it can be connected as an external device if there is a free USB port.
Options for connecting a second hard drive are as simple as possible:
- Connecting the HDD to the computer system unit.
Suitable for owners of regular desktop PCs who do not want to have external connected devices. - Connecting a hard drive as an external drive.
The easiest way to connect a HDD, and the only one possible for a laptop owner.
Option 1. Installation in the system unit
HDD type determination
Before connecting, you need to determine the type of interface the hard drive works with - SATA or IDE. Almost all modern computers are equipped with a SATA interface, so it is best if the hard drive is of the same type. The IDE bus is considered obsolete and may simply not be present on the motherboard. Therefore, connecting such a drive may cause some difficulties.
The easiest way to recognize the standard is by contacts. This is what they look like on SATA drives:

And this is how the IDE does it:

Connecting a second SATA drive in the system unit
The process of connecting a disk is very easy and takes place in several stages:

Boot priority for SATA drives
The motherboard usually has 4 connectors for connecting SATA drives. They are designated as SATA0 - the first, SATA1 - the second, etc. The priority of the hard drive is directly related to the numbering of the connector. If you need to manually set the priority, you will need to go into the BIOS. Depending on the BIOS type, the interface and controls will be different.
In older versions, go to the section Advanced BIOS Features and work with the parameters First Boot Device And Second Boot Device. In new BIOS versions, look for the section Boot or Boot Sequence and parameter 1st/2nd Boot Priority.
Connecting a second IDE drive
In rare cases, there is a need to install a disk with an outdated IDE interface. In this case, the connection process will be slightly different.

Connecting a second IDE drive to the first SATA drive
When you need to connect an IDE drive to an already working SATA HDD, use a special IDE-SATA adapter.

The connection diagram is as follows:
- The jumper on the adapter is set to Master mode.
- The IDE plug connects to the hard drive itself.
- The red SATA cable is connected on one side to the adapter, and the other to the motherboard.
- The power cable is connected on one side to the adapter, and on the other to the power supply.
You may need to purchase a 4-pin to SATA adapter.
Initializing the disk in the OS
In both cases, after connecting, the system may not see the connected disk. This does not mean that you did something wrong; on the contrary, it is normal when the new HDD is not visible in the system. The hard drive must be initialized before it can be used. Read about how this is done in our other article.
Option 2. Connecting an external hard drive
Often users choose to connect an external HDD. This is much simpler and more convenient if some files stored on the disk are sometimes needed outside the home. And in the situation with laptops, this method will be especially relevant, since there is no separate slot for a second HDD.
An external hard drive is connected via USB in exactly the same way as another device with the same interface (flash drive, mouse, keyboard).
A hard drive designed for installation in the system unit can also be connected via USB. To do this, you need to use either an adapter/adapter or a special external case for the hard drive. The essence of the operation of such devices is similar - the required voltage is supplied to the HDD through the adapter, and the connection to the PC is made via USB. Hard drives of different form factors have their own cables, so when purchasing you should always pay attention to the standard that specifies the overall dimensions of your HDD.


If you decide to connect the drive using the second method, then literally follow 2 rules: do not neglect the safe removal of the device and do not disconnect the drive while working with the PC to avoid errors.
We talked about ways to connect a second hard drive to a computer or laptop. As you can see, there is nothing complicated in this procedure and it is absolutely not necessary to use the services of computer specialists.


