Cannot connect to remote computer security. An authentication error occurred. The specified function is not supported
Modern technologies allow you to remotely control your computer; you just need to establish a connection with it using the required protocol. Sometimes it happens that you cannot connect to a remote computer. Here's how to solve this problem.
Causes of the problem
The remote computer connection error started in 2014. Then a Windows update codenamed KB2992611 was released, tightening the OS security settings.
Sometimes the problem is associated with installed third-party data encryption programs such as CryptoPRO and VipNet. In this case, you should try connecting without using them.
The logs recording the error record the following text:

Solution options
The problem is eliminated based on the reasons that caused it.
Update fix
You must download a separate version of the KB2992611 package and install it manually on the computer you want to connect to.

After that, run and install the update.
Changing the encryption level
Not the safest way to configure the system, but as a temporary solution it is quite suitable.

After this, try connecting again.
Using TeamViewer
Sometimes using an alternative application can fix the problem. The most common remote administration program is TeamViewer.
Note! The program must be running on both computers to establish a connection.

After this, you need to confirm the connection on the remote PC.
Advice! TeamViewer can be configured so that the connection occurs without confirming a password.
conclusions
If you cannot connect to a remote computer, you need to reinstall Windows update package KB2992611 from the official website, lower the system encryption level, or disable third-party programs with this functionality.
Good afternoon, dear readers and guests of the blog, today I encountered the following situation: when I tried to connect to a terminal server on Windows Server 2008 R2, I received the error " Can't connect to a remote computer. Try connecting again. If the problem persists, contact the owner of the remote computer." After entering your login and password, which indicates at least that the port is accessible, let's see how we can solve this problem and restore access.
Causes of the "Try to connect again" error
Last time we defeated the blue screen error dpc watchdog violation, we will defeat this one too, but first you need to understand the reason for all this action. This is what the problem looks like:

As I wrote above, it appears after entering the correct login and password.
- This whole rigmarole began back in 2014, after updates KB2992611 and subsequent ones. At the time of installation of these updates, the level of security and encryption was tightened.
- The second possible reason is the presence of CryptoPro or VipNet programs, I had exactly the second option
- Other third party encryption software.
If you look at the Windows logs, you can find the following system warnings:
- The following fatal warning occurred: 36888. Internal error status: 1250

- The X.224 RDP component detected an error in the protocol stream and disabled this client.

How to solve an error with an RDP connection
There are several methods to solve the error "Cannot connect to the remote computer. Try connecting again. If the problem persists, contact the owner of the remote computer." what you should do:
- Remove required Windows updates
- Removing or updating "Crypto PRO" and VipNet
- Installing additional updates
Removing or updating software
I start with this method, since it is the most correct both from the point of convenience and from the point of safety. If you don’t need this software, then I advise you to remove it and clean the system of garbage, but if the programs are needed, then consider updating them to fresh versions that no longer have such problems. In my case, this could not be done, since I needed the old version of VipNet.
Uninstalling update KB2992611
The next method I will recommend is installing new updates that solve this, I can recommend KB3018238 (it now comes with KB2992611) and KB3011780, as time goes on, these updates may overlap with newer ones, so keep an eye on them on the official Microsoft website. If KB2992611 is installed, then try to remove it, check connectivity and install it again.
Download KB2992611 https://www.microsoft.com/ru-ru/download/details.aspx?id=44618
Download KB3011780 https://www.microsoft.com/ru-ru/download/details.aspx?id=44966

Download and update, this is similar to the steps described in the problem where Windows 7 does not find updates, we also installed standalone versions.
Reduced encryption level requirements
Not the most correct solution, as it reduces the level of protection and encryption of traffic, but it can be a lifesaver in some situations. In the terminal server settings, lower the "security/encryption level" level. To do this, go to "Start > Administrative Tools > Remote Desktop > Remote Desktop Session Host Configuration", select "Settings for server", then the "General" tab and two items:
- Security Level > RDP Security Level
- Encryption level > Low

Now everyone, reconnect and try to log in via RDP again, the error should disappear, but look for an opportunity to update.
In this article, we will look at basic techniques for diagnosing a problem with an RDP connection to a remote desktop. For example, when trying to establish a connection to the desktop of a remote server using the standard client mstsc.exe (Remote Desktop Connection), the line “Initializing a remote connection...” appears, and then the user receives the error:
Remote Desktop could not find computer %PCName%." This may mean that %PCName% does not belong to the specified network. Check the name and domain of the computer you are connecting to.
Remote Desktop Can’t Find the computer %PCName%. This might mean that %PCName% does not belong to the specified network. Verify the computer name and domain that you are trying to connect to.
In most cases, this error indicates that there are problems with your DNS server, due to which your computer cannot resolve the specified name.
First of all, make sure that you have correctly specified the name of the remote RDP host in the RDP client in the Computer field.
Try connecting to the RDP server using an IP address instead of a DNS name.
Then try to see if your DNS server knows the FQDN name of the RDP server you are connecting to (%rdpserver%). Open a command prompt with administrator rights and run the command:
Nslookup rdpserver
Make sure the command returns the server's IP address, for example:
Address: 192.168.22.21

If the command returned an incorrect entry, try resetting the DNS cache on the client (ipconfig /flushdns) and resolving the name of your RDP server using again.
If the Nslookup command still returns an incorrect entry, open the hosts file with the command:
Notepad C:\Windows\System32\drivers\etc\hosts
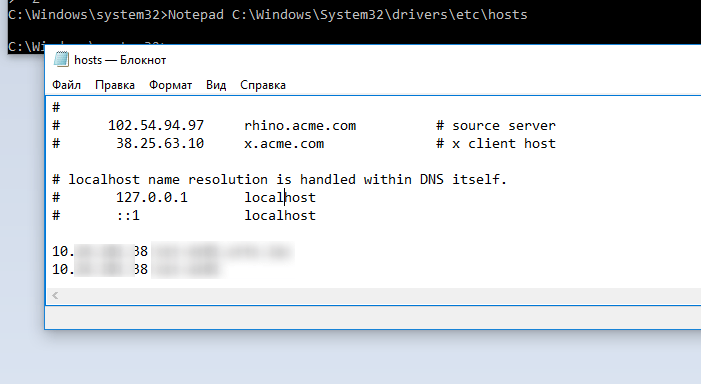
If the file does not contain static records for your RDP server (this is generally correct), you can try adding them manually (this way you can bypass the incorrect records that your DNS server returns). You need to add a format line:
192.168.22.21 rdpserver.site
If the problem is resolved, your DNS server is to blame; you need to check the records on it, or report the problem to the DNS administrator.
Check the availability of the RDP server using the ping command:
ping rdpserver.site
Then you should check that RDP port 3389 is accessible from the client to the server (this is the default port for RDP connections). The easiest way to check port availability is with the PowerShell command:
Test-NetConnection rdpserver -port 3389

If the Test-NetConnection command returned TcpTestSucceeded: False, this means that the RDP service on the remote computer is not enabled, or the connection is blocked by a firewall on the client side, server side, or on firewalls or routers between them.
A few tips to check if you are unable to connect to a remote RDP host:
- Try updating the version of your RDP client (this is especially true if you are using Windows XP, Windows 7 or 8.1).
- Try using an alternative rdp client - Remote Desktop Manager.
- Temporarily disable the antivirus and firewall on the client and server sides and check the RDP connection.
- In the event that you are connecting from a Windows XP client, and the NLA (Network Level Authentication) function is enabled on the server side - network level authentication), then on the XP client side you can enable NLA support only through the registry.
- Remote RDP connection is not possible if the user account under which you are connecting does not have a password.
If the error “Remote Desktop could not find the computer” occurs when making a remote RDP connection from the RD Web Access page, try manually specifying the correct RD Gateway server address in the RDP connection settings (connection via RDWebAccess is performed not through the standard port 3389, but through port 443 HTTPS) and try to connect. If the connection is established successfully, then your RDWebAccess server is not configured correctly. 
To fix the problem, open the IIS console on the RD Web Access server. Go to section Sites –> Default Web Site -> RDWeb -> Pages. Open section Application Settings and in the parameter specify the external DNS name of your RD Gateway server, under which it should be accessible to external clients. 
Imagine a situation where you are on a business trip or on vacation and just at this time you need to watch or do something on your home computer. For ordinary users, such a need arises infrequently, which cannot be said about IT industry workers, businessmen and managers. When creating Windows, Microsoft developers foresaw this, so they built into the system such a feature as remote desktop control.
Windows 7/10 Remote Desktop, or RDP, is a feature that allows you to control one computer from another via a local or global network. To be honest, its implementation in Windows is somewhat lame, so special programs like TeamViewer, AeroAdmin or Ammyy Admin are more often used for remote access.
The disadvantage of third-party tools is the requirement to confirm access on the side of the remote host, however, TeamViewer also has the ability to connect without confirmation. Other disadvantages of such software include slower operating speed than when using the standard RDP function, and limitation of simultaneous parallel access to the remote computer. Third-party programs can be very convenient when it comes to remote maintenance and support, while Windows 7/10's built-in remote desktop access is more suitable for everyday work.
Setting up a remote desktop using Windows
For computers to communicate, they must be configured correctly. Technically, the task does not seem too difficult, although there are some nuances here, especially in the case of control via the Internet. So, let's see how to set up a remote desktop using system tools. Firstly, the PC that will be accessed must have at least a Pro version of Windows installed, but you can also manage it from the home version. The second and very important condition is the need to have a static IP address on the remote PC.
Of course, you can try to configure it manually, but there is a problem. The fact is that the internal IP is given to the PC by the DHCP server of the Internet center for a certain period, after which the computer will need to request a new IP. It may be the same, but it may also change, then you will not be able to use the RDP protocol. This happens with gray, dynamic addresses, and, I must say, these are the addresses that most providers allocate to their clients. Therefore, the most correct thing would be to contact your provider’s support service with a request to allocate a static address to your computer.
If we don’t want to pay for a white IP (the service is provided for an additional fee), we try to configure the connection manually. Team control /name Microsoft.NetworkAndSharingCenter Open the “Network and Sharing Center”, click on your connection and click the “Details” button in the window that opens.

Make a note of the IPv4, subnet mask, default gateway, and DNS server information.

You can get the same data by running the command in the CMD or PowerShell console ipconfig /all. Close the details window and open properties in the status window.

Select IPv4 from the list, go to its properties and enter the received data in the appropriate fields. Save your settings.


You have a static address, now you need to enable connection access permission. Open with command systempropertiesremote"Remote Access" tab in system properties and turn on the "Allow remote connections to this computer" radio button.

If necessary, add users to whom we want to provide the ability to connect remotely.

In Windows 10 1709, you can access all of these settings from the Remote Desktop subsection of the Settings app.

If you are using a third-party firewall, open TCP port 3389 in it. At this point, the general configuration of the remote desktop is completed.
If the connection is made on a local network, you can start working immediately. Run with command mstsc built-in RDP application, enter the IP address or remote host name in the window that opens, select a user and click “Connect”.


We ignore it, disable connection requests (uncheck the box) and click “Yes”. If the connection is successful, you will see the desktop of the remote host.
Setting up a remote desktop over the Internet is more difficult, since here you will have to forward port 3389 to the IP address of your PC, and then connect to the external IP of the router, which can become a real headache for the user, since you will have to delve into the settings of the router. Finding out your public IP is not difficult, just go to the website 2ip.ua/ru or similar resource.

In case with, you need to go to the section Forwarding – Virtual Servers, click “Add” and enter 3389 in the “Server Port” and “Internal Port” fields, in the “IP Address” field indicate the IP used by the computer, in the “Protocol” and “Status” fields “All” and “Enabled” should be set " respectively. Save your settings.


Now you can try to connect to the remote desktop from the main PC. Run the RDP program with the mstsc command and enter the previously obtained external IP address with the port number separated by a colon in the “Computer” field, for example, 141.105.70.253:3389. Further, everything is exactly the same as in the example with a local network connection.

Ensuring connection security and setting up user access
RDP has fairly good security, however, checking and enabling additional parameters would not hurt. First, make sure encryption is enabled on the remote host. In the Local Group Policy Editor, go to the section Computer Configuration - Administrative Templates - Windows Components - Remote Desktop Services - Remote Desktop Session Host - Security. On the right will be the setting “Require the use of a special security level for remote connections using the RDP method.” Enable this policy and set the security level to Negotiate or High.


In the same section, enable the policies “Require a secure RPC connection” and “Require user authentication for remote connections using network level authentication.”


Paranoid people can enable the maximum level of encryption by going to the section Windows Configuration - Security Settings - Local Policies - Security Settings, finding the “System cryptography: Use FIPS-compliant algorithms...” setting on the right and activating it.


As an additional measure, you can change the default port 3389. To do this, expand the registry branch HKEY_LOCAL_MACHINE/SYSTEM/CurrentControlSet/Control/Terminal Server/WinStations/RDP-Tcp, on the right find the parameter PortNumber and change its value to yours (your port number), not forgetting to then open it in the firewall.

At the stage of providing remote access, check the list of users who can connect via RDP. By default, all users in the Administrators group can connect to a remote desktop in Windows 7/10. You can change this. Using the command secpol.msc go to local security policies, and then go to the section Local Policies - Assigning User Rights. On the right we find the “Allow logon through Remote Desktop Service” policy, open it and delete the “Administrators” entry.


Here you can allow access to a specific admin. There are other ways to ensure RDP security, such as restricting access by IP address.
Common errors when connecting to a remote desktop
Above, we outlined how to connect to a remote desktop in Windows 7/10 via the Internet and local network. Unfortunately, errors that arise in this case are not uncommon. So, at the moment of connection, the system gives a refusal and asks you to repeat the action. The reasons may vary. If everything was configured correctly, the problem may be the use of a VPN or too high security requirements (see encryption above).

On Windows 8.1 and 10 PCs, you may encounter a session disconnected error where the user receives a message that the Remote Desktop CAL has been changed or is missing. In this case, it is recommended to delete the contents of the subdirectory MSLicensing in the registry branch HKEY_LOCAL_MACHINE/Software/Microsoft, and then run the RDP program with administrator rights.

You can try to deal with other licensing errors in a similar way.

Errors with different codes often appear after installing cumulative updates. The problem is resolved by removing the updates, but in general you need to look at the error code and its description. For example, the appearance of error 720 is accompanied by a notification about the possible need to change network settings. There are many problems with RDP and each one must be solved individually.
Registering a computer on the network...
Error: 720: Unable to connect to the remote computer. You may need to change your network connection settings. Click the "Advanced" button or contact the support center for assistance, indicating the error number.
Description of error 720:
Error 720 means that there are no PPP management protocols configured.
Reasons for error 720:
Error 720 Occurs when PPP control protocols are missing, incorrectly configured, or corrupted.
Most users who have encountered error 720 have noticed that error 720 in many cases appears after incorrect removal of the Avast antivirus program! (not confirmed).
Possible solutions:
Method one:
Restoring the operating system to the date (recovery checkpoint) when connection error 720 was not detected in the system. In order to perform a rollback, you need to press the key combination WIN+R and enter in the window that appears rstrui.exe and press Enter.
The operating system recovery program will launch.  Next, follow the prompts, select a date and select a restore point.
 The system will roll back for the specified time and reboot. This method is not always effective and in most cases error 720 appears again. If this method does not help get rid of error 720, proceed to the next step.
Advertising
Attention! The following items require some skill and knowledge of the Windows operating system. If you are not confident in your abilities, ask for help from more experienced users or contact a specialist.
Method two:
This method is to restore the Winsock configuration. To do this, press the key combination WIN+R and in the window that opens, enter cmd and press Enter. In the command prompt window that opens, enter
and press Enter.

After running this command, restart your computer.
Using the netsh winsock reset command may cause some programs that use the Internet or manage network connections to work incorrectly or not start at all. Such programs will need to be restored or reinstalled (in the uninstallers of some programs, in addition to the uninstall option, there is a Repair item).
Method three:
If the first two methods are ineffective, try the following: press the WIN+R key combination and enter the command regedit and press Enter. In the left part of the Registry Editor window that opens, find and delete the following registry keys responsible for Winsock:
- HKEY_LOCAL_MACHINE\System\CurrentControlSet\Services\Winsock
- HKEY_LOCAL_MACHINE\System\CurrentControlSet\Services\Winsock2
Then restart your computer. The operating system will recreate the deleted partitions upon startup.
Reinstall the TCP/IP protocol. To do this, open Control Panel and find in it Network and Sharing Center. In the window that opens, click on the link "LAN connection". In the window that opens, click the button <Свойства> .
Note: On Windows XP, simply open the Network Connections folder. Right-click the network connection and select Properties.
Click the button <Установить> .

Select Protocol and click the button<Добавить>.
Click the Have Disk button. 
Enter C:\Windows\inf\nettcpip.inf and press the button<ОК>.
In the list of protocols, select Internet Protocol (TCP/IP) and click the button<ОК>.

Method four:
If all of the above options do not help, try reinstalling the operating system.
Remember! Incorrect handling of the operating system + your inexperience or negligence = failure of the PC or operating system.


