How to get rid of the message: “You may have purchased a counterfeit copy of the software” in Windows XP
We fix an error that occurs when running the program in MacOS, after installing it. The program does not open and reports an error.
The message comes in two types:
1. The program does not open or is damaged
2. The program “Application_Name.app” failed to open due to corruption. Move the program to the Trash. The program "Application_Name.app" failed to open due to corruption. Move the program to the Trash.
In English the error will look like this:
“. . . ”is damaged and can’t be opened. You should move it to the Trash. |
An error occurs when opening programs or images downloaded via the Internet. Defender Gatekeeper on Mac OS blocks programs it has not verified due to the threat of malware. This was done to protect the user from accidental installation of malware. By default, in the Mac settings, there is no option to enable the installation of any applications:  By default, Gatekeeper on Mac OS allows you to install only trusted programs
However, this does not mean that all programs downloaded over the Internet contain viruses or malicious code. And therefore, sometimes it is necessary to disable Gatekeeper to allow a separate program to run. You can turn it off completely.
Open it and enter the commands. Disable for a specific program:
Disable for all programs:
sudo spctl -- master - disable |
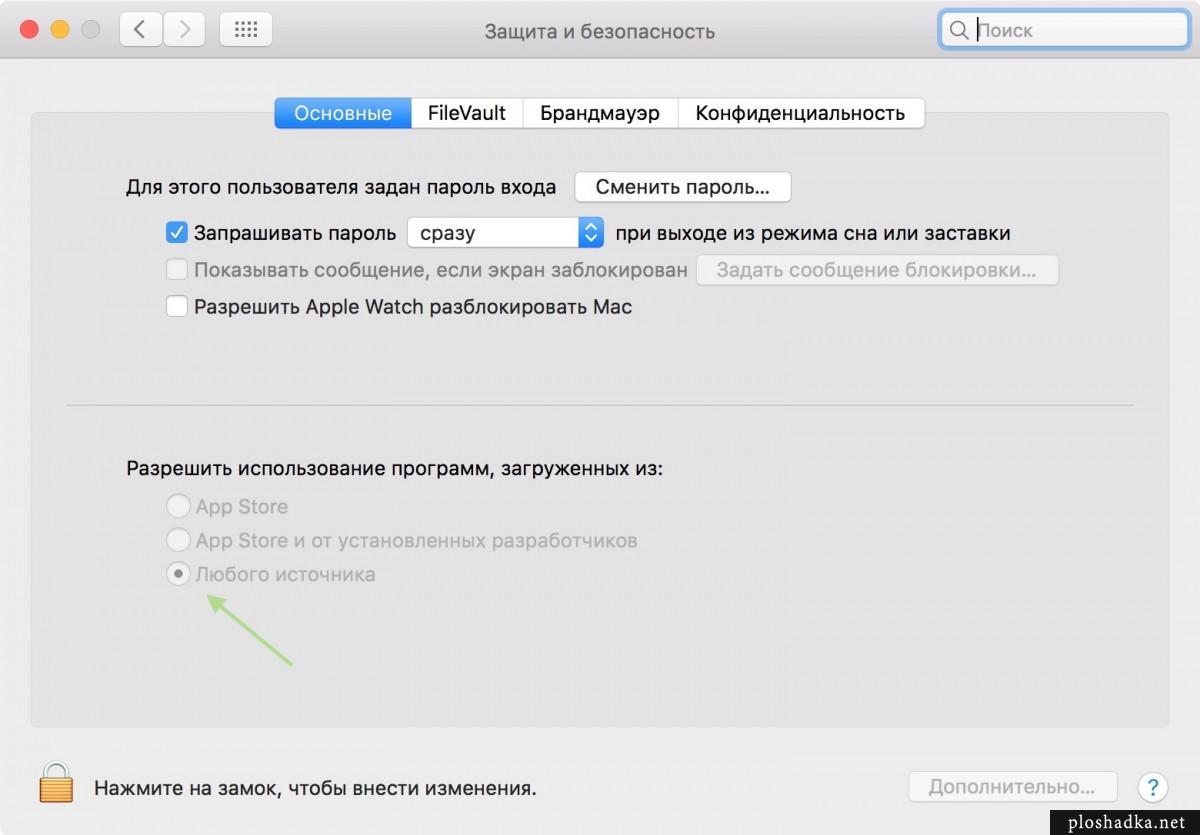 In Mac OS settings, it becomes possible to install programs from “any source”
If you have an unlicensed version of Windows XP installed and its automatic update is configured, then one day, when you turn on your computer, you may see the following message in the lower right corner: “You may have purchased a counterfeit copy of the software. This copy of Windows has not been authenticated."
 This means that along with other updates, an update has been installed for you KB905474. It notifies the user that their copy of Windows XP is not authenticated. And now this message will appear every time you boot your computer.
There are several ways to get rid of the message, but perhaps the easiest is to make small changes to the registry.
Go to “Start” – “Run”. We are recruiting regedit and click “OK”. In the Registry Editor window that appears, follow the following path: HKEY_LOCAL_MACHINE\SOFTWARE\Microsoft\Windows NT\CurrentVersion\Winlogon\Notify\WgaLogon
That's exactly the folder WgaLogon we have to remove (only her). To do this, right-click on it and select “Delete” – “Yes”.
Now restart your computer and the message will disappear.
I also recommend disabling it in Windows after this. automatic update. To do this, right-click on “My Computer” – “Properties” – “Automatic Updates” tab. Here we put a checkmark next to “Disable automatic updates” - click “OK”.  You can also disable the service of the same name. Go to “Start” – “Control Panel” – “Administration” – “Services”. In the list of Windows services that appears, find “Automatic Updates” - double-click on it and in the “General” tab select “Startup Type – Disabled”. Click “Apply” – “OK”.
I'll start with the background. My parents have a home computer and it is a 2012 Mac Mini. We once gave it to them and solved a bunch of problems with it: they stopped complaining about viruses, I no longer had to study Windows manuals in order to solve the next misfortune that befell the Microsoft system. I just did a little training on the basics and said, “Do what you want!”
Everything was fine until complaints about the slow operation of the system began to come in. And they had OS X Yosemite. There is nothing to do - the simplest solution is to install the update. Due to slow Internet (or some other problem), the App Store was interrupting the download of OS X El Capitan. I had to go to the torrent and download the system, and then install it.
But during the installation I encountered the problem “This copy of the program could not be verified... It may have been corrupted or modified during the download process.
After googling a little, I found out that Apple signs not only iOS, but also OS X. Therefore, it prohibits installing older versions of the system. That is, I had the OS X El Capitan 10.11 installer, and the current system version is 10.11.3.
The solution to the problem is ridiculously simple. It is necessary to set any date in the system when the downloaded version was current. For example, October 20, 2015.


After such a simple manipulation, the El Capitan installation was successful.

I don't remember if there were similar problems before or if this check appeared with El Capitan. But for the future, the method is worth remembering.
Good luck to everyone and fewer mistakes!
Free upgrade to OS X Mavericks Available to all owners of modern Macs in the Mac App Store. Let us remind you that users of Mountain Lion, Lion and even Snow Leopard can upgrade to the new system for free.
Why update and how to download OS X Mavericks?
Let's go over the key innovations of OS X Mavericks again:
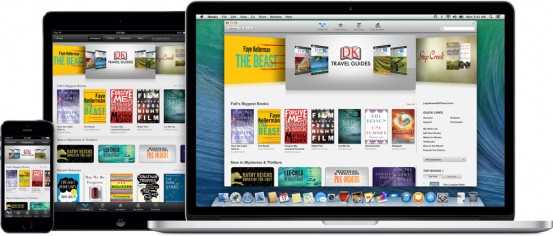
The reader, well known to all iOS users, is now available as a built-in OS X application. The functions are the same - storing your media library, reading on any screen, accessing the iBooks Store catalog of books.
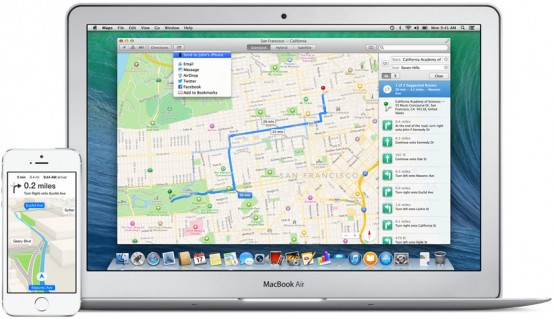
Cards
Although Apple maps are still far from perfect, all competitors can envy their integration with other company services. So, in Mavericks you can not only quickly find the establishment you need or admire Flyover panoramas, but also design any route on your Mac screen, and then instantly send it to your iPhone or iPad to start your trip.

Safari 7 + iCloud Keychain
The new version of Safari has become even faster and easier to use. In the sidebar, you can see links that are being shared by those you follow on Twitter and LinkedIn.

Safari now has built-in synchronization of logins and passwords between all devices. Mavericks will prompt you to create complex passwords, immediately remembering them and storing them encrypted in the cloud. They will instantly become available on other Macs, as well as on iPhone, iPod touch and iPad with iOS 7.0.3 on board. All your passwords are now securely synchronized between any Apple equipment, and this is extremely convenient.

Improved notifications
OS X Mavericks makes it nearly impossible to miss an important notification. When you return to your computer, right on the login screen you will see all the notifications that arrived while you were away. For messages in mail, iMessage, FaceTime, etc. You can respond directly to notification center pop-up banners. Websites you're interested in can now also send you notifications about new content.
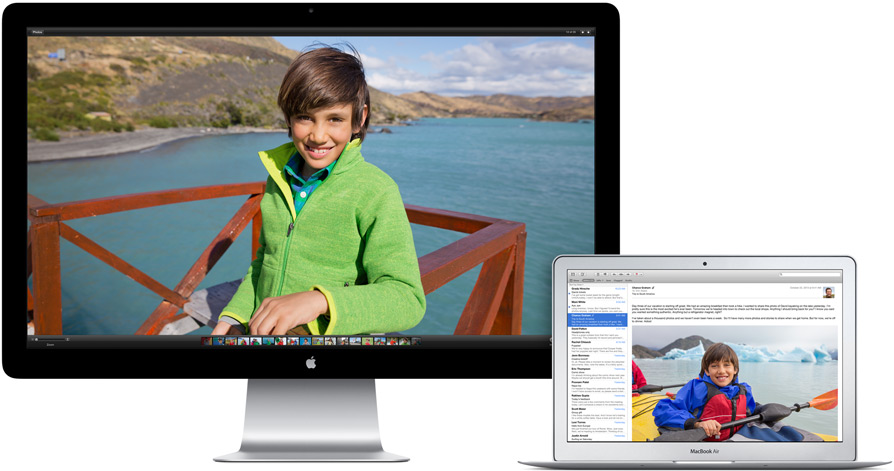
Full support for multiple displays
Each display now has its own menu bar. You can access the dock from any display. Any full-screen application can be placed entirely on a separate display. You can control the content of each display using Mission Control. Finally, now even your TV connected to Apple TV can be a full-fledged external display.

Tags
The concept of multi-colored labels has been further developed in OS X Mavericks. Now these are full-fledged tags: you can create as many of them as you want and tag any documents with them. Tags are even available for documents in iCloud. Finding the file you need will now be even easier.

Energy efficiency and productivity
Due to deep optimization of the load on the processor and memory, Mavericks not only runs noticeably faster, but also consumes less energy. The battery life of Apple laptops during energy-intensive tasks will increase by about 1-1.5 hours. Apps you can't see will be forced to sleep, reducing your computer's energy consumption. Safari will be able to disable resource-intensive plugins until you need them. iTunes will consume 35% less energy than before.
Where can I download OS X Mavericks?
Mavericks can be installed on top of Snow Leopard (10.6), Lion (10.7) and Mountain Lion (10.8). Before updating, make a backup via Time Machine, then go to the Mac App Store, download the installer and agree to the system update. Here is the download link.
Note for Creative Cloud subscribers:
Creative Cloud does not use serial numbers - instead, users sign in using an Adobe ID.
1. Get your serial number
Each Adobe Creative Suite product you purchase has a serial number. Use the serial number to verify your rights to use the Adobe Creative Suite product. The serial number is located in the following locations:
- Retail DVD: The serial number is on the back of the DVD case.
- Retail electronic copy: The serial number is emailed to you on your Adobe Store receipt. The Adobe Store sends a receipt to the email address you used as your Adobe ID when purchasing the product. Additionally, retail customers can obtain a serial number through their Adobe.com account. When you download any product purchased from an online store, a serial number is automatically registered in your account.
- Registered serial numbers: If you registered your serial number using an Adobe ID, that serial number is associated with your adobe.com account and Adobe ID.
- Educational versions: Teachers and students can obtain a serial number from the Adobe Educational website. For more information about obtaining serial numbers for educational versions of products, visit the following websites:
- Corporate license: The serial number is located on your license certificate for Adobe Open Options or Adobe Volume Licensing. In some cases, you may need to contact your local Adobe reseller or IT department to obtain this information. The serial number is also listed on the Licensing Website (LWS). If you lose your certificate, you can log into your account and obtain a serial number for your order. ( Note. To view serial numbers on your order, you must be listed as the contact person for this account ID.)
Vawow! Once you purchase Adobe Volume License software, you must download it from the Licensing Website (LWS). You can also install the software using the CD or DVD included with your enterprise order. If your serial number does not work, you may be trying to use it to activate a retail or trial version of the product. - Seller/Reseller (OEM): The original equipment manufacturer provides the serial number. OEM products come bundled with hardware or other software. (For example, in some cases you may be able to purchase a computer with an Adobe product already installed.) Contact the company that created the package.
2. Enter the serial number for the Creative Suite product you are installing.
The title bar displays the name of the product being installed. The following information may help you enter the serial number correctly.
- The installation program varies depending on the product. A separate installer is created for each Adobe Creative Suite product. For example, the Photoshop serial number will not work for installing other products.
- The installer varies depending on the platform. The Windows version serial number will not work on the Mac OS version.
- Serial numbers are numbers. Do not enter alphabetic characters.
- You do not need to type hyphens when entering your serial number. (If you accidentally entered hyphens when entering your serial number during installation and startup, it will be accepted.)
- The installer runs on one platform only (Mac OS, Windows) and supports all of the following options. (The installer works for software in all languages.)
- All languages
- Serial number of the complete product or update
- Retail, educational, enterprise license, or purchased from a reseller (not directly from Adobe)
- trial version
3. (Start) Reinstall the product with the serial number.
Using the installer, you can install a trial version of the product or a version with a serial number. When installing the trial version, specify the installation language.
- If your serial number is for a product in a different language, you receive this error message.
- The following programs, which have versions in different languages, install packages for two languages. Each line represents a new language group. You can serialize from each language in the package. The invalid serial number error does not appear when a product is installed in one language and serialized in the next.
- en_US (English)\en_GB (International English)
- fr_FR (French)\fr_CA (Canadian French)
- es_ES (Spanish)\es_MX (Latin American Spanish)
Reinstall the product and enter the serial number when prompted.


