How to clear Samsung Android memory. What is cache? How to clean up your Android device: cache, history and junk files
In modern smartphones, the average amount of permanent memory (ROM) is about 16 GB, but there are also models with a capacity of only 8 GB or 256 GB. But regardless of the device you use, you notice that over time the memory begins to run out, as it fills up with all sorts of junk. Is it possible to clean it?
Initially, out of the indicated 16 GB of ROM, you will have only 11-13 GB free, since the operating system itself takes up some space, plus, it can be supplied with specialized applications from the manufacturer. Some of the latter can be removed without causing much harm to the phone.
With time of using a smartphone, the memory quickly begins to “melt”. Here are the main sources that absorb it:
- Applications you have downloaded. After purchasing and turning on your smartphone, you will probably download several applications from or third-party sources. However, many applications do not take up as much space as they might seem at first glance;
- Photos, videos and audio recordings taken or uploaded. The percentage of fullness of the device’s permanent memory depends in this case on how much media content you download/produce using your smartphone;
- Application data. The apps themselves may weigh little, but over time they accumulate various data (most of it important for operation), increasing their share of the device's memory. For example, you downloaded a browser that initially weighed 1 MB, and two months later it began to weigh about 20 MB;
- Various system junk. It accumulates in approximately the same way as in Windows. The more you use the OS, the more junk and broken files begin to clog the device’s memory;
- Residual data after downloading content from the Internet or transmitting it via Bluetooth. Can be classified as a type of junk file;
- Old versions of applications. When updating an application in the Play Market, Android creates a backup copy of its old version so that you can rollback it.
Method 1: Transfer data to SD card
SD cards can significantly expand the memory of your device. Now you can find small copies (about the size of a mini-SIM), but with a capacity of 64 GB. Most often they store media content and documents. It is not recommended to transfer applications (especially system ones) to the SD card.
This method is not suitable for those users whose smartphone does not support SD cards or artificial memory expansion. If you are one of them, then use these instructions to transfer data from the permanent memory of your smartphone to an SD card:

If you do not have the opportunity to use an SD card, then you can use various cloud Internet storages as an analogue. It’s easier to work with them, and on top of that, they provide a certain amount of memory for free (about 10 GB on average), but you will need to pay for an SD card. However, they have a significant drawback - you can work with files that are saved in the cloud only if the device is connected to the Internet.
If you want all the photos, audio and video recordings you take to be saved directly to the SD card, then you need to do the following manipulations in the device settings:
- Go to "Settings".
- There select the item "Memory".
- Find and click on "Default memory". From the list that appears, select the SD card currently inserted into the device.
Method 2: Disable automatic Play Market updates
Most apps downloaded on Android can be updated in the background via Wi-Fi. Not only can new versions weigh more than old ones, but older versions are also saved on the device in case of failures. If you disable automatic application updates through the Play Market, you will be able to update only those applications that you consider necessary yourself.
You can disable automatic updates in the Play Market by following these instructions:

However, some applications from the Play Market can bypass this blocking if the update is very significant (according to the developers). To completely disable any updates, you will have to go into the settings of the OS itself. The instructions look like this:

You should not trust third-party applications that promise to disable all updates on Android, as at best they will simply perform the setup described above, and at worst they can harm your device.
By disabling automatic updates, you can not only save memory on your device, but also Internet traffic.
Method 3: Cleaning up system junk
Since Android produces various system garbage, which over time greatly clutters up the memory, it needs to be cleaned regularly. Fortunately, there are special applications for this, and some smartphone manufacturers make a special add-on to the operating system that allows you to delete junk files directly from the system.
Let's first consider how to clean the system if your manufacturer has already made the necessary add-on to the system (relevant for Xiaomi devices). Instructions:

If you do not have a specialized add-on for cleaning your smartphone from various debris, then as an analogue you can download a cleaner application from the Play Market. The instructions will be discussed using the example of the mobile version of CCleaner:

Unfortunately, not all applications for cleaning junk files on Android can boast of being highly effective, since most of them only pretend to delete something.
Method 4: Factory reset
It is used extremely rarely and only in emergency situations, as it entails the complete removal of all user data on the device (only standard applications remain). If you decide to use this method, it is recommended to transfer all the necessary data to another device or to the cloud.
Freeing up some space on your phone's internal storage isn't that hard. As a last resort, you can use either SD cards or cloud services.
The speed of a phone or tablet directly depends on how full its memory is. In this case, we are talking about all its types. And if you clean the memory in a timely and correct manner, your Android OS-based device will work much faster and more stable.
Different types of Android device memory
Every Android device uses several types of memory for different purposes. It is important to be able to distinguish between them in order to understand what is at stake when cleaning memory and optimizing the device. The following types of memory are distinguished:
- The device's random access memory (RAM - Random Access Memory) is used to store temporary files of those applications and programs that are currently running. The stability and speed of the device depends on it. If there is insufficient RAM, bugs and other failures appear. And this drawback occurs either when too many applications are launched, or when temporary files are poorly “unloaded” from RAM;
- permanent device memory (ROM - Read Only Memory) - contains the system files of the device, including operating system files. It differs from others in that it always stores files, even if the phone or tablet is turned off. However, they cannot be deleted or changed without the use of special programs. And you shouldn’t do this, because changing the permanent memory can damage the device. In a normal situation, ROM cannot be changed, and as a result, you are not in danger of filling it;
- The internal memory of the device (Internal Phone Storage) - can be used to store any information. This is where applications are installed, messages and photos are saved. The information in this memory can be permanently erased or overwritten. Its cloggedness does not have a serious impact on performance, but it still needs to be cleaned from time to time, since many installed applications that are not used can still consume device resources in the background;
- external memory of the device - this includes various memory cards. They can add some amount of storage to your device, and you, in turn, can transfer installed applications and files to them. Thus, they are used to free up internal memory and expand the possible storage capacity for files.
Show free memory on Android device
To find out whether you need to clear the memory on your device, you need to see how much of it is currently occupied. RAM can be viewed as follows:
It is also not difficult to find out permanent memory:

Clearing Android Device Memory
It is simply necessary to clear your memory from time to time. This contributes to stable operation of the device and increased productivity. And there are different methods for cleaning.
Cleaning device memory using built-in features
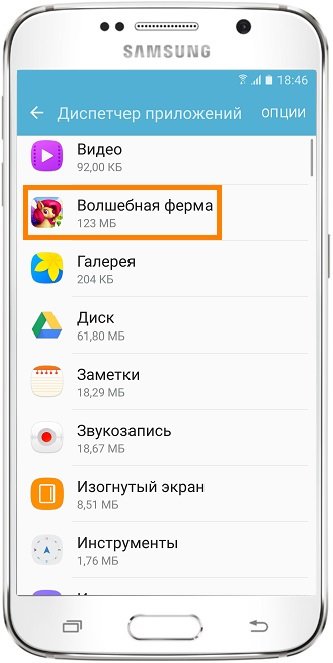
You can also clear the device memory using standard means, for example, through the “Application Manager”:
- Open your device settings. Find “Application Manager” in them.
 Open Application Manager in Settings
 - On some devices this item will simply be called “Applications”.
 Sometimes the section may simply be called “Applications”
 - In the list of applications installed on your device, select the one you do not use and want to remove. Click on it.
 Select the app to uninstall from Application Manager
 - Before uninstalling, clear app data from your device. To do this, go to the “Memory” item.
 Go to "Memory" to clear application data
 - Clear application data. This will free up space from settings files and saved application data. If you do not do this or there is no such option, the application can still be deleted. Return to the previous menu.
 Click "Clear data" under "Storage"
 - Remove the application itself by clicking on the corresponding button.
 Click the "Delete" button to remove the application from your device
There are a few things to consider when deleting apps:

Video: Completely clearing the memory of an Android device
Clear Android device memory using a computer
Another way to clear internal or external memory is to connect the device to a computer. In this case, you will have several options for cleaning:
- You can see all the files and folders of the device if you connect the device to your computer as a drive. Using Explorer, delete unnecessary data, such as photos or videos;
- You can perform cleaning with a number of different programs. For example, specify the device drive to be scanned by CCleaner or antivirus systems. This will also help get rid of temporary files or malicious applications on the system;
- You can use special applications for working with Android devices for cleaning. For example, Android Commander. It will allow you to delete not only files, but also applications.
Clearing memory through Explorer
After connecting the device as a drive, you can get confused in the various folders and names. You should be extremely careful, as accidentally deleting system files can damage your device. To free up your device’s internal memory as much as possible in this way, do the following:

USB debugging allows you to prepare the device to work with programs and access files on it. And now you can start deleting the contents of the following folders:
- dsim - stores all the photos taken on the phone. They can take up a lot of space;
- downloads - it contains files of any type downloaded from the Internet;
- movies - by default used to store videos;
- music - as the name implies, it contains music files;
- pictures - images that are downloaded to the device go here;
- media - stores any media files.
Other folders should not be touched. They do not take up much space and can contain the files necessary for the device to operate.
Cleaning Android memory using special programs
Trying to clean the RAM of a phone or tablet manually is ineffective. Yes, you can try to clear the cache or restart the device, but it is better to install special applications for this. In addition, many such programs also help clear internal and external memory.
A very compact application that performs its basic functions well. This application is capable of:

Using this utility to speed up your device is very simple:

Such cleaning is completely safe and does not require any other action from the user.
An application that will take care of the protection and speed of your phone or tablet running the Android OS operating system. It is capable of:

This program has a special mode to speed up games. To use it, do the following:

This application has a number of additional features. They are optional, but may be useful:

To clear memory with this application, do the following:

The application from a well-known antivirus manufacturer has two versions: a lightweight version with reduced functionality and a regular version, where many features are available. It allows the user:

At the same time, the application has a convenient and simple interface, intuitive for every user.
To clear memory using 360 Security, do the following:

Clean effectively with CCleaner app
Most memory cleaning apps are very easy to use. It is enough to learn how to work in one, and there will be no problems with the rest. The CCleaner app for Android OS is great for this. After installing it on your device, do the following:

Almost all cleaning apps work in a similar way, and some will even do it at the touch of a button.
Resetting your phone to factory settings as a cleaning method
There is another method that allows you to clear the device’s memory and significantly speed up its operation. This is resetting your phone or tablet to factory settings.
Resetting your phone to factory settings will delete all files and data on the device. This action will help free up memory as much as possible and may be the only way out in case of errors or serious lack of space on the device.
To reset your device, do the following:

Video: Resetting your phone to factory settings
Increasing device memory
There are several ways to increase the available amount of permanent memory:

It is impossible to increase the amount of RAM inside the device. Replacing the device can help here. Although a good RAM cleaning will allow you to make good use of what you have.
Save memory on your Android device
You won't have to clean out your phone or tablet memory often if you don't clutter it. Here are some simple tips that will make your phone need to clear its memory less often:
- Don't install everything. There are many attractive apps and games, but it's best to think twice about whether you really need them. If you install only what you need, the memory will fill up more slowly;
- Do not store unnecessary files and applications on your device. If you don't play the game, then you can delete it. If you took photos, upload them to your computer. As a last resort, store such things on a large memory card;
- Optimize your device from time to time, even if it is working fine. Clearing temporary and permanent memory at least once a month will save you from problems in the future.
There are many memory cleaning apps available. New ones are released regularly. Such applications are in demand because cleaning the memory of an Android device is a mandatory procedure, which determines the performance of the phone or tablet after long-term use. Try to follow the tips from this article if you want your device’s performance not to degrade due to busy memory and to keep you happy for a long time.
Recently, all kinds of gadgets have become an integral part of the lives of many modern people. Most owners of smartphones and tablets with the Android operating system sooner or later face the problem of lack of memory. In budget models, its volume is, as a rule, no more than four gigabytes, but it should be taken into account that at least a quarter is occupied by the operating system itself.
All modern games, as well as high-quality photographs, music and films, require increasing amounts of available memory. So, at some point the user simply will not be able to install the necessary application or download the necessary data. The lack of free space also negatively affects the speed of the device itself. So, how to free up internal memory on Android? You can move files to external storage and optimize the operation of your smartphone.
What fills the empty space?
When figuring out how to free up the internal memory of an Android phone, you should pay attention to several points. Certain methods may be effective in some cases, but completely inappropriate in others.
Before you free up internal memory on Android, you need to understand where the data filling the device comes from. Here are some of the most common options:
- saving photos, music and videos;
- data used in social media sharing;
- audio from a voice recorder;
- data downloaded via Bluetooth or Wi-Fi;
- applications from the Play Store located in the device memory.
How to prevent files from being saved to the device memory?
To prevent the problem from recurring from time to time in the future, you need to redirect the download of files from the device memory to other media. For example, to a memory card (SD card). To do this, you should change the save path settings in the settings of some applications:
- camera options;
- voice recorder options;
- Browser download space;
- location of cached files from applications;
- regulation of messengers;
- regulation of bootloader programs;
- regulation of GPS navigation maps.

In all of the above settings, the path to a specific folder (or several folders: separately for music, videos, pictures and files) must be specified, which is located on the memory card.
How to move data?
It is better to move files from the device memory to a memory card in similar folders. If there are none, you can create them using any file manager that is downloaded from the Play Store, or by connecting the device to the computer via a cable. Moving to places with similar standard names will avoid unnecessary confusion. Folders usually have the following names:
- Bluetooth;
- DCIM;
- download;
- media;
- movies;
- music;
- video;
- sounds.
Transferring files, as well as creating new folders, can be done in two ways: directly by the functions of the device itself or using a computer. You should not transfer data whose purpose is in doubt. Moving program files can cause device malfunctions, so you should be aware of this before freeing up space on Android's internal memory.
How to transfer files directly to the device?
To transfer pictures, music and videos directly to the device, it is better to use a file manager. The ES conductor is simple and reliable to use. The main function of the manager is to work with folders and files. This file manager is very lightweight, does not take up the already small amount of memory, and is convenient.

To transfer the necessary data, you need to select it with one long press. When choosing the “move” action, click on “SD-card”. The advantage of this file manager is that the menu allows you to immediately create new folders for transferring files.
How to transfer files using a computer?
In order to clear the internal memory of Android using a computer, you need to connect the device to it using a USB cable. To ensure the ability to manage data on a smartphone or tablet, specialized programs and drivers must be installed on the PC. As a rule, such software is installed automatically, but you need to wait a little while the computer determines the type of device and finds the appropriate drivers on the network.

Problems that arise when transferring files using a PC can be easily resolved with the free AirDroid service, which allows you to work with your device from a distance by connecting to a Wi-Fi network. Firstly, this is good because you don’t need to install any additional programs or drivers to recognize your smartphone or tablet. Secondly, this service ensures communication between devices over a distance longer than a cable.
And yet, how to free up system memory on Android via a computer using this method? Everything is very simple here - data management is possible through any browser.
How to move apps to SD card?
How to free up internal memory on Android to unload devices? Let us note right away: this is not an easy task. The reason is that in order to carry out this operation for applications, as a rule, you need to have special rights, namely administrator rights, which will allow you to fully manage all files.

You can obtain administrator status by installing additional software or changing smartphone settings. In the latter case, everything is much simpler. Devices in the settings of which you can set “developer mode” allow you to perform many actions that are not available to ordinary users, for example, installing a fake localization.
If administrator access is already enabled, you should next install the Link2Sd application. It allows you to transfer both additionally installed and standard applications from the device memory to a memory card. But here you need to remember that such actions can lead to malfunctions of the device.
Without administrator rights, you can only move some applications. This action can be performed in the device settings. But the standard method is not very convenient, and if you do not want to change the settings, it is better to download the Android Assistant application.
Android Assistant consists of eighteen tools for versatile work with Android. Directly transferring applications is carried out as follows: open the program, go to the “Tools” section and select “App2Sd”. A list of applications that can be transferred will open.
Also, using this application, you can perform a comprehensive removal, which will help optimize and increase the speed of the device.
How to clean your device from unnecessary debris?
By following the above steps, you can make significant progress in the process of clearing your memory. Once you have set the correct settings, you most likely will not have to do all the steps again from time to time. But you will have to use information on how to free up internal memory on Android by removing garbage often. So, by installing a special application (for example, Clean Master), you can make the cleaning process quick and easy.

The so-called garbage in the device, which occurs through the accumulation of cached data from the Internet, browser history, and applications, is a very common phenomenon. Periodic cleaning allows you to increase the free space on your device and speed up all actions.
If we look at cleaning a device from debris using the example of the most optimal and convenient Clean Master program, then there will be no difficulties in using it. You just need to select the “garbage” option and click “clean”. The application, conducting an in-depth analysis, makes sure to specify which files should not be deleted.
How to store files on the Internet?
To free up internal memory on Android 4.2, you can use so-called cloud storage. They allow you not only to store files, but also to open them using various devices. Having installed an application of this type on a smartphone, to gain access to the data you will only need to register (when you turn it on for the first time), and subsequently enter your username and password.

Constant access to the Internet is also important when working with cloud storage, because the data is stored in “virtual memory”. Among the most successful cloud storages are Google Drive, Mega storage, Yandex.Disk or Dropbox.
How to completely clean the device?
To radically clear the device’s memory, you need to completely delete all data. The action is performed using the “Format” option. As a rule, this item is located in the device settings in the “Backup and data reset” tab. After confirming the user’s intentions and deleting the data, the device will reboot and take on its original appearance, that is, the smartphone will be missing everything that was installed and downloaded after purchase.

In general, the instruction “How to free up memory on Android” includes several steps, some of which are interchangeable. Consistent execution of various types of actions will lead to an increase in free space, which certainly entails optimization of the device.
Some time after the first turn on, too much information accumulates on the phone and there is simply no free space left for new files. Owners of budget Android devices especially often encounter this problem. But not everything is so simple, all phones have several types of memory, and first you need to figure out what each of them is responsible for, and only then clean the gadget of unnecessary files and irrelevant information. What ways are there to clean up or increase storage capacity?
Types of memory on Android devices
Each of the memory departments has its own tasks and characteristics, which we will now look into:
If the internal and external memory becomes completely full, you will no longer be able to place anything on the device. It is also possible that the phone will begin to freeze, slow down and refuse to launch applications.
If the RAM or ROM is completely full, the phone will start to freeze, slow down and stop opening applications. Also, many devices have a function that automatically reboots and disables some applications when the RAM or ROM is heavily loaded.
How to view statistics on the memory load of a smartphone or tablet
First, let's check how much and what kind of memory we have left by following these steps:
 Open settings
 Go to the “Memory” section
 Memory usage information
 Press the "Menu" button to view data about RAM and ROM
 The button at the bottom of the screen contains information about the available and total memory of RAM and ROM
How to clear device memory
Since everyone faces this problem sooner or later, there are several cleaning methods, each of which is used for a specific memory.
Using built-in applications
First of all, let's use what the developers of your smartphone came up with to clear the internal and external memory by following these steps:
 Go to settings
 Go to the “Memory” section
 Click on the “Cache” button
 Confirm cache deletion
 Go to the “Miscellaneous” section
 We mark applications whose files you don’t mind deleting
 Click on the garbage can icon to delete data
Video tutorial: leave what you need, delete what you don’t need - how to properly clear memory in Android
To clear RAM and ROM, follow these steps:
 Hold down the "Menu" button to open the list of running applications
 Click on the broom icon to close all applications at once
 Open the phone settings
 Go to the “Applications” section
 Go to the “Working” section
 Selecting applications that can be stopped
 Click the “Stop” button
 Click on the special icon to go to the list of cached applications
 Stopping unnecessary applications
Video tutorial: clearing RAM on an Android device
Freeing up storage space manually
This method involves transferring files and programs from internal memory to external memory, since usually the phone’s built-in memory is noticeably smaller than that which can be additionally installed using an SD card. You can transfer pictures, videos, e-books and files that are not involved in maintaining the functionality of the phone to external memory. In general, transfer everything that is not related to the operating system.
 Open Explorer
 Go to internal memory
 Select file to transfer
 Click on the scissors icon to cut the file
 Go to the MicroSD section
 Insert the cut file using the “Insert” button
You can also transfer part of the application to external memory by following these steps:
 Open the phone settings
 Go to the “Memory” section
 Check the box next to MIcroSD
 Reboot the device
Using a computer
Don't forget that you can use your computer as an external drive. To transfer files from phone to PC, follow these steps:
 We connect the phone and computer using a USB cable
 Let's go to the contents of the phone
We expand the capabilities of the gadget using cloud technologies
In recent years, such a branch of the Internet as cloud technologies has been actively developing, allowing you to upload a file to the cloud via an Internet connection. It goes like this:
 Install the Yandex.Disk application
 Upload the necessary files to Yandex cloud servers
We work with third-party programs
In the Play Market you can easily find many free programs that help you clean your phone in a couple of clicks. Now we will look at the most popular and practical of them:
Clean Master will free your storage from unnecessary information
Probably one of the most famous applications, and not only in its category, as it has more than 5,000,000 installations. Clean Master offers a complete cleaning of the device from temporary files, cache, damaged and empty folders, browser history and other garbage. Its capabilities also include automatic closing of unnecessary applications and a built-in antivirus. The application has a nice and convenient interface that allows you to clean your device with just two clicks of the “Analysis” and “Clean” buttons. Installation link from Play Market -
 Install the Clean Master application
System monitoring in Android Assistant
Also deservedly located in the top Play Market program (https://play.google.com/store/apps/details?id=com.advancedprocessmanager&hl=ru), which has a very wide list of features:
 Installing the Android Assistant application
Total Commander will help you structure folders and files
This application is designed to organize all the files on the device. Total Commander will allow you to pack and unpack folders with their contents in rar and zip formats. Its capabilities also include editing and transferring the contents of the phone from place to place or to another device. Installation link from Play Market -
 Installing the Total Commander application
How to increase internal memory on Android
If clearing the memory did not solve your problems, then it’s time to think about upgrading your device.
First, get an SD card. At the moment, their cost depends on the amount of memory. That is, an 8 GB card will cost twice as much as a 4 GB card. Try to buy a card with more memory than you currently need, so that you can move it into a new phone in the future without having to buy a new one.
Secondly, install the FolderMount application from the Play Market (https://play.google.com/store/apps/details?id=com.devasque.fmount&hl=ru) and the 360root application, which will give your device root rights (download it can be found on the official website of the developer http://360root.ru).
 Press the button to give the phone root rights
 Open the application
Video: combining folders
Thirdly, let’s figure out how to increase the device’s RAM. This can be done using special programs that create a swap file. For example, Ram Manager.
 Install the RAM Manager Free application
 Give the application root rights
 Select one of the modes
Ram Manager operating modes:
How to avoid cluttering your phone and save system resources
To avoid problems with free device memory in the future, you should follow simple rules:
The performance of the device directly depends on the free space. If the memory is clogged, then you cannot avoid freezes and reduced phone performance. Remember that any computer device requires constant care and protection from viruses. Only if you are careful and careful with your gadget will it serve you for a long time and with high quality, constantly satisfying your needs.
10.08.2017
All owners of gadgets running the Android operating system often face the problem of filling up the internal memory of their device. How to clean it and get rid of problems associated with ROM fullness. Let's figure it out.
All manufacturers of smartphones, tablets and other mobile equipment declare the amount of internal memory in their characteristics. But when purchasing such a gadget, you need to understand that part of this memory will already be occupied by the operating system and system programs. This poses certain problems when downloading the latest episodes of an interesting TV series or the discography of your favorite group to your device. If you don't want to see the inscription " Android internal memory is full", you have to compromise and upload one thing.
This can be avoided if, in addition to your own memory, you purchase a large flash card for your device. But not all modern devices support external drives. What should owners of such devices do, how to clear their phone memory?
There are several solutions to this issue:
- Transfer “heavy” files (pictures, audio and video) to your computer
- Clear memory of unnecessary (“junk”) files
- Transfer files to the cloud
Transfer files to a flash card
But let's start by solving this issue for those devices that support SD cards. Want to know how to move files on Android? Nothing could be simpler. In order not to fill the memory, you can save all possible files to a flash card. To do this, specify this option in the settings:
- Cameras
- Voice recorder
- Browser
- Messengers
- File downloader
This list can be continued for a long time. Particular attention should be paid to applications that work with “heavy” files. For example, image, video or audio editors. When saving files to a memory card, create a folder there (if this is not done automatically) for each application. Then you can avoid problems with your device’s memory being full.
IMPORTANT
This method of clearing device memory cannot be used for system files. This can cause problems with the performance of the gadget and even its failure.
 The easiest way to move files from the device memory to the card is using a file manager. There are a lot of applications in this category in the Play Market. The most popular today is.
Many consider this manager to be the best for Android, and for good reason. With its help, you can simultaneously move several folders and files, it is possible to save apk files of installed applications and much more.
How to move files on Android using ES Explorer:
- To do this, you need to select them (long press on one file),
- call menu ("More" button)
- find the “Move to” item
- in the proposed list you need to select “SDCard”
How to move files on Android using PC
Synchronizing your device with your computer has many benefits. You can share files and keep the amount of free memory at the required level. For example, before going to work, you can “upload” new chapters of an audiobook, music albums or videos. This procedure can be carried out every time you need to update and measure such files.
Connecting your Android smartphone or tablet to your computer is very easy. All you need to do is connect these devices using a USB cable. To do this, you do not need to download any programs or drivers. Modern computer operating systems can easily determine the type of connected device. You can enter its memory using standard conductors.
Today you can use a more modern solution - AirDroid. With it, you can share files with your PC remotely. While outside your home, you can download a music album or movie from your media library and listen to it. No wires are needed for this. All you need is a stable Internet network. To which both the PC and the mobile device must be connected.

Setting up such synchronization using this service is very simple. Thanks to the user-friendly interface of the program, even those who have never had the opportunity to share their files remotely can do this.
How to transfer applications to a memory card
Any application installed from Paly Market by default is installed in the device memory. And it takes up an unreasonably large amount of space. In order to transfer applications from the memory of a smartphone or tablet to a flash card, you must have super administrator rights () and install special software Link2sd.
IMPORTANT
If the procedure for obtaining root rights is incorrect, your device may turn into a “brick”. Therefore, this procedure must be carried out very carefully, monitoring every step. But even properly rooted, it voids the developer’s warranty. Is it worth the risk? Answer you.
Some applications can be transferred from the device memory to the card without special rights and applications. To do this, go to “Settings” and select the “Applications” section. There you can find a sparse set of tools for such a transfer.
There is another way to transfer applications to a memory card - the program Android Assistant. Essentially, this is a whole package of small utilities that will help you carry out all the necessary actions with your Android system.
This application can be found on the Play Market. After you install and run it, you need to go to the “Toolbox” section. Among the lists of provided tools, you need to find “App2Sd”. When you click on this item, a menu will appear. Where you need to select “Application information”, and then “To SD memory card” (if this item is active).
Using Android Assistant, you can batch remove unnecessary applications. And thereby clear the memory of your device.
How to clear internal memory of Android from garbage
A very large amount of the memory of any device is occupied by garbage. In order to keep the amount of free space under control, you need to periodically clean the system of such files. The easiest way to do this is with special software - Clean Master.
By “garbage” we mean the cache of Internet pages, running applications and their remains after uninstallation. Over time, such garbage accumulates and not only causes the internal memory of Android to fill up, but also negatively affects the performance of tablets and smartphones.
Clean Master is a very convenient and multifunctional tool for cleaning Android internal memory from garbage and optimizing the device. To use it, you need to install this application and select the menu item - “Garbage”. Then click on the “Clear” button. The program's algorithms will analyze the memory and find files that can be deleted.
Storing files on cloud services
Thanks to high-speed Internet, today there is no need to download the files you need to smartphones or tablets. They can be uploaded to special services (“clouds”) and used if necessary. Almost all leading companies provide the opportunity to use cloud services for free. And if the space provided by such a tariff is not enough, then it can always be expanded at an additional cost.
The most popular cloud storages are:
- Google Drive
- Yandex.Disk
- OneDrive
- [email protected]
Each of these solutions has an application for easily syncing files with a remote service. It is enough to install such an application (or several), mark the files that need to be placed on the server and, after transferring them, delete them from the device. Then, when you need to use such a file, just go to the application and click on it.


