How to connect Android to your home network and what is required for this. Android and Windows local network - how to connect? Local network android pc
If users think about distributing the Internet via Wi-Fi for their Android phone/tablet first of all, then after a while there is a desire to transfer their files to a computer via the same Wi-Fi. This approach will allow you to get several advantages - quick access to remote media (including playback of audio/video files), and... there is no need to use a Bluetooth or USB cable!
In this guide I will describe how to implement:
1) Connecting a mobile device to the hard drives of a Windows PC;
2) General principles of creating a home local network (LAN).
Connecting an Android device to LAN
So, here's what we need (standard set):
- Mobile device (in my case, an Asus Nexus tablet);
- Android application ES Explorer;
- The computer whose hard drives we will connect to;
- A router to which a computer and an Android device are connected;
It is assumed that your mobile device is already connected to the router via Wi-Fi, since this topic deserves a separate discussion, we will not consider it in this article.

Setting up a local network
Usually, when connecting through a router, there are no problems, everything happens automatically, dynamic IP addresses for devices are issued. But it is important that all your computers are in the same workgroup. How to do it?
Go to “Control Panel > System”, look for the “Computer name, domain name, workgroup name” section and click “Change settings” and “Change” again.
In the "Workgroup" field write "WORKGROUP". Then click “OK” and reboot the PC.

Go to "Control Panel > Network and Internet > Network and Sharing Center" and share the folders.

If for some reason we receive an error about the RPC server being unavailable, then go to “Management (right-click on the “My Computer” icon) > Services and Applications” and start the services:
- Remote procedure call (RPC);
- Server;
- DCOM server process launcher;
We try to detect our PCs in EN Explorer, if unsuccessful again, move on to the next section.
Setting up IP addresses
If it is difficult to connect devices on a local network, it is recommended to register the IP addresses of devices manually. The task is tedious, but not difficult :)
1. On your computer, go to “Control Panel > Network and Internet > change the view to “Large icons” in the upper right corner > Network and Sharing Center > Change adapter settings.”
We select our connection, my laptop is connected to the router via an Ethernet cable (“Local Area Connection”), so I’m setting it up. You can configure “Wireless connection” in the same way.

2. To simplify your task, right-click on the icon of our connection and select “Status”, in the window that opens, click the “Details” button.

We are interested in the current IP address of the computer and the main gateway. We will need them in the next step. Leave this window open for now.
3. Again, right-click on “Local Area Connection” (point 2). Select "Properties" from the list. And go to the properties "Internet Protocol Version IP (TCP/IPv4)".
The simplest solution to connect an Android phone to a computer via WiFi is ES Explorer. The application is free and has a clear interface, but most Android phone owners limit themselves to using it only as a file manager. To open the network capabilities of the program you must:
If the connection is successful, all directories on the computer available for public use will be displayed.
To open files from your phone to your computer via WiFi, it is recommended to use another menu item: “Network -> FTP”. No authentication or selection of additional settings is required. The application will independently create an FTP server on your smartphone, open the required port and provide a ready-made link for connection.

You can view or download files from your phone via WiFi in any browser. It is enough to enter the specified data in its address bar.

If, in addition to viewing files, you need to download from an Android device or upload folders to it, this can be done through standard operating system applications. To do this, just enter the server address that was provided by the program directly into the “Explorer” line. Directories located in the smartphone’s memory will open in the same form as files and folders on the computer itself.

In the search bar, enter es file explorer and press Search:
Select an application from the search results ES Explorer from the developer ES APP Group:
Click Install:
Click Accept:
After downloading and installing the app is complete ES Explorer(or ES File Explorer) click Open:
Settings ES File Explorer
The application has three screens:
- HomePage(HomePage);
- Device;
- Net.
Go to screen Net by swiping to the side and clicking the button in the lower left corner Create:
Select the connection type from the list: LAN:
In the settings window Server please indicate:
- Server IP address;
- Username;
- Password;
- Display name (optional)
and press OK:
To the list called LAN your computer will be added (it can be a laptop, server, network storage, in general, any network device with a storage device).
Using ES File Explorer to access your computer over the network from an Android device
Click on the icon of the newly added network device (see figure above).
If the login and password were specified correctly, you will see a list of network folders.
In our example, we opened the desired network folder with media content under the name Media. Therefore, we go to the network folder Media:
In it we see videos:
And audio recordings in the folder Music:
We check music playback - click directly on the file in the network folder. A window appears asking you to select a player. Check the box Set as default and select your favorite player:
The recording will be played:
You can switch the folder display to a list or table using the button View:
How to copy a file from your computer to your Android device
Long press on the file to turn on selection mode.
Check the files you want to copy from the network drive to your Android device.
Click the button More and select Copy to:
Select the folder on your Android device where you want to copy files from the network folder and click OK:
Create another folder in the folder or just click OK to copy files directly to the current folder:
Files are being copied:
Most of those who own an Android tablet or smartphone for the first time sooner or later wonder: how to connect an Android device to a computer via WiFi?
If you are tired of transferring files from your personal computer to your Android device and back using a flash drive or memory card, or you want to watch movies and listen to music from your PC via WiFi, these couple of methods will help you using well-known programs from the Google Play Store.
To scan your network environment, click the button with the image of a magnifying glass, after which the network scan will begin.
After the scanning is completed, a list of servers (computers) with their network addresses will appear on the screen.
If your computer is not found during scanning, you can add it manually. To do this, go to the menu -> create -> server, and in the window that opens, enter the network address of the computer or folder on it, login, password, server name. If a login and password are not needed, check the “anonymous” box. It is not necessary to enter the server name. If you did not enter a name, the address entered in the first field will be displayed instead in the list of network resources.
We press the OK button, and we see how a new server has appeared in the list of network resources. By tapping on it, we will see its folders and drives to which network access is open.
All. Now you have the ability to copy and open files on a remote computer via a local network.
If you cannot access a computer running Windows 7, try in Control Panel -> Network and Sharing Center -> Advanced sharing options and check the box next to “Turn off password protected sharing”. And make sure that the “Turn on network discovery” and “Turn on file and printer sharing” options are also enabled.
Also, do not forget to enable sharing in the properties of the drive or folder to which you want to give access over the network and set permissions for users, if this option is available.Total Commander, as you know, is a classic two-panel manager, and in order to copy a file over the network, we need to open a folder located on the computer on one panel, and the local tablet folder on the second, and then simply drag the desired file from one panel to the other.
First of all, we need to install the application itself. Total Commander can be downloaded.
After this, you will need to add a plugin to the program to work on the local network. To do this, click on the “Add plugins (Download from website)…” item in the main program window:
After which a window will open asking you to go to the plugin download page:
Click the “OK” button, after which the browser will start and the following page will open in it:
We need to select the second item LAN (Windows network) Plugin and click on the link Download+Install
In the window that opens, select Play Store
The LAN plugin window will open in the Play Store. Click on the “Install” button
After installing the plugin, the LAN icon (Windows shared network directories) will appear on the Total Commander main screen:
Using this item you will navigate to files and folders on your computer. However, first, we need to access it. To do this, click on the above icon and add a new server to the list of computers by clicking on the corresponding icon:
In the window that opens, type:
The name of your computer as you want to see it in the list:
Computer network name or network address, username and password:
You do not need to set a username and password if your computer has network access to folders and directories for all users.
To find out the network address of your computer, click on the WiFi connection icon with the second mouse button and select “Status”, and in the window that opens, click on the “Details” button.
In the IPv4 Address line you will see the network address of your computer.
All. Now you can access your computer's folders and files via your local network via WiFi.
If you cannot access a computer running Windows 7, try in “Control Panel” -> “Network and Sharing Center” -> “Advanced sharing settings” and check the box next to “Turn off password sharing” protection."
Also, make sure that the “Turn on network discovery” and “Turn on file and printer sharing” options are also enabled there.Also, do not forget to enable sharing in the properties of the drive or folder on the computer to which you want to give access over the network and set permissions for users, if this option is available.
I'll probably be right if I say that every second owner of a tablet or phone on the Android operating system has at least once thought about the question - how to connect your mobile gadget to your home local network so that you can download videos and music from your computer or laptop, and in the return post photos and videos taken. Unfortunately, this operating system does not yet have built-in support for the Samba protocol, which runs the network environment in Windows. But as Baron Munchausen used to say: “There are no hopeless situations”! In principle, there is a very simple and quick solution that allows you to connect Android to the Windows local network using the excellent free ES Explorer utility.
True, here you need to clearly understand that in order to implement the idea, the home local network must be organized through a WiFi router (or, at a minimum, there must be a wireless access point), with which the phone or tablet will be connected. It doesn't have a cable connector!
We find it in the Play Market application “ES Explorer”, install and launch it.
In the main menu of the program, select the “Network” section:
Another submenu will open in which you need to select the “LAN” section:
Otherwise, run it manually by clicking on the “Scan” button. The program will detect your computer and show it in the list. In fact, this is an analogue of Network Neighborhood in Windows.
Click on it. If guest access is configured on the PC, then the login will be automatically made with Guest rights. Otherwise, you will be prompted for login and password:
The simplest solution to connect an Android phone to a computer via WiFi is ES Explorer. The application is free and has a clear interface, but most owners...


Let's now configure your Android phone or tablet so that it can access a shared folder on the local network? after which you can quickly exchange files without the need to connect to the Internet. We will configure access using Windows 10 as an example.
This article is suitable for all brands that produce phones on Android 10/9/8/7: Samsung, HTC, Lenovo, LG, Sony, ZTE, Huawei, Meizu, Fly, Alcatel, Xiaomi, Nokia and others. We are not responsible for your actions.
Attention! You can ask your question to a specialist at the end of the article.
Features of connecting Android to a local network
By connecting to a local network, you will have access to Windows 10 network folders on your Android device. For example, to watch a movie you don’t need to download it to your gadget, but it will be played directly from the network. It also makes transferring files between the gadget and computer much easier.
This guide is applicable in a situation where the computer and Android phone are connected to the same Wi-Fi network. The first step is to set up a local network on your computer, even if you are using one computer. Then you should provide access to the necessary folders, for example, with music and videos.
Setting up shared access to a local network folder in Windows 10
To organize data exchange between different devices on the same local network, you need to configure shared access to folders on your computer. To open public access to a folder, perform the following algorithm:
Access rights
Now you need to determine who will have access to the folder and what rights the user will be given. Click on the “Permissions” button, a window will open where in the “Groups or Users” list you need to select “Everyone” and check the “Full Control” box. Now click “Apply” and “OK”.
 Increase
 Adding a group
If the Everyone group is missing, it must be included in the list. Click “Add”, then in the window that appears, in the “Enter the names of the selected objects” section, add “All” (in quotes), then “OK”. Now we proceed according to the algorithm already described.
 Increase
  Increase
 Restriction of user rights
To restrict user rights when working with network resources, for example, prohibit deleting folders and files, you need to use the “Security” section. To do this, select the “Everyone” group and click on the “Advanced” button. In the window that appears, you need to select “All” and click “Change”, then at the top right click on the line “Display additional permissions”.
 Increase
 Disable unnecessary permissions by unchecking the boxes. We confirm the actions by clicking on “OK”.
 Increase
 This completes all the necessary security and access settings.
Login and password
During the first access to a network resource, the system will prompt you to specify a login and password. We simply enter the name of the computer whose disk we are accessing and the password. If there is no password, leave the field blank. Don't forget to check the box next to "Remember credentials".
 Increase
 Troubleshooting possible problems
If the system displays a warning that a network resource is unavailable and “swears” at the settings, you need to check the sharing settings for different network profiles on the computer whose network resource you are accessing.
We go through the chain: “Start” - “Settings” - “Network and Internet” - “Wi-Fi” or “Ethernet” - “Changes advanced sharing settings”. All parameters must be set as in the screenshots below.
 Increase
  Increase
  Increase
 Connecting Android to Windows LAN
In the example, to connect from Android to a local network, we will use the free file manager ES Explorer (ES Explorer). The functionality of the utility has everything you need to gain access to a network folder. Download the file manager from Google Play.
Today we will talk about a seemingly very banal topic, namely the local network.
The local network, LAN(slang. local; English Local Area Network (LAN) is a computer network covering a relatively small area or group of buildings (home, office, company, institute).
Ask: “What is the connection between LAN and smartphones?” Everything is very simple. When I bought my first Android smartphone (HTC Wildfire), I was very interested in how this “smart guy” was able to tightly “communicate” with computers without the help of a synchronization cable, using only the Wi-Fi module.
Having studied it inside and out, I noticed that the firmware was not suitable for a network environment. Only later versions of Android introduced DLNA.
D digital L iving N etwork A lliance is a standard that allows compatible devices to transmit and receive various media content (images, music, videos) over the home network, as well as display it in real time.
But I wanted to transfer not only music, but also documents and other files. And many thanks to the third-party developers who came up with a cool program for Android that helped me turn my wish into reality, “This program combines a file manager with its own archiver, multimedia support and so on and so forth. But her trick lies elsewhere. Using ES Explorer, it is very simple and convenient to share files over the network and with cloud services (Google Drive, Sky Drive, Drop Box, etc.).
So, we will need a computer (OS - Windows, Linux, possibly OS X), a smartphone (Android OS) and a shared Wi-Fi point (router).
Download the application from Google Play (it is free) and install it on your smartphone.

At the top you see three bookmarks. By default there are four of them, but I removed one (FTP) because I don’t use this protocol. Let's talk about the LAN and “Network” bookmarks. Let's start with LAN.
When you click on the bookmark, you see the following picture:

Here I added the computers that I use. To do this, you need to click on the second button from the right (with a plus sign), and then a window will appear in which you will be asked to create a server or scan your network environment. Let me note right away that the scanning process can be lengthy and not always effective. So select the “Server” item.


Here you are asked to specify a domain name (if you have a DNS server), server IP address (for example 192.168.0.100), login and password (if your computer requires it), check the “Anonymous” checkbox (more on that later) and, in fact, enter the name of the connection (the name that will be displayed on your smartphone; it can be anything, for example, “Home computer”).
If you check the Anonymous checkbox, it will look like this:

All you have to do is enter the computer's IP address and connection name, which is enough to exchange documents between your smartphone and PC. Now you need to share folders or drives on your computer.

The smartphone and PC must be on the same Wi-Fi network
Now take your smartphone and go to your computer, select a folder or file, and press the icon.


Now select an action (for example, copy or cut) and go to the PDA tab.

Select the folder where you want to paste the file, and voila, it’s on your phone.
The same can be done with cloud servers. Select the “Network” tab.

We add a server in the same way as we added a computer, only here you will have to enter the credentials of your account in the cloud service.


After adding cloud servers, you can do the same file sharing activities as you would with a PC. You can also exchange directly between the cloud and a PC using a smartphone (without downloading information to it).
If, unlike me, you use an FTP server somewhere, then know that adding and setting up are similar. The only thing is to check the correctness of the port, login and password (if required). It is much more interesting to get through a browser to a smartphone using FTP. To do this, you need to go to the ES Explorer settings.


Select remote access settings (Root rights are not needed).

And we set everything up: select the port (any port is possible, but let it stand as it is) and the root folder (the folder into which the first login will be made). Next, we set up accounts (this is if you want to limit access to your smartphone), then set up the encoding (if the browser shows hieroglyphs), and quickly launch the FTP server (creates a shortcut on the smartphone’s desktop). To get to your smartphone from a computer, you need to type ftp://192.168.0.102:3721 in your browser (just enter the IP address of your phone, it is listed in the “Remote access” section).
P.S. And advice to students. If you have a Wi-Fi network deployed at your university, buy yourself a Wi-Fi adapter. This will greatly simplify the task of copying information.
If you find an error, please highlight a piece of text and click Ctrl+Enter.
Today, smartphones and tablets have become closely integrated into our daily lives. It’s hard to imagine that a few years ago no one knew what Android was, and that there might not be a device running this operating system in every apartment. But in addition to Internet surfing, games and communication on social networks, advanced users use tablets and smartphones to view photos and watch videos. Therefore, we are often asked questions like:
- How to watch a movie on a tablet from a computer over the network;
- How to log into a computer from a smartphone;
- How to access a network folder from a smartphone.
Today we decided to answer these questions. Because thanks to the abundance of applications on Google Play, this problem can be easily solved. Below we will talk about how to access a network folder on a computer from an Android device.
Access from Android to Windows. Settings on the computer side
2 Open access to the desired folder. As an example, we took a typical and simple situation: we place media content on a separate disk and open access from the local network to the entire disk:
Right-click on the desired folder/drive and select Properties:

Go to the tab Access and press the button Advanced setup:

Check the box Share this folder, enter a name for the network folder and click OK:

Access is open. Now click Close to close the folder properties window:

Access from Android to Windows. Settings on the smartphone/tablet side
Installing the application.
Run Play Market:
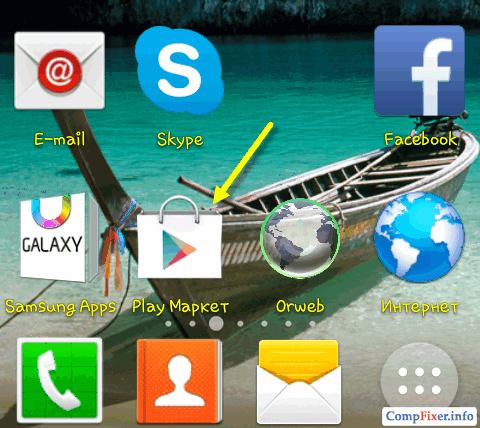
In the search bar, enter es file explorer and press Search:

Select an application from the search results ES Explorer from the developer ES APP Group:

Click Install:

Click Accept:

After downloading and installing the app is complete ES Explorer(or ES File Explorer) click Open:

Settings ES File Explorer
The application has three screens:
- HomePage(HomePage);
- Device;
- Net.
Go to screen Net by swiping to the side and clicking the button in the lower left corner Create:

Select the connection type from the list: LAN:

In the settings window Server please indicate:
- Server IP address;
- Username;
- Password;
- Display name (optional)
and press OK:

To the list called LAN your computer will be added (this can be a laptop, server, network storage, in general, any network device with a storage device).

Using ES File Explorer to access your computer over the network from an Android device
Click on the icon of the newly added network device (see figure above).
If the login and password were specified correctly, you will see a list of network folders.
In our example, we opened the desired network folder with media content under the name Media. Therefore, we go to the network folder Media:

In it we see videos:

And audio recordings in the folder Music:

We check music playback - click directly on the file in the network folder. A window appears asking you to select a player. Check the box Set as default and select your favorite player:

The recording will be played:

You can switch the folder display to a list or table using the button View:

How to copy a file from your computer to your Android device
Long press on the file to turn on selection mode.
Check the files you want to copy from the network drive to your Android device.

Click the button More and select Copy to:

Select the folder on your Android device where you want to copy files from the network folder and click OK:

Create another folder in the folder or just click OK to copy files directly to the current folder:

Files are being copied:


