Types of SIM cards: sizes, trimming. Self-installation of a SIM card in the Samsung Galaxy S8
The SIM slots in each phone are different. In some places there are auxiliary elements for removing the SIM card, but in others it is quite difficult to do this. However, owners of complex smartphones have already learned how to operate them using improvised means.
In the iPhone you will not find the usual SIM card slot, as in Androids. The manufacturer even includes a special paperclip with the kit, a key for opening the slot, which is most often located on the side (iphone 5). However, it may happen that the key is not included in the set. The first generations of Apple phones were produced without such an auxiliary tool at all, for example the iPhone S. Let's look at what a paper clip is for removing a SIM card, and how to remove a SIM card from an iPhone 4 (5.6) and how to insert a SIM card into the phone.
If you use improvised means incorrectly, you can cause serious damage, then the problem will be more serious than just “how to get a SIM card out of an iPhone.” Therefore, before you figure out how to open the slot with a paperclip and how to remove the SIM, try to find a special device that should come with your smartphone. Take out the factory box, perhaps it went unnoticed there when you unpacked the phone.

When you have found the key, follow the following strategy:
- Turn off your device. To do this, you need to press the power button, which is located at the top of the iPhone, and hold it for a while. You will see the message “Turn off” on the display. You need to scroll your finger across the inscription from left to right, and the device will turn off.
- Be sure to turn off the device before removing the SIM. If you do this while it is turned on, over time the phone will begin to glitch and freeze, since you are creating a system malfunction with such an action.
- After completing the work, find the SIM card slot on the side or top (depending on the iPhone generation).
- There is a small hole on the slot. You need to insert a special key into this hole, and the SIM card slot can be easily removed. Ready!

What to do if the SIM card is stuck
It often happens that the SIM card is stuck in the iPhone 6 and the slot does not open all the way. If this happens, do not despair and immediately take the device to a service center. You can solve this problem yourself at home.
So, how can a SIM get stuck? You insert the key, open the slot, try to pull out the slot along with the SIM, but you can’t do it because, for example, it is bent and creates an obstacle. How to remove the SIM card?
We fix problems
To fix problems, you will need a thin but tough plastic sheeting. You can find this one right in the iPhone box (the cords are wrapped in it).
- We take the device out of the box.
- Cut a small piece out of it so that there is an acute angle.
- We push the plate with a sharp angle into the open SIM card tray until it pries off the card.
- We hold the plate and the socket, pull it towards us and take out the tray, we figure out how to install the SIM card ourselves.

We take out the SIM with a paper clip
If the kit still did not include a key. Or you accidentally lost it, don’t be upset. This tool can be quite effectively and safely replaced for the phone with an ordinary paper clip.
To get a card with this stationery item, follow these steps:
- Take a paperclip and straighten one end.
- Locate the SIM slot on your iPhone and the hole next to it.
- Carefully insert the end of the paperclip directly into the hole and apply light pressure. You cannot use brute force, otherwise you can simply break the phone.
- When pressed, the slot opens automatically. Now you can pull it towards you and pull it out, or insert the SIM into the iPhone if the slot was empty. If you are wondering how to insert a nano SIM correctly, then you can simply cut it out from a regular SIM card. In general, almost all sims are now made with threads for micro and nano, that is, there is a frame from which you simply squeeze.

A few items you can use if you don't have a paper clip
You don't have a paper clip at home and you lost your iPhone key? No problem, don’t panic and run to the store for paper clips. You can use other items as an alternative. Here are the most common of them:
- Stapler staple. It can also be found in notebooks or notepads, as manufacturers staple the sheets together with them.
- Needle. An iPhone needle can be dangerous if you are not careful. The main thing is not to use needles that are too thin; there is a risk that they will bend inside the phone and break, leaving one end in the hole. It is most convenient to use a safety pin (a needle with a tip).
- Toothpick. Even though the device is made of wood, it can help you just as well as a paper clip. The main thing is not to break the tip or leave it inside the hole.

Conclusion
This is how you can easily and simply insert a SIM card into your iPhone without a key if you decide to change the SIM, or simply remove the card tray. Using your imagination, you can solve any problems with your smartphone, but do not overdo it to the detriment of the device.
Video instruction
Date: 06/07/2018 Time: 07:39 31256
How to insert a SIM card into a smart watch with GPS directly depends on the specific Smart Baby Watch model. Some manufacturers leave special connectors in the case, others suggest removing the battery, under which the corresponding slot is hidden. We provide general recommendations and instructions for top-end devices.
SIM card size
A smart watch is a small gadget, so there is not much space inside for a SIM card. Telecom operators today produce SIM cards in three sizes:
- Mini-SIM - 2G, 3G
- Micro-SIM - 3G, 4G
- Nano-SIM - 3G, 4G
Of all the sizes available today, you are most likely to use the last two formats - micro and nano. Which SIM card to choose will depend on the watch model.

When purchasing a new SIM card, choosing the right size will not be difficult. On a standard plastic card they are presented in three types. The user can only select the desired one and extrude the template.
If you have an old-style SIM, then you have three options on how to proceed:
- Buying a new card is the simplest and most expedient, besides, in this case you can choose any phone number
- Writing an application to the cellular operator’s office for a replacement and issuing a copy of a new sample is the longest way.
- Cutting your old SIM card to a template is the riskiest way
When a working SIM card of the required size is prepared, you can begin to configure and activate it.
SIM preparation and activation
The functionality of a smart watch is significantly inferior to that of a phone or smartphone, so before inserting a SIM, it is better to configure and prepare it in advance. To do this, select a phone, smartphone or tablet as the first device you will insert it into. Through the phone menu you need to do the following:
- Activate your SIM card by making the first call
- Disable locking and PIN entry on it
- Check your balance and, if necessary, add money to your account
- Choose a suitable tariff
- Set up Internet access by selecting 2G networks (enable data transfer)
Where to insert a SIM card into a children's GPS watch
A prepared, that is, selected by size, configured and activated SIM can be inserted into a children's GPS watch. For this:
- Open the instructions and find a diagram of the clock showing the connectors and slots
- Remove the back cover and remove the battery or open the silicone plug on the device body
- Determine which side and which edge you need to insert the SIM - usually with the beveled corner facing down
- Place the card in the slot
- If necessary, press it with a thin object, such as a needle or toothpick, until you feel a slight click.
- Place the battery back, close the cover or silicone plug
Now, the map is installed, and the children's smart watch with a GPS tracker is ready for use.
How to insert a SIM card into Q80
In Smart Baby Watch Q80, the SIM card slot is located on the side, at the end under a silicone plug, so installing or replacing the card is not difficult. Size – micro.

Insert SIM card into Q50
The Smart Baby Watch Q50 children's smart watch comes with a micro-format SIM card. Installation requires a small Phillips screwdriver and a little patience. The slot is located under the back cover, which is secured with 4 bolts and a battery. To remove or replace a SIM card, you will have to repeat the operation from the beginning. The undoubted advantage is that the child will not accidentally pull out and lose the card.

Installing a SIM card in Q90
In the Smart Baby Watch Q90, the slot is located on the side and is closed with a silicone plug. Installing or replacing SIM will not cause any difficulties. Size – micro.

SIM card slot in Q100
One of the latest models of children's smart watches, Q100, uses another SIM – nano, and for its insertion there is a special slot with a protective cover and quick access. It is located on the back cover of the watch, but you don’t need a screwdriver to open it. It closes tightly until it clicks.

Conclusion
The Smart Baby Watch market today offers a huge number of original models, copies and replicas of gadgets from famous brands. Depending on the manufacturer, the process of installing a SIM card in a children's watch may vary. Didn't find your model in the list? Leave your questions in the comments, and we will add appropriate instructions to the text.
How to use the universal slot to its fullest? Make a combined SIM card with a built-in memory card!
Hybrid slot allowing you to install or 2 SIM, or SIM and flash drive- the scourge of our time. Separate slots are steadily appearing in smartphones in the lower price segment. Most of the popular, noteworthy models force you to get out with flash drives connected via OTG.
Or purchase a device with more memory. The manufacturers' policy is clear - to profit as much as possible by offering a smartphone with an increased amount of internal memory for much more than the cost of the memory itself.
Why is this necessary?

Smartphones with a minimum amount of internal memory usually cost much less than their counterparts with larger storage. Applications and content are perfectly placed on the card, so almost all brands retain the ability to install it (with the exception of some overly “principled” Chinese brands).
Typically, in a “paired” tray, the contacts of the microSD memory card and the second SIM card are in different places. If desired, you can combine- and nothing prevents them from working simultaneously. There are no software restrictions.
For which smartphones can a hybrid SIM+microSD be made?

For almost any smartphone that has a slot design similar to the one shown in the picture above. Yes, the contacts of the flash drive and SIM card are directed in the same direction. However, they use different sets of contacts with different heights to operate.
Some companies deliberately reduce the thickness of the slot, or change the direction of the elements in the tray. In such cases, you first need to turn to specialized communities dedicated to discussing the relevant smartphone.
In addition, it is worth considering that the tray and its slot are not designed for increased thickness of elements. Therefore, problems are observed in certain models with hybrid “microSD+SIM”. Only a thematic forum can provide accurate information.
ATTENTION!
You carry out all the manipulations described below at your own peril and risk. We do not accept any responsibility for any damage you may cause to your device.
The chances of damaging the SIM card are greatest. To a lesser extent - a MicroSD memory card.
Manufacturing instructions
Determining the correct position of elements

First, you will need to determine the correct position of the SIM card in the tray. Cards from different operators may have different contact configurations.
Has the meaning trace the outline, which will fit into the slot - this will make it easier to trim. It is also necessary to estimate the maximum allowable thickness of the SIM card.
SIM manufacturing

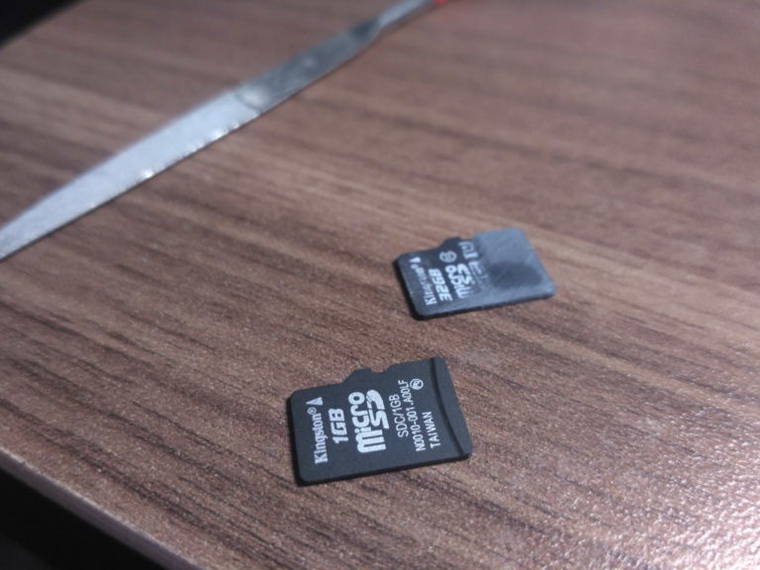
After we have decided on the size, it is necessary separate the SIM card itself (chip) from the plastic base. Two methods are used for this:
1. Heating the SIM card from the plastic side at a temperature of about 200 degrees for 30-60 seconds to 1 minute. In this case, the plastic is separated from the chip using a knife or blade.
2. Chemical dissolution of the plastic substrate using dichloroethane (POISON! Use only in a ventilated area!), acetone or a similar solvent - for example, 646.
The separated chip will require additional processing. First you need to get rid of any remaining glue on the back side using a knife or solvent - carefully so as not to damage the contacts.
Then you will need to carefully trim SIM card contact pad for placement on microSD in accordance with the first point. It will take 1-2 mm on each side.
Connecting SIM and microSD
After preparing the SIM card, you need to check whether there are any interferences during installation on the side of the flash drive itself. In some cases, it is necessary to file off the tubercle on the reverse side using a small (jeweler's) file.
We make sure that the combination fits flush or barely sticks out in the slot;
- glue the elements to each other using superglue based cyanoacrylate(“Moment Superglue Gel”), carefully gluing the SIM card around the edges. 
If necessary, cyanoacrylate is easily destroyed using specialized compounds from the store or nail polish remover without acetone (isopropyl alcohol).
Checking the work

Finally, you need to check that all actions have been performed correctly. If everything is done correctly, then the simultaneous work will look like this: 
If the memory card is not visible, you need to tin the contacts of the memory card with a soldering iron, or stick a strip of electrical tape on the back side to make the contacts a little higher.
Precautionary measures

The thickness of the elements should be minimal. There should be no gaps between the SIM card and the flash drive. Gluing along the edge is required - if the SIM card sticks out at least a little, there is a chance of leaving it in it when you pull out the slot.
It is recommended not to remove the tray after manufacturing and installation. Therefore it is worth taking care microSD card capacity- and don’t skimp on cards with a large capacity. As practice shows, the chance of ruining a SIM card is much greater - it is the one that gets stuck.
In addition, before manufacturing, you should contact the specialized community for information: are there any problems with using hybrid microSD+SIM. Especially when making it for the first time.
Many brands have problematic smartphone models: for example, Meizu M2 Note. “Sandwich” has every chance of breaking the universal slot.
A dream has come true, and you have become the proud owner of an iPhone 4. Having accepted the seller’s congratulations on your successful purchase and the wishes of “Come see us again,” do not rush to leave the store with your purchase packed in a box. Please note that the iPhone 4 and 5 generations have a different SIM card size. Therefore, if you want to immediately purchase a new SIM card, then contact the seller - he will select the required size for you, or cut the existing one. You can cut a SIM card at a mobile phone store, or do it yourself. So, the SIM card is the right size, the question arises: how to insert a SIM card into iPhone 4?
Again, there is an option to pay extra at the salon, and they will install it for you right away, but do you have the opportunity to constantly go to the salon? Or learn to do it yourself, especially since the procedure itself is simple. Let's look at an option on how you can insert a SIM card into your phone without contacting specialists.
Insert SIM card into iPhone
Take the iPhone in your hands, on the right (and you hold the iPhone with the screen facing you, as expected, and do not try to look at it from behind) there is a small hole on the end, for which a special tool is included with the iPhone - instead, however, you can use a regular paper clip. You should not use a needle so as not to damage the latch. Insert the tool or paperclip into the hole and press, but not too hard. After pressing, a tray will slide out - a slot for our SIM card. Let's take him out. Carefully insert the SIM card there, not forgetting that the SIM card is placed face up (this is the side on which the telecom operator is indicated) up, and with the chip down. Then we insert the tray back into the end part of our iPhone. Press down and check that it is inserted all the way.
Turn on the iPhone. After a few seconds, the screen should light up and the network search will begin. If waiting for a minute does not give the desired results, then try going to the settings, select the “Operator” menu and activate the “Automatic” function. After this, the signal level should appear and you can make calls.
Hints
When buying an iPhone, you can contact the seller, who will show you how to insert a SIM card. He will do it quickly and habitually. If you didn’t have time to see all the seller’s manipulations, and you don’t have time to ask for a repeat or it’s inconvenient, then you shouldn’t panic and elevate this little thing into a problem. The video will help you understand this issue step by step. Holding your iPhone in your hands and watching the video, you will see that there is no need to waste time going to a cellular phone store. Or you can easily insert a SIM card yourself and use your new acquisition.
Apple iPhone and iPad are modern, in-demand devices of high quality and functionality. One of the advantages over other gadgets is the possibility of high-tech 3G and 4G communications, which is provided by a SIM card in regular or nano-sim format. In this article we will tell you whether it is possible to make a call on an iPad and how to insert a SIM card into it to use it as a regular smartphone.
It often happens that the long-awaited iPad has been purchased, but no one knows where to insert the SIM card into iPad 2, 3, 4 or mini iPad. Therefore, before choosing a tablet to buy, first decide which card can be installed on it, because not all iPads support the same cellular operator cards.
So, first, let’s decide which Apple tablets have the ability to insert a SIM card. On iPad, iPad 2 and iPad 3rd and 4th generations, a regular standard SIM card or micro-SIM card is suitable. Since iPad 5 generation and in all devices since 2011, including the iPad mini, you can install nano sim.
If you have a standard SIM card and a new generation tablet, then your card can be converted to nano-sim by cutting off the regular SIM card.
In each generation of iPad, the SIM card tray is located differently. For example, the first generation of Apple tablets has a SIM card slot on the left side of the device. Whereas, in the second generation iPad, on the contrary, the slot is on the back side in the upper right corner.
To insert a regular SIM card into an iPad 3 or 4, you need to open the SIM card slot by pressing the special round hole at the end of the tray with the usual end of a paperclip or a standard lot opening tool included in the kit when selling the device. If the direction of the paperclip is correct, the tray should release and protrude slightly. Then you push it out with your fingers and take it out.
Insert your SIM card into the empty slot with the right side, like in a puzzle, so that it does not protrude from either edge, and place the tray with the card evenly and neatly in place, pressing it at the end so that it snaps into place. Then turn on the tablet and check the availability of mobile communication on iPad 3 or 4. If the SIM card is inserted correctly, a communication antenna will appear on the main menu screen in the upper right corner.
How to get a SIM card
You need to remove the SIM card tray in the same way as described above, using a paperclip and preferably with the device turned off. If you have a nano SIM card, then the procedure for opening and closing the tray is exactly the same as described above, just a smaller tray.

What to do if a regular communication card of standard sizes does not suit you and you need to turn it into a nano-SIM in order to insert it into a micro-tray.
For this purpose, you need to cut the card to the size of the nano-SIM by contacting a professional specialist at the service center. Some users are not afraid to cut cards themselves in the following way: they make a special stencil and cut the card according to the stencil with even scissors so as not to touch the metal side and maintain the correct proportions. Then the edges of the card are rubbed with fine-grained sandpaper to prevent burrs. The cut card is inserted into the micro-tray in the same way as a nano-SIM.

There are cases when, in a hurry, users incorrectly insert the card into the tray and close it, and then cannot open this tray with a 3G card in any way, since the SIM card has moved in the tray and is stuck. It makes no sense to get a SIM card using the method described above, since nothing will work. To avoid breaking the tray this time, it is better to take the iPad to a service center, who, using special tools, can easily remove the SIM card without damaging anything.
Some users have learned to remove a stuck SIM card on their own, for which you need to press the hole with a needle as usual when opening the tray so that it comes unfastened, and then carefully and slowly use a needle to straighten the SIM card through a small hole-slit so that it falls into place, and pull it out tray with SIM card in hands.
In principle, inserting a SIM card is as easy as removing it. The only thing you need to be careful is to be careful and not to rush, and if you are using a cut card, then take the trouble to file the edges so that the SIM card can easily fall into the intended slot.


