Installing OpenServer. Local Open Server - installation and configuration, working with WordPress
A few days ago I was once again visited by a thought. The idea was not new and quite intrusive: “let's switch to Windows8. Well please." And since there was no way to drive her away, I stocked up on tea and cookies and got started.
It took no more than two hours to install the system and all the necessary programs, but then the most interesting moment came: I needed to deploy a working environment, namely GIT + local server (Apache, MySQL, PHP, nginx, memcached, mongodb). Remembering the experience of previous installations, this time I decided to document the entire process and save it for posterity.
Disclaimer number one:“I’m not a programmer” (c), but an interface designer and front-end technologist (but in some cases I can help my colleagues and code something like that, and even then they won’t beat me for it)
Disclaimer number two: Yes, I perfectly imagine that in Ubuntu all this is done much faster. But I work on Windows, this is how it historically happened.
So let's get started.
Our work plan includes installation of the following products:
- PuTTY
- Denwer (Apache, MySQL, PHP)
- Nginx
- Memcached
- MongoDB
1. PuTTY
PuTTY- a freely distributed client for various remote access protocols, including SSH, Telnet, rlogin.
PuTTY includes several utilities, but in my work I only need it and Pegeant (an SSH authentication agent that stores keys to git repositories).
Offsite:
If you don't need any SSH, forget about this point and move on.
2.GIT
To work with git I've been using it for years now TortoiseGit, which is stable, flexible and covers all my needs by 146%. In general, I recommend it.
Offsite:
2.1
TortoiseGit requires git for Windows, which can be picked up on Googlecode;
2.2
myself TortoiseGit install from here
3. Denwer
Denver- A gentleman's kit for a Web developer (“D.n.w.r”, read “Denver”) - a project by Dmitry Koterov, a set of distributions (Apache, PHP, MySQL, Perl, etc.) and a software shell used by Web- developers to develop websites on a “home” (local) Windows machine.Offsite:
3.1 Installation
We will need to download basic kit and additional PHP5 modules.Lyrical digression:
no, not just download, but receive download links by email! That is, you will have to enter your email, as well as your first and last name, twice in the form under the large “Registration” heading. “Registration is required due to the future release of Denver 4.” For many years now the form has been apologizing, but I don’t believe it anymore(.
Usually, installing Denver is quick and painless, but on Windows8 I was attacked by an error that complained about a missing library msvcr71.dll. You can put the library in a folder "\Windows\System32\"(x32) or "\Windows\SysWOW64\"(x64). After the file is in the folder, open its properties and click the “Unlock” button.
3.2 Functionality check
After installing Denver, we will create a test script, which will be used to check the functionality of everything that we will install later.Let's go to Z:\home and add a new site: create a folder test.local, there is a folder in it "www", to which we add the file index.php with incredibly creative text:
";
Restart Denver, open in browser www.test.local, get impressed and move on
4. Memcached
Memcached- middleware that implements a data caching service in RAM based on the hash table paradigm.
Memcache- PHP extension, provides a convenient procedural and object-oriented interface to memcached, a highly efficient caching daemon that was specifically designed to reduce database load in dynamic web applications.
4.1 Installing memcached
A. download the archive with the binary: Memcached 1.4.5 for Windows from hereIN. \usr\local\memcached
4.2 Installing memcache
A. download the archive with the library from hereIN. unpack the contents of the archive into \usr\local\php5\ext\
WITH. open the file php.ini (\usr\local\php5\php.ini) and connect the extension:
extension=php_memcache.dll
4.3 Configuring the launch of Memcached along with the launch of Denwer
To run the script with Denver we need:- write a script containing commands to start and stop the application/service and put it in a folder \denwer\scripts\init.d
- create a link to this script in the startup/stop configuration folder \denwer\scripts\main\
A. create a file named “memcached.pl” in the directory \denwer\scripts\init.d\
#!perl -w package Starters::Memcached; BEGIN ( unshift @INC, "../lib"; ) use StartManager; my $basedir = "/usr/local/memcached/"; chdir($basedir); StartManager::action $ARGV, start => sub ( ### ### START. ### print "Starting memcached\n"; system("memcached.exe -d"); print " Started!\n"; ), stop => sub ( ### ### STOP. ### print "Stopping memcached\n"; system("TASKKILL /F /IM memcached.exe"); print " Stopped!\n"; ); return 1 if caller;
B. Now let's create a link to the script - a regular text file containing instructions that when starting, restarting and stopping Denver, you must execute init.d/memcached.pl
We write in a text editor
init.d/memcached
and save the file under the name "40_memcached" to the following folders:
- \denwer\scripts\main\start
- \denwer\scripts\main\stop
- \denwer\scripts\main\restart
4.4 Checking the result
We add to our test script (index.php):$memcache = new Memcache; $memcache->connect("127.0.0.1", 11211); echo 'Memcache ver: ' . $memcache->getVersion();
Let's restart Denver and see what happens
5. Nginx
Nginx- a simple, fast and reliable server, not overloaded with functions.Offsite:
5.1 Setting up Nginx
A. download the Windows version from the offsite and unpack it into \usr\local\nginxB. setting up a virtual host for our test site. To do this we open \usr\local\nginx\conf\nginx.conf and add it there
Server ( listen 127.0.0.1:80; server_name www.test.local test.local; if ($host = "test.local")( rewrite ^/(.*)$ http://www.test.local$1 permanent ; ) location ~* \.(jpeg|jpg|gif|png|css|js|pdf|txt|tar)$ ( root Z:\home\/test.local\www; ) location / ( ssi on; proxy_pass http ://127.0.0.1:8080/; proxy_set_header $request_uri; proxy_set_header $remote_addr; proxy_set_header $host; proxy_connect_timeout 90; out 90; proxy_redirect off; proxy_set_header Connection; proxy_pass_header Content-Disposition; proxy_pass_header Content-Length;
This is an example of settings from a real project, your settings may obviously vary.
5.2 Setting up Apache
By default, Apache runs on port 80, but we just gave this port to Nginx, so now we need to change the template for the virtual host in the Apache settings and assign it a port other than 80 (for example, 8080).Opening \usr\local\apache\conf\httpd.conf and change the port number
## ## START OF VIRTUAL HOST TEMPLATE. ## ## If you want Apache to run on a port other than 80 by default, ## change the port number in the next directive. ## #Listen $&(ip:-127.0.0.1):$&(port:-8080) #NameVirtualHost $&(ip:-127.0.0.1):$&(port:-8080) #
5.3 Configuring Nginx launch along with Denwer launch
A. create a file named “nginx.pl” in the directory \denwer\scripts\init.d\#!perl -w package Starters::Nginx; BEGIN ( unshift @INC, "../lib"; ) use StartManager; my $basedir = "/usr/local/nginx/"; chdir($basedir); StartManager::action $ARGV, start => sub ( ### ### START. ### print "Starting Nginx\n"; system("start nginx.exe"); print " Started!\n"; ) , stop => sub ( ### ### STOP. ### print "Stopping Nginx\n"; system("nginx.exe -s stop"); print " Stopped!\n"; ); return 1 if caller;
B. write in a text editor
init.d/nginx
and save the file under the name "50_memcached" to the following folders:
- \denwer\scripts\main\start
- \denwer\scripts\main\stop
- \denwer\scripts\main\restart
5.4 Checking the result
Place the file next to the script style.css with contenth1( color: red; ) h2( color: green; )
And we will ennoble our index.php:
Test me
Memcached
connect("127.0.0.1", 11211);echo "Memcached ver: " . $memcache->getVersion();

?>
Now we restart Denver and admire the result. If the CSS file is connected, Nginx works fine. 6. MongoDB
Offsite:
MongoDB
A.- a document-oriented database management system (DBMS) with open source code that does not require a description of the table schema. 6.1 PHP driver Download the library \usr\local\php5\ext\php_mongo.dll from this site: and put it in a folder Through trial and error, it was found that a suitable driver is contained in the archive
B. mongo-1.2.5.zip/mongo-1.2.5-php5.3vc9ts.zip php.ini
. If for some reason it doesn't start, try other versions.
connect the extension to
extension=php_mongo.dll 6.2 Installing Mongo A. download the archive from Mongo and unpack it into a folderB.\usr\local\mongodb
. In the same folder we create two more folders:
> mongod.exe --install --dbpath=C:\WebServers\usr\local\mongodb\db\ --logpath=C:\WebServers\usr\local\mongodb\logs\
6.3 Setting up MongoDB to launch in conjunction with Denver
A. create a file with the name "mongod.pl" in the directory \denwer\scripts\init.d\#!perl -w package Starters::mongoDB; BEGIN ( unshift @INC, "../lib"; ) use StartManager; StartManager::action $ARGV, start => sub ( ### ### START. ### print "Starting mongoDB\n"; system("net start mongoDB"); print " Started!\n"; ), stop => sub ( ### ### STOP. ### print "Stopping mongoDB\n"; system("net stop mongoDB"); print " Stopped!\n"; ); return 1 if caller;
B. write in a text editor
init.d/mongod
and save the file under the name "60_mongod" to folders already familiar to us:
- \denwer\scripts\main\start
- \denwer\scripts\main\stop
- \denwer\scripts\main\restart
6.4 Checking the result
Let's launch the mongo console interface> Z:\usr\local\mongodb\bin\mongo.exe
And we will insert and output the test value into the “test” database
> db.test.save(( name: “Habr!” ))
> db.test.find()
The result should look like this:
6.5. Installing the Mongo database management interface
There is a list and short reviews of admin panels on the MongoDB website, so you can choose according to your taste.I chose RockMongo for myself, so with its help we will finally make sure that everything works for us and does not crash anywhere.
A. download the archive with the admin panel from this page. Naturally, we choose Windows version. At the time of writing this article RockMongo-on-Windows v0.0.4
B. take a folder from the archive \rockmongo-on-windows\web\rockmongo
and copy it to the directory of our test site
Opening config.php and change the value of the parameter
$MONGO["servers"][$i]["control_auth"] = true;
on
$MONGO["servers"][$i]["control_auth"] = false;
C. Check the result using the link www.test.local/rockmongo/index.php 
Congratulations! Now we are completely and irrevocably well done.
Bonus #1. Working with php from the Windows console
Perhaps it will be useful to someone. It came in handy for me when our evil tech lead decided that “SQL files are a thing of the past, let’s use migrations.” Of course, for the sake of decency, I tried to feign complete misunderstanding and even shed a tear, but I was exposed and sent to figure out how it works on Windows.It turned out that all you need for happiness is add PHP directory to PATH.

Click on “Edit” and add to the end of the line
;Z:\usr\local\php5
Now let's check that everything worked.
Let's create a file in the directory of the test site console.php
Open the console(you can directly from the same folder - right-click with SHIFT pressed on an empty space and select “Open command window”).
Enter:
> php console.php “UserName”
The console responds:
> “Hello, UserName!” 
PHP is defeated, general rejoicing, applause, curtain.
Bonus #2.
All files and examples mentioned in the article in one archive for free without SMS: on GithubI hope that this material will be useful.
I would be grateful for comments and suggestions.
Tags:
- denwer
- local server
From the article you will learn: what OpenServer is needed for, where to download it from and how to install it (I will show using Windows 10 as an example)
Open Server allows you to use a local server on your computer. This means that you can work on your site on your home computer, and when the site is ready, transfer it ready and working to the Internet.
Click Download. On the loading page, select the Basic version. Enter the numeric code from the picture and click the Download button.

A page will open where you will be offered two options to download the program.
The first method is paid (Minimum donation amount is 60 rubles) - this method will ensure fast loading.
The second method is free and therefore very slow))

A file like this will be downloaded (on the day this article was written, it looked like this, but now it may look different). This is an archive with the program.

Double click on the file. A window will open asking you to select a location where to unpack the files from the archive. I chose drive D.

Click the OK button. The unzipping process will begin.

We go to the folder that we selected in step 3. We see that the OpenServer folder has appeared. We enter it.

We see two shortcuts for launching the program (there can be only one shortcut, it depends on the bit depth of Windows).
Double-click on the Open Server x64 shortcut.
Since this is the first launch of OpenServer, the process of installing components (MicrosoftVC++) for the correct operation of the program will begin.
After installation is complete, the program will prompt you to restart your computer. Reboot.
We go through the fourth step again - that is, we go to the OpenServer folder and launch the program.
In the tray (the area in the lower right corner where the clock is) we see a new icon - a red flag.
Click on it and the program menu will open. Click on the green checkbox that says Run.

We're waiting a little. The red flag will change to yellow, and then change color to green. The server is running.

If the open server does not start - a window appears with the words “Startup failed!”, then go down to the bottom of the article to the description of the open server settings.
Checking OpenSever operation
Click on the green flag. In the menu that opens, point the arrow to My Sites. A submenu will appear with the only item localhost. Click on it.

A page will open in the browser with a message that OpenServer is running.
Hooray! We made it))

As you can see, installing openserver is not at all difficult. I like this local server more than Denver, so I use it in my projects and recommend it to you.
Now it needs to be configured.
Open server setup
Click on the checkbox. → In the menu that opens, click on Settings.

In the window that opens, on the Basic tab, check the box next to Run with Windows. I left the delay as suggested at 20 seconds. The delay is needed so as not to slow down the loading of Windows. First, all the components necessary for the computer to operate will be loaded, and then the Open Server will start.
Also check the box Require an administrator account. Some functions only work with administrator rights, so be sure to check this box.

In this lesson we will figure out how to install Open Server on your computer. But first, let’s find out what Open Server is and what is it for?
Open Server is a portable server platform and software environment created specifically for web developers, taking into account their recommendations and wishes.
The software package has a rich set of server software, a convenient, multifunctional, well-thought-out interface, and has powerful capabilities for administering and configuring components. The platform is widely used for the purpose of developing, debugging and testing web projects, as well as for providing web services on local networks.
In other words, Open Server will allow you to create websites right on your local computer. Also, you will be able to work with the current site by first uploading it to Open Server, rather than experimenting with the existing site directly on the hosting. This can be useful when you want to check a new engine update, try out a new module on the site, change the design, etc. Open Server will help you with all this.
You can read more complete information about Open Server on the official website.
I’ll also add that I used to use it to develop websites, but since it hasn’t been updated for a long time, and there’s no way to independently make the necessary settings on the local server, I turned my attention to the alternative - Open Server, and I’ve never regretted it choice.
Well, let's start installing Open Server.
First of all, we need to download the distribution itself. To do this, go to the official website in the “Download” section, select the desired distribution version (1). It is worth noting that the product comes in three versions: Ultimate, Premium, Basic, how they differ from each other can be clearly seen in the comparison table on the website. I always use "ULTIMATE" (maximum performance). Next, enter the code from the image (2) and click the “Download” button (3).

As soon as the distribution is downloaded, we begin the installation.
The distribution is presented in the form of a self-extracting archive. We launch it and we are immediately prompted to select the disk where Open Server will be unpacked. I leave the “C” drive by default; if you want to install on another drive (or on a flash drive or portable drive), then specify the appropriate path for unpacking. After the disk is selected, we begin unpacking and click the “Ok” button.

We are waiting for the distribution to be unpacked.

Now we can run the program. Since the program is portable, no shortcuts are created on the desktop or in the Start menu. Therefore, go to the drive where Open Server was unpacked (for me it’s C:\OpenServer\) and you will see two exe files to run Open Server: for 32 (Open Server x86.exe) and 64 (Open Server x64.exe) bit Windows systems. Depending on your Windows operating system, you can display one of the shortcuts on your desktop to always have quick access to launch Open Server.

When you first launch you will be asked to select a language.

Also, when you first start the Open Server, you will be prompted to install patches for Microsoft Visual C++. Click “Ok”.

We are waiting until the installation of the necessary libraries is completed.
And the last thing we can do is restart the computer for all the changes to take effect. Click “Ok”.
As soon as the computer restarts, you can start working with the local server.
Starting and checking the operation of Open Server
Launch Open Server and you will see that a red flag icon has appeared in the tray. This means that the program is activated, but the server itself has not yet started.

To start the server, click on the icon with any mouse button and in the context menu that opens, select “Run”. As soon as the local server starts, the checkbox will turn green.

Now the Open Server is running and ready to work.
To check its functionality, go to your browser and enter: http://localhost/ in the address bar. If you see the message: “Welcome to Open Server!”, then you have done everything correctly and the local server is ready to work.

This completes the installation of Open Server! Congratulations, you have successfully completed your task :)
In one of the next lessons I will talk about setting up Open Server, so don't miss it.
Articles in the same category
Concise and easy to understand OpenServer installation. Here we will configure the Database correctly and install WordPress on the local Open Server.
This local server is free, for which many thanks to the developers. These modest guys, however, do not intrusively offer to make a donation of any amount for the development of the project. I think this is very noble towards us and I think this donation should be made.
Download the Open Server program
You can download Open Server at . The downloaded archive is self-extracting. At startup you will be asked to select a location for unpacking. You can specify any location, even external media in the form of a flash drive or portable hard drive.Also, during installation there will be no shortcut on the desktop and in the start menu. The program is portable.
Choose any of the three distributions, I described them in.
Fill out the captcha and download.
After installation the folder will look like this

I advise you to install a shortcut in the taskbar. It will be convenient to launch the program.
Don't look for the program in Program Files, you won't find it there. It, as I already said, is portable and runs only from the folder where you installed it. Therefore, the shortcut should only be looked for there.
Put the meme on the shortcut in the taskbar and wait a while. The program will not show any signs of its operation when loading its necessary files. After a minute, a yellow flag will quietly appear in the tray (bottom right, near the date and time).
If it doesn’t appear, click the arrow next to it, find the checkbox, after which the server will boot, and now by clicking the green flag in the tray, start Open Server. 
A small but essential step. If you use Skype, you need to log into it, and go to settings, Tools - Advanced - Connection, and uncheck the checkbox, as in the screenshot 
This will allow the Open Server to run without problems occupying its ports.
And further. The server will create a virtual disk for itself, so don't be surprised if you see an additional disk in Explorer. It will disappear when you log out of the local server.
Creating a website in Open Server
Now you need to go to the folder where you defined the location for Open Server. Open the domians folder, you will have one localhost folder there.Create a new one, for example test.ru .
And now we will install the engine on this domain wopdpress.
First of all, download WordPress from the official website.
The archive that you unpack in the same folder will be downloaded Downloads and open the unpacked folder.
Select all folders and files and copy to the clipboard. Then open your new site folder test.ru
and paste all these folders there. 
Then open the file from this folder under the name wp-config-sample.php text editor Notepad++ or just use notepad and edit the code. 
Now, in order, what we edit.
But first we will create a Database. To do this, we will take a break from editing, and then we will return to this step. It is important to create the Base, because we will enter the name of the Base in this batch file.
Database Installation
We go to the Open Server menu by clicking on the flag in the tray and open PhpMyAdmin in the server menu itself.
A login window will open, where in the User window we enter root, leave the password blank, OK.
We entered the program where we will create a database for our virtual site 
We assign the name base, in our case mywordpress, and set the database format utf8_general_ci. Create.
We have created a Database for our website.
Now we return to editing the file from where we were distracted to create the Database.
Fill in the same way as the red squares are highlighted. Except for the big one.
This is our unique arbitrary code. You can create it by following the link indicated by the arrow. Just copy the URL and open it in a new window, you will be offered a unique code, which you can copy and replace the one you had by default. All.
Save your changes and close Notepad or other editor in which you are editing the code.
Now change the file name from wp-config-sample.php on wp-config.php.
That's all.
Go to tray, restart (yellow flag) server IT IS NECESSARY!
Then log into the server again, still in the same tray, and go to My Sites. There you will find your test.ru.
Click and you are on the site. The WordPress engine installation will start. Give the site a name, for example My blog
. Just create a login admin5. And the password. Make it simple, this is a test site after all and we are not afraid of hacking. 

After which we can dial test.ru/wp-admin, enter our username and password 
And we get to the admin panel 
And if we type in the address bar test.ru
then we'll get to the site 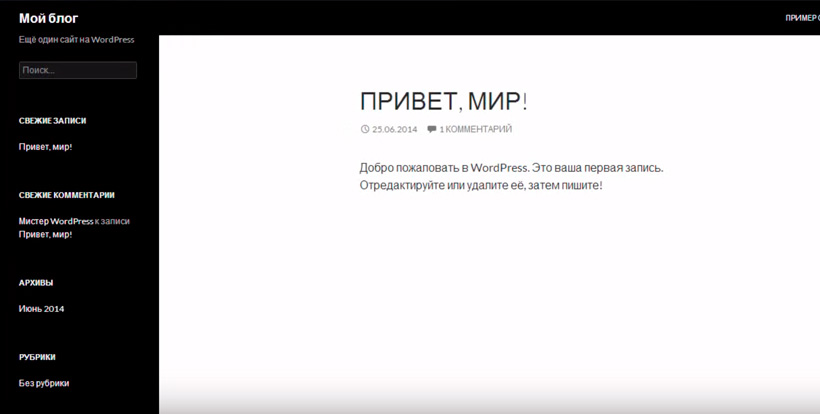
Our local server with the new test site is ready. Let's get started with work and further training.
And all the best!
Work hard! The world will not be a paradise for those who want to live as lazy people. Sachs Hans
It doesn’t matter why you need to create your own website, the main thing is to approach this matter with full responsibility and act step by step. The first thing to do is install a local web server on your computer with which you can practice and start creating your own website even without Internet access.
In order to turn your local computer into a full-fledged (test) web server, you need to download and install a special software package. There are quite a lot of similar complexes, but they usually include a standard set of products - Apache web server, MySQL DBMS, PHP language And so on.
In this article we will look at one of the most popular software packages for web developers called Denwer. And exactly We will install Denwer on your local computer running operating system Windows 7. If you have a different version of the operating system, it's okay Denwer installs without problems on Windows XP and Windows 10.
Where to download Denwer
Before you start the installation, you need to download Denwer (Denver) from the official website of the developer, where you need to fill in your personal data, such as name and email address, after which a link to the distribution kit will be sent to you at the address you specified. Or you can go the other way and download exactly the same distribution from our website using .
Installation process
Now let’s begin installing Denver on Windows 7. Let me remind you that for other versions of Windows, be it XP or 10ka, the whole process will be similar.
We launch the newly downloaded Denver distribution and see a security warning that says whether we really want to allow the application to make changes to the computer. We say that we agree by clicking on the “Yes” button and move on to the next step.
In the installer window, when asked “Do you really want to install the base package?” Click “Yes” and wait until the archive is unpacked.
After unpacking the archive, a browser window and console will open in front of you. The browser, as a rule, does not contain any useful information for us; moreover, in most cases it tries to open a non-existent page on your computer, so you can safely close it. You shouldn’t touch the console; we’ll need it to install Denver.

After closing the browser window, although this is not necessary, go to the console and press the Enter key.

Next we read something like “blah blah blah”, and at the very end of the console the directory in which the server will be installed is indicated, by default it is C:\WebServers, but no one forbids specifying another drive, simply entering a new path, as in the screenshot below:

Next, we confirm the installation in the selected location, in my case the folder D:\WebSrv already exists and a warning appears asking whether I really want to install in it, we do not pay attention to all this and click on the “Y” button if we want to continue, or press the “N” button if you change your mind.

The next step is to again confirm that we want to install the web server in this directory by pressing the “Enter” key. Everything is standard in the style of small-soft (Microsoft).

The next step will create a virtual disk, which is necessary for the functioning of all system components. We choose any drive letter you like, by default it is the letter “Z”, we’ll probably leave it.
Press “Enter”, and then again and before moving on to the next step, wait until all the files are unpacked.

Now we have to choose how exactly to load a virtual disk, there are only two options:
- The disk is created and appears immediately when the system boots and is not disconnected when shutting down.
- The disk is created when the web server starts, and after the web server is stopped the disk disappears.
In principle, both options are good in their own way, choose what you like. I usually choose the first option, in this case, even when the server is turned off, you can work with files on the disk (of course, you can do this directly in the folder specified at the beginning of the installation, but it’s more convenient for me).
Press “Enter” and move on to the next step.

At the end of the installation, Denver will ask something like the following - “would you like to place shortcuts on the desktop?” I strongly recommend answering “I want”, in which case it will be more convenient to work with it in the future. Press the “Y” key and press “Enter”. After that, 3 shortcuts are created on the desktop to start, stop and restart the server.

At this point, the installation of the local Denwer web server is complete, and you can see 3 shortcuts on the desktop:
- Restart Denwer - restart the server
- Start Denwer - start the server
- Stop Denwer - stop the server.
They look like this.


