Create a freeware iso disk image. UltraISO - a program for creating ISO images
Read about how to create and work with disk images, as well as what programs you use in our article today.
Disk image. Areas of application
A disk image is a file containing a complete copy of the content and structure of the data located on the drive.
In this case, a disk should be understood as any hard disk (HDD), floppy disk (FDD) or optical disk (CD/DVD) or Flash drive.
Advice! The main advantage of a virtual image is the fact that the disk image contains absolutely all the information to duplicate the structure, content and location of data on the storage medium, repeating its set of sectors and ignoring the file system.
Virtual disks are used for the following purposes:
- Reserve copy.
Unlike conventional backup programs, which copy only those files to which you have access, when creating an image, in addition to the actual data, the bootloader and files that may have been blocked by the OS will also be copied. - Software distribution. For distribution (including via the Internet) of large operating systems (OS) and software (for example, BSD, Linux OS distributions).
- Creating virtual hard disks in virtual machines. Before you start working with a virtual machine, you need to create a virtual hard disk on which the operating system will subsequently be installed.
- Replication of similar systems.
If it is necessary to install the operating system and software on computers that have the same hardware configuration.
A more rational step would be to install and configure the OS and software on one computer, after which an image is created along with all system settings and installed on other computers.
The .ISO format is the most popular disk image format, but has the disadvantage of lacking support for multi-session data.
Other popular formats are .DMG and .IMG formats, as well as proprietary .MDS/.MDF (Alcohol, Daemon Tools), NRG (Nero Burning ROM), .VCD (VirtualCD) and others.
Overview of programs for creating a disk image
Alcohol 52%
The program settings allow you to:
check the accuracy of reading data from physical devices;
improve the quality of scanning bad sectors;
simultaneous operation with 6 virtual drives;
work with formats: BIN, BWA, BWI, BWS, BWT, CCD, CDI, CUE, ISO, ISZ, NRG, MDS;
DAEMON Tools
As can be seen from the table, the functionality of the free version is sufficient for the tasks of the average user, which allows you to create and mount all existing types of images and emulate up to 4 drives.
The program has a clear Russified menu.
Ultra ISO
Ultra ISO- this program allows you to create, edit, convert images into various formats (b5i, b5t, b6i, b6t, bin, bwi, bwt, ccd, cdi, cue, daa, dao, dmg, icf, iso, ima, img, isz, lcd, mdf, mds, nrg, pxi, sub, tao, uif, vc4).
In addition to creating images from CDs, it is also possible to create images from hard drives and
Or in another safe place.
The created disk image can be sent somewhere, copied and, in fact, used without inserting the physical disk itself into the CD-ROM.
To create a disk image, it is convenient to use the UltraISO program. This program is one of the best when working with images and can do a lot of things.
When installing the program, you are prompted to create virtual drives. We agree with this and an additional virtual DVD-ROM is obtained on the computer.
How to create a disk image in UltraISO
We launch UltraISO, there are directories in the window at the bottom, and the work area at the top.
Take some folder with data. Let it be photos from a sea album or maybe even an operating system on a physical disk.
Now, in order to write this data, for example, to a flash drive, you need to create a disk image. That is, as already mentioned, make a virtual disk out of them.

In the UltraISO window, we add to the work area the photographs from which we want to create an image.

Go to the directory below and select the folder Diving, select all the images, right-click and select Add.
You can simply move them to the work area by pressing the left mouse button. Now you need to create a virtual image from this data.

The image creation procedure begins. After some time it will be created. The image looks like an ordinary sheet of paper. In the folder properties you can see that this is indeed an ISO image file, in this case 37.1 MB in size.
When you select an image, you need to choose how to open it. Choose Open using UltraISO, put a tick below Always use this application to open .iso files and press OK.
The image after these steps will be displayed as a disk. Now you can send it somewhere. You can also record to removable media.
To do this, in UltraISO you need to select Tools - Burn CD Image. In the window that opens Burning an image you need to select the drive and select the image file to burn.

It is better to set the recording speed lower, because the higher the speed, the greater the opportunity for failures and recording errors. Click Write down and the recording process occurs.
Click on UltraISO Mount virtual drive, in the window that opens, select the drive and image file. Thus, it is as if we inserted the disc into a CD-ROM.
This can be useful if, for example, you downloaded a file in an image. After selecting the image, click Mount and open the disk image. The image works exactly the same way if we launched a physical disk.
You can also use UltraISO without mounting the image. To do this, click File – Open, look for the desired image, select the files, right-click and select Extract to... Next, we indicate the place where they should be placed.
The data is extracted and will no longer appear as an image, but as open files that can be opened and viewed in the usual way.
What can be packed into an ISO image?
Anything. You can create images with absolutely any content, be it video, music or some documents. You can create a compressed ISO image, or just an uncompressed ISO.
Right in the application, you can click on any video or file and it will start. Any data from the image can also be extracted to any location on the computer.
When writing an image to a physical disk, you need to monitor the volume at the top of the application so that the volume does not exceed the capacity of the disk.
If the file is mounted in a virtual drive, UltraISO does not allow it to be deleted. To delete an image in this case, you need to unmount it in the program and then delete it.
How to create a multiboot flash drive
Using UltraISO it is possible to create a multiboot flash drive. If you simply take the operating system files and try to write them, they will not load.
Therefore, you need to again create an image from the OS files,
open the image in UltraISO, click and select from the drop-down menu Burn disk image.
In the window that opens, from the drop-down list, select the desired flash drive, recording method and that’s it. If you press Format, then the flash drive will be formatted and press Write it down.

The recording of the OS image to the USB flash drive begins. After recording is complete, you will have a multiboot flash drive. You can insert it into the computer, launch the boot menu, or rebuild the boot in the BIOS so that the computer boots from a USB drive.
In general terms, the publication discusses the UltraISO program. It’s quite easy to work with; if necessary, you can create a disk image, unpack it, or burn a bootable USB flash drive. I hope the information was useful and see you in new posts.
Creating a system image Windows 7. You can’t imagine how many times this image has helped me out during serious system crashes and various troubles, and how much time it has saved me. I hope that you will be able to successfully apply this information in practice.
Note: Friends, this article was written two years ago, read our more complete article on this topic - using a standard archiving tool on DVDs, or on a portable USB hard drive and how to recover from these images, you will also learn how to connect to your laptop, netbook SATA, IDE drive or old hard drive and store your backups on it.
We also have an article - or another hard drive using the tools built into the operating system.
Creating a system image
Sometimes, due to our own erroneous actions on the computer or a virus attack, it is not possible to download Windows 7 by any means. Or it will be possible to load the operating system, but working in it can be simply unbearable, due to serious problems and malfunctions, and if you imagine that there is not one computer, but ten. There are also many friends who, unfortunately, also have computers and in the evenings you have to solve their problems, such a life would truly seem like a nightmare if such a tool as Creating a system image.
This image may be useful if none of the remedies did not help you, and therefore all our previous articles did not either. First I will describe how create a system image Windows 7 using the Computer Data Backup tool, then we will restore our Windows 7 from the image. Below are examples of how to restore individual files of your data from an image.
- It is important to know that when you restore Windows 7 from a system image, all information from the hard drive partition to which you are deploying the image will be deleted and replaced with the contents of the image. By the way, this operation can be carried out using the program.
Creating a system image
Start->Control Panel->Backup computer data->Create a system image.
In the dialog box that appears in front of us - Where should the archive be saved? The operating system will give us a hint, for example, in my case, Windows 7 selected the Local disk (E:), with a capacity of 339.19 GB, located on the second hard drive (I have two hard drives), one contains the system itself, and the second contains System Images Windows 7 made using our Computer Data Backup tool. If you have one hard drive, then the system image needs to be created on a free partition.

Just in case, I am attaching a screenshot of the Disk Management window on my computer.

Important Note: The ideal option for storing system images is a portable USB hard drive or a specially purchased SATA hard drive. If you choose DVD discs, you will need a lot of them; this option, in my opinion, is the most inconvenient; you can also store images online, but this method deserves a separate article. You also need to know that, unlike the archives of our data, the system image can only be saved on a disk with the NTFS file system.
Which partitions of your hard drive should be included in the backup? By default, the Local disk with the Windows 7 operating system will always be selected, in our case (C:). You can additionally choose to include in the system image any disk with your personal data or all disks, this means that the System Image you create will contain all the information stored on your computer, as long as there is enough space on the media where you are creating the image. Click next.

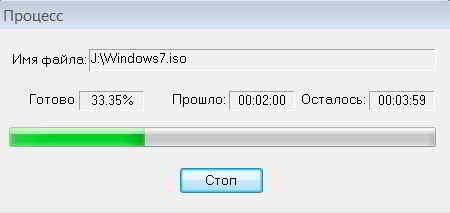
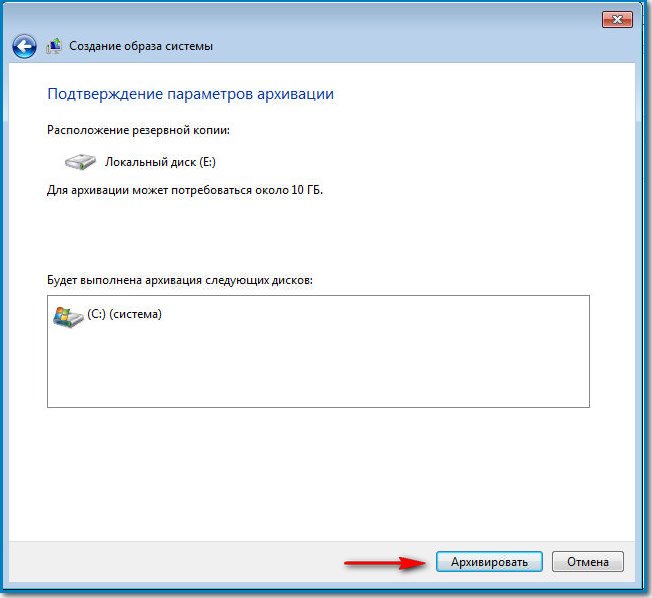
We confirm the archiving parameters, we see a warning that to create a system image in my case you will need 9.42 GB, your requested space may be more. Click Archive, the process of creating a System Image will begin, which may immediately result in an error if we do not have enough space to store the image.

At the end of the process, you are prompted to create
Disk images are a convenient file that can contain several other files or even folders. Its main convenience is that the image imitates an optical drive, as if deceiving the system. You can run the image and install the program as if you were doing it from a disk through a floppy drive. You can create such files yourself using special programs. In this article you will find a detailed guide on creating a disk image with files or from an existing physical disk in your drive. Try creating your first image along with the article.
Which program to choose to create a disk image
You can find a large variety of specialized programs on the Internet, for example:
- UltraISO;
- Alcohol;
- Daemon Tools;
- ISO Creator.
This article will use the Daemon Tools program, as it is easy to use and has many different versions for any user. You can choose another program that suits you more, but their principle is approximately the same.
Go to the official Daemon Tools website to download the program https://www.daemon-tools.cc
How to make a disk image from files
To create your own disk image from existing files and folders on your computer, follow this algorithm:
- Finish downloading and installing Daemon Tools Lite. You need the Lite version, as it is designed for a narrow range of tasks and is easy to use; the other versions are designed for more advanced users.
- Installation will not take you much time.


- After installation, you will find the program in the start menu of your computer.


- Once Daemon Tools opens, find and click on the “New Image” tab.


- In the window that appears, click on the “Create image with data” field.


- This is where the customization of your image is done.
- First of all, select the files that will be inside the image. To do this, click on the plus sign in the upper right corner.

- Mark all the files on your computer that should be included in the image.

- A list of them will appear in a small window in the middle of the screen.
- Once you're done choosing, choose the format of your image. If you don’t know which one is better to choose, then give preference to ISO - this is a standard and universal image.


- Now click on the “Save As” field and specify the folder in which the finished image will be saved. This is where you will take it and use it.


- When all the setup is finished, you can click on “Start” to start creating the image.
Wait until the image has finished being created and verified. After this, you can take the finished ISO file in the folder you specified and use it.

How to create an image from an existing disk
Creating an image from files is very convenient, however, when you already have some kind of disk with data, it will be easier to create an image from it, rather than transferring the data to the computer and using the previous method.
- In the “New Image” menu, you can see the “Create image from disk” field. This is exactly the method that will come in handy in such a situation.


- The setup is fairly quick: you need to select your optical drive in the “Drive” field. It should already have a data disc inserted.


- In the “Format” field, select the desired format for the future disk image.


- You can protect your image so that it can only be opened with a password. To do this, check the box next to the words “Protect”, then enter the password twice. Don't forget it and don't share your password with anyone.


- The program also offers advanced settings at the very bottom of the window.

- They are suitable for advanced users who need to set their own speed and profile settings. If you do not understand what this is, then it is better to put this setting aside and not open this option.


- Click “Start” and wait until the recording finishes. Do not touch the drive at this moment and better go about your personal affairs. Once the image is complete, you will be able to use it.


Read how and why an ISO image is used. How to create an ISO image from an optical disc, mount it to your PC's virtual optical disc, or extract data from it, if necessary. Personal stationary and mobile computing devices are extremely popular and are widely used in all areas of our lives. Every sector of the economy, education, healthcare, social culture, etc., one way or another, uses computer technology for its needs. All accounting, control, processing and storage of various information is carried out using such devices.
Content:
Naturally, computer devices are used quite widely by users for personal use. Performing various tasks, communicating using electronic applications, creating any information files, editing and exchanging audio, video files and images, sending and receiving emails, organizing leisure and entertainment and much more.
It is not surprising that for the correct operation of computer devices, it is necessary to have modern, high-performance software that will make full use of their capabilities.
Most modern computer programs, which have a wide range of capabilities, are delivered to the user on optical media or otherwise in a specific digital format. And quite often a situation arises when it is necessary to save a copy of a particular disk. In this case it may help "ISO image". "ISO file"(often called image "ISO") is an archive file that contains an identical copy (or image) of data found on an optical disk, such as a CD or "DVD disc". This type of file format is often used for backing up optical discs or for distributing large sets of files to be written to an optical disc.
What's happened "ISO image"
Name "ISO" taken from the name of the file system used by optical media, usually "ISO 9660". Can you imagine the image "ISO" as a complete copy of everything stored on a physical optical disk such as "CD", "DVD" or "Blu-ray" disk, including its own file system. It is a sectoral copy of the disk, and no additional compression is used. Idea of images "ISO" is that you can archive an exact digital copy of a disc, and then use that image to burn a new disc, which in turn is an exact copy of the original. Most operating systems (and many "utilities"– auxiliary computer programs that perform specialized standard tasks for the correct operation of the equipment or operating system) also allow you to mount an image "ISO" like a virtual disk. In this case, all your applications treat it in the same way as if it were an actual optical disc inserted into your personal computer's drive.
While many users use "ISO" to create backup copies of your optical drive, "ISO image", these days, is mainly used for distributing large programs and operating systems because it allows you to store all the files in one easily downloadable file. People can then decide whether they want to mount the image for later use or use it to burn an optical disc.
Most bootable operating systems, including "Windows" and various distributions "Linux", spread like images "ISO". This will come in handy when downloading the current version "Ubuntu" for subsequent installation on your computer or installation of any old game disc on a laptop in the absence of a real physical disc.
How to connect "ISO image"
Concept "install ISO image" means that you will mount your disk image to a virtual optical disk. All your applications will treat the mounted image as if it were a physical disk in your personal computer's drive.
Operating system versions "Windows 8, 8.1 and 10" allow you to mount a disk image "ISO" without the use of additional third-party software. To do this, just open the file explorer "Windows" folder where the image of the required one is stored "ISO disk", and right-click on it to open a pop-up context menu. In the list of available actions that opens, you need to select a section "To plug".

Or in file explorer "Windows" Left-click on the required image "ISO", and then on the Explorer main menu ribbon in the tab in the section "Control" click the button "To plug".

If you are using an operating system on your personal computer "Windows 7"(or a previous, earlier version of the system), you will need to install an additional third-party application, such as the free and easy-to-use application "WinCDEmu".
How to record "ISO image" to disk
OS "Windows 7, 8 and 10" have an image recording function "ISO" to disk, directly built into the pre-installed services of the system itself. Everything you need to record "ISO image", is to insert an optical disc into the computer drive, prepared for recording, and then use one of two methods to choose from. By analogy with the previously described connection methods "ISO image" you will need to open in file explorer "Windows" folder containing your "ISO image". Now right-click on it and select the command from the pop-up context menu that opens.

Or mark the file with the left mouse button "ISO image" and in the tab in the section "Control" press the button.

Note: If your personal computer does not have a device that allows you to write to an optical disc, you will not see this button. Also, if you have a file compression application installed (such as "7-Zip"), and it is associated with the file extension "ISO", this button will also be unavailable to you. We'll cover this in more detail in the next section.
In the operating system "MacOS" recording function "ISO image" to disk works on the same principle as in the system "Windows", so there is no need to describe it in detail.
How to extract data from an ISO image
If you don't want to mount "ISO image" or burn it to a disk, but still need to access the files stored inside, then you can extract its contents to your computer. To do this you will need a third party app like "WinRAR" or "7-Zip". We will show a way to get data from "ISO image" using an example application "WinRAR", but you can use the application you are used to working with.
If when installing the application "WinRAR" you associated it with a file extension ".iso", then to open and view its contents, you only need to double-click the required "ISO image". Depending on the size of the original "ISO file", the opening process may take some time, so be patient.

You can copy any files from "ISO image" into a regular folder by simply dragging and dropping them.
If you want, you can also extract the full contents "ISO image" to a regular folder. In File Explorer, simply right-click on "ISO image" and open the pop-up context menu. Among the available actions, you can use one of three sections to choose from, each containing a specific file extraction command. Team "Extract files" allows you to independently select the location for subsequent extraction of files, the command "Extract to current folder" extracts files to the same location where the file is located "ISO image", and the team "Extract to "folder name"» creates a new folder at the location "ISO image" and gives it a name "ISO file".

Other file compression applications such as "7-Zip", work on the same principle and offer similar features as the application described above.
However, one important detail should be noted. If you install a file compression application such as "7-Zip" or "WinRar", and you allow this application to associate with files "ISO", then you will no longer see the built-in control commands "ISO images" in file explorer "Windows" to fully work with them. So it's better to have a control "ISO images" in the file explorer, because you can still right-click on them and access compression application commands to extract data from "ISO image" whenever you want.
If you have already installed one of these applications and it is associated with the image files, then you can easily reassign the file extension "ISO" for file explorer "Windows". To do this you will have to use the application "Options". This application contains all the basic settings of the operating system. And the developers "Windows 10" intend to replace the application with it "Control Panel" to improve the user experience. Therefore, we will dwell in more detail on possible ways to open the application. "Options". We will show you five ways to access the application, and you can choose any method you like for further use.
1 way: Open file explorer "Windows" "This computer". On the Explorer main menu ribbon, select the tab "Computer". On the tab panel that opens, in the section "System" press the blue button with the white gear "Open settings".

2 way: Click the button in the lower left corner of the desktop "Start", located on "Taskbars", and open the main user menu "Windows". Select the button with the gear shown on it in the left menu panel and open the application. Or, in the list of installed applications, move the scroll bar down and, in the corresponding menu item, select the section "Options".

3 way: Search on "Taskbars" button "Search", presented in the form of a magnifying glass and located next to the button "Start", and open the search bar. Enter your search phrase in the query field "options". The system will analyze in the graph "Best Match" Click on the link of the application you are looking for.

4 way: Click icon "Windows Action Center", which is located in the lower right corner of the desktop on "Taskbars". In the pop-up sidebar menu, find the shortcut buttons at the bottom. To open the desired application, press the button "All parameters".

5 way: The easiest and fastest way to call an application "Options"– press the keyboard shortcut together "Windows + I" and open the app directly directly.

On the main page, go to the section "Applications". Next, in the left panel of the new page, select the section "Default Applications". In the right pane, move the scroll bar to the bottom of the page and click the text link.

The next window displays a very long list of file extensions. Use the scroll bar to find the extension in the list provided. ".iso". Next to the indicated icon in the right half of the window, click any application that is currently associated with the file extension ".iso". From the pop-up menu, select the file explorer option "Windows".

How to create your own file "ISO" from an optical disc
Process of creation "ISO file" from Discs allows you to get a digital backup of your physical discs. Then you can use the created "ISO files" to install them on computers that do not have an optical drive. In the future, you can create additional copies of the disk image from your existing "ISO file" without using the original physical disk. And of course you can share it "ISO way" with other people.
While operating systems "MacOS" And "Linux" come with pre-installed software that allows you to create "ISO image" from a physical disk, in the operating system "Windows" there is no such possibility. Instead, you'll have to use a third party app to create "ISO file"


