Microsoft outlook mail login. Creating a mailbox in Outlook. Checking the service status. Email outlook com and other mailers
-
E-mail address « [email protected] » );
Account type- IMAP;
Incoming mail server- imap.yandex. ru ;
Smtp.yandex. ru ;
IMAP server - 993;
SMTP server - 465.
In the window Account setup 
File → Details and press the button Adding an account.
Select value Manually configure server settings or additional server types and click Next. 
Leave a value Internet email default and click Next. 
Attention. ru »

Other settings.
Go to the tab Outgoing mail server, enable the option and select the value . 

Click OK button.
Add an account
Synchronize the created account with the server to get a list of folders.
Open menu File → Setting up accounts, select an account from the tab Email and click the Change button. 
Click the button Other settings and go to the Sent tab.
Set value Save sent items in the following folder on the server and specify the Sent Items folder. 
Name - username (for example, "Alice Little");
E-mail address- your mailing address on Yandex (for example, "alice.the.girl@yandex.„ ru “» );
Account type- IMAP;
Incoming mail server- imap.yandex. " ru »;
Outgoing mail server (SMTP)- smtp.yandex. " ru »;
User - your login on Yandex;
IMAP server - 993;
SMTP server - 465.
Launch the program and click Next in the welcome window. 
In the window Setting up a Microsoft Outlook account Leave the default Yes and click Next. 
If you already have an Outlook account set up and want to add another one, open the menu File → Details and press the button Add an account.
Select value Manual configuration or additional server types and click Next. 
Select value POP or IMAP protocol and click Next. 
Specify the following account settings:
Attention. If you set up receiving mail from a mailbox like “login@yandex. ru », the login is the part of the address before the “@” sign. If you use, you must specify the full mailbox address as your login.

Leave the rest of the settings as default and click the button Other settings.
Go to the tab Outgoing mail server, enable the option SMTP server requires authentication and select a value Similar to the server for incoming mail. 
Go to the Advanced tab. Select from Use the following encrypted connection type SSL value for IMAP and SMTP server. Specify the following options:
Leave the rest of the options as default and click OK.

To complete your account setup, click in the window Change account Next button - your account settings will be checked. If the test is successful, click Finish. If not, make sure all parameters are specified correctly.
Problems with Microsoft Outlook
This step-by-step guide will help you solve problems related to your email program.
Select an issue:
What message did you receive?
If a message appears about no connection to the server, try logging into Yandex.Mail with the same username and password that you use in the program. Enter your username and password manually, without using those stored in the browser.
Make sure that in the Mail programs settings section the protocol\n you want to use is enabled.\n
Make sure that in the mail program settings you have accurately specified\\n the following server parameters:\\n \\n \\n
If you are using IMAP
- \\n \\n
- connection security - SSL; \\n
- port - 993. \\n
- \\n \\n
- connection security - SSL; \\n
- port - 465. \\n
\\n \\n \\n \\n
If you are using POP3
\\n \\n \\n Incoming mail \\n \\n
- \\n \\n
- connection security - SSL; \\n
- port - 995. \\n
- \\n
- mail server address - smtp.yandex.ru; \\n
- connection security - SSL; \\n
- port - 465. \\n
\\n \\n \\n \\n\\n
For more information on how to check server settings in different mail programs, see the section.
\\n ")]))\">
Make sure that in your mail program settings you have accurately specified\nthe following server parameters:
If you are using IMAP
- \n
- mail server address - imap.yandex.ru; \n
- connection security - SSL; \n
- port - 993. \n
- \n
- mail server address - smtp.yandex.ru; \n
- connection security - SSL; \n
- port - 465. \n
\n \n \n \n
If you are using POP3
\n \n \n Incoming mail \n \n
- \n
- mail server address - pop.yandex.ru; \n
- connection security - SSL; \n
- port - 995. \n
- \n
- mail server address - smtp.yandex.ru; \n
- connection security - SSL; \n
- port - 465. \n
\n \n \n \n\n
Encryption of transmitted data.
\n\n ")]))">
Make sure that the protocol you want to use is enabled in the settings section.
Make sure that in the mail program settings you have accurately specified\n the following server parameters:\n \n \n
If you are using IMAP
\n \n \n Incoming mail \n \n
- \n
- mail server address - imap.yandex.ru; \n
- connection security - SSL; \n
- port - 993. \n
- \n
- mail server address - smtp.yandex.ru; \n
- connection security - SSL; \n
- port - 465. \n
\n \n \n \n
If you are using POP3
\n \n \n Incoming mail \n \n
- \n
- mail server address - pop.yandex.ru; \n
- connection security - SSL; \n
- port - 995. \n
- \n
- mail server address - smtp.yandex.ru; \n
- connection security - SSL; \n
- port - 465. \n
\n \n \n \n\n
For more information on how to check server settings in different mail programs, see the section Encrypting transmitted data.
\n ")]))">
Make sure that in your mail program settings you have accurately specified the following server parameters:
If you are using IMAP
Incoming mail
- mail server address - imap.yandex.ru;
- connection security - SSL;
- port - 993.
- mail server address - smtp.yandex.ru;
- connection security - SSL;
- port - 465.
If you are using POP3
Incoming mail
- mail server address - pop.yandex.ru;
- connection security - SSL;
- port - 995.
- mail server address - smtp.yandex.ru;
- connection security - SSL;
- port - 465.
For more information on how to check server settings in different email programs, see the section Encrypting transmitted data.
If the "Authentication required" message appears, "Sender address rejected: Access denied" or “Send auth command first”, authorization on the Yandex SMTP server is disabled in the mail program settings. Make sure the option is enabled User Authentication(for Outlook Express) or SMTP Authentication(for The Bat!).
If a message appears "Sender address rejected: not owned by auth user", the address from which you are trying to send a letter does not match the one under whose login you are authorized on the SMTP server. Make sure that in the mail program settings, the return address is set to exactly the address from which the login is used in the SMTP authorization settings.
If a message appears "Login failure or POP3 disabled", the mail program cannot access the mailbox using the POP3 protocol. Make sure that the correct password for the mailbox is entered and that access via the POP3 protocol is enabled in the settings section.
If a message appears "Message rejected under suspicion of SPAM", the contents of your email were recognized by Yandex.Mail as spam. To solve the problem, open Yandex.Mail and send any one letter as a test. This way you will prove to the system that the letters are not being sent by a robot.
Check your computer for viruses using free antivirus programs: CureIt! from Dr.Web and Virus Removal Tool from Kaspersky Lab.If your mail program does not accept or send letters, check that your mail program settings are correct, as well as your computer’s Internet connection settings.
If you are using an antivirus program, firewall, or proxy server, disable them and see if this reproduces the problem.
Read step-by-step instructions to find missing emails. Before starting work .
Select an issue:
When you delete messages, they go to the Deleted Items folder and are stored there for 30 days. During this period you can restore them:
Go to the Deleted Items folder.
Select the required letters.
Click the To Folder button.
If more than a month has passed since they were deleted, it will not be possible to restore the letters - they have been permanently deleted from the Yandex.Mail servers.
If the letters are not in the folder where they should be, then most likely they ended up in another folder, for example in Deleted Items or Spam. If you remember the sender's name or address, part of the text of the letter or the subject, try searching for letters in all the folders in your mailbox.
Have you found the letters?
You can restore letters:
Go to the folder in which the letters were found.
Select the required letters.
Click the To Folder button.
Select from the list the folder where you want to move the letters - for example, Inbox.
Why emails disappear and how to avoid it
The Deleted emails folder is stored for 30 days, and the Spam folder for 10 days. After this, they will be permanently deleted from Yandex servers. Why emails may end up in these folders without your knowledge:
Another user has access to your mailbox
Emails can be deleted by a user who has access to your mailbox: perhaps you forgot to end your session after working on someone else's device. To end your session, click the link in your account menu Log out on all devices. This can also be done on the page - using the link Log out on all computers.
Letters disappear in the mail program
A rule has been configured that deletes or moves letters. Letters disappear in the mail program.
If you use a mail program and delete letters in it, then they disappear on . This happens because your program is configured using the IMAP protocol - in this case, the mailbox structure on the service is synchronized with the mailbox structure in the program. To delete messages only in the program, but leave them in Yandex.Mail, you can configure the program using the POP3 protocol, but we recommend not doing this: the messages may not synchronize correctly with the server.
A rule has been configured that deletes or moves emails Indicate reliable ones in Yandex.Passport and link them to your account. Our security system may have found your account suspicious and blocked your mailbox. Most often, this happens due to the fact that the phone number is not attached to the box or the Passport contains a fictitious first and last name. It usually takes a couple of hours to remove the lock.
If you delete letters in your mail program, but they are still in their folders on the Yandex.Mail website, then most likely your mail program is configured using the POP3 protocol. Due to the peculiarities of the POP3 protocol, messages in the mail program may not synchronize correctly with the server. To work with Yandex.Mail, it is recommended to use the IMAP protocol. To learn how to migrate your email program from POP3 to IMAP, see Migration from POP3.
If your email program does not display sent messages, then most likely your email program is configured using the POP3 protocol. Due to the peculiarities of the POP3 protocol, messages in the mail program may not synchronize correctly with the server. To work with Yandex.Mail, it is recommended to use the IMAP protocol. To learn how to migrate your email program from POP3 to IMAP, see Migration from POP3.
The report always indicates the reason for non-delivery. You can read about the most common reasons in the article ../web/letter/create.html#troubleshooting__received-report.
If you receive errors about an incorrect certificate when activating SSL encryption in your email program, make sure that your email program and operating system are configured correctly:
- On a computer (without lags and "date from the future"). If the wrong date is set, the system erroneously determines that the certificate has not yet expired or has already expired.
- All installed.
- Checking HTTPS connections is disabled in your antivirus settings. You can change your antivirus settings according to our instructions for Kaspersky Internet Security and ESET NOD32 Smart Security in the section
After you have selected the mail settings item, you will see a connection window. Here you need to correctly enter the email address you are using and the password for the mailbox. You can enter any name in the “Your name” field; in the future it will be used to sign the letter. In this window, you can connect an account to absolutely any email service, for example, Google or. To connect a mailbox, you must first register on the website of your postal service, for example, for Gmail, register a Google account.
In some versions of Outlook, you will have access to a link to register a mailbox account from Outlook.
The “Manual configuration or additional server types” section is also available. By selecting this item, you can manually enter the types (POP3 or IMAP) and specify the addresses of the incoming and outgoing mail servers, as well as configure the ports for accessing them. This item should be selected when setting up corporate mail or mail registered on separate servers with different types of encryption.
When registering a mailbox, problems may arise with connecting Outlook to an encrypted server; this can happen if the server does not use encrypted connections, in which case the program will automatically switch to using an open connection. When such a notification appears, click “Next” again so that the program switches to a different type of connection to the server.
We recommend using email services that provide a secure connection to the email server. By using this type of connection, you can be sure that no one will intercept your letter on the way to the server.
After completing the settings, you can immediately start working with mail; the program interface will open in front of you, in which you will immediately see all your incoming letters. For more fine-tuning read
Mail settings in Outlook
Now we will look at the instructions, which will describe how to connect an additional box through the program settings.
To enter the mail settings menu, you need to open the “File” menu, which is located in the upper left corner of the program window.
After opening the "File" menu, you need to go to the "Information" section. Having opened this menu, you need to left-click on the “Account Settings” section and select the same section again in the drop-down menu.
After you have selected the “Account Settings” item, a window will open in front of you in which, to create an additional mailbox, you need to go to the “Email” tab, and then select the “Create” button.
If you need to change the settings of a previously registered mail, to do this, select the desired mailbox from the list and click “Change”.
After clicking on the “Create” button, a registration window will open; further steps will be exactly the same as described above.
The "Default" button will help you determine the main mailbox. By marking the desired mailbox with this button, you will set this mailbox as the standard one for writing and sending letters.
In order to delete a mailbox registered in the program, you need to select the one you want and click the “Delete” button. After this action, the mailbox will be removed from the Outlook client, but not from the servers of your mail service, so you can connect it again in the future.
When you delete a mailbox from the Outlook email list, a mailbox file remains in which all letters are saved, so to completely delete all information from your computer, you need to go to the “Data Files” tab and delete the desired file from there.
Interface
The interface of the Outlook email client is quite simple and intuitive; it is also similar to the interfaces of the bazaar versions of email clients. Now we will describe the main components of the interface and its capabilities.
Let's start with the panel on the left side of the window. At the bottom there are 4 icons that will open “Mail”, “Calendar”, “Contacts” and “Notes”. The main section is mail; when you select the next section, its interface will open.
Above are lists of the main sections with separated folders for ease of working with mail. The first list is “Favorites”, in it you can view the common mail folder for all connected mailboxes. This list can be collapsed if necessary.
Below the Favorites list is a list of Outlook Data Files folders. Initially, all folders contained in it should be empty. Messages from all connected mailboxes will be duplicated there, but only fresh ones: those messages that were in the mailbox before it was registered by the system in Outlook will not be included in this list. If you want to move old messages to this list, you can do this manually.
Below there will be sections with incoming and outgoing mail folders for all other connected email accounts. All sent and received messages will be stored in Outlook data files.
When you select one of the folders from the left panel, the entire contents of this folder will be displayed to the right of it, namely the list of messages. The dimensions of such panels can be changed; to do this, it is enough to move the cursor over the border and, holding the left mouse button, move it to the desired distance.
When you select a letter from the central panel, you can display its contents in the panel on the right. Here you will see full details as well as the body of the email. 
In order for you to be able to read all incoming messages from all mailboxes at once, you should place all folders with incoming messages in the “Favorites” list. This way you won’t have to view each inbox separately for each mailbox; all letters will arrive in one folder. To do this, you need to right-click on the desired folder and select “Show in favorites” from the drop-down menu.
If you need to duplicate all old messages located in different folders of different mailboxes in order to read all these messages in one big list. To do this, you need to select the folder from which you want to duplicate messages, then select any message or press the Ctrl+A key combination to select all messages. After selecting the required letters, right-click on any of the selected ones and in the drop-down menu click on the “Move” item, then “Copy to folder...”. After these steps, a window will open in which you need to select the folder corresponding to the type of messages and click OK.
Basic Outlook tools and features
In this section, we will examine in detail the main functions of the Outlook email client for which it was designed.
Creating and sending letters
In order to send a letter, you must click the “Create message” button, which is located in the upper left corner of the window in the “Home” tab. Do not forget that letters will be sent on behalf of the mailbox that is selected by default in the account settings.
In the window that opens for creating a letter, everything is quite simple, fill out the fields and write the desired letter. To attach files, you can either drag x into this window or use the “Attach File” button 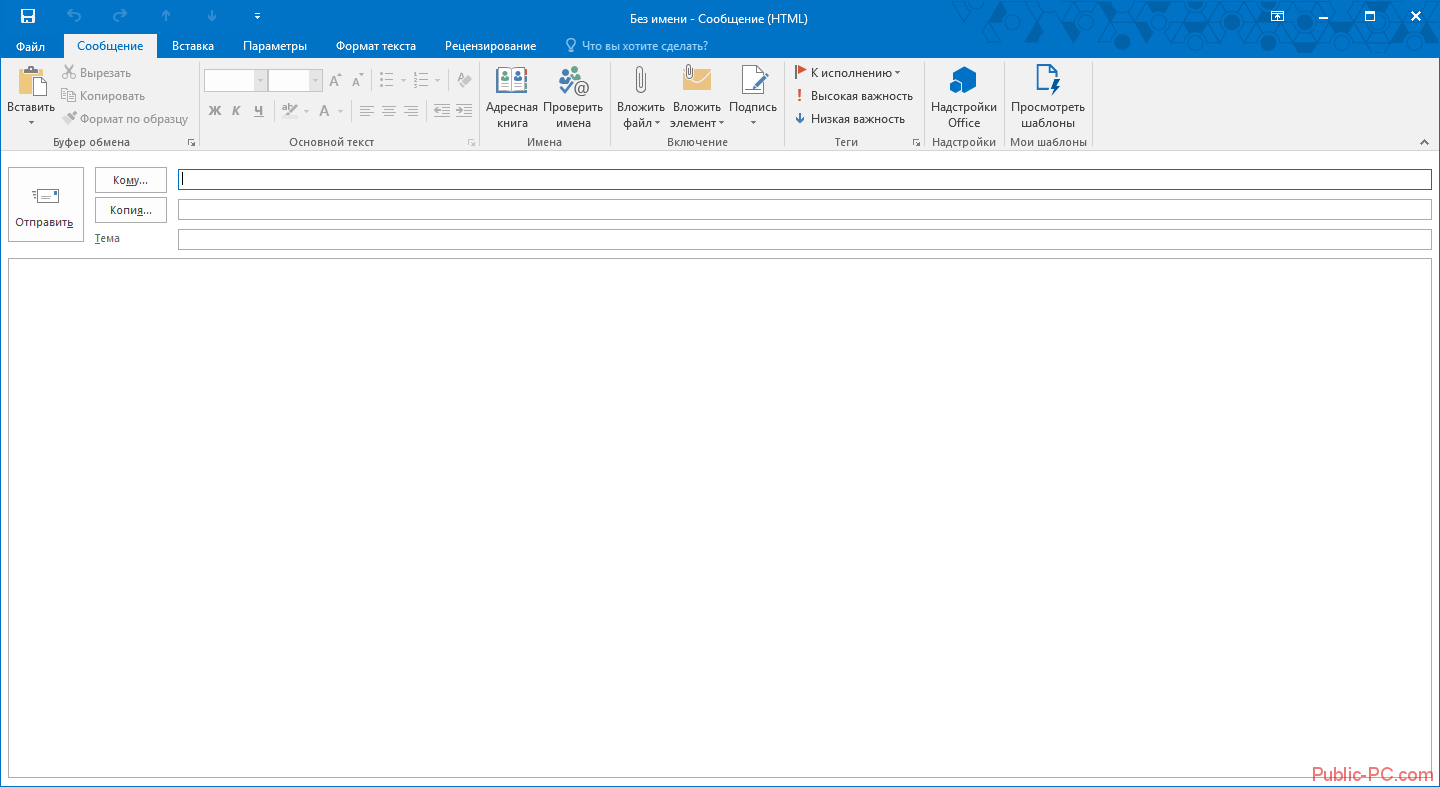
Deleting and restoring emails
Messages are deleted equally for all mailbox folders. To delete a letter, right-click on it and select “Delete” in the drop-down menu, or you can select the desired letter and click the Delete button.
All such messages will not be deleted immediately; they will first be placed in the “Deleted Items” folder and then, after a period of time, they will be permanently deleted. This is done to ensure that you do not accidentally lose important information.
To recover a previously deleted email, do the following: click on the “Deleted Items” folder and the email you want to recover, right-click on it and select “Move” and “Another folder...” in the drop-down menu. After this, a window will open with a list of folders, select the one you need and click “OK”. After that, look for your recovered email in the selected folder.
Error when deleting a message
If an error occurs during deletion, you should take some steps. First you need to clean out the “Deleted Items” folder, right-click on it and select “Empty Deleted Items”. When emptying this folder, a window will appear with two deletion options, you need to perform each option in turn.
If after the above steps the error does not disappear and the letter still cannot be deleted, then right-click on the problematic message and select “Move”, then “Another folder...”. In the window that opens with a list of folders, select any from the list and click “OK”. After this, restart the program and try again to delete this message, which is now located in a new folder.
Mail update
In order to update your mailbox and receive or send letters, open the “Sending and Receiving” tab, then click on the “Send and receive mail - all folders” button. After this, the program will connect to the servers to receive incoming letters and send outgoing ones. If you need to update only one mailbox, to do this, select the desired mailbox and in the same tab click the “Update folder” button.
Additional features
The Outlook mail client provides maximum opportunities for convenient work with a large number of mailboxes. One of the necessary functions is to create your own folder hierarchy for your mailbox; you can add your own folders and send letters to them for convenient sorting. This function is not present in all similar programs.
Creating folders
To create a folder, right-click on the mailbox in which you want to create an additional folder, then in the drop-down list, select “Create a folder...”, after which your folder will appear in the hierarchy, then you will need to enter a name for it. To change the order of folders, you just need to left-click on the desired folder and drag it to the desired location.
Creating tasks
The task creation function is also very useful. You can create a task in the task list, set due dates, importance and reminder. You will then be able to stay on top of important tasks and complete them on time.
To create a task, open the task tab; to do this, click on the icon of this function located in the lower left corner. After this, a window will open; to create a task, right-click on the empty area and click “Create task” in the drop-down menu.
When creating a task, a window will open in which you can set parameters, due dates, etc. Once created, this task will be displayed both in the task list and in the calendar.
Create a meeting
Using this feature, you can schedule a meeting of employees by notifying them by mail. If everyone who receives this notification uses the Outlook email client, they will be able to automatically mark the date of the meeting in their calendar.
To create a meeting, you need to go to the “Calendar” section, which is located in the lower left corner and select “Create a meeting” in the top menu, after which a window will open in which you can create a list of meeting participants, set a time limit and date for the meeting. After creating a meeting, click the “Send” button, and everyone who was on the mailing list will receive your email with information about the meeting
Conclusion
The article described only the most basic functions of the Outlook email client. This program has a fairly large number of functions and tools, and can be a good alternative to web versions of email clients.
It is worth noting a very convenient and intuitive interface, which is very important when working with a large number of mailboxes.
Outlook is an email application that many users are actively interested in. This is not surprising, since Outlook not only allows you to successfully conduct electronic correspondence with many business partners and relatives, but also provides a lot of other useful things.
With Outlook you can conduct electronic correspondence with friends and relatives, as well as with business partners
Along with this, you can successfully use the email application as an organizer that will not allow you to miss an important event or schedule two events that overlap each other.
Outlook is a tool in the Microsoft Office suite, so anyone can use this email application. However, before that, you will have to familiarize yourself with how to add an account in Outlook.
So, the interest in how to create an Outlook account is quite understandable, since without this it is impossible to work correctly with the mail application.
Conducting business correspondence is impossible unless you take steps to create an account. It should be noted that such actions are not accompanied by difficulties, so there is no point in turning to specialists for help.
All manipulations are easy to carry out yourself if you carefully study the instructions on how to create an account in Outlook.
Creation algorithm
First, open the Outlook application itself on your computer. Now in the main dialog box that opens on the monitor screen, find an option such as “Service”, click on it to open an additional drop-down submenu.
Step 1
At the very bottom of the list in the submenu there will be a line “Account Settings”, which is also what you should click on.

In the new window that opens, it is easy to find the “Create” button located at the very beginning, click on it too. Now it is very important not to miss one detail.
In the dialog box that opens, you will be offered automatic email setup, but due to the fact that not all providers are able to provide effective support, it is recommended to put a checkmark in the checkbox, orienting the process to the fact that you intend to carry out all the necessary settings manually.
After that, immediately proceed to the next step by clicking on the “Next” button. Now a window opens directly in which the process of creating the first or next account is carried out.
Step2
Fill out all the requested data, indicating your first and last name, which will subsequently be displayed when conducting correspondence, as well as your e-mail. The account type remains unchanged, but you will need to enter the mail servers (incoming and outgoing correspondence) manually, taking the data from your provider.

Step 3
Finally, you need to enter a password. Don’t forget to check the box below, which will allow you to automatically log into the created account in the future.

After completing all fields, click on the “Advanced options” button. A dialog box will open containing five horizontal radio buttons for making changes. We should select the Outgoing Mail Server option.
You will see the line “SMTP server requires authentication” with an empty checkbox next to it. Check this checkbox and immediately select the option below “Similar to the server for incoming mail”, placing a dot next to it too.

After this, you should make changes on the “Advanced” tab. We go to it, enter the port numbers provided by the provider.

Then, next to the “Leave copies of messages on the server” option, check the box so that all correspondence is subsequently saved and not automatically deleted from the server.
Feel free to click on the “Ok” button so that all the changes made take effect. To check whether the changes were made correctly and correctly, click on the “Check account settings” line.
If everything has been entered without flaws, you can immediately make sure that correspondence can be sent and also received perfectly by your account.
If you make mistakes in the settings, the program will immediately report them, then you will have to reconsider all the information that you enter. It is especially important to double-check the data provided by the provider.
As we can see, we can add an account without problems, and not much time is spent.
Deleting an account
The Outlook email application can simultaneously contain multiple accounts. However, at some point it may happen that the need for a particular one disappears, which is why the pressing question arises of how to delete an Outlook account.
Removal algorithm
After reading the instructions on how to delete an Outlook account, it will become clear that this process is surprisingly simple. In addition, it does not involve performing any complex manipulations or entering information, as when adding a new email.
To remove unwanted email from an email application, first open it.

Review all of them, find the one for which the need has already been exhausted, click on it so that the line is highlighted. Now click on the outermost “Delete” button. The removal process will be carried out at lightning speed.
In practice, you will see that deleting an extra email address or account is really incredibly easy. This does not require any special attention or any computer knowledge. It is only important to read the instructions and act strictly according to the indicated algorithm, and not rush on a whim.
So, the process of creating and deleting an account in Outlook is not accompanied by difficulties, but it is very important for the email application to effectively carry out certain types of activities and work successfully with email and the organizer.
A Microsoft account is a universal account with which you can use a range of services, from Outlook email to the Xbox Live digital content store. And with the advent of Windows 8, it became possible to use this account to log into the operating system. In this article we will tell you how to log into your Microsoft account on different services.
How to log into Microsoft through websites
The procedure for logging into a Microsoft account is the same for all online services - you need to go to the login page, enter your username and password. If you are the only one using the computer, you can also check the “Keep me logged in” checkbox so you don’t have to log in to your account every time. After entering all the required data, click the “Login” button.
Although the Microsoft account is the same for all services, their login pages are different. You can access your account settings through the main Microsoft website. Through the Outlook website - to email. The OneDrive website logs into cloud storage, and the Xbox website logs into an Xbox Live account for gamers.
Login to Skype
You can also use your Microsoft account to log into Skype, both on the website and in applications. To log into Skype with a Microsoft account on a computer, tablet or smartphone, launch the application, select the “Microsoft Account” option in the login window, enter your username and password and click “Login”.
To sign in to Skype through the website, open the sign-in page and click the “Microsoft Account” link on it. Enter your username, password and, if necessary, check the “Keep logged in” checkbox, and then click “Login.”
Logging into Windows 8.x
To sign into Windows 8.x with your Microsoft account, select it on the sign-in screen, enter your password, and click. If you are the only user of the computer, then your account will be selected by default and you will only have to enter your password.
Access recovery
If you've forgotten your Microsoft account password, on any of the login pages listed above, click the "Can't access your account?" link. Select the most appropriate reason why you are unable to log in and click the “Next” button.
Enter your login and verification code from the image, and then click “Next”. On the next page, choose how you want to receive the security code - by mail or SMS - and enter your email address or mobile phone number, respectively, and then click "Next". You will be sent a code that you need to enter on the next page and click “Next”. Create a new password and enter it twice, then click Next.
In the previous article, we figured out what an email client is and how outgoing and incoming message servers (POP3 and SMTP) work. We also took a step-by-step look at the process of setting up Windows Mail and Microsoft Outlook Express to receive and send email from your computer. Today, continuing this topic, we will look at configuring other email programs: Outlook Office 2007 and Outlook Office 2003, and try to understand where and how to look for the correct settings for configuring email programs. As an example, we use an abstract mailbox on www.mail.ru with the name and password password
(mosloadposition debug)
Setting up mail in Microsoft Office Outlook 2007
Microsoft Office Outlook 2007 is included in the Microsoft Office 2007 software package. To launch Outlook 2007, go to Start - Programs - Microsoft Office and select Microsoft Office Outlook 2007. If this program is not in the list, it means it is not installed on your PC. You need to run the installation of Microsoft Office 2007 and select Office Outlook to install on your computer.
To configure Outlook 2007 to work with your email account, you must create a new email account. To do this, in the “Tools” menu, select “Account Settings”.
In the window that opens, on the “Email” tab, click the “Create” button.
For public mail servers on the Internet, such as mail.ru, yandex.ru, rambler.ru, etc. the settings are configured manually, so check the box next to “Manually configure server settings or additional server types” and click “Next”.

Check "Internet Email" and click "Next".

Enter your email access details:
the name that will be displayed in letters in the “From” field;
your email address, for example ;
incoming and outgoing mail servers (for mail.ru this is and);
data for accessing email: user (same as the mailbox name) and password for accessing email (in our example this is password);
Check the “Remember password” checkbox so you don’t have to enter it every time you receive and send email.

But that is not all. For the mail.ru service, in this window you need to specify additional settings for sending messages. Click the “Other Settings” button and in the window that appears, go to the “Outgoing Mail Server” tab. Check the boxes “SMTP server requires authentication” and “Same as incoming mail server”. Click OK.

These settings are necessary so that no one can send spam on your behalf.
Already at the stage of creating an email account, you can check the correctness of the specified settings. To do this, click the “Account Verification” button.

Office Outlook will attempt to connect to your incoming and outgoing mail servers and notify you of the result.

Now in the “Add a new email account” window, you can click the “Next” button. The program will inform you that the mailbox has been created and the settings have been successfully applied. Click "Done".

You will see your newly created email account in the list. If you want to change any of its settings in the future, use the “Change” button. To delete an account, select it in the list and select “Delete”.

Setting up mail in Microsoft Office Outlook 2003
Microsoft Office Outlook 2003 is included in the Microsoft Office 2003 software package. To launch Outlook 2003, go to Start - Programs - Microsoft Office and select Microsoft Office Outlook 2003. If this program is not in the list, it means it is not installed on your PC. You need to run the installation of Microsoft Office 2003 and select Office Outlook to install on your computer.
To set up Outlook 2003 to work with your email account, as in the previous case, you need to create a new email account. To do this, select “Email Accounts” from the “Tools” menu.

The Account Setup Wizard will launch. Check "add a new email account" and click "Next".

In the window for selecting the server type, check “POP3” for mailboxes on mail.ru, yandex.ru, etc. and click Next.

Enter your user name, email address, and password. Don't forget to check the "Remember password" checkbox. Also enter the incoming and outgoing mail server names for your mail service. For mail.ru email these will be pop3.mail.ru and smtp.mail.ru.

To start setting up, go to the “File” section of the program menu.

Click on the “Account Settings” button. In the list that appears, click on the exact same name.

In the window that opens, select the account that you are going to edit and double-click on it.

The account settings window opens. At the top of it, in the “User Information” settings block, you can change your name and email address. However, the latter is done only if the address was initially entered incorrectly.

In the “Server Information” column, incoming and outgoing mail addresses are edited if they are changed on the side of the mail service provider. But editing this group of settings is extremely rare. But the account type (POP3 or IMAP) cannot be edited at all.
Most often, editing is done in the “Login” settings block. Here you specify the login and password to log into your mail account on the service. For security purposes, many users often change the password to their account, and some perform the recovery procedure because they have lost their login information. In any case, when you change the password in your mail service account, you also need to change it in the corresponding account in Microsoft Outlook 2010.
In addition, in the settings you can enable or disable password remembering (enabled by default), and secure password verification (disabled by default).
When all changes and settings have been made, click on the “Account Verification” button.

Data is exchanged with the mail server, and the settings made are synchronized.

Other settings
In addition, there are a number of additional settings. In order to go to them, click on the “Other settings” button in the same account settings window.

In the “General” tab of additional settings, you can enter a name for account links, information about the organization, and an address for replies.
![]()
In the “Outgoing Mail Server” tab, you specify the settings for logging into this server. They can be similar to those for the incoming mail server; you can log in to the server before sending, or a separate login and password are allocated for it. It also specifies whether the SMTP server requires authentication.

In the “Connection” tab, select the type of connection: via local network, telephone line (in this case you need to specify the path to the modem), or via a dialer.

The “Advanced” tab indicates the port numbers of POP3 and SMTP servers, server waiting time, and the type of encrypted connection. It is also indicated whether copies of messages should be stored on the server, and the period for their storage. After all the necessary additional settings have been entered, click on the “OK” button.

Returning to the main account settings window, for the changes to take effect, click on the “Next” or “Account Verification” button.

As you can see, accounts in Microsoft Outlook 2010 are divided into two types: primary and other. Entering the first of them is mandatory for any type of connection, but other settings are changed relative to the default ones only if required by a specific email service provider.
There are a number of good reasons why you should sign in to apps with a single Microsoft account.
What is a single account?
It is a universal account that can be used to perform actions in a number of Microsoft services:
- online music service Xbox and Xbox Music;
- Outlook.com email client;
- Skype voice and video communication software;
- phone search service;
- cloud storage OneDrive (formerly SkyDrive);
- Office 365 and other applications.
How to register and login
If you use one of the above applications on your mobile gadget, then you already have a Microsoft account.
If you don’t have it, you can create it:
- Find the “settings” section in the phone menu;
- select the item “mail” - “accounts”;
- On the “stay updated” screen that appears, click “sign in.”
Perform further actions according to the instructions.
Registering on a computer is also not particularly difficult. Just go to the official website and fill out the fields of the registration form.
Be careful: when entering the desired email address, make sure it is free. Correctly indicate the country of your location to avoid further problems with registration.

The login password must consist of 8 – 16 characters.
If you have a Microsoft account, to log in, simply enter your email address and password in the form provided. And in order not to have to do this every time, check the box next to the words “stay logged in”, and in this case you will be logged in automatically.
E-mail has proven to be such a successful solution and such a convenient way to maintain contact between people that most active Internet users today can no longer remember the last time they had to write regular letters - if it was ever done at all.
Simplicity and extreme convenience, the ability to send text messages and files of various formats to any inhabitant of the planet through your own email account, as well as sending almost at the speed of light, could not help but please users.
Since the active development of Internet technologies, all kinds of mail services have become widespread, providing functionality for sending and receiving letters via the Internet and this was done using a web interface. However, the capabilities of the web mail interface are far from perfect, and this shortcoming has given rise to a considerable number of more or less successful computer programs for working with e-mail. One of the most popular programs in this segment has become a multifunctional application Microsoft Outlook in Russian.
In order to download Outlook mail for free in Russian, you need to use the installer of one of the following office packages: Office 2013, Office 2016 or the universal web version of Office 365 on a computer with Windows or Mac OS. You, of course, can use older releases, such as 2007 or 2010, but we recommend paying attention to the latest releases due to their advanced functionality and compatibility with most popular email services. In this case, setting up outlook for yandex or mail.ru will not cause any difficulties at all.

This is due to the fact that many users could not correctly configure Yandex mail in Outlook due to not knowing which Yandex incoming mail server to specify and what type of protocol to use for incoming mail (POP3 or IMAP). Because of this, logging into the mail was difficult. This also applied to other well-known email services, such as Google, Yahoo, etc.
Today, from the once little-known Microsoft Outlook application, we have received not just a program for working with mail, but a full-fledged effective mechanism in the person of an excellent information manager, supplied as part of the Microsoft Office office suite.
A common mistake is that users often confuse this client with the Outlook Express application - it is also an email software, but these are still completely different programs with different goals.
An undeniable advantage is its ability to work not with one email account, but with several at once - for each of them the application creates and maintains its own account. Thus, you can set up receiving Outlook mail for yandex, mail.ru, google, rambler, as well as many other services and your own sweat servers.

In addition, the mail client works with news groups, and also allows not one user, but several, to take advantage of all its benefits - each of them has their own identity. But even this would not have made Outlook so popular if not for additional modes that provide a huge array of possibilities.
Contact management
The “Contacts” mode was originally created in order to collect and store information about the correspondents to whom messages are sent and from whom mail is received. However, the regime subsequently developed into an effective option for storing electronically information about any of your contacts, including not only business communications, but also personal interactions. Among other things, the program uses a modern Internet computer environment and is able to provide information about any contact taken from social networks.Tasks
The “Tasks” mode is a complete list of activities important to the user of the program. Moreover, the event to be performed or participated in may contain the dates of its beginning and completion, or may be indicated without them.Event Management
The “Calendar” mode will be needed not only to remember what date it is, but also to not forget about the important matters of today down to the minute - meetings, appointments or any other events. If necessary, Outlook can inform any necessary correspondents about a meeting or a meeting using a variety of communication channels, from a local network and e-mail to a fax message.Documentation
The “Diary” mode records any actions that the Outlook user performed at the computer - working with documents, mail, talking on the phone. In addition to them, the mode allows you to keep notes in the style of a regular classic diary, if necessary.Taking notes
The Notes mode in Outlook is more like a handy notebook - here you can make any entry as soon as the corresponding idea comes to the user’s mind.Both the main functionality and additional modes are learned very easily and quickly, so the program is relatively simple to use, and the design of the software controls turned out to be a harmonious and beautiful addition to all its capabilities. Therefore, if you are wondering how to set up Outlook and don’t know where to start, then pay attention to the simple and convenient help system called by the F1 button.

Among these features, the great idea of the developers stands out - organization of operational actions. Behind the name, which is incomprehensible at first, lies the ability to perform a certain standard set of actions by pressing just one button - this is incredibly convenient and saves a lot of time.
Another pleasant quality of the email client is the ability to structure an array of messages: the application will demonstrate the complete sequence of messages, which, if necessary, will help you find in this sequence any desired letter, a response to it, and all messages associated with it. If the message flow is excessively long, it can be divided into an arbitrary number of shorter chains– each of them can be deleted, archived or divided into arbitrary categories.
General short list of Microsoft Outlook features:
- interaction with many popular email services, connecting to an account in a few clicks;
- allows you to work with a large number of email accounts simultaneously;
- cross-platform (Microsoft Outlook can be downloaded for free for Android, iOS, Mac OS, and of course Windows.
- If you don’t have access to a PC, you can work with mail using the Internet version of the program - Outlook.com
- the ability to restore messages that were long deleted;
- detailed and high-quality interface localization (good support for the Russian language);
- a convenient mechanism for printing messages received by e-mail;
- working with attachments (allows you to send and receive large files hosted on the OneDrive cloud);
- Allows you to archive old messages (a whole range of tools is provided for this);
- Full work with the planner and built-in calendar (sharing access for other users);
- effective and complete work with user contacts (can be imported to the phone);
- The Internet version of the Outlook.com application automatically interacts with other services and applications from Microsoft, such as the popular Skype messenger, OneNote, OneDrive cloud, etc.
- allows you to store all the user’s contacts in one place for their convenient administration and synchronization with mobile devices;
- the ability to download Microsoft Outlook for free in Russian (depending on the type of subscription and license).

Convenient email interface
In order to find all the messages from the interlocutor we need, just open the view and you can see all the correspondence with the contact of interest, as well as any tasks and calendar events that include them.As a structural element of the office suite, Microsoft Outlook has excellent working synchronization with the Microsoft Word application, and automatic diary creation and tracking of changes in documents are added to the user's capabilities.
The program's considerable capabilities are aimed at ensuring that the user's time is spent as rationally as possible and the efficiency of his actions is maximized, however, a large number of users choose simpler email clients, since Outlook, for all its versatility, is not as easy to use as its counterparts. But if this doesn’t scare you, you can safely download the Russian version of the program.


