There is no wireless network connection on the laptop. Identifying network settings. Error “Windows could not connect to...”
Is there no Wi-Fi icon on the Windows taskbar or in the Network and Sharing Center menu? This does not mean that the equipment has failed. Equipment breakdown is only one of the likely causes. In some cases, you can do it yourself.
What to do if there is no “Wireless Network Connection” icon.
This problem occurs if:

Is there a Wi-Fi receiver?
If a receiver is not installed on your computer, you will not see the Wi-Fi network icon. But how can you check what kind of adapter you have? The simplest thing is to look at the PC characteristics. Laptops should have a sticker that lists the device specifications. Another option is to find out the adapter model and find information about it. Do you have a desktop computer? Then look for ports on the system unit for connecting a modem. If an antenna is installed there, then the product is suitable for operation via Wi-Fi.

And the easiest way:
- You need the Windows Control Panel.
- Open Device Manager. It's in the Hardware and Sound category.
- Expand the Network Adapters menu.
- See if there are any models that say "Wirelles", "802.11" or "WiFi".

If there are no such inscriptions, you will not be able to set up a wireless connection. But you can purchase a Wi-Fi module or a network card that already has an antenna. There are also external Wi-Fi receivers.
Driver
Windows usually loads the software it needs on its own. But if the network hardware driver is missing or damaged, it must be installed manually.

To connect, you need to download the software. There are several ways. The first one is suitable if the driver was installed incorrectly.
- In the Manager, right-click on the item with the yellow triangle.
- Select "Delete" and confirm the action.
- Restart your computer.
- After Windows starts, it will “detect” the presence of a new device.
- If this does not happen, go to the Manager again.
- Select any item.
- "Actions - Update configuration."

This will only work with equipment that is installed in a "Plug and Play" manner. The software for these devices downloads itself. You can use them immediately after connecting. If the board does not have such a function at all:
- Select any item in the Manager.
- "Actions - Install old device"
- A window with explanations will open. Click Next.
- Check "Automatic Search" or "Manual".
- Select Network Adapters.
- If you know the model and type of gadget, find it in the list.
- Wait until the installation finishes.
To download an update for outdated software:
- In the Manager, right-click on the device.
- In the drop-down list, click on “Update Driver”. This option will be active if Windows has detected the hardware model.
- Select “Automatic search” so that the system finds the software on the network and downloads it.
- Or click “Search on your computer” to specify the path to the installer.
A disk should be included with your new Wi-Fi adapter or laptop. You can download the necessary software from it. If you do not have a CD with the driver, and the system itself did not find it:
- Go to the network equipment manufacturer's website.
- Copy the model name into the search bar.
- Open the information page for your adapter.
- Download the software from there. It is usually located in the “Support”, “Downloads”, “Files” or “Programs” section.
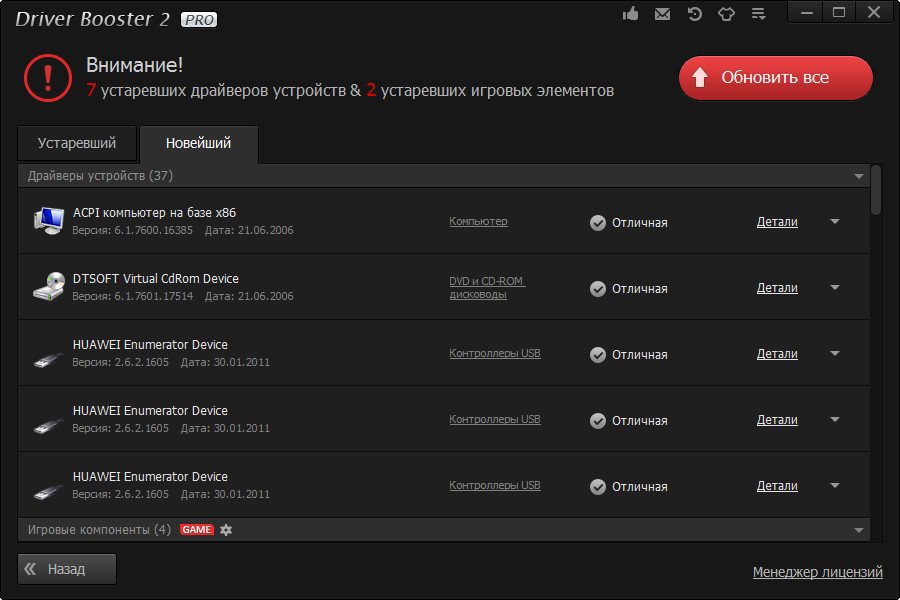
There are special applications for installing system software. For example, Driver Booster. It determines the hardware model and downloads the latest driver versions for it.
You will need
- Connected Wi-Fi router, working computer with Windows operating system, client for working in a wireless network
Instructions
Go to the Start menu. Select "Settings" and in it - "Network connections". Right-click on the “Network Neighborhood” icon to bring up the drop-down menu and select “Properties”.
Return to the Network Connections window. Right-click on the “Wireless Network Connection” icon and select “Properties” from the drop-down menu.
In the tab that opens, select “General” and make sure that the “When connected, display an icon in the notification area” and “Notify when there is limited or no connection” buttons are checked.
Go to the "Wireless Networks" tab in the same window.
If the “Wireless Networks” tab in the “Wireless Network Connection” - “Properties” window is missing for some reason, click OK.
Go to the Start menu, select Settings and go to Control Panel.
In the new “Control Panel” window, double-click on the “Administration” and “Services” icons.
Make sure the Wireless Setup service is running. Otherwise, double-click the “Wireless Settings” icon, and in the new properties window, click the “Start” button and OK.
Return to the Network Connections window. Right-click on the “Wireless Network Connection” icon to open the drop-down menu and go to “Properties”.
On the Wireless Networks tab, make sure that the “Use Windows to set up the network” button is checked.
Click the Add button under Preferred Networks. Go to the "Connections" tab. Enter MIAN in the Network Name field. Make sure the “Connect even if the network is not broadcasting” button is checked. Select WPA in the "Verification" menu section. Select TKIP from the drop-down menu on the Data Encryption tab. Make sure that the checkbox is checked on the “This is a direct connection to a computer” button and unchecked on the “Access points are not used” button.
Go to the Authentication tab in the Wireless Properties window. Select "Protected EAP" from the drop-down menu in the "EAP Type" section. Uncheck the "Authenticate as when information is available" button. Make sure that the checkbox next to “Authenticate as a guest when there is no computer or user information” is selected. Click the Properties button.
Uncheck the Check Servers button in the EAP Protected Properties window. Check if “Secured password” (EAPMSCHAP v2) is in the “Selecting an authentication method” section. Select the checkbox next to the “Enable Fast Reconnection” button.
Click the "Configure" button. Uncheck the Automatically use Windows login and password button in the EAPMSCHAP v2 Properties window. After that, click OK.
Click OK on the EAP Protected Properties window. Go to the "Connection" tab in the "Wireless Network Properties" drop-down window. Make sure the "Connect if a network is within range" button is checked and click OK.
Click OK in the Wireless Network Connection Properties window.
note
The names of the buttons and tabs vary slightly depending on the operating system version.
Helpful advice
As operating systems improve, the procedure for connecting to wireless networks becomes easier and, perhaps, some of the steps described above will be unnecessary in your particular case.
Sources:
- Information IT portal
- no wireless network
In the modern world, most people are gradually abandoning cables and other inconveniences of wired Internet. And this is not surprising. Why tie yourself and your laptop to a specific place when you have the opportunity to walk with it throughout the apartment and even outside it? Almost all providers offer to connect to wireless WiFi service Internet. But there are ways to bypass the system and save a lot of money. We will tell you how to set up wireless Internet at home. Using the example of the Beeline provider and the D-Link dir 615 router.
You will need
- WiFi router
- Laptop or PC with WiFi adapter
- LAN cable
Instructions
Installation .
The most optimal location for this is in the center of the apartment. This will allow you to achieve the best signal in any corner of it. After installing the router, connect it using the network cable included in the kit, inserting one end into the network card and the other into any LAN port. Go to the router menu by typing in any //192.168.0.1 using the username admin. Go to Setup – Internet Connection Setup Wizard. Click next 2 times, and in the third step select username (Russia L2TP).

Next, enter your username and password, leave the DNS Setting as standard, and in the L2TP Server IP Address item, enter tp.corbina.net. Click connect. After this, you will need to reboot by disconnecting power from it for at least 15 seconds. This action should be performed if it does not occur automatically.

WiFi setup.
Go to Setup – Wireless Settings – Wireless Network Setup Wizard. Now enter the name of your future network and its password in sequence. After clicking the Save button, the wireless network will be ready for use. If there is no access, reboot the router.

Video on the topic
note
Set strong passwords containing letters, numbers and symbols to prevent your router from being hacked.
Helpful advice
Try not to reset your router to factory settings after setup.
If the device does not work properly, update the firmware downloaded from the manufacturer’s website.
Sources:
- how to connect wifi internet
For all its convenience, wireless compound is the most vulnerable to unauthorized connection. However, it can be reliably protected using standard router tools with certain settings.

Instructions
Connect Wi-Fi to your computer using an Ethernet cable. In this case, the indicator on the router should light up, indicating that the network is connected. After that, launch any browser to go to the router settings. To do this, enter the address 192.168.1.1 into the address bar of your browser. If the connection is successful, a dialog box should appear in the browser in which you must enter your username and password to log in. By default, the login and password are “admin” “admin”. In the router settings window, go to the Security tab.
Wireless is most reliable compound protected by a password. To set a password, first select the type of encryption that the router will use. For domestic purposes, it is recommended to use WPA encryption. It is better to use a random set of letters, numbers and numbers as a password, which will be difficult to crack. Do not use number, last name and date as a password; this kind of data is quite easy to hack or select.
Enter a password for all devices that you plan to connect to your home Wi-Fi, and to avoid inconvenience, make sure they connect automatically.
In addition to a password, a wireless network can be protected by limiting the number of network clients, that is, if only two continuously use Wi-Fi in your home, you can set a limit of two clients, and no one else will be able to connect to this network. This can also be done in the router settings. However, if one of the devices disconnects from the network for some reason, then anyone can connect to the “free slot”. Therefore, this method is not as effective as a password.
Video on the topic
Helpful advice
Use both methods to secure your wireless network for the best security. Set a password and limit the number of clients based on the number of Wi-Fi devices in your home.
Technologies such as infrared and Bluetooth are becoming less and less popular because they are being replaced by modern wireless networks. Wi-Fi is being used more and more, as there are a large number of free hotspots in cities.

Instructions
To wireless compound a specific key combination. Usually this is Fn + F2. To connect to the Internet you need to look for specific access points. On a personal computer, you can connect to Wi-Fi only if you have a special removable device. Ask a peripherals consultant about Wi-Fi devices for a personal computer. Prices may vary, but mainly depend on the signal reception radius.
Once the device is purchased, unpack it and insert it into the USB drive. If you have USB 3.0 technology on your computer, then insert Wi-Fi there. The computer system will automatically detect the new device. The kit also includes a CD with drivers. Insert it into the drive and install all the drivers. Next, restart your computer so that all saves in the system are recorded. After the reboot, an icon will appear in the tray that will show the Wi-Fi status.
Go to the “Control Panel” item. This can be done using the “My Computer” shortcut. Next, click the shortcut called “Wireless Networks.” Here are all the settings that relate to W-Fi technologies, as well as Bluetooth. Click the "Turn on Wi-Fi" button.
After this, the wireless technology will be active, but it is not yet possible to connect to the Internet, since you need to look for special access points that can be locked with passwords so that unauthorized persons cannot penetrate the system and automatically connect to the connection. To do this, click the “Find new” button compound" The system will automatically begin scanning access points that are in operation.
If no such systems are found, try scanning in another location. As soon as compound will be found, try to connect. As practice shows, some cafes and educational institutions use free access points that allow you to connect to the Internet. You can find a list of such establishments on the Internet using search engines.
Tip 5: How to set up wireless Internet on your computer

You will need
- Wi-Fi adapter.
Instructions
To connect a desktop computer to an access point, you must have a special device - a Wi-Fi adapter. Select the appropriate module. They come in two types: internal and external adapters.
Check the types of radio signals your Wi-Fi router produces. The most common channels you can find are 802.11 b, g and n. Based on the information received, select the appropriate Wi-Fi adapter.
Connect the wireless module to your computer. Turn on your PC and wait for the operating system to load. Install the drivers necessary for the correct functioning of the Wi-Fi adapter. It is best to use the original disk that came with the device.
After updating the software, open the Network and Sharing Center. Click on the “Manage wireless networks” link. Wait for the new menu to launch and click the “Add” button.
In the next dialog box, select “Create a network profile manually.” Study and fill out the form provided. Be sure to enter exactly the parameters that the desired access point works with. Any error will result in you not being able to connect your computer to the Wi-Fi network.
If your access point is configured to hide its name, enable the “Connect even if the network is not broadcasting” option. Click "Next". Select “Done” and wait for the connection to the access point to be established.
Check that your wireless connection is working properly. It is worth noting that some PCs may not connect to a wireless access point if they are connected to a Wi-Fi router via a patch cord.
Video on the topic
The benefits of a wireless network are undeniable. You are not tied to any specific workplace, and you can go to net from anywhere in your apartment, office, shopping center, etc., where there is network coverage. It is convenient and can greatly simplify the work of any organization. Our instructions will help you set up a wireless network yourself.

Instructions
Find the “Network Neighborhood” icon on your desktop. If this icon is not on your desktop, go to the Start menu // Settings // Network connections. Then right-click on the Network Neighborhood icon. A drop-down menu will appear in which you need to select “Properties.”
In the “Network connections” window that opens, right-click on the “Wireless network connection” icon. A drop-down menu will appear, select “Enable.”
Check the settings options on the General tab. The checkboxes should be on the buttons “When connected, display an icon in the area” and “Notify when there is a limited or absent connection.
Find and select the “Wireless Networks” tab in the “Wireless Network Connection - “Properties” window
If you do not find such a tab there, then in the “Wireless Network Connection - Properties” window you need to click the “OK” button. In the “Start” menu, click the “Settings” button, then the “Control Panel” button.
In the “Control Panel” window that opens, double-click on the “Administration” icon, double-click on the “Services” icon. Make sure that “Wireless Zero Configuration” (or “Wireless Settings) is in the “Working” state. If not, then double-click on “Wireless Zero Configuration”, in the service properties window that appears, click the “Start” button and “OK”. In the “Network Connections” window, right-click the “Wireless Network Connection” icon, select “Properties.” Find the “Wireless Networks” tab and make sure that the “Use Windows to configure the network” button is checked.
In the “Preferred networks” field, click the “Add” button. On the “Connections” tab, in the “Network name (SSID)” field, you need MIAN (Attention! all letters must be capitalized). Check the box “Connect even if the network is not broadcasting.” In the “Authentication” section in the menu, you need to select WPA. On the Data Encryption tab, select TKIP from the menu that appears. Make sure that the “This is a direct connection to a computer” button is checked, and that the “Access point is not used” button is unchecked.
In the Wireless Network Properties window, select the Authentication tab. In the “EAP Type” section in the menu that appears, select “Protected EAP (PEAP). Uncheck the “Check as if information about . Make sure that the "Authenticate as if there is no information about the computer or user" button is unchecked. Click the "Properties" button.
In the “EAP Protected Properties” window, uncheck the “Verify server certificate” button. Make sure that in the “Selecting an authentication method” section, “Secured password (EAPMSCHAP v2)” is located. On the “Enable fast reconnection” button, check the box.
Click the “Configure” button. In the EAP MSCHAPv2 Properties window, uncheck the Automatically use Windows login and password button. Now click the “OK” button.
Click OK in the EAP Protected Properties window. In the Wireless Network Properties dialog box, select the Connection tab. Make sure the “Connect if the network is within range” button is checked. After that, click “OK.
Video on the topic
note
The vast majority of laptops and other mobile devices available on the market are equipped with Wi-Fi adapters for accessing wireless networks. These can be home networks, networks in public places, corporate and many other networks. How to connect to such a network and how to configure it correctly is described in this article.
Helpful advice
Moreover, in order to set up a Wi-Fi network, you don’t have to be a “network connection genius.” This procedure can be performed by any modern schoolchild. Firstly, what are we connecting? In our case, this will be 2 computers with Windows XP (with at least SP2) and a wireless access point. First, let's find in the instructions the IP address (computer identifier) and password of the access point. For example, the address could be: 192.162.2.234.
Sources:
- setting up wireless internet
Many users have already learned how to create their own local networks with Internet access. But not everyone knows that such a network can be set up even if your provider provides access to an ADSL network.

You will need
- - DSL router.
Instructions
Setting up such a network is not fundamentally different from a conventional LAN network. The only significant difference is that a specific router is required. Purchase a Wi-Fi enabled device with a DSL port to connect to the Internet.
Install this Wi-Fi router near one of your desktop computers. Connect power to the equipment. Using a splitter, connect the telephone line cable to the router's DSL channel.
Find any Ethernet (LAN) port on the equipment case and connect it to the computer’s network card using twisted pair cable. Turn on the selected PC and launch any of the existing browsers.
Open the instructions for the Wi-Fi router and find the original IP address of the equipment in it. Enter its value in the browser URL input field to enter the device settings menu.
Explore the menu that opens. Find WAN (Internet) and open it. Configure this item as you would if you had a regular DSL modem. It is also recommended to activate the DHCP and NAT functions.
Save the settings for this menu. Reboot your Wi-Fi router and make sure that authorization on the provider's server was successful. Go to the Wi-Fi menu (Wireless Setup Settings). Create a wireless access point. Pay special attention to the choice of security types and radio signal transmission.
Save your settings changes. Reboot your Wi-Fi router again. Connect desktop computers to the remaining Ethernet (LAN) channels. Connect your laptops and communicators to the Wi-Fi access point you created. Check that all of the above devices have Internet access.
Helpful advice
Alternatively, you can use a LAN router and DSL modem together.
Some owners of netubes and laptops prefer to create their own wireless net Wi-Fi. This allows you to get rid of cables that negate the advantages of these mobile devices over desktop computers.

You will need
- - network cable;
- - Wi-Fi router.
Instructions
To create and successfully configure the network described above, you will need a Wi-Fi router. Choose the hardware that's right for your mobile computing needs. To do this, study the following parameters of laptop Wi-Fi adapters: types of radio signals (802.11n, b or g) and security protocols (WEP, WPA-PSK or WPA2-PSK).
If you don't have instructions at hand, then open the device manager, find the wireless adapter there and write down its model. Visit the official website of the company that produces these devices. Find out the technical characteristics of this model. Purchase an appropriate Wi-Fi router.
Install this equipment in the desired location and connect the device to AC power. Connect the cable provided to you by your provider to the Internet channel (DSL, WAN) of the equipment.
Open the user manual for the equipment. Find in it the login, password and IP address required to access the router settings. Enter this IP into the address bar of your browser.
The program window will display the web interface for the Wi-Fi router settings. Go to the Internet Setup Setting or WAN menu. Change the values of the items in this menu to communicate with your provider's server.
Save the settings and go to the Wireless Setup Settings menu. The settings options in this menu depend only on the characteristics of your or laptops. Select the desired values and save the settings.
Reboot the equipment by clicking the Save & Exit button. If this function is missing, then turn off the power to the Wi-Fi router for a few seconds.
Disconnect the cable. Search for available wireless access points. Connect your laptop to the network you recently created. Make sure you have internet access. Connect other devices to the router.
Video on the topic
If you have a home wireless network for multiple devices, you need to be very careful when choosing a Wi-Fi router. This equipment must be able to create an access point to which all the necessary laptops can connect.
If you do not have a Wi-Fi wireless network connection on your laptop with the Windows operating system installed, these instructions are for you.
Many Windows 7 users have difficulty connecting their laptop to a Wi-Fi network. Or, in other words, there is no wireless network icon in the operating system interface on the taskbar, and the “Wireless network” or “Wireless network connection” connection is not displayed in the control panel in the network and Internet settings. We will analyze this problem only for Windows 7, so that it is easier for you to navigate using the screenshots.
We'll show you how to turn wireless on and off, and troubleshoot adapter settings. Here's how to turn it back on. Does your laptop keep crashing or losing wireless connection for no reason? Or maybe your laptop can see the wireless access point, but won't connect unless you restart the entire computer?
The main culprit for this type of problem is usually the software, not the hardware. This usually fixes problems with deleting the connection! If this doesn't work, you can also try to restore your wireless connection. My image shows a LAN connection, but you should see a wireless network connection if you have a wireless card installed on your computer.
If there is no Wi-Fi connection, then in the lower right corner of the taskbar you will see an icon with a red cross through it. Next, you should also make sure that there is no adapter for setting up a wireless network. To do this, go to “Control Panel” → “Network and Internet” → “Network Connections”.
The main reasons for problems setting up a Wi-Fi connection
In such a situation, the problem lies either at the software level or at the level of the hardware itself. Therefore, most likely, the recommendations even from the instructions will not suit you.
Many times people change them manually or are notified by technical support users over the phone that they have changed them. Therefore, if updating the driver, resetting the configuration and restoring the network connection do not work, try disconnecting the wireless router and reconnecting it after a minute. It's best to also turn off your cable modem, but you should turn on the modem first and then the router.
Unless there is something physically wrong with the router, one of the methods above should work! You can also scroll below for step-by-step instructions. On your desktop screen, you will see a wireless adapter status icon in the system tray next to your clock.
Two conclusions can be drawn from this:
Firstly, your laptop may not have a network driver installed, which means you can only access the Internet with a direct cable connection. This problem is common among laptop users. Secondly, it is possible that the computer does not physically have a network card for wireless communication. Then you should purchase this network adapter from the store. They are divided into internal and external. Most often, you will have to solve the problem in a similar radical way if you are the owner of a desktop PC. You can read more in the instructions. As for a laptop, the adapter is usually built into it by default, so it doesn’t cost anything to buy additionally.
Find the name of the wireless network. If your wireless router requires a key or password, this message should appear. If you're successful, the wireless status icon should show signal strength bars without a yellow star. If the text reads "Switch to Category View" you are already in Classic View and can move on to the next step.
You will then be prompted to enter your network password. Understanding wireless networks. Because a computer connects to the network via radio signals rather than cables, a person can move from place to place on the network, such as from an office to a conference room, and remain online all the time. An access point connects users to other users on a network and can also serve as a connection point between a wireless network and a fixed wired network. Access points are typically used in large public or commercial networks that provide services to multiple users. A wireless router is a gateway between an Internet connection or fixed-wire network and a wireless network. Most home wireless networks or small business wireless networks use a wireless router to connect users to each other and to the Internet. An access point is a station that transmits and receives network information. . Follow one or more of the following methods to connect to your wireless LAN.
How to make sure you don't have the right driver
To find out whether the network driver is really not installed, you should start the device manager in one of two ways:
- Press on the keyboard at the same time Win+R, then in the “Open” field type msc and click on the button Ok.
- In the “Computer” menu, move the mouse cursor over an empty space and select “Properties” from the context menu. Find and open the device manager or, as it is also called “Device Manager”, in a new window.
In the window that opens, find the list Network adapters and expand it. Most likely, you will see only one network card adapter in the list, and at the top of the list the device manager will place some kind of “Unknown device” with a yellow exclamation mark icon. It should detect at least one such device and display it as in the screenshot:
Method 1: Preparing the laptop. Method 2: Install network wiring. If you do not have an Internet connection, you will need to contact your Internet service provider to set one up before you can connect to the Internet. To do this, follow these steps:
Please note that you must first create a wireless network profile to which you will assign static information.
Some networks require you to use a proxy server to access the Internet. A proxy server is another computer or device that acts as an intermediary between you and the Internet by passing your requests to the server and the servers' responses to you. Unfortunately, this type of installation requires you to specify certain settings so that you can use the Internet correctly.
How to install a wireless driver
Now that the problem is completely clear, all that remains is to install the necessary driver on the computer. To do this, you should follow the steps that are described here:. Once the driver has been successfully installed, the Wi-Fi icon should appear on the taskbar. Otherwise, incorrect installation or an inappropriate driver version is possible. Check both options and try to install again. In general, the driver should be included with the adapter or laptop.
You will no longer be automatically connected to this network. When working with computers and network problems, problems invariably occur. The first step is to make sure that the wireless connection does not require a password. You can determine this by seeing if there is a lock symbol next to the wireless network name. If there is, make sure you know the correct password for the network before attempting to join it. If this still doesn't solve your problem, try moving closer to your wireless router and see if you can then connect.
I hope that after reading these instructions you will be able to connect to a Wi-Fi network on your laptop. Probably, some points in your opinion remained untouched in the current article, then leave comments with questions.
By the way, if you are a Windows 10 user, I advise you to read similar instructions:.
The first suggestion, if the wireless router is under your control, is to allow the router to broadcast this name. If you are able to connect, you may have entered the wrong name, selected the wrong encryption type, or entered the wrong encryption password. You should then confirm these settings by looking at the router configuration and, if necessary, changing these settings to new ones.
What to do if you cannot access the Internet when connected to a wireless network. If it shows that you are connected to the network, but you still cannot access the network, first make sure that your Internet connection is actually working. Check the connection from another computer and device to confirm it is working. If you do not fill out these fields, click the "Renew Lease" button and then click the "Update" button when it asks you whether to continue.
Introduction
The use of various devices with WiFi is rapidly bursting into our lives; now not only complex equipment like laptops and communicators, but even such simple gadgets as a photo frame are equipped with WiFi. Setting them up to connect to wireless networks is becoming a challenge, so it's not surprising that technologies are emerging that can greatly simplify the setup procedure.
To determine this, you should ask the owner or administrator of the wireless router. To check this, simply forget the network profile and try to recreate it and enter the password again. The three quality levels are shown from best to worst, as the lowest level is the worst connection speed. Another option is to buy a wireless extender that can extend the range of your wireless device so that it is strong throughout your entire home or apartment. When you add an extender to your wireless network, it will increase the range of your wireless router so you can connect to your network in places you previously couldn't.
Creating a new wireless network begins directly with the configuration of the access point (wireless router) connecting computers and other wireless equipment to it.
Technology
The traditional setup method looks very complicated from the point of view of an ordinary user: you need to perform difficult steps with connecting to an access point for the first setup, you need to manually create a wireless network name, and specify a complex and difficult to reproduce security key. And this entire setup process requires the user to have basic knowledge about WiFi. It will be much easier for him to simply press a button or enter a PIN so that everything is configured and connected.
Wireless Protected Setup (WiFi Protected Setup - WPS) was just invented to quickly, easily and safely configure network devices and computers. For example, one way to connect a game console with WiFi to a wireless network is to simply press the WPS buttons on the wireless router and on the game console.
Regardless of your location's specific requirements, we hope the information in this guide has shown you how to work with them. If you have any questions with the information here, or need help with this, please feel free to ask us. Manually connecting to a wireless network is when you establish a new connection or network.
Select your computer's operating system for instructions. You can now connect to your wireless network. Make sure the “Start this connection automatically” checkbox is selected. You should now be connected to your wireless network. Follow these steps to update your connection settings.
WiFi Protected Setup is now the standard for creating a wireless network easily and securely. In Microsoft terminology this is Windows Connect Now (WCN).

If you do not have a Wi-Fi wireless network connection on your laptop with the Windows operating system installed, these instructions are for you. Many Windows 7 users have difficulty...
When all the components for connecting to the Internet have already been purchased, you can begin connecting. So, setting up a wireless wi-fi network depends on the main device, represented by a personal computer or laptop. Setting up the World Wide Web directly depends on the operating system of the personal computer.
Any wi-fi camera for Windows also starts working, after taking into account the features of the provided equipment. The system selected by the user must have a window in which a special network connection management item is displayed.
If you need to establish a wireless connection in Windows xp, then you should take into account the difference between the current product of computer companies and previous versions.
Setting up a wireless wi-fi network in Windows xp is considered more complex than in windows 7.
Windows xp.
First, the user must select the "Network Connections" option from the Control Panel's Start menu. Then find “wireless connection” and click on it. After enabling this command, communication is established, but you should view the available wireless networks by selecting the appropriate item.
In order for the main device to work in a given direction, “Change the order of network preference” is required. When a new window appears, you can already put a checkmark next to “Use Windows to configure the network” and click on “Advanced”. Next, you will again have to return to “Change the order of network preferences” and remove the checkbox from “The key is provided automatically.” The network details are then entered and OK is pressed to confirm.
Wireless network access for Windows 7
Setting up a wireless wi-fi network in Windows 7 begins with the “Control Panel”, in which you select “Advanced system settings”.
Then go to the “Computer Name” tab and click the “Change” option.

After this action, a window appears on the monitor with the names of the computer or domain. The personal work device itself must have a unique name. If this name had to be changed, a computer restart is required.
Setting parameters for Internet connection in Windows 7
Next, click on the wired connection icon, which is located in the lower right side of the monitor. This is where the “Network and Sharing Center” appears. It must be selected by pressing the confirmation key. From the list that appears, select the “Add” option and create a “Computer-to-computer” network. To continue click “Next”.
In the fields with names and network parameters, enter data as necessary. Then they confirm the actions and enable Internet connection sharing. The Windows 7 wi-fi wireless network will start working immediately after clicking “Close”.
The initially installed settings on personal computers or laptops do not always allow you to connect to a wireless network without problems. After all, the Windows 8 operating system may not see the wireless adapter, although it is definitely present.
Setting up a wireless wi-fi network in Windows 8 usually starts by clicking the star icon. After this, a list of proposed wireless networks appears on the monitor. One of them must be selected by typing the required security code. Confirm the above action with the “Next” button.
When it comes to your home network, it is better to choose shared access. When the connection is normal, the asterisk next to the division icon disappears and the signal reception level begins to be displayed.
Implementation of wireless communication reception by the tenth version
Operating system Windows 10 differs from previous versions in additional settings that provide for the use of touch screens. The necessary drivers are also automatically updated here. Because of this additional feature, setting up a wireless wi-fi network in Windows 10 is not particularly difficult. The user just needs to click on the icon in the lower right corner of the monitor and determine the available network.

Connecting wi-fi on Windows 10
It is also possible to automatically select a connection by checking the box next to the appropriate item. If the wi-fi adapter is not connected, then on the marker in question with divisions there is a cross instead of an asterisk. This can be easily fixed by pressing a specific button.
Most often, the wireless network is protected by a password, which must be entered into the window that appears when connecting and confirmed.
Modern computers and laptops already have a built-in special radio receiver that is responsible for sending and receiving information at a distance without the use of wires. For this reason, setting up a wi-fi connection occurs without much difficulty.


