Cloud icloud. Where is the cloud on the iPhone? What is iCloud and how to use it
Those who do not yet know what iCloud Drive is, what it is for and what can be stored in it. Don't worry from this post, you will learn:
iCloud Drive- part of the iCloud cloud service, which appeared in 2011. You can store photos, videos, documents and music in it. iCloud Drive not only stores all this, but also provides access to all your devices, from iPhone and iPad to Windows and macOS computers. The service has automatic synchronization between all devices. It is possible to create new files and folders in applications that support this service and work with them in several applications and on different devices at once.
You can also access iCloud Drive from iCloud.com. Here you can create and edit office documents in Pages, Numbers and Keynote. View saved documents from other applications.

Apple is giving all users 5GB free. You can store any file in iCloud Drive, but the size of one file should not exceed 15 GB and, of course, no more than the volume that is available to you. Speaking of which, the volume can be increased with a monthly subscription fee, the prices are as follows:
- for 50 GB you need to pay 59 rubles/month,
- for 200 GB - 149 rubles/month,
- for 2 TB - 599 rubles/month.
Friends! If you have an iPhone, you don’t have to use iCloud cloud storage, but of course it’s more convenient. For those who don’t like him, I’ve also put together a selection.
How to enable iCloud Drive on iPhone, iPad, macOS and Windows

Before you start using iCloud Drive, make sure your iPhone and iPad are running iOS 8 or higher. iMac, Macbook, and Mac mini run OS X Yosemite or higher. On a Windows 7 or higher computer. The web version of iCloud.com requires one of the Safari, Chrome or Firefox browsers. On all devices running iOS 9.x and OS X El Capitan, iCloud Drive is already activated.

- Log in on your device to “Settings” → “iCloud” → “iCloud Drive”
- Turn the toggle switch opposite “iCloud Drive” to on or off
Please note that just below are all applications that have access to iCloud Drive; opposite them are toggle switches that can be used to allow or disable the use of the cloud service.

- In the upper left corner, click on the black apple and select “System Preferences”
- Find and click on the iCloud icon
- Enter your Apple ID if required
- Check the box next to “iCloud Drive” and you can close the window
Turn iCloud Drive on or off on Windows 7 or 8

- Follow this link, download and install iCloud for Windows 7 or 8
- Launch the program and enter your Apple ID and password
- Check the box next to “iCloud Drive” and click “Apply” or “Apply”
Enable or disable via Safari, Chrome or Firefox browser
- Go to https://www.icloud.com
- Enter your Apple ID and password
- Choose any of the three icons Pages, Numbers and Keynote
- A window will pop up asking you to enable iCloud Drive.
- Agree
Once you enable iCloud Drive using any of these methods, all documents and other files from the cloud will be available on all devices in the iCloud app. And managing them will become much easier, because all the data will be divided into ordinary folders with the names of programs that use the cloud to store their data.
Google Photos offers unlimited cloud storage for photos and videos for your iPhone and iPad
22.10.16 at 17:07
For many years in a row, the iPhone has become the most popular device for taking photos according to the Flickr service. This did not happen by chance, but due to the good quality of the resulting images and ease of use. Unlike digital cameras and point-and-shoot cameras that were popular in the past, the iPhone is always in your pocket and does not require additional manipulations with peripherals. In addition, pictures taken on the iPhone immediately go to your Mac and other iOS devices, and information about their location on the map is saved.
Following the simplicity and ease of use of the iPhone camera, social networks and applications such as Instagram began to actively develop, aimed at publishing your photos online. The volume of photographs is no longer tied to 36 film frames as in the past and therefore the number of photographs produced has increased many times over. Now every owner of an iPhone and iPad is faced with the problem of storing all previously taken photos. You can download them to your Mac or hard drive, but it's better to store them in the cloud, where they'll never get lost and you can share them with friends and family.
Where to store huge volumes of photos
1.iCloud
2. Flickr
3. Google Photos
1. Sync iOS photos with iCloud
If you have enabled support for photo synchronization in iCloud, then all pictures taken will be sent to Apple's cloud storage. At the same time, there is an option that allows you to save space on your iOS device, which will store low-quality photos on the iPhone only to display their preview. But as soon as you click on the photo, it will be immediately downloaded in the original from iCloud. This is a very clever and convenient trick, you can continue taking photos as much as you like, the originals are stored in the cloud, and your iPhone will remain more or less free for new photos. But here a problem arises: the free volume of iCloud is limited to 5 GB. If all your photos and videos do not fit, you can increase your cloud space by purchasing a subscription.

Cost of additional iCloud Drive storage
At the same time, deleted photos from iCloud will delete these photos from all your iOS devices.
Pros: Synchronization with iCloud is built into the operating system of Apple mobile devices. It stores originals and saves space on iOS.
Minuses: If you actively use the camera, 5 GB may not be enough; you will need to subscribe to larger volumes.
2. Sync iOS photos with Flickr
Flickr recently released an updated app for iOS that allows you to sync all your videos and photos to the service automatically. You are provided with 200 times more free iCloud volume. All photos uploaded to Flickr will be marked as private by default, they will be visible only to you and hidden from prying eyes. Deleted photos from Flickr will not affect deleted photos on iPhone.
pros: 1000 GB is many times more than the free iCloud volume. All photos and videos are stored in original quality.
Minuses: This volume may also run out over time. Synchronization requires the installation of a special application, which must be launched periodically or kept in memory. Uploaded photos to Flickr are not deleted from the iOS device, which requires periodic manual cleaning of already uploaded photos from the iPhone library.
3. Sync iOS photos with Google Photos
Google has presented another opportunity, which with its proposal looks very, very appetizing. They offer you unlimited cloud space for all your photos and videos for free.
By installing the Google Photos iOS app, you can upload all your pictures and videos to the Google Photos service and store them there indefinitely without any restrictions on quantity or time. This is definitely a big plus.
What could be the catch? According to Google, the maximum size for stored photos is 16 MP and 1080p for videos. This means that if your pictures were taken with a camera in a resolution of more than 16 MP, they will be reduced to the specified size.
Fortunately, most modern cameras are around this value. In addition, pictures of iPhone 5s, iPhone 6, iPhone 6 Plus have a resolution of 8 MP. However, even though iPhone photos are smaller than the specified limit, they will still be slightly compressed to reduce their volume. Visually, it is very difficult to distinguish the difference between the original and compressed versions.
Can I store originals in Google Photos? Yes, this option is also present but requires a subscription. You are given 15 GB of cloud space for free.
How to Sync Photos from iOS to Google Photos
Next, your entire library will be prepared (which may take some time, in our case there were so many photos that it took 2 days to prepare). Photos uploaded to Google Photos can be deleted from your iPhone, just like you can delete them from Flickr manually. In addition, you can free up space on your iPhone if you go to Google Photos, select the photos, click on the menu at the top right and select “delete copies from this device”, while everything that was uploaded to Google Photos will remain there, and these same photos will be deleted from iPhone memory.
However, if you delete photos from Google Photos, they will also be deleted from your iOS device.
All uploaded photos to Google Photos will be recognized by the smart visual search engine. For example, you can click on search and enter the words objects, items, locations. Most of the time, Google Photos finds the things you need. This is a very convenient trick, for example, you can find photographs of a sofa or your dog from your hometown, taken back when cameras could not remember the location of the photograph taken.
In addition, Google Photos can identify places in pictures, even without geotags. For example, having determined that the Eiffel Tower is in the picture, Google will mark this picture as taken in Paris. And subsequently, by entering “Paris” into the search, you will see pictures of this city, even if the photo did not have location information.
In addition to the iOS application, Google Photos has a web version of the service. You can use it to access your photos, but it will also be used if you give access to someone who doesn't have Google Photos.
To summarize, we can say that Google has introduced an excellent service that will allow you to forever forget about the problem of free space filled with numerous pictures and especially videos. The Google Photos app has an intuitive, easy-to-use interface, the ability to delete local copies, and was an excellent, if not a 100% replacement for iCloud, then at least a means of backing up all your footage. This service will undoubtedly be convenient for those who save significant moments of their lives every day using an iPhone or iPad and do this very often.
To sync with Google Photos, you need to install the iOS app and have a Gmail account. After authorization, the application will offer to enable automatic uploading of photos and videos to its service, and will also ask you to indicate what type of storage you choose — free unlimited with pictures reduced to a specified size or storage in paid storage.
Logging into iCloud (iCloud) from a computer can make it easier for the user to work with Apple services.
This action will help you set up receiving instant notifications about new messages and account transactions.
iCloud is a popular cloud storage service with email functionality from Apple.
Every user of an Apple device has a registered account in iCloud.
The profile stores backup copies of multimedia and office files, correspondence, and application data.
The developers have created the ability to log into your account online not only from a branded device, but also from any PC, regardless of the operating system used on it.
Let's take a closer look at how to perform authorization.
Authorization via browser
This method is the simplest and fastest.
Its essence lies in the fact that the user logs in to his account through the official website of the cloud storage.
No additional software installation is required for this method. Follow the instructions to log in to the system:
- Go to the main page of the official website of the iCloud platform via the link icloud.com;
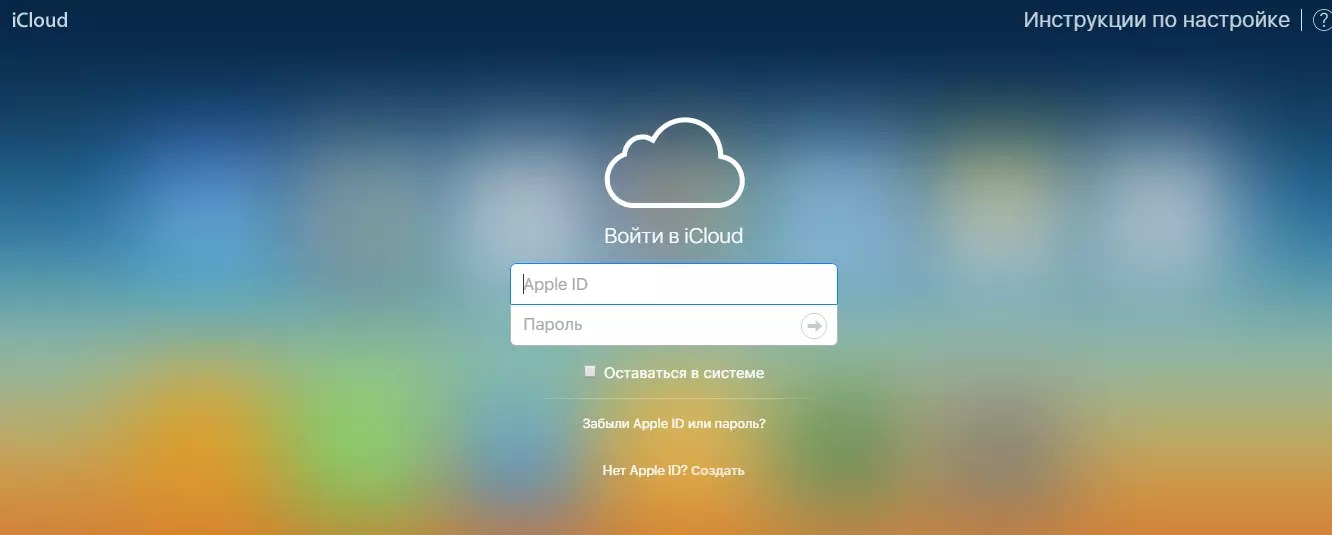
- enter your Apple ID and password to authenticate;
- If you do not have an account registered in the system, create one by clicking on the appropriate link. For more detailed information on working with your profile, go to the “Setup Instructions” tab.
Menu icons may vary depending on what synchronization options you specified during registration.

Using this window, you can manage data synchronization, search for your phone, create reminders and notes that will be automatically saved to your smartphone.
It is also possible to edit saved documents directly in the browser.
In the “My Devices” tab, you can view the names of the last devices from which you logged into your account:

Versatility is the main advantage of this method. You can use your account from the browser of any computer, no matter what OS is installed on it.
The disadvantage of this method is the inability to automatically download photos from their iCloud service to your personal computer.
Authorization using official software
Installing specialized software allows you to fully use all the functions of the storage: access to email, full access to the cloud drive, instant file synchronization.
The official PC application is available to users of the MacOS and Windows OS operating systems (version 7 and higher). To log into your account, follow the instructions:
- download the program executable file from the official developer page;

- Once the installation is complete, open the program and log in to your account. To do this, you need to enter your Apple ID and your password. Then click the “Login” button;

- After entering the data, you need to wait a few seconds for all files and personal settings to appear on your PC. After completing the authorization process, the iCloud folder with the contents of the cloud storage will appear in the Windows system explorer.
Now you can move files from your computer to the iCloud directory.
If there is an Internet connection, all transferred files will be automatically synchronized by the service.
You can also instantly move files from your cloud drive to your PC.

In the main window of the program, you can configure synchronization settings and find out data about the storage volume:

Rice. 6 – main page of the application
Since the world saw a variety of Apple devices, using them has become very comfortable, especially if the smartphone, tablet and other gadgets are connected to iCloud storage.
iCloud is a cloud service owned by Apple, which, when you create a new account, makes it possible to synchronize a variety of information between devices such as iPhone, iPod Touch, iPad and computer. For the user, first and foremost, iCloud provides incredible ease of interaction between a variety of Apple devices.
Whatever he is currently working on, he has access to the most current version of all the most important documents, notes, contacts and applications. In addition, by creating an account for your iPhone in a global cloud storage and using it, the user has an easy opportunity to restore any lost data using an iCloud backup.
The user can also create new mail in the i-cloud, and such mail is extremely convenient. A distinctive feature of iСloud for iPhone is its simultaneous simplicity and irreplaceability, but first things first.
Key Features of iCloud
Cloud iTunes
The service has the ability to synchronize and, if necessary, restore all data about the user’s purchases, and automatically downloads purchased applications, books or music to the iPad and iPhone.
All keys in one bundle
Let's say a user works on an iPhone, then he decides to switch to another gadget from Apple or work from a computer. At the same time, the service will not only absolutely automatically restore data and synchronize it, but will also allow you not to remember all logins and passwords for accounts, applications, and other things.
iTunes Match - all your favorite music at your fingertips
If you have a huge amount of music and do not have the opportunity or desire to purchase it on iTunes, then such an application will come in handy. It will quickly scan the songs loaded there from the library, and if there are matches, it will upload music from the iTunes Store. If they are not found, then the music can be copied to the iPhone from the computer. The maximum number of saved songs is up to 25 thousand.
Endless stream of photos
Taking pictures with an iPhone is much more comfortable than carrying around a bulky camera. The smartphone camera allows you to take high-quality photographs, so many people use it to take pictures almost every day. What should you do if you need to transfer photos from iPhone to iPad or computer, or restore photos?

For those who know about this global cloud and use it, this is not a problem. After a photo is taken, it is automatically uploaded to the photo stream and transferred to all gadgets that the user wants to synchronize in iCloud. The volume of saved images is up to 1000 pieces. In this case, no additional actions are needed - you just need to use it, log in to your account and thereby synchronize the data.
All necessary documentation in the cloud service
There are situations when certain work data needs to be urgently restored or downloaded to an iOS device, and iTunes, as luck would have it, is not at hand. But with an iCloud account this is also not an issue. You just need to go to iWork from your computer, upload this file to the required application, then go to this application on iOS and in a matter of seconds the document will be where you need it.
This app is truly invaluable and using it will give you complete peace of mind. In addition, when you edit a document on iOS, its updated version automatically appears in the web version of iCloud, on the iPhone and other connected gadgets. So even if it is possible to lose some data, it is extremely easy to restore it at any time.
Restoring from a backup. How it works?
After registering with the service, the owner of the gadgets receives 5 GB of free space in cloud storage for free. You can always change the volume of your cloud by paying for additional space. Using it, he stores backup copies of all important data on his devices there.
Now you no longer need to launch iTunes over and over again to restore your iPhone from a backup, as everything becomes much easier. The moment your iPhone is charged and Wi-Fi is turned on, a backup copy of all data is created absolutely automatically. The recording stores:
- general device settings (a copy of them is always stored in the cloud);
- individual arrangement of icons on the screen;
- all messages (iMessage, SMS), lost ones can be restored at any time;
- purchased music, books, TV spots;
- arrays of photographs, videos shot on the device’s camera (with this service, you can go to the cloud at any time and restore everything that is important to the user from a copy);
Ability to find a lost device
Losing an expensive iPhone is always stressful, especially if some important information was stored on it. But having a global cloud at hand and constantly using it, even the loss of a device does not feel like the end of the world.

No matter where you left it - in the library or in the kitchen at home, you can log into your iCloud.com account from your computer and instantly see where your iPhone is on a map. If the device is truly lost, you can block it remotely (data can be restored from cloud storage) or display a message asking the finder to contact you urgently.
Family access to all data
Icloud allows you to create a family group for access to all information on all devices. This group can include up to 6 people; you don’t need to create a new account in the service for this - you can use it with the one that was created earlier in the service.
iCloud Mail: its undoubted “advantages”
When you create an iCloud account, you not only get the ability to use your calendar, contacts, reminders, bookmarks, and notes, which can be synced with each other. Another important feature appears - creating a new mail. Its some advantages:
- this mail is completely and completely free of advertising;
- push notifications about a new message appearing on the server are sent to your email instantly;
- It is possible to create aliases - change your data and create virtual mailboxes.
You can either synchronize your mailbox with the cloud and with other gadgets, or leave the cloud, making your mail inactive for public access and use it personally.
iCloud account
So we got to the most important and at the same time the simplest. How can you create an account, log in and start using iCloud? In order to get into the web interface from your computer, you just need to enter your Apple ID details on the iCloud website and in a few seconds you will be inside.
The main settings and changes are made directly on the phone, so, according to the attached images, you can choose point by point what exactly needs to be synchronized, whether to include “Keychain” and “Photos” with “Documents”, or whether to track the phone through “Find iPhone”. Backup to iCloud and “Deleting an account” are also configured here.

Overview of iCloud settings on iPhone
A special word about iCloud mail; here, in the settings, you can create a new mailbox and use it in a couple of minutes. You don’t need to log into it separately; it is enough that you are authorized in iCloud. All additional settings are made here.

Tour of iCloud Mail Settings
Come in, get comfortable and put everything into practice. And for those who still have questions, we recommend watching a video review of iCloud capabilities.
Apple iCloud is free storage for everyone who has an iPad or iPhone. The main task of iCloud is to provide users of Apple products with a single storage for all data - applications, photos, books, documents, Safari bookmarks, etc.
How it works? Suppose you took a photo on your iPad, it will immediately appear in the storage, and through it on your iPhone or laptop (Apple company). This happens without your participation; other devices themselves “take” it for themselves. All you need is to be connected to the Internet.
Basic questions about iCloud
- Where and how to download and install iCloud? There is no need to download iCloud, the service is already built into your system.
- Registration in iCloud. There is no need to register separately for iCloud. To log in you need to use your Apple ID - login and password.
- How much space is available in iCloud? Each user receives 5 GB for free. This size is reserved for storing mail, application data, settings, etc. Please note: iCloud will store a maximum of 1000 photos from the last 30 days.
If 5 GB is not enough for you, then for an additional fee you can purchase more memory. The money will be debited from your Apple account.
How to set up iCloud on iPad
- You need to go to the Settings application.
- Find iCloud in the list on the left.
- Mark the main applications that will synchronize their data.
- If you go to the Storage and copies section, you will see how much of the 5 GB available to you you have already used.
- Click on Storage and then on your device. You will see all the programs you have installed that send their data to iCloud. By default this is all programs. You can disable sending data for programs that are not particularly necessary so that they do not take up valuable storage space.
How does automatic copying work?
Automatically. Without your participation. You don't need to do anything. It is only important to meet a few conditions:
- The iPad is connected to power (charging).
- Locked (that is, you are not working on it, it is in sleep mode).
- Connected to a Wi-Fi network.
Typically, this happens when you leave your iPad charging at home (where there is a Wi-Fi network familiar to it). Moreover, if all three conditions have not coincided for a long time, your iPad will remind you that a backup copy has not been created for a long time.
Useful iCloud features or restoring from a backup
You may need recovery if:
- You accidentally deleted some very valuable data - for example, a photo.
- You set a password for your iPad or a parental control password and forgot it (you can restore the copy made before entering the password).
What data will be recovered
The following materials are saved in iCloud backup:
- iTunes purchased music, movies, TV shows, apps, and books (with restrictions).
- photos, videos from the album Camera Roll.
- settings.
- Application data (such as games, notes, etc.).
- view of the main screen and the order of applications.
- iMessage, text messages (SMS messages) and MMS messages.
Not saved:
- Music, movies, and TV shows not purchased from the iTunes Store.
- audiobooks.
- photos that were downloaded from your computer.
Changes you made after creating a backup will disappear during recovery. Therefore, before restoring a backup, save everything you need on your computer.
How to restore data from a backup
- Connect the iPad using a cable to the computer.
- Open iTunes.
- Open the page of your iPad (you need to click the iPad icon in the upper right corner).
- Click on the Restore button.
- Confirm the action by clicking Restore again.
- Once the recovery is complete, a reboot will occur. Then the screen will ask you whether to set up your device as new or restore from a backup, select Recover from iCloud backup.
- Enter your Apple ID and password.
- A list of the three most recent backups will appear. Select the one you need and click Restore from backup.
- After restarting the device, the data on it will be restored.


