Unknown file system on hdd. What to do if your hard drive appears as a RAW file system
All users encounter bad situations when working at a computer, no matter what anyone says, sooner or later this happens. One of the problems is a malfunction of the hard drive. In a Windows system, you can find the disk file system - RAW. In fact, this designation is not a file system, as it indicates a disk error. The system tries to recognize the specified disk structure, and if this fails, the disk is marked as RAW.
Before using the drive, you need to format it;
- The disk properties indicate the RAW file system;
- A window appears about the absence of a sector;
- Other error messages.
Reasons for the appearance of RAW
- Incorrect shutdown of the computer;
- Unstable voltage;
- Poor SATA connection to the hard drive;
- The presence of so-called “bad” blocks (bad blocks);
- Cable damage;
- Damage to system files;
- The presence of virus software in the system;
- Hard drive failure.
The danger of this problem is that if you format or do another incorrect action, you will completely clear the partition. This will, of course, restore the disk's functionality, but this method is almost always not useful. Now let's try to figure out how to convert a RAW system to NTFS without losing data.
At first, you need to use the simplest methods to solve the problem. As practice shows, many problems are solved by restarting the computer. If the failure turns out to be serious and this procedure did not help, read the following points.
#2 – Checking cable connections
If you have a desktop computer, then completely turn off the power, open the system unit and check the connections of the wires to the hard drive and system board. Try disconnecting them and reconnecting them.
Carefully examine each wire, make sure that they are all intact and not damaged.
If you do not have a computer, but a laptop, you can also open it and check the internal components. If you lack repair skills and proper prevention, you should turn to professionals.
If you have a hard drive connected via USB, the easiest method is to connect it to another USB connector.
Try the above methods and then move on to software solutions.
#3 – Using the CHKDSK utility
In Windows, as a utility for checking the drive, there is one that corrects file system problems. This will come in handy for us.
We launch the command line as administrator (you can right-click on the Start menu and select the appropriate item);
Enter the command "chkdsk D: /f"(the /f attribute allows the utility to correct errors on drive D);
As a result, you will receive a fixed partition with NTFS and saved data, or this method will not give a positive result.
#4 – Checking the integrity of system files
As I said above, the problem may be hidden on the system side, that is, the system files are damaged. Sometimes their integrity can be restored. We read:
- Launch the command line;
- Enter a simple command - sfc /scannow
- We wait.
As a result, one of two answers is displayed: the scan did not reveal any integrity violations, or some files cannot be recovered.
#5 If the system does not boot
If the system disk has come under attack, or due to RAW partitioning Windows for some reason refuses to work normally, all of the above actions with the command line are performed using a boot disk or flash drive, or safe mode.
The first option is this: you create a bootable USB flash drive with the version of Windows that you have, for example, “ten”. After booting, you get to the point where you need to select a partition to install the system. In this window you press keys Shift+F10. A command line window appears. Execute all the above commands.
What to do if you don't know the drive letter?
In this case, we will use the diskpart utility:
- On the command line enter the command diskpart ;
- Next we enter list disk to display disks;
- Now we register list volume– display of disk partitions;
- In the window you will see all your partitions, then look at the file system type volume. We are interested in RAW and the drive letter (Name).
Now you can run commands to check the disk and restore integrity. For now, these are the only options for restoring the drive without deleting data.
#6 Use antivirus utilities
The RAW procedure in NTFS without data loss can be implemented using anti-virus programs. Of course, you can scan your computer with installed antiviruses, such as Avast, Windows Defender and others. It won't be effective. You need to download the following utilities and check your PC with everyone:
#7 Regular hard drive formatting
So we come to the method where we have to completely clear the partition. This is done only if there is nothing important on the disk, or all the options described at the beginning of the article did not help. Let's try to convert RAW to NTFS.
Press the keyboard shortcut Win+R and write the following:
diskmgmt.msc
The disk management utility will immediately launch, where the volume in the RAW system will be indicated. Right-click on it and select from the context menu "Format".
#8 Using the Recuva utility
Download the program from the Internet, install and run. At the top, in the drop-down section, select the problematic section that needs to be fixed.
Press the button "Analysis" and wait.
Depending on the number of files on the disk and its size, over time a large list of files that you can recover will appear in the window. Simply tick the required volumes (everything is possible) and, by right-clicking on any object, select the option "Restore selected".
This way you can recover files deleted after formatting.
#9 Using MiniTool Power Data Recovery
There is a good utility for working with disks. It’s easy to find on the Internet, download and install, so I won’t dwell on such things.
Having launched the program, go to the section "Lost Partition Recovery".
Select a partition with the RAW file system and press the button "Full Scan". We are waiting for the file search process to complete.
Select the files you want to save and click "Save".

Specify the location to save the data.
When the files from the disk are restored, you can safely format it.
#10 Advanced option: TestDisk utility
Let's consider the last option as one of the more difficult ones. You need to download the TestDisk utility.
Find the file in the archive with the tool testdisk_win.exe, which you run with elevated privileges. Something like a command line opens.
- Use the arrows to select an option "Create" and confirm with the Enter key.
- Use the arrows to select a disk with the RAW file system, and confirm the action with the ENTER key.
- At the next stage, immediately press Enter.
- Choose an option "Analyse" .
- Click on the option "Quick Search" .
- After displaying damaged volumes (in our case RAW). Then press the key "R" to display data for this section or sections.
- Use the arrows to select an option "Write"- press Enter.
- If the volume is unsuccessfully found, select the option "Deeper Search" and repeat all the commands again.
Raw file system and how to return ntfs
Today we’ll look at how the raw format of hdd disks appears, what the RAW file system is, why it is needed, and what to do if one of your disks is determined to be invalid, not marked up, not formatted, or damaged. We will also consider what to do if it says that “chkdsk is not valid for RAW disks” when trying to correct the situation using the operating system.
The RAW file system is implicitly present in NT operating systems from Windows Corporation. It was created with a single purpose - to provide applications and operating systems with data about the size of the current volume and the name of the file system (FS) used on it. If you received a RAW partition on a hard or solid-state drive (flash drive, SSD), this means that the file system of this volume or drive was not recognized by any file system driver installed in the environment used by Windows. That is, the file placement structure is clearly different from NTFS and FAT/FAT32. The consequence of this is errors such as:
- a message that the drive/partition is not formatted in a known file system;
- there is no possibility of normal access to the device/partition;
- The disk file system has been damaged.

If one of the above-described alerts appears, further work with the volume is impossible either in read mode or, especially, in write mode.
Sources of the problem
Most often, such an error appears on a flash drive due to improper handling or wear of the device, but also for hard drives, especially removable ones, the problem is very relevant. Its sources in most cases are:
- malicious applications that interfere with the file table or volume structure;
- partial damage to the boot sector or volume file table;
- damage to the file table, which contains information about all stored data;
- physical damage to sectors of a volume causes a type of file system called RAW to appear;
- Incorrect removal of the flash drive or abnormal operating modes of the device (voltage surges, loss of electricity, or improper shutdown of the PC).
Disk or partition treatment options
Depending on the reasons why the RAW format appeared instead of FAT/NTFS, there are many methods to gain access to the information stored on the device.
Checking the volume for bad sectors and errors
The first step that should be taken if the file system of a disk or flash drive is detected as RAW is to check for damage on the drive or its logical partition. For the case where the system volume is not detected, this recommendation will not work, but in other situations you should start with it.
We call the command line on behalf of an account that has system administrator privileges through WinX or the search bar.

In the black window, execute a command like: “chkdsk x: /f /r”.
In this case:
x: - target volume;
/f – flag responsible for error correction;
/r – the argument will allow you to find and fix bad sectors.

We wait for the operation to complete and try to open the problematic volume.
If the error “chkdsk is not valid for RAW disks” appears as in the screenshot, it means that the target volume is the system volume, and to check it we do the following.
Starting a PC from Windows installation media of the same edition and bit depth.
On the language selection screen, click “Next”.


Go to the diagnostics section and open the list of advanced parameters.

Launch the command line.

Let's select "diskpart".
Using the “listvolume” command we find out the letter of the problematic volume.
Exit diskpart by entering “exit” and confirming its execution with the “Enter” button.
Execute a command like “chkdsk x: /f /r”.
This way, you can regain control of the disk without losing any data.
In this case, the message “chkdsk is not valid for RAW disks” should not appear; if this happens again, move on to the next subsection of the article.
Checking the integrity of files in the OS itself
Often, to convert RAW to NTFS, you just need to resuscitate system files. This is no more difficult than searching for damaged drive partitions.
Call the “Run” window using the Win + R combination.
Execute “cmd” to launch the command line.
Run “sfc /scannow” to launch a utility that will find and fix errors in the operating system.

We format a section if there is no important information on it
A RAW disk or flash drive that does not have any files on it (let’s say you just purchased the device), is missing important data, or is duplicated, can be easily converted from RAW to NTFS using Windows.
Open the “Run” window using the Win+R key combination.
Execute the line “diskmgmt.msc” to launch the disk management utility.
Using the context menu of the problem section, call the “Format” command.

We set the desired label and decide on the file system (it is better to choose NTFS), then click “OK”.
If a removable hard drive (its partition or flash drive) is not formatted, try disconnecting the removable device, if it is one, and then connecting it and trying again. In the case of an HDD, restart your PC and be sure to end all programs that may be using the problematic volume.
Now you know how to fix the RAW format of HDD and flash drives, but the formatted storage medium will not contain the original data. If the option to format a drive or disk is not suitable, move on.
HDD RAW Copy Tool
The HDD RAW Copy Tool utility is designed for sector-by-sector copying of media and allows you to extract all data from the problematic device without data loss.
Download the utility from the official application support resource.
Install and launch the HDD RAW Copy Tool and wait until the partitions detected on the PC appear in the main frame.
We select the problematic device from which we will subsequently recover information (a file system defined as RAW has appeared on it).

Click “Continue”.
We specify the file type as *.img to create an image of the recoverable disk.
Here it should be taken into account that when specifying the image storage path where all the files from the RAW disk will fit, there must be more free space than the volume/drive itself that we will copy.

We return to the HDD RAW Copy Tool interface, where we click “Continue” again.

After this, you can safely open the generated image through a data recovery program that supports working with images, for example, R-Studio, and begin restoring the necessary data, and format the just copied media to NTFS.
We will not describe how to recover data from an image due to the large amount of information, which will be enough for another similar article.
On this HDD RAW Copy Tool you can close it.
DMDE
Although the previous method is highly reliable, working with the original source is much safer and more reliable. Let's look at how to resuscitate important files if a RAW format appears for one of the HDDs. Here we will do without formatting, so if some disk has become RAW, using the method described below you can easily access all its files.
Go to dmde.ru and download the DMDE utility, which allows you to read a disk in a format such as RAW and restore it.
Working with the program consists of the following sequence of steps.
Select the physical disk where the partition with the raw file system is located, checking the “Physical” option. devices."

When we find the required partition, select it and click “Open Volume”.
If this does not happen, we scan the media, the file system of one of the partitions of which has become defined as RAW.

We open the volume and look at its contents to see if the files are on it.

If everything is correct, click “Restore” and confirm the restoration of the boot sector.

If everything happens properly, after a short time the DMDE program will recover the lost partition without making any changes and return it to the previous file system.
Attention! If the system volume was problematic and recovery was performed by booting from another disk or after installing the media on another computer, you will additionally have to resuscitate the bootloader.
TestDisk
The TestDisk program is the most difficult to use, but it also performs the best recovery of volumes with RAW file system. Having launched the installed application, perform the following steps:
Click “Create”, then select the target partition.

We decide on the partition type, if this does not happen automatically (MBR or progressive GPT).
Click on “Analyze” and press “Enter”.
On the next screen, press “Enter” again, selecting “Quick Search”.
Find a partition for data recovery from a disk with the RAW file system.
To view the files stored on it, press the Latin “P”, exit the preview mode by pressing the “Q” button. If the partition is marked P, it can be restored; volumes marked D will not be restored.

Make sure that the table shown on the screen, which she will be after resuscitation, is correct.
Here you should be confident in the correct choice, but you shouldn’t become a coward and do nothing either.
Select “Write” and confirm the action by clicking “Y” in order to perform RAW recovery.

The change will take effect after restarting Windows.
At this point, the topic “how to change the file system if the disk is in RAW format” can be considered fully covered. As you can see, there are absolutely no difficulties in solving the problem.
Every operating system contains storage devices, and for them to work, a file system is required. With its help, the computer converts information (photos, music, videos) into a binary system, in other words, into a language that it understands. After this, the data is organized and further transformed for viewing by the user.
Storage devices- This is very vulnerable technical equipment. Damage occurs both in the logical partition and in the physical partition. Most hard drive problems are fatal and require hardware replacement, but there are also solvable problems. The RAW file system is of this type.
Raw file system - what is it?
As previously said, a hard drive has a file system. The most popular are NTFS and FAT, which can be used for both hard drives and flash drives.
But what is the RAW file system? No matter how contradictory it may sound, this is the absence of any system at all! In other words, this is a critical error in the existing file system and Windows does not recognize it. It occurs due to the inoperability of the file system. As a result, technical information about the media is not displayed and access to files is impaired.
Let's look at the features of the RAW system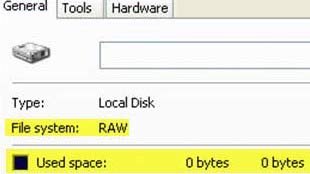 1.
Access to the device is denied, and if the file system on your computer or laptop is faulty, Windows will not boot and you will see an error.
1.
Access to the device is denied, and if the file system on your computer or laptop is faulty, Windows will not boot and you will see an error.
2.
If such an incident occurs with a removable drive, an advertisement will pop up telling you about the need for formatting.
3.
Open the “properties” of the drive and in the displayed information column, you will see “File system type – RAW”.
Why does the flash drive have a RAW file system?
For such dramatic changes to occur in the file system, one reason from the “gentleman’s set” is enough:
- Incorrect shutdown of the computer, power surge and disconnection of the computer from the network with a USB flash drive connected! Such treatment can also affect the computer’s file system and cause fatal problems with other components.
- Operating system failures can also cause this problem.
- The most common cause is viral infection. After all, it was not fools who came up with the idea of installing anti-virus programs.
- Physical damage to the drive, which can also cause loss of information.
- Processes occurring at the level of the file system structure. Problems with the boot sector, broken partition geometry values, etc.
The appearance of a RAW file system is not fatal in most cases, and recovery of user data is possible. There are exceptions, this is due to physical damage incompatible with life.
It is recommended to contact a service center, where specialists will carry out the necessary operations to restore the flash drive and the data on it. This can be done with your own efforts, but you should be very careful not to aggravate the situation and not lose all the information. 
To return the NTFS file system, you can use one of these programs:
- Hard DISK Format Tool,
- Recovery Tool,
- Acronis Disk Director.
- Online service – RecoveryOnLine.
- Reformat the disk to NTFS using MS Windows.
If using these programs did not help solve the problem, then in the global storage you need to find out which controller the drive has and reflash it, but this is a very difficult procedure and even experienced users may not be able to cope. If even such manipulations did not help, then your flash card is dead.
3 more useful articles:

Most often, the disk file system changes to RAW after the computer was turned off incorrectly, when the lights were turned off, or the user saved time and pulled out the power cord of the system unit from the outlet. Another reason is viruses that change the NTFS to RAW format of HDD drives. How to fix this problem, read this article.
What is the RAW file system?
If the disk is in RAW format, Windows will display it among other hard drive partitions. But when you try to open it, the computer will give you an error and ask you to format it. In addition, any actions with this volume will be unavailable: checking for errors, defragmenting, etc. (it is useful to read “How to check the integrity of Windows 10 system files and restore them?”).
There is no RAW file system as such. If the disk receives this formatting, it means that the computer drivers are not able to determine the type of its file system - NTFS, FAT or FAT32. In practice, this happens in several cases:
- the file system structure is damaged;
- The partition has not been formatted;
- There is no correct access to the contents of the volume.
If the OS volume is damaged, the “Reboot and select proper boot device” or “Operating System not found” warnings will appear when the computer boots.
Recovery
If the problem occurs on a non-system drive, but it contains important information that will be lost when formatted, use standard Windows tools or third-party programs to fix the error.
Windows tools
Basically, the standard chkdsk utility helps fix problems with formatting in RAW.
After checking, the computer will repair damaged sectors and the NTFS file system on the problematic volume.
Important! This method is effective if the flash drive or hard drive has been formatted in NTFS.
The chkdsk utility will also help when the system disk is damaged. But for this you will need a boot disk or flash drive.
- Start the computer from a bootable USB flash drive or disk → Select “System Restore”.
- Advanced options -> command line -> enter chkdsk drive_letter: /f.
In the recovery environment, the partition letters are different from the names of the logical drives. To avoid mistakes, open the list of computer partitions in the command line.
Enter diskpart → list volume → the list will indicate which disk is the system one.
Third party programs
There are third-party programs that help restore the NTFS file system if for some reason it was reformatted to RAW. They do not damage the user’s information stored on the volume, unlike the chkdsk utility, which can “affect” them during the recovery process.
MiniTool Power Data Recovery
Important! This method is most effective if the RAW file system appears on a flash drive.

TestDisk
This is a multifunctional free utility that works with hard drive partitions using a large number of options. The program is presented in a portable version, so it does not require installation. The main disadvantage of TestDisk is that it does not have a Russified interface.
- Download the archive with the program → run the file testdisk_win.exe as administrator → select “create” → enter.

- Use the up/down arrows to select the desired drive → enter.

- Specify the desired type of partition table (the utility will do this automatically) → enter.

- To search for “lost” partitions, select “Analyze” → enter → Quick Search → enter.

- The utility will find “lost” volumes → press “p” to view the list of files.
Unfortunately, sometimes you can encounter a situation when a user turns on a computer or laptop, and instead of some logical partition, a disk with an incomprehensible RAW format is displayed. Let's try to find out what this is. At the same time, let's look at some of the simplest ways to convert this format into a normal form.
RAW format: what is it?
If we talk about a format of this type, you need to clearly understand that, in fact, this is not even a format in the usual sense. This is a modified file system type.
When accessing such a section, you can note two types of problems that arise. Firstly, the volume may not be displayed at all in the file manager. And secondly, even if it is visible, then either there are no files on it, or the system suggests immediate formatting, since the file system is incompatible with the operating system (RAW format of HDD drives). How to fix this situation? You need to choose the right approach, because formatting a partition and destroying even non-displayed data is not the best option.
Why are HDD formats changing?
Before proceeding to solve the problem directly, it is necessary to clarify the reasons for changing the section structure. In general, it is generally accepted among experts that the RAW format of HDD disks (how to fix it to readable will be discussed later), as a result, can appear, for example, under the influence of some viruses that purposefully change the file system during a sudden power outage ( electricity) at the time of performing any operations that require direct access to the partition, etc.

Actually, after this, sometimes the disk can be visible even with the folders and files present on it, but performing operations, say, changing the volume label, formatting it using standard means, changing the size, and much more, becomes simply impossible. This happens because, roughly speaking, the file system changes or fatal errors appear in the partition table. However, there are several solutions on what to do if RAW format HDDs appear in the system. Let's take a closer look at how to correct this situation.
Correction method
Now let's look at the main aspects of the remediation processes. As is probably already clear, HDD recovery as the main task uses a solution that allows you to bring the partition’s file system into a form that would be perceived by the operating system itself (FAT32, NTFS, etc.). Please note that in most cases, even rolling back the system to a previous state does not give the desired result, so it is not worth doing this. It's just a waste of time.
To begin with, you can try to make sure that the section displays files and folders, which in some cases makes it possible to copy them to another location, for example, to the same removable media.
How to make files visible and copy them to another location?
In this case, the RAW format is processed using a very interesting utility called MiniTool Power Data Recovery (the program belongs to the class of shareware).

After installation, you need to launch the Lost Partition Recovery module in the application, select the required partition and run a Full Scan. When the process is complete, the program window will display a list of all available files. All you have to do is mark the required data and click the Save button. The application will prompt you to select a location where the selected files will be copied. Specify it and activate the process. After this, you can start formatting the partition. If the procedure is not available, proceed to the next step.
The simplest way to restore the format using the system
Now let's look at how to convert RAW to NTFS using Windows' own tools (especially since this is what this solution is best suited for).
First, you should launch the command line (cmd) from the Run menu (Win + R). Please note that HDD recovery can only be done in this way; a standard partition scan in a Windows environment will not give any results.

Now it all comes down to just typing the command chkdsk “drive letter”: /f (for example, in the case of drive D, it will look like chkdsk d: /f) - and pressing the enter key. All that remains is to wait for the process to complete, during which the file system will be restored, and reboot the system.
By the way, this method is ideal for system drives in file systems that previously had an NTFS structure. Only when using this technique will the computer terminal or laptop need to be booted from a boot or recovery disk.
Correcting the format using the TestDisk utility
At this stage, we will consider another aspect of the topic “RAW format of HDD disks: how to fix it.” TestDisk (a utility for quickly restoring the original format) is best suited. The main advantage of this application is that it does not require installation. Because it comes in a portable version. Minus - it does not have a Russified interface and works in a DOS-like mode.

So, let's start restoring the HDD. At the first stage after starting the program, you need to select the creation of a new log file (Create item) and press the enter key. Then, use the arrows to select the desired disk or partition, after which the application will automatically determine the type of partition table (it can be changed manually, but I don’t think this should be done).

Next, you need to first use the analysis line (Analyse), and then quick search (Quick Search). After each action, press Enter. When the lost partition is found, you should use the option to save the structure (Write). Otherwise, if the desired section is not displayed in the list of search results, you should use Deeper Search, and then follow the steps just described to save the structure. Now, as in the previous option, you just need to restart your computer or laptop. The problem should go away.
Using Ontrack EasyRecovery
Here is another program that allows you to convert the RAW format of HDD disks. How can I fix it using this utility? As easy as pie.

In principle, the application works almost similarly to the TestDisk program, but many users can be attracted by the fact that it has a beautiful and user-friendly interface. By the way, many experts call this software product an indispensable tool when it is necessary to recover large disk partitions. The only negative is that the program is paid, but I think this is not a problem for our people. In the vastness of the Runet you can easily find activation keys, patches, and key generators for it.
Conclusion
What's the result? At the moment, the RAW format of HDD disks has been considered. I think it’s already clear how to fix it so it’s readable by the system. As for what exactly to apply depends on the specific situation. For example, if formatting using your own means is possible, you can display the files and copy them to another location. This is, so to speak, to be absolutely sure. You can also use the command to check and restore the partition to its original state, which is provided in the system itself, but this process can take a very long time if the volume is large enough.
On the other hand, third-party utilities, described just above, are also perfect for simplifying user actions. Another thing is that some users will not accept the DOS interface of the TestDisk application. However, it is easy to get used to it. Moreover, as already mentioned, this is a portable version, which means you can always have it on hand and run it from the same flash drive. If you don’t like it, please use the similar Ontrack EasyRecovery application with a graphical shell. True, some may object to the question of cost, but here it is worth deciding for yourself what is more important: money or a hard drive with the information stored on it? In addition, among all such utilities, these two are the most powerful, and sometimes you won’t get high-quality results from free software. However, the choice is up to the users themselves.


