How to remove old Windows if there is a new one. Removing old Windows after installing a new one - step-by-step instructions
They are not rare. However, not everyone can remove one of the two operating systems. Some people continue to work with several operating systems at once.
When the “eight” from Windows appeared, not everyone was in a hurry to remove the “seven”; a popular solution was to install two versions, this made it possible to check the functionality and ease of use, and, if necessary, remove an unnecessary option. Some remained on the “native” Windows 7, while others opted for the new edition.
There is no point in working with two operating systems at once. A powerful computer allows you to install at least 7 series of OS, the amount of hard drive memory can cope with such a task, but this will not be useful. But on outdated equipment this will already affect the speed of operation, and even freezes are possible. In each case, it is necessary to remove unnecessary Windows from the computer, but how to do it?
Some users, when they see such a problem, are sure that it is easy to solve; they need to format the partition of the extra OS and the task is completed. In fact, this will not solve the problem, but will only hide it, because the bootloader will continue to work. You also need to erase the OS from the boot window.
Why are there multiple operating systems on one computer?
- In most situations, the problem occurs due to the installation of several operating systems on one computer. As already mentioned, some do this to test the operating system, but inexperienced users do it by mistake, after which for a long time they do not even notice the “duplicity” of their PC;
- Another reason why you have to select an OS every time you boot is the incorrect installation of Windows. When a person forgets to format a hard drive before recording a new OS, the process will occur on top of the previous Windows.
As a result, a selection window appears at startup, but in fact, only one OS is running on the computer
The second variant of the problem is not so serious; you can remove the “false” OS line from the selection window. Also, the choice of operating system by boot is eliminated by installing the working version by default.
How to remove a second operating system from your computer
If the download starts with selecting the operating system each time, then this is not critical. You can remove the operating system from your computer through the command center. The method is suitable for different versions of Windows (including 7 and 8), and is performed in four steps:
- After turning on the PC, you need to enable the command line (Win and R keys). In the input line of the “Run” menu, enter the command “msconfig” and confirm the actions by pressing the “OK” button (or press “Enter”);
- Next comes editing the Windows 7 boot menu.
- Before you remove the old Windows, you need to select the extra lines (when the operating system was installed a couple of times and did not follow the recommendations, then there can be 3-4 lines at once) and delete them.
- At the next stage, the application will offer to restart the device. Experts advise not to put off this action until later; the system needs to promptly make some changes to the OS boot record.
This is how it turns out to remove the second Windows 7 at startup; after turning it on, a window with two options will no longer appear. By default, the series of operating systems that was installed last will start working (At this time, the previous Windows publishers will no longer exist, there were only entries in the boot window).
You need to be vigilant during formattingAfter you succeed in removing the old Windows 7 from your computer, the logical question arises what to do with the partition where the old OS was stored. In such situations, it is advised to simply format the section, and in the future leave the necessary electronic documents there.
First you should check everything that is stored there. In particular, there should be folders with program files, user accounts and a Windows folder. When you had to remove the second operating system, the partition will not be on the C drive.
Important! The procedure will erase all data from the local disk memory. For example, if the deletion took place from the system drive C, then all desktop files, “My Documents” folders, etc. will go away forever.
How to remove one of the two operating systems for Windows 7 (no different for version 8)
It is advised to remove the old Windows after installing the new one by working in the menu of the system that will remain on the computer. The procedure is also possible with the old version (a kind of self-removal), but it will be easier. For example, when you need to remove previous versions of Windows 7, but leave the “eight” (although the process is no different between 7 and 8).
You can remove the second Windows 7 at startup along with the partition. The Disk Management function is suitable for this; it works the same on Windows 8 and 7. First, right-click on the partition to be deleted, then you need to select the “Delete volume” line.
At the final stage, right-click on the existing partition and select “Extend volume”Thus, the volume of the partition's memory will increase at the expense of the previous one.
This is how you can remove an operating system through the command line, if there are two of them. Even inexperienced owners will be able to remove the second operating system. Still have questions? Let's ask!
WATCH THE VIDEO
In a situation where the computer starts to work slowly, the only correct solution among the recommendations for setting up the computer yourself, you will find reinstalling the operating system, but this is not always done correctly, so then there is a need to remove the old Windows after installing the new one. Usually the OS is installed on a clean partition, but if it so happens that you installed the new Windows operating system in the same place (in the same logical drive) as the old one, it will automatically remove the files of the old operating system into a folder called “Windows.old” " After all the necessary files have been saved, the folder with the old OS can be deleted. Moreover, there is never too much space on your hard drive. There are two ways to do this.
Removal using Windows
Cleaning the boot menu
After you have installed a new operating system on the same partition, you may have a problem in the form of a menu that prompts you to choose which OS to select when booting. This problem is quite easy to solve.
- Click "Start";
- In the search bar, type msconfig;
- Select this program in the search results;
- In the next window, go to the “Download” tab;
- Select the old operating system;
- Click the “Delete” button, after which the program will inform you about the need to reboot;
- Restart your computer.

After all the above steps, the operating system will boot in normal mode and the menu for selecting the operating system will no longer appear.
There is nothing complicated about how to remove old Windows installations; the main thing is to decide on the method of execution. Now you can start setting up sound on your computer, setting up drivers, networking, and other things with peace of mind. Remember: in order to avoid the procedure of uninstalling previous versions of operating systems, it is recommended to install Windows on a pre-formatted partition. Thus, you will save your new operating system from garbage in the form of programs and files of the previous version of Windows.
Some users love Windows 7 and don’t even want to talk about any other operating system. And someone, apparently obsessed with the spirit of conservatism or due to the remarkable abilities of their PC, abandons the “seven” and returns to the old XP. This is despite the fact that it is no longer supported by Microsoft. However, lovers of everything new also agree with these comrades. Without delay or any doubt, they remove Windows 7 and install the new distributions of Windows 8.1 and Windows 10.
All these zeal, in principle, are understandable and justified. And then, according to taste and color, when choosing an operating system, there are no comrades. The question is different. How to remove Windows 7 so that there are no elements left of it on the hard drive, and so that it does not interfere with the installation of another system?
The solution to this problem depends on the specific situation and user intentions. Let's look at the most common methods of removing Windows 7 from a computer.
Disk formatting
With this approach, Windows 7 is completely neutralized during the installation of another system by completely formatting the disk (that is, its contents are completely erased). The installation disks for both XP and Windows 7/8 contain all the necessary tools to implement this function. Let's learn how to use them.
Note. If you do not want to switch to a new system, but simply want to reinstall Windows 7, correctly remove the old distribution and install a new one, you can also use the instructions below.
1. Insert the installation disc of the operating system you want to install (XP, 7, 8 or 10) into your DVD drive.
Attention! Before following the next step in the instructions, find out which key on your computer activates the menu for configuring the boot of disks and devices, or the BIOS (add-on shell) into which this menu is integrated.
2. Click "Start". In the drop-down menu (shutdown), click the left arrow icon and select Restart.
3. During the reboot process, hold down “F2”, or “F8”, “F9”, “F12” (depending on the computer manufacturer! see note).
When the “Please select boot...” window appears:
- use the cursor arrows to select CDROM from the list;
- press "Enter".
If disk boot order is performed in the BIOS, do the following:
in the “BIOS SETUP UTILITY” menu, go to the “Boot” tab;
open the “Boot Device Priority” subsection;

in the additional “Options” window, use the “up” and “down” keys to select “CDROM”.

After completing this setting, when you restart the PC, first of all turn not to the system partition, but to the installation disk. Which is what is required in this case.
Windows XP:

- upon completion of the preparation procedure, when the XP installation menu appears, press “Enter” (thus, you select the first item - “Proceed with installation”);
- press "F8" to accept the agreement;
- select the system partition (the partition on which Windows 7 is currently installed) and press “Enter”;
- select the “Format partition... NTFS” function from the list or the same function marked “Quick”. And press "Enter" again.

Upon completion of formatting, Windows 7 will be completely removed and the installation of Windows XP will begin.
Windows 7/8:
- wait for the installer components to load into the PC memory;
- select the system interface language;
- in the new window, click “Install” (the message “Starting installation” will appear);
- enter the license key, click “Next”;
- accept the agreement;
- in the “Windows Installation” window, click on the system partition (on which Windows 7 is located);
- at the bottom of the same window, click “Format”;
- When formatting is complete, click “Next” and continue with the installation.

These steps will allow you to correctly remove the old OS (in this case, “Seven”) and install a new one.
Removing a second system
This method of removing Windows 7 is suitable if several systems are installed (for example, XP and 7). Either the “seven” was uninstalled or installed incorrectly and when the PC starts, it displays a menu asking you to load one of the existing systems, although one of them is not working. (For example, a copy of Windows 7 is listed.)
To remove an unnecessary distribution from the disk (or a non-working copy of Windows 7), do the following:
1. Press the “Win+R” keys simultaneously. (The Run window will appear on the display.)
2. In the “Open” line, type - msconfig.
3. Click "OK".
4. In the “System Configuration” settings panel, go to the “Download” tab.

5. Select the OS you want to remove from your computer by clicking the mouse.
6. Click the “Delete” button, and then “Apply” and “OK”.
All. The system has been neutralized. Now when you start your PC, the system selection menu will no longer appear.
How to delete the Windows.old folder?
The Windows.old folder is automatically created by the system when updating or reinstalling the OS without formatting the system partition. Takes up about 2-15 GB of disk space. It stores backup copies of important system components, which are used when rolling back (restoring) Windows 7 to its previous settings.
To remove it from your computer, follow these steps:
1. Press the “Win+E” keys.
2. Right-click on the system partition (drive C).
3. Select “Properties” from the context menu.
4. On the General tab, in the properties window, click Disk Cleanup.

5. In the cleaning settings window, click “Clean up system files.”
6. When the procedure is complete, return to the list of items and check the box next to the “Previous Windows installations” object.

7. Click OK.
8. In an additional window, confirm your intention to delete the Windows.old folder: click “Delete files”.
If all the operations in this instruction are performed correctly, then Windows.old will safely disappear from the hard drive, and there will be more free space on drive C.
Many laptops and personal computers come with pre-installed operating systems. If you've been using Windows for several years, chances are it will stop working as quickly as it used to. Over time, the OS becomes overgrown with many errors, which can take too long to fix manually. In this case, the best option would be to reinstall. This article describes how to remove Windows from your computer and then install a new version.
If Windows was installed on one drive and then you purchased a new one, you can simply install the OS on it. In this case, your personal computer will have 2 operating systems at once: new and old. This is often done by users who want to take advantage of solid-state drives. Just connect a new drive and install Windows on it, as described in many guides.
Deleting files manually
After this, you need to remove the old OS from the laptop. This is necessary for two reasons. Firstly, it takes up a lot of space on your disk. Secondly, when booting, you will constantly have to choose which version of Windows to boot from. This is very inconvenient: you can accidentally confuse the version, and then wait until everything reboots.
The most effective way to delete it is to completely format the partition. Its disadvantage is that absolutely everything will be deleted. Any file, each program on this media will be irretrievably lost.
If only a few gigabytes of important information are stored on the disk, this is not a problem. You can temporarily move it to a new (system) drive, transfer it to a flash drive, or upload it to cloud storage. 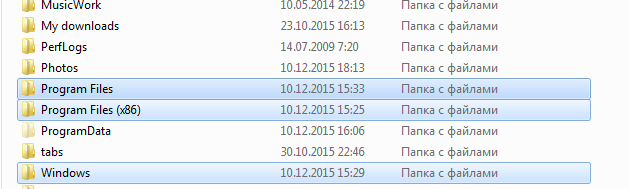
Otherwise, you will have to delete all unnecessary data manually. To remove the OS from your personal computer or laptop, you need to delete the folder called “Windows”. After this, you can clear the space from programs. After installing the new system, the old programs will no longer work and will have to be installed again. Therefore, the contents of the “Program Files” and “Program Files x86” directories (if you have a 64-bit OS installed) can be safely sent to the trash.
Formatting a disk using Windows
If something important is missing on the old system HDD, or you managed to copy all the information to a safe place, it is recommended to use formatting. During this process, all data along with the markup will be destroyed, after which the disk will be re-marked.
After formatting, you will probably feel how much faster your computer has become. The difference will be even more significant than after defragmentation. It's easy to start this process. Just follow the provided guide:

You can also do this using the Windows console:

Formatting during installation
If you are going to reinstall Windows on the same HDD on which the system is currently located, the steps will be slightly different. You will not be able to remove a running Windows using its own tools. You can try formatting drive C - the computer itself will tell you about it.
Fortunately, Microsoft developers foresaw this and created a formatting tool right on the installation disk. Begin installing the operating system as usual, following the instructions. 
If your computer has been updated to Windows or the system drive was not formatted during a clean installation, the Windows.old directory will appear in the file system. You can remove it using standard tools or third-party utilities. The folder takes up more than ten gigabytes, which is why users want to get rid of it.
It must be said that the Windows.old directory should under no circumstances be deleted if you plan to return to a previous version of the OS. Therefore, it is recommended to leave it for at least a couple of months. During this time, it will be possible to test all the features of the new edition of Windows and evaluate whether it is worth rolling back the changes.
Built-in utility
Windows has a built-in utility that will help you erase an unnecessary directory. Moreover, cleaning the folder with its help is the simplest option for solving this problem. Windows.old without downloading third party products?

- Press the Win + R combination on your computer keyboard.
- In the Run window that opens, enter the cleanmgr command and click OK.
- Wait while the system cleanup utility scans the files.
- Click on the button labeled "Clean up system files." Agree to grant administrative rights to the application.
- Once all software processes have completed, a new window will appear on the display. It will contain a list of all OS files that can be deleted without violating the integrity of the operating system. Find the text “Files from previous Windows installations” or similar in the list and check the box next to it.
- Left-click on “OK” and wait until the utility completes.
After completing this instruction, the directory or its contents will be deleted. To check the result, open the properties of the Windows.old folder and pay attention to the numbers next to the "Size" label.
Command line
If the previous instructions did not help, you should try to get rid of the folder using the command line. This tool has absolutely no interface, and to perform any operations you must enter short text commands. using the command line?
- Right-click on the desktop.
- From the drop-down menu, select New > Shortcut.
- In the "Location" line, enter cmd and click on the "Next" button. Now all that remains is to specify the desired name for the shortcut. It can be absolutely anything.
- Right-click on the newly created element and select “On behalf of administrator” and answer yes to the operating system question.
- In the window that opens, enter the command RD C:\windows.old /S /Q and press the "Enter" key.
Task Scheduler
How to remove Windows.old using Task Scheduler?
- Expand the Start menu. Find “Control Panel” in the list and left-click on it.
- Click on "Maintenance and System" in the list that opens.
- Now select "Administration".
- In the window that opens, double-click on the “Scheduler” item.
- On the left side of the utility there is a task tree. In it, find a task named SetupCleanupTask.
- Right-click on it to open the context menu and select "Run".
The most reliable way
If none of the above instructions helped?

- In the Start menu, click on the Restart button while holding down the Shift button.
- In the list that opens, click on the inscription “Diagnostics”.
- Now go to the "Advanced Options" menu and click on the item named
- After rebooting, the text interface will open.
- Type and then list volume. These actions will display a list of all existing sections and brief information about them. The main task is to determine which letter corresponds to the system drive, because in the recovery environment the literals are mixed up. The easiest way is to study the "Size" column to understand the correspondence between letters and sections.
- Enter the exit command to close the console utility.
- Now type RD /S /Q "X:\Windows.old. Replace X with the letter of the system partition.
- When the command completes, exit Command Prompt and select Continue Downloading.
CCleaner
For inexperienced users, the instructions may seem complicated. To make things easier, you can use a third-party utility called CCleaner. It is absolutely free, and the interface is completely translated into Russian. How to remove Windows.old using CCleaner?

- Install and launch the application.
- Click on the "Cleaning" link in the main window of the utility.
- In the left list, uncheck all the boxes, leaving only one - opposite the Old Installation Windows item.
- If there is an icon with an exclamation mark in a blue circle next to the "Other" text, click on it and agree to clear the operating system logs.
- After this, click on the “Clear” button.
It should be noted that using third-party software is the most unreliable way to delete the Windows.old directory. Such utilities cannot always obtain the necessary rights.
Having installed the tenth version of the OS, think twice before uninstalling Windows 7. Old will help restore the “seven” if you don’t like the new edition or the computer’s hardware is not powerful enough for the new software.


