Engineering menu lg g3. How to open and configure the engineering menu on Android - instructions and secret codes
The engineering menu provides access to manual configuration of the “hardware” part of the smartphone. To enter you need to enter a special code or install an application, but there are a number of features that are worth paying close attention to. If you were unable to enter the engineering menu the first time, then you did not take into account the features of the device. It is worth immediately clarifying that any interference with the operation of the device may lead to its inoperability and loss of warranty.
Hidden capabilities of the system
At the last stages of setting up a smartphone, developers test the system for errors and check the operation of all sensors on the device. Especially for this, Android has a special subroutine built into it - the engineering menu, which provides access to hidden settings of the Android OS and allows you to reconfigure them yourself. In addition, the menu contains detailed information about the device. The full list of menu options is known only to the platform developers, so you should make your changes with caution.
Secret paths of developers
To enter the engineering menu, dial the code *#*#3646633#*#*. On some models, you additionally need to press the call key. It is worth considering the features of phones: for different brands there are different combinations of numbers. The Android version does not affect the functionality of the engineering menu.
 Enter a special code to enter the engineering menu
If no problems arise, you will be taken to an additional menu for fine-tuning your smartphone.
 Enter the menu subsection
Depending on the system version and processor model, the engineering menu may be incomplete or missing. In the photo above there is a subsection of the menu with elements for testing smartphone sensors, setting up a USB connection, and performing internal and external memory tests.
If it doesn't work out the first time
Not all devices can access the engineering menu. Let's look at a number of common problems and ways to fix them.
Android is a complex Unix-based operating system. If you can’t do something, you haven’t taken into account all the nuances of the functioning of a particular subroutine.
List of special codes
One of the common reasons for blocking entry to the engineering menu is an incorrect special code. The combination of numbers depends not only on the device model, but also on the type of processor. For example, most devices based on the MTK chip are equipped with an engineering menu. If we talk about Qualcomm, not all smartphones based on this platform have an engineering menu built into them. The list of combinations is given in the table. If you don't find the one you need, try entering a different combination.
Table: code options for different Android models
DIY engineering menu
If none of the special codes work, don’t worry. There are many applications on the network with engineering menu functionality. It is worth noting that the MTK prefix in the names eloquently indicates compatibility only with MediaTek processors.
The first option is Mobileuncle MTK Tools. In addition to the necessary set of settings, this program has several additional functions: firmware update, recovery update, GPS receiver improvement mode and much more.
 Mobileuncle MTK Tools provides a set of settings
Another program is MTK Engineering Mode. The program completely replicates the standard engineering menu.
 MTK Engineering Mode repeats the standard engineering menu
For those whose device is not equipped with an engineering menu, there is another option: installing third-party firmware. Assemblies from third-party developers often contain a wide range of customization settings.
Where to begin
When you first enter the menu, you can get lost in the jungle of parameters.
Engineering menu settings
Settings open up enormous possibilities for users.
Depending on the hardware platform, some items may not be available or may be missing.
In this section you can configure mobile communication settings.
- Auto Answer. You can enable or disable automatic answering of an incoming call.
- Band Mode. Allows you to manually select the frequency range for the GSM module to operate. You will see all technologies and frequencies for them supported by your smartphone model. If you wish, you can uncheck bands that are not used by your carrier. This will significantly save battery power. To save the settings, press the set button.
- CFU Setting (Call forwarding Settings). The option enables or disables conditional forwarding. It must be supported by the operator.
- AT Command Tool. A utility for developers that supports AT commands. This menu item will be of interest to programmers and developers. Using this menu, you can perform various queries directly to the system without visual add-ons.
- Modem Test. Configuring the compatibility of the “access point” option with various types of connected devices.
- Network Selecting. Here you can select mobile communication standards (GSM, WCDMA, LTE). For additional energy saving, turn off unused ones.
- NetworkInfo. Select one or more options to display information about the status of cellular communication parameters. Once selected, open the additional menu (three dots in the upper right corner) and click Check Information. This option is convenient for checking the quality of cellular operator services.
- GPRS. Setting up a connection to the mobile Internet, selecting an active SIM card (if there are several of them).
- HSPA Info. Information about the 3G network if supported by your mobile operator.
- Mobile data service preferred. The Internet will be given priority over voice traffic to increase data transfer speeds. Incoming calls may not go through.
- Fast Dormancy. Allows you to save battery energy in third generation networks. The option must be supported by your telecom operator.
- RAT Mode (Phone Info). Allows you to select the priority communication standard. You should change the parameter carefully, it blocks the settings of the Network Selecting item.
- RF De-sense Test. You can select a frequency range and a specific channel to check the communication quality.
- SIM ME Lock. This subsection allows you to configure the regional parameters of the GSM module (MNC, NCC) manually.
Photo gallery: mobile communication parameters
We get to the main window of the subsection Enable or disable auto answer Enable or disable conditional forwarding Configure the “Modem” mode Display information from the GSM module Configure the mobile Internet Select the priority of the connection type Configure the operation of the 3G mode Select the type of mobile communication Check the network power Configure regional communication parameters
Wireless interfaces
This section is intended for testing wireless data transmission modules (Wi-Fi, Bluetooth, FM).
- Bluetooth. A wide range of settings and tests for the module of the same name in order to check the reception and transmission of data, and start the debugging mode.
- CDS Information. Information about the parameters of wireless interfaces.
- FM Receiver. Checking the FM module of the device.
- Wi-Fi. Testing the module for transmitting and receiving information on the specified frequency channel.
- Wi-Fi CTIA. Recording logs of wireless technology tests.
Photo gallery: wireless data transmission
Select the section for checking the device’s wireless modules Check the bluetooth operating mode Find information about the wireless interfaces Configure the FM module Check the operation of the WiFi module Write data about checking the WiFi module to a log file
- Audio - fine-tuning audio playback parameters.
- Camera - a set of parameters for taking photos and videos that are not included in the Camera application.
- Driving Current Camera - takes current readings from the sensor in the camera circuit.
- CPU Stress Test - performing tests of all subsystems of the central processor.
- Deep Idle Setting - disable sleep mode in standby mode.
- Sleep Mode Setting - sleep mode settings.
- ChargeBattery - View battery information.
- Sensor - sensor calibration.
- Multi-Touch - checks the number of available points for simultaneously pressing the screen.
- Location Engineer Mode - checking the parameters of the GPS module.
Photo gallery: equipment testing
Go to the section for checking electronic components Adjust the volume of the conversation speakers Adjust the camera's power supply Adjust the standby mode Adjust the frequency of the central processor Adjust the sleep mode View information about the battery Adjust the touch screen Check the capabilities of the multi-touch function Configure the GPS module
Adjusting the speaker volume
In the subsection you can adjust the overall volume level, headphone and speakerphone volume.
You should be careful when changing volume settings. All parameters are individual for a specific device model. Incorrect configuration may result in poor hearing performance.
There are a number of general parameters:
- MaxVol - general volume level. The range of values is from 0 to 160. The higher the number, the higher the volume.
- Sph - volume during a telephone conversation.
- Mic - microphone sensitivity.
- Ring - speaker volume for incoming calls.
- Media - volume level when watching movies, listening to music and playing games.
Very often, users are unhappy with the speaker volume during a conversation. To improve audibility, go to the Normal Mode menu and change the Sph parameter to 150. If the phone rings quietly when there is an incoming call, then you need to increase the value of the Ring parameter. We advise you not to set the value above 200, as this may damage the speaker. To make you better heard, change the Mic parameter from 100 to 172. This will increase the sensitivity of the speaker.
ROOT is a panacea for a smartphone
On a smartphone without root rights, the functionality of the engineering menu is limited: some items are not displayed, and changes made are not saved. Any interference with the operation of a smartphone requires open access to the system. Don't forget that gaining root access can damage your gadget and will void the device's warranty. We strongly recommend that you back up important information to a memory card and synchronize it with your Google account and remove it to avoid data loss. To unlock full access to the system, you can use one of the existing methods.
Installing the application directly on the device (KingRoot)
Superuser access can be opened from a smartphone using special programs. Let's look at the sequence of operations using the KingRoot program as an example:

After this, you can safely change the parameters in the engineering menu, all changes will be saved. If the result is negative, we move on to the next method.
Obtaining superuser rights via PC (Kingo Root)
This method differs in a slightly larger number of preparatory activities:

The engineering menu is used to configure the device and test the operation of the hardware. This is a built-in system routine that is an indispensable tool for both experienced users and newcomers to the world of mobile devices. However, it should be noted that manipulations with the engineering menu can render the gadget inoperative.
Manufacturers of Android smartphones implement and use the engineering menu to test devices. It contains all kinds of tests and device settings that are not available to ordinary users. However, today, knowing the USSD command or downloading the application from PlayMarket, anyone can go to the engineering menu.
Why do you need a hidden engineering menu in Android?
Engineering Menu (Engineering Mode) is essentially a hidden application that developers use to test and set the optimal parameters of a mobile phone or tablet. Specialists check the operation of the sensors and, if necessary, make adjustments to the functioning of system components.
When working with the Android technical menu, be careful - changing some functions leads to malfunctions of the device.
How to enter the menu
To open the menu installed by the manufacturer, activate the dial pad on your smartphone and enter one of the USSD commands presented in the table. After entering the command, the numbers will disappear from the screen, and a menu will open instead.
In the dial pad, enter a combination of numbers and symbols to enter the menu
Table: combinations for launching Engineering Mode
| Device manufacturer | Team |
| Sony | *#*#7378423#*#* |
| *#*#3646633#*#* | |
| *#*#3649547#*#* | |
| Philips | *#*#3338613#*#* |
| *#*#13411#*#* | |
| ZTE, Motorola | *#*#4636#*#* |
| HTC | *#*#3424#*#* |
| *#*#4636#*#* | |
| *#*#8255#*#* | |
| Samsung | *#*#197328640#*#* |
| *#*#4636#*#* | |
| *#*#8255#*#* | |
| Prestigio | *#*#3646633#*#* |
| LG | 3845#*855# |
| Huawei | *#*#2846579#*#* |
| *#*#14789632#*#* | |
| Alcatel, Fly, Texet | *#*#3646633#*#* |
| Smartphones and tablets with a MediaTek processor (most Chinese devices) | *#*#54298#*#* |
| *#*#3646633#*#* | |
| Acer | *#*#2237332846633#*#* |
Video: how to work in Engineer Mode
If the code does not work and you cannot launch the service menu using the standard method, use third-party applications - you can download them on PlayMarket. Recommended programs - “Launch the MTK engineering menu”, Mobileuncle Tools, Shortcut Master.
The manufacturer menu does not work on some device models with Android 4.2 JellyBean (x.x.1, x.x.2), as well as on Android 5.1 Lollipop. The menu is also invalid when the Cyanogen Mod firmware is installed. In Android 4.4.2, when you reboot, changes made in the application are reset.
“Launch the MTK engineering menu”
The application allows you to open and configure the engineering menu without typing digital commands. Works correctly on MediaTek processors (MT6577, MT6589, etc.) and Android systems 2.x, 3.x, 4.x, 5.x. According to user reviews, the program successfully performs its functions, but after rebooting the smartphone, the settings made using the application are reset.
Mobileuncle Tools program
The functionality of the application is similar to the previous one, but, in addition to accessing the engineering menu, the user has the opportunity to view information about the screen, sensor and device memory, as well as update the firmware, restore the IMEI number and improve GPS. For stable operation, root rights are required.

To enter the engineering menu, select Engineer Mode
Shortcut Master utility
The Shortcut Master program is designed to work with shortcuts and system applications: creating, searching, deleting. It does not have a direct function for entering the engineering menu. But with its help you can view the list of secret commands operating on your device. And by clicking on the name of the command, you will see a drop-down menu in which there will be an item “execute”. Convenient and does not require unnecessary actions.

In the program, call up the additional menu and select Secret code explorer to see a list of codes
Root rights to access the engineering menu
To get to the service menu on some versions of Android, the user must have superuser rights (root). You can obtain rights using specialized applications: Farmaroot, UniversalAndRoot, Romaster SU and others. To get Root access to your device using Farmaroot:
- Install and run the program. Link to Google Play: https://play.google.com/store/apps/details?id=com.farmaapps.filemanager&hl=ru.
- If the application supports installing root rights on your device, then on the screen you will see a list of possible actions, among them - “Get root”. Select this item.
- Choose one of the preset root methods.
- The program will begin installation.
- At the end of the procedure, you will see a message about the successful installation of root access.

Instructions for obtaining root access through the Farmaroot application
Possible problems and solutions:
- the application closed mid-installation - restart the device and try again;
- root rights are not installed - try installing using a different method (select a new exploit in the application).
What can be configured in the menu
The appearance of the engineering mode and the ability to adjust parameters may vary depending on the tablet or smartphone model. In the menu, users most often adjust the sound, change camera settings and use recovery mode. The parameters for adjustment and the procedure are given below. Be careful - the names of menu items may differ in different device models! You act at your own risk.
Audio: Increase volume level
If your phone does not ring loudly enough, find the Audio section in the engineering menu and go to LoudSpeaker Mode. Select Ring. For each signal level (level 1–6), change the values - set the numbers in ascending order, from 120 to 200. Increase the value in the Max item. Vol - maximum 200. Press the SET button to save the settings.

Sequentially change the maximum volume values for each level
Audio: Increase phone call volume
To enhance the speaker tone for conversations, in the Audio service menu section, select Normal mode and open the Sph item. Set the values for signal levels (level 1–6) from 100 to 150, and the number for Max. Vol. – up to 160.

By adjusting the speaker volume, you will be able to hear your interlocutor better during a call.
To increase the sensitivity of the microphone, go to the menu Audio - Normal mode - Mic. For each level, assign the same microphone sensitivity values, for example, 200. Press the SET button, reboot and check whether the other party can hear you better.

Increased microphone sensitivity will allow the other person to hear you better
Video: adjusting sound parameters in the engineering menu
Battery: Disable unused frequencies
Smartphones quickly drain battery life running applications, maintaining cellular communications, and network connections. Using the engineering menu you can increase the battery life.
Modern devices scan several GSM frequencies - 900/1800 MHz and 850/1900 MHz. In Russia there is a 900/1800 MHz pair, which means there is no need to scan the network at other frequencies. The radio signal for the second pair can be turned off, which will significantly save the charge level.
In Engineer Mode, open Band Mode. Disable unused frequencies by unchecking the corresponding items - PCS1900 and GSM850. If the device supports two SIM cards, open the SIM1 and SIM2 items one by one and perform the indicated steps in each. Press the SET button to save the settings.

Disabled frequencies save battery power
If your smartphone and SIM card operate in 3G networks, disable the networks that are not used in Russia: WCDMA-PCS 1900, WCDMA-800, WCDMA-CLR-850. Press the SET button again.
You can enable scanning of disabled networks by returning to the same menu and checking the boxes.
Camera: photo and video settings
By default, Android devices save pictures in JPEG format. Meanwhile, photographers prefer to shoot and process material in RAW to gain more editing options. The technical menu allows you to select the desired image format.
Find Camera in the menu and select Capture Type. Set the photo format to RAW and press SET. Also in the Camera menu you can increase the size of pictures, set the ISO value, enable shooting in HDR for higher photo detail, and set the frame rate for videos. After changing each parameter, remember to press SET to save the settings.
Recovery Mode
Recovery Mode is an analogue of Bios on a computer, it allows you to manage the device without logging into the Android system. Recovery mode features:
- resetting settings to standard;
- firmware update;
- access to root rights;
- creating a backup copy of the OS;
- removal of personal data from the system.
In Recovery Mode, do not perform an action if you are not sure what it will lead to. Some commands may harm the device and system.
If the settings are not saved
Users who have access to the technical menu complain that the parameters changed in it are not activated or are reset when the device is restarted.
To activate the settings after changing the parameters, tap on the SET button at the bottom of the screen. If the parameters are reset after rebooting the device, try accessing the technical menu not through the application, but using a digital command.

After setting the settings, do not forget to press the SET button
Service codes for Android devices
In addition to the technical menu, secret USSD codes - combinations of numbers and symbols, which the user types by typing to perform an action, allow you to control the functionality of Android smartphones. Secret codes for different devices are given in the table.
Table: list of secret commands for Android
| Manufacturer | Digital Team | Meaning |
| Codes for most manufacturers | *#*#7780#*#* | Rolling back settings and uninstalling user applications |
| *2767*3855# | Firmware change, total settings rollback. | |
| *#*#232339#*#* *#*#526#*#* |
Checking wireless connections | |
| *#*#34971539#*#* | Camera details | |
| *#*#232338#*#* | View Wi-fi address | |
| *#*#273283*255*663282*#*#* | Activating media backup on your phone | |
| *#*#1472365#*#* | Express GPS test | |
| *#*#0*#*#* | Checking the screen | |
| *#*#2663#*#* | Viewing touchscreen information | |
| *#*#2664#*#* | Touchscreen testing | |
| *#*#4636#*#* | General device and battery data | |
| *#*#0673#*#* *#*#0289#*#* |
Audio tests | |
| *#*#7262626#*#* | Checking GSM reception | |
| *#*#0842#*#* | Vibration and display brightness test | |
| *#*#3264#*#* | RAM information | |
| *#*#232331#*#* | Testing Bluetooth Communications | |
| *#*#8255#*#* | Checking Google Talk | |
| *#*#232337#*#* | Bluetooth address information | |
| *#*#1234#*#* | Device firmware data | |
| *#*#44336#*#* | Device build date | |
| *#06# | IMEI number information | |
| *#*#197328640#*#* | Service activity test | |
| *#*#1111#*#* | Free-to-air version of programs | |
| *#*#2222#*#* | Iron number for free-to-air | |
| *#*#0588#*#* | Checking the proximity sensor | |
| Sony (devices use the same commands) | **05***# | Unblocking a PUK code |
| Motorola | *#06# | IMEI |
| *#*#786#*#* | Reverting settings to original | |
| *#*#1234#*#* *#*#7873778#*#* | Opening applications with root rights | |
| *#*#2432546#*#* | Checking for updates | |
| *#*#2486#*#* | Entering the service menu | |
| HTC | *#*#4636#*#* | Service menu |
| ##3282# | EPST System Application | |
| *#*#8255#*#* | G-talk monitor | |
| ##33284# | Network status | |
| *#*#3424#*#* | Functionality test | |
| ##3424# | Device diagnostics | |
| ##7738# | Protocol diagnostics | |
| ##8626337# | Voice Coder | |
| Samsung (generic codes are effective) | ##778 (+call) | Activation of EPST menu |
| LG (working with codes is replaced by the technical menu) | 3845#*855# | International devices |
| 3845#*400# | Chinese devices | |
| 5689#*990# | Sprint | |
| ##228378 (+ call) | Verizon Wireless | |
| 3845#*851# | T-Mobile | |
| 3845#*850# | AT&T |
If for some reason the service code did not work, do not worry - install and run the Secret Codes application (Link on Google Play: https://play.google.com/store/apps/details?id=fr.simon.marquis. secretcodes&hl=ru).
The program will analyze the combinations active in the device and offer you a list. You can activate the combination directly in the application with one click on the name.Share with your friends!
Why you need to root an Android device and what opportunities it provides is known to a fairly large number of users, which cannot be said about the hidden advanced menu of hardware settings, also called the engineering menu. Few people know about these settings, and even fewer mobile device owners know how to use them. What is the Android engineering menu and why is it needed?
The Android engineering menu is nothing more than a special subroutine designed for testing by developers of the operating system and device sensors. The interface of this program is represented by a set of options that allow you to change the hardware configuration of your mobile device. With its help, you can get comprehensive information about the hardware of the gadget, test the processor, RAM and physical flash memory, wireless connection modes, configure the parameters of the camera, display, microphone, speakers and much more.
Entering the engineering menu
All this, of course, is good, but how do you go to the engineering menu if there is no corresponding option in the Android interface? You can enter the advanced hardware settings menu using a special code entered in the phone number dialing line. The menu should open immediately after entering the last character of the combination, but in some cases you may need to press the call button.
There is nothing complicated in the procedure itself, however, it should be taken into account that different models of mobile gadgets have their own codes. Below we have provided a list of codes for the most popular manufacturers. Engineering menu codes in Android are universal, however, their correct operation on phones with “left” firmware is not guaranteed. You can also use special programs to access Android hardware settings, for example,"MTK Engineering Menu" or.

Such applications are especially useful on tablets whose firmware does not provide a dialer. The interface and set of available options in these programs are somewhat different, however, understanding them will not be difficult.
Whatever method you use, you need to exercise maximum caution when working with the engineering menu. Before starting work, it is strongly recommended that you write down all the initial parameter values so that you can restore the settings. It is unacceptable to experiment with the engineering menu just to find out what comes out of it, as you can render your device unusable!
To obtain a list of engineering codes for a specific phone model, you can use a special application Secret Codes, available on Google Play. On some mobile device models, full access to the engineering menu may require superuser rights (root).
What you can change using the menu
You know how to get to the engineering menu, now let's find out what settings can be made using it. The possibilities are more than wide. The menu subroutine supports changing the speaker volume level and microphone sensitivity, built-in camera settings, audio parameters, GPS, Bluetooth and Wi-Fi modules, and turning off unused frequencies to save battery power. You can also test key components of your device and external memory card, configure I/O operations, determine the exact temperature of the processor and battery, and the level of harmful electromagnetic radiation.
Another useful function is to gain access to recovery mode - an analogue of BIOS on computers, which in turn contains a whole set of settings. Recovery mode features include resetting the device to factory settings, updating the firmware, creating a backup copy of the operating system, gaining root access, and deleting sensitive user data. It is not possible to list all the engineering menu options in one article; the more sensors and components there are in a phone or tablet, the more extensive it will be.
Increasing phone volume through the engineering menu
Now let’s demonstrate how to work with hardware settings using the example of one of the most popular operations and learn how to increase the volume on Android through the engineering menu. So, go to the menu using Mobileuncle MTK Tools or by entering the “magic” code, then find and open the Audio subsection. If you entered the menu through the Mobileuncle Tools program, this subsection will be located in the senior section Engineer Mode, in other cases it is usually located on the Hardware Testing tab.

In the Audio subsection you will have the following options:
- Normal Mode – normal mode that works when a headset is not connected to the device.
- Headset Mode – headset mode that turns on when headphones or speakers are connected to the smartphone.
- LoudSpeaker Mode – loudspeaker mode. Activated when the speakerphone is turned on, provided that a headset is not connected to the device.
- Headset_LoudSpeaker Mode – loudspeaker mode with a connected headset. The same as the previous one, but with headphones or speakers connected.
- Speech Enhancement - this mode is activated when talking on the phone without using the speakerphone.

There may be other settings in the section, for example, Debug Info and Speech Logger, but it is better not to touch them. Select the mode for which you want to change the volume level (let it be Normal Mode), select Type in the list that opens and indicate for which function we will change the volume. The following functions may be available:
- Ring – adjust the volume for incoming calls;
- Media – adjust the speaker volume when playing multimedia;
- Sip – sound settings for Internet calls;
- Sph – sound settings of the conversational speaker;
- Sph2 – sound settings of the second speaker (the option may not be available);
- Mic – change the microphone sensitivity;
- FMR – FM radio volume settings;
- Sid – it is better not to touch this parameter, otherwise problems with the interlocutor’s voice may occur.
Having selected a function, scroll through the current list, set the desired Value (from 0 to 255) and click to apply the new Set settings.

To change the volume level, you can also use preset templates - the Level option. Most phones have seven levels, from 0 to 6. It is advisable not to touch the Max Vol setting, just as you should not set the Value values too high, otherwise the sound in the speakers will begin to wheeze. Other modes in the Audio subsection are configured in a similar way.
Some smartphone and tablet models require a reboot for the new settings to take effect.
Reset
And the last thing we will look at today is resetting the engineering menu parameters to factory values. It may be needed if, after making changes, the device begins to work incorrectly. There are several reset methods. If the system boots normally, go to the settings and open the “Backup and Reset” subsection.


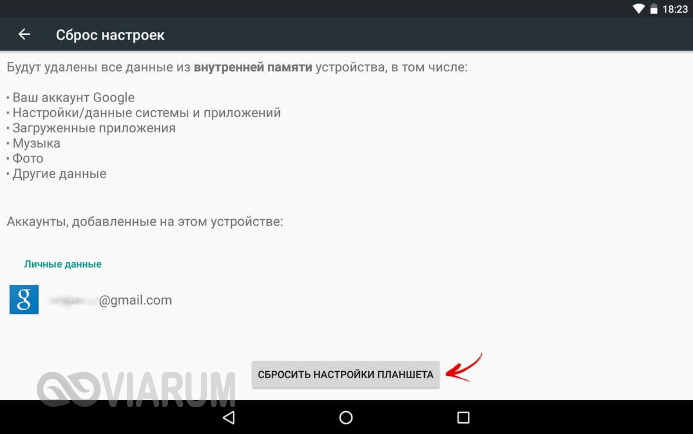
You can also reset the engineering menu by entering a special service code in the dialer. Usually it is *2767*3855#, *#*#7780#*#* or *#*#7378423#*#*, but your phone model may require a different code.
Another option is to use the recovery mode mentioned above. To get into it, use one of these combinations:
- Power button + volume down.
- Power button + volume up.
- Power button + Home button + Volume down/up.
- Power button + volume up + volume down.
In the list of options that opens, select “wipe data/factory reset” → “Yes – delete all user data” → “reboot system now”. The device will reboot and the settings will be reset.


There is another way to reset the engineering menu settings, but it requires superuser rights. Using any file manager that supports root rights, go to the root directory of the system, and then delete all or part of the contents of the folder data/nvram/apcfg/aprdcl and reboot.

Files in a folder aprdcl they are responsible for setting up the engineering menu. It is not necessary to delete all files at once. If you mess up, say, your audio settings, all you need to do to restore the original settings is delete files that have an audio string element in their names. And one moment. Regardless of the reset method, always make a backup of your personal data and applications, as they may all be lost.
Articles and Lifehacks
The purchase of a mobile device by an experienced user is always associated with the fact that he wants to gain access to those functions that are not available to him in normal mode. In this regard, he is often interested in how to get to the service menu on LG G2. What is such a menu, and why is it needed? And can they charge for using it? Let's try to provide answers to these questions, and also tell you about other features of the device.
What is the service menu on LG G2, and how to get to it?
Let's start with the fact that it is recommended to use the engineering or service menu only if you have sufficient knowledge and skills, since any changes made may affect the operation of the mobile device. Using this menu, you can not only find out the information you are interested in about the G2, but also change those settings that are usually unavailable. Sometimes the codes for calling up menus from the same manufacturers are the same, but in most cases unique combinations are provided.
So, it is strictly not recommended to use the service menu unless necessary. If the buyer understands it, he can test a smartphone with it before purchasing. For example, it will check the display for dead pixels, test the operation of radio modules, touch-screen responsiveness, etc.
So, how to get to the service menu on LG G2? To do this, enter the combination 3845#*802#, and then select the HW device test option. We entered the engineering menu.
What else do you need to know about the LG G2, besides the service menu code: overview of other characteristics
At the end of November, LG announced that this device is available for sale in the Russian Federation. This unusual device was released after the flagship Optimus G, and it embodies the most interesting mobile solutions of its developers. The G2 has excellent display resolution, a powerful processor, numerous communication capabilities, optical image stabilization (built into the camera), and a decent amount of memory.
There are several modifications of this device, between which there are significant differences. For example, they have different bands of the LTE standard, different capacities, etc.
A model such as the D802 is officially imported into the Russian Federation. It runs on Android 4.2.2, is equipped with a 4-core processor with a frequency of 2.26 gigahertz, 2 gigabytes of RAM and 32 gigabytes of internal memory (without support for micro-SD cards), Adreno 303 graphics subsystem, FM tuner, GPS and GLONASS support, and a 3000 mAh battery. The smartphone has a 13 megapixel main camera (with optical stabilization, auto focus, flash), a 2.1 megapixel front camera, a True HD-IPS display with a resolution of 1920 by 1080 pixels and a diagonal of 5.2 inches. Micro SIM supported. Device dimensions: 138.5 x 70.9 x 9.1 millimeters, weight – 143 grams.
The device has a completely ordinary, but stylish design. We note the “native” IPS screen from LG Display, as well as the protective glass Gorilla Glass 2. The above-mentioned 13-megapixel main camera can be considered the real pride of this smartphone. As for the display, it is also quite good.
So, the main advantages of the device include its camera, support for studio-quality sound (when listening to music on headphones), a high degree of performance and a contrast screen with excellent brightness. Among the shortcomings: the lack of a slot for a memory card and the case is easily soiled.


