Hotkeys to the end of the line. Keyboard shortcut for saving a Word document
We all dream of a “magic” button that, when pressed, would solve all our problems. Alas, she is not there yet.
However, in the computer world, they have made sure that we can quickly and easily store any amount of a wide variety of information.
Texts, pages, pictures, photographs, calculations, reports, websites - this and much more can be easily kept as a keepsake with a simple “save” button.
Where to look for this miracle button? Each case has its own instructions!
Here is a user looking at the keyboard and thinking: “Interesting, huh? what is shown on the “save” button icon? The answer is simple - nothing! There is no beautiful and single “save” button. But, stop! There is no need to be upset.
There are analogues and convenient keyboard shortcuts that are easy to find and easy to remember:
- Simultaneous pressing of “Ctrl” + “S/ы”. Suitable for any text documents, most standard programs and browsers. Press easily and quickly with two fingers of the left hand.
- The button above the standard letter series or number block is “PrtScr”. This is a quick "save" button for any information on your computer screen. PrtScr takes a photo of the screen and easily displays the result as an image.
It is important to understand that after clicking on PrintScreen, you need to go to any editor - be it graphic or text - and open the saved image.
To open, you need to use the “Paste” function, which can be easily found in a small menu when you right-click on the screen, or activate it with another key combination – “Ctrl” + “V/M”.
3.Miracle button F12. It will appeal to advanced users who not only need to save a document, but also make a later copy of it. F12 performs the “Save As...” function and is ready to either ensure the safety of a completely new, unnamed document, or make a duplicate of an existing one, but under a different name. 

What does the “Save Page” button look like in a browser?
- For further study in the absence of the Internet;
- To return to it later if you have access to the World Wide Web.
Each goal has its own possibilities, but again you will need the magic “save page” button! And she’s gone again!
We solve problems sequentially, but the principles of operation will be approximately the same for all browsers, so you won’t have to worry about searching for a saving function in Opera, Mozilla, Chrome or somewhere else.

 Explorer bookmarks
 Firefox
 - To ensure the safety of the page for subsequent viewing, you need to find in the line where the page address (Url) is indicated "asterisk" in Chrome– in the browser Opera it will be “heart”– and click on this symbol. When hovered over with the mouse, the icon may show different names: “add page to bookmarks”, “add to favorites or reading list”. It doesn't matter. The essence of all such symbols is the same.

 Saving bookmarks in Chrome
 Bookmarks in Opera
 When clicked, a menu will be displayed where the storage location will be specified and when you click on “done” the selected page will move to a safe place.
Essentially this is a bookmark, but that’s what we need. To now launch the saved site, simply find the desired name on the browser start page: in the top menu bar, as a large icon, or in another place where the word “bookmarks” appears.
The paths are identical to saving the document, that is, from the keyboard:
- Combination “Ctrl” + “S/ы” with the appearance of a window and clarification of the storage location.
- “PrtScr” key for photographing a page and then inserting it into any editor or document.
- "Save As..." function. It is launched either from a menu called up with the right mouse button, or by clicking on this phrase in the browser menu. The browser menu is most often encrypted with three vertical dots, when clicked on, a rather large list of different functions and capabilities opens.
“Save” buttons in Word, Corel, Excel
The most important thing for the user is to figure out where the “save” button is in Word, Excel, and standard work programs. For graphics lovers, you will have to master the specifics of Corel, Photoshop, and their analogues. Believe me, it's not difficult!
- Floppy disk – “information storage”. Elementary.
- The “save” button in Corel has a similar appearance.


Knowledge of the following points will help ensure the safety of the created document, file, image:
- "Save" or "Save As...". You can find these function lines in the menu. It opens either by clicking on “File” in the upper field of the open program window, or through the “Office” button, which looks like different-sized colored squares in the upper left corner of the document in the latest versions of Word and Excel.
- "Export". A typical function for image editors, allowing you to save created images in a variety of formats. In short: when you click on “Export,” a window appears for specifying saving parameters. Then “ok” and you’re done!
The combinations “Ctrl” + “S/ы” and F12 work great in office and graphics programs.
What should I do and why is the “Save” button missing or inactive?
And now here's the riddle: save button doesn't work. What to do? The situation is quite typical - especially for Corel Draw programs installed using demo versions or through pirated software.
It is best to solve such problems preventively, that is, use licensed programs and not worry about failures.
But since the problem already exists, we will have to deal with it.
There is an interesting way to do this:
1.Add to C:\WINDOWS\system32\drivers\etc\hosts .
0.0.0.0 apps.corel.com
0.0.0.0 mc.corel.com
corel.com
2.Delete the folder.
for Win 7-10
C:\Users\%username%\AppData\Roaming\Corel\Messages
for WinXP
C:\Documents and Settings\%username%\Application Data\Corel\Messages
Judging by the reviews of those in similar trouble, the recipe is effective and helps solve problems with preservation.
In 1C, such difficulties are removed by adjusting access rights for a specific user. The way is simple: “Service” - “Users” - “Setting up additional user rights”.
There, select the employee who has problems with the visibility of the save buttons, and put a checkmark in his rights in the table editing line. And everything works again.
It turns out that the “magic” save button still exists on computers, laptops, programs and browsers. Of course, you need to find it first, but with the help of all the instructions described, it’s unlikely to be difficult anymore!
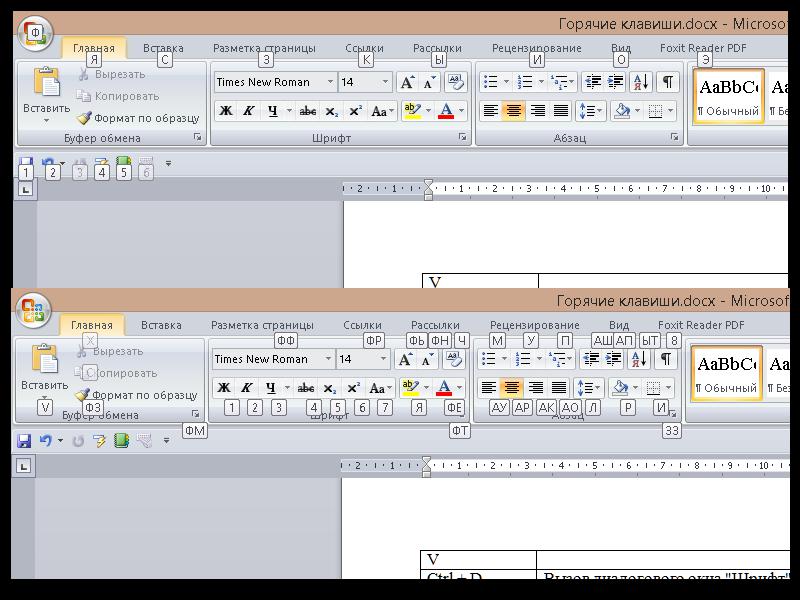
Hot combinations and WORD keys
To select a vertical block of text in Word, you must first press the key combination “Ctrl” + “Shift” + “F8”. In addition, you can select a vertical block using the mouse while holding down the “Alt” key.
In Word, working in Cyrillic mode, sometimes you need characters that are only available in Latin mode, for example. @, $, & in order not to switch modes, just press the Alt + Ctrl + desired key (or Shft + Alt + Ctrl + desired one).
Hotkeys
Bold text - press Ctrl+B (or in Russian mode - Ctrl+I). It turns off in the same way.
Italic text - Ctrl+I or Сtrl+Y (in Russian - Ctrl+Ш or Ctrl+Н).
Underlined text - Ctrl+U (in Russian - Ctrl+Г)
Text with double underline - Ctrl+Shift+D (Ctrl+Shift+in)
Text typed in capitals (reduced capital letters) - Ctrl+Shift+K (Ctrl+Shift+Л) (to change these attributes of an entire word, it is not necessary to select it entirely. It is only enough that the cursor is inside the word).
Paragraph alignment: left - Ctrl+q (Ctrl+th);
right - Ctrl+r (Ctrl+k);
in the center - Ctrl+e (Ctrl+у)
by format - Ctrl+j (Ctrl+o)
bulleted list - Ctrl+Shift+L (Ctrl+Shift+d)
Shift a paragraph to the right Ctrl+M (Ctrl+ь)
Increasing left indentation (except for the first line) - Ctrl+T (Ctrl+e)
Printing a document (in Word and almost all other programs) - Ctrl+P (ctrl+З).
Some useful notes for those who touch type and hate using the mouse:
Change the font in the text - press Ctrl+Shift+F (Ctrl+Shift+A), this will activate the font change window in the formatting panel. We type the name of the desired font in this panel (usually the first few characters are enough - then Windows completes the name automatically) and press “Enter”.
Change the font or paragraph style - similarly, press Ctrl+Shift+S (Ctrl+Shift+І), and enter the font name, for example, “Heading 1”. After pressing "Enter", the entered style is applied to the paragraph, and if the style does not exist, then it is created based on the formatting of the paragraph where the cursor is located.
Entering an endnote. You can, of course, go to the menu to do this, but this again means using the mouse! It is much easier to press Ctrl+Alt+F (Ctrl+Alt+A), and a footnote will immediately appear in the specified place in the text, and the cursor will move to the bottom of the page, where you can enter its description.
It is very easy to remove unused buttons from the panel by simply dragging them out of the panel with the mouse while holding down Alt; in the same way, when holding down Alt, you can change the location of the buttons without going into the options and settings windows (with pressed Alt+Ctrl - you can make a copy of the button). Using the same manipulations, you can place buttons in the menu and menu sections in the toolbar with buttons.
Sometimes a problem arises and you need to change the case of letters, to do this, stand on the word in which you need to change the case (or select several words) and press Shift+F3 several times, depending on how you want: All Capital Letters At the Beginning of Words, CAPITAL or Lowercase.
Word keyboard shortcuts
Hotkey table for MS Word:
(this table of Word hotkeys will help you make your work with the program more efficient; using even a few basic Word hotkey combinations when working with the program can significantly speed up the process of creating and editing documents).
Word hotkeys:
F1 - Call help or assistant
F2 - Move text or pictures
F3 - Insert AutoText Element
F4 - Repeat last action
F5 - Go (Edit menu)
F6 - Move to next area
F7 - Spelling (Tools menu)
F8 - Expand Selection
F9 - Update selected fields
F10 - Go to menu bar
F11 - move to next field
F12 - Execute the Save As command (File menu)
SHIFT+:
F1 - Call context help
F2 - Copy text
F3 - Change letter case
F4 - Find or Go Next
F5 - Go to previous fix
F6 - Go to previous window area
F7 - Thesaurus (Tools menu)
F8 - Decrease Selection
F9 - Display codes or field values
F10 - Display context menu
F11 - go to previous field
F12 - Execute the Save command (File menu)
ALT+:
F1 - Go to next field
F3 - Create AutoText Item
F4 - Exit Word
F5 - Previous program window sizes
F7 - Next error
F8 - Run macro
F9 - display codes or values of all fields
F10 - maximize the program window
F11 - Display VISUAL BASIC code
CTRL+ ALT+:
F1 - System Information
F2 - Open (File menu)
CTRL+:
F2 - Preview
F3 - Delete the selected fragment to the piggy bank
F4 - Close window
F5 - Previous dimensions of the document window
F6 - Go to next window
F7 - Move (window menu)
F8 - Size (window menu)
F9 - insert an empty field
F10 - Maximize or restore the document window
F11 - field lock
F12 - Execute the Open command (File menu)
As soon as you write the title, immediately save the document so that in case of unforeseen circumstances, you don’t lose the document you’ve been working on all day!
Save a document in Word 2010 and newer versions
To save a document in Word 2010, go to the File tab. Then move the cursor down and click on the line Save as

Rice. 2
In the window that opens, on the left, we see a list of folders on your computer. In this list, the folder is highlighted in gray My Documents, in which it is proposed to save the new document by default. But you can choose another place to save. Scroll the list using the slider (highlighted with a red frame) and click the desired folder or disk (flash drive)
Part of the first line of your text is automatically entered into the File name field. You can agree with the proposed name of the document or change it to your own. Leave the File type field unchanged.
If necessary, below you can specify additional information for your document: author, keywords, title, topic, etc.
Paying attention! If you have forgotten the name of your last document and the folder where you saved it, then go to the File tab (Fig. 3) and select Recent. On the right you will see a list of text documents you have worked with, as well as the folders in which you saved them.

Rice. 3
Saving a document in Word 2007
To save the document in Word 2007, press button 1 (Figure 4). Then move the cursor down to the Save as 2 button, and from there, follow the arrow to the right and click the Word Document 3 button

Rice. 4
The "Save Document" window will open:

Rice. 5
In the window that opens, on the left, we see a list of folders on your computer. In this list, the Documents folder is highlighted in gray, in which the computer offers to save the new document. You can disagree and, by clicking on the folders, open the one in which you want to save.
The File Name window highlights the name your computer wants to give your document. You can immediately replace this name with your own.
Paying attention! If you did not change the name of the document and the destination folder, then at least remember where you saved the document. Because novice users often press the button Save, and then spend half a day searching for where the saved document is located.
Saving a document in Word 2003
So, you typed the phrase " Much needed article", now, at the top of the Word window, click the File menu button, and in the menu that opens, select Save as... .

Rice. 6
In the window that opens Saving a document you see the name of the folder (My Documents) in which Word offers to save the new document. Under the folder name we see a list of documents already available in that folder. Instead of the suggested folder, you are on your computer. The main thing is don’t forget where you saved it!
The computer also suggests a file name, but you can immediately replace it with another one. File Type: Word Document should remain this way. In the future, to open a document it will be enough to click on the title of the article, and it will open immediately in the Word window. There will be no need to launch Word first! Now press the button Save and the document is saved!
Save a Word document using the keyboard
Above I showed you how to save a new document using the menu. However, there is a faster method of saving a document - you just need to remember the desired key. Key F12 is located in the top row of the keyboard. After pressing the F12 key, a window will open
saving the document (Figure 6 - for Word 2003, Figure 4 - for Word 2007). Then proceed according to my tips under the pictures.
If, after saving the document, you continue to type text, Word will automatically save the text you type. But you can save it yourself, immediately after making changes to the document, by pressing the keys Shift + F12. I am this
I do this: I press the right Shift key with my right thumb, and the F12 key with my middle finger. Try it - it’s very convenient and quick.
Microsoft Word has a huge number of tools that allow you to change text beyond recognition. Either of these can be found in the standard menus (version 2003 and earlier) or on the tool ribbon (version 2007 and later). But if you need to quickly convert a document, then using the program’s graphical interface forces you to do unnecessary steps and waste time. Therefore, the developers came up with combinations of hot keys or hotkeys to access basic functions using the keyboard.
Function keys
They are in the first row of the keyboard. They contain inscriptions in the range F1-F12. The functions they perform are shown in the table below.
| Description of action |
|
| Calls up help information for the program. |
|
| Allows you to move the selected picture or text once |
|
| Reruns the last command |
|
| Activates access to all GUI elements. Single click allows you to use items Double - Tool Ribbon (Word 2010 and newer). Triple - disables access |
|
| Checks spelling. If there are errors, opens a dialog box to correct them |
|
| Highlights text. Double-clicking highlights the word around the cursor. Triple - the entire line. 4 clicks - all text |
|
| Updates selected fields inserted using Insert>Quick Blocks>Field |
|
| Enables use of the keyboard interface |
|
| Moves to the next field (see F9 key) |
|
Window management
The first part of the Microsoft Word program that can be controlled by hotkeys is the window and interface. The button combinations that allow you to do this are summarized in the table below.
| Description of the action being performed |
|
| Ctrl + Shift + F6 | Switch open editor windows between each other. The second combination goes to the previously displayed window |
| Reduces the size of all open Word windows to their default size. Clicking again does not expand them |
|
| Reduces or enlarges the active window to fill the entire screen |
|
| Collapses and expands the tool ribbon in Word 2010, 2013, 2007, 2016 |
|
| Minimizes the active window. System |
|
| Ctrl+Alt+Escape | Makes the window inactive. System |
| Minimizes all windows in Windows OS. System |
|
| Switches windows between all windows open in the system. System |
|
| Takes a screenshot and places it on the clipboard. To extract it, you can paste it into any raster graphics editor. System |
|
| Alt+PrintScreen | Places an image of the active window on the clipboard. System |
| Divides a document sheet in half, allowing each part to be viewed independently of the other |
|
| Helps you navigate through the tool ribbon by “skimming” drop-down lists and moving the selection to the button in the lower right corner of the block |
|
| Ctrl + mouse wheel rotation | Zooms in or out on a document |

Note: "system" means that the hotkey from Word can also be used in Windows.
File Operations
The second function of hotkeys in the Microsoft Word editor is to operate commands found in the “File” (all versions except 2007) and “Office” (Word 2007) menus. These include:
| Main key | Additional key | Description of action |
| Creates a new document with the "Normal" style |
||
| Opens a dialog box to select the file to open |
||
| Saves changes to the document. If saving is being done for the first time, this hotkey will bring up the "Save As..." dialog box. |
||
| P or Shift + F12 | Open the "Print" window to configure and launch it |
|
| Allows you to close the document, but does not close the editor |
||
| Activates the "Preview" function |

The hotkeys in Word “Create Document”, “Open”, “Print” are universal for software packages from other developers.
Move around the worksheet
To perform this task, there are also assigned hotkeys in Word. They are used in conjunction with special keys located in the navigation block on the right half of the keyboard. The table shows their capabilities.
| Main key | Additional key | Description |
| Places the cursor at the beginning of the line |
||
| Moves the cursor to the end of the line |
||
| Moves the cursor 1 sheet up, maintaining the position |
||
| Page Down (PgDn) | Moves the cursor 1 sheet down, maintaining its original position |
|
| Arrows "left"\"right" | Move the pointer along the line in 1 character increments |
|
| Up\Down arrows | Move the cursor up and down lines |
|
| Places the cursor before the first character in the document |
||
| Places the pointer after the last paragraph in the document |
||
| arrows "right"\"left" | Allows you to move left and right in a line in increments of one “word” or punctuation mark along with a space after it. A “word” is understood as a continuous set of letters and numbers. For example, "Yl65465voaprflyopr" |
|
| up and down arrows | Moves around the document, placing the cursor at the beginning of each paragraph |
|
| or Page down | Place the cursor at the beginning of the previous (1st command) or next (2nd command) sheet |
|
| Brings up the Find and Replace window with the Go tab active. |

All these special keys are duplicated in the number pad of the keyboard. To use it, you need to disable the number input by pressing the NumLock button 1 or 2 times. The shutdown is confirmed by the first unlit light above the digital block.
Text selection
The third use for hotkeys is the text selection operation. The most famous command for it in Word is “Select All” (hotkey Ctrl + A). It selects all text in the document. But more often it is necessary to select small fragments. Therefore, there are other combinations. Their list is given in the table below.
| Main key | Additional key | Description |
| Shift | Selects all text from the beginning of the line to the pointer |
|
| The same, but from the cursor to the end of the line |
||
| Page Up or Page Down | Selects text from the top of the sheet to the bottom. The volume is adjusted by scaling the document using the slider in the lower right corner of the editor |
|
| left/right arrows | Selects text in 1 character increments |
|
| up/down arrows | Selects text in 1 line increments. The end of the selection is usually located under the place where it began |
|
| Selects all text from the beginning of the document to the cursor |
||
| Selects text from the cursor to the last non-printable character(¶) |
||
| "right/left" arrows | Highlights text in word increments |
|
| up/down arrows | Selects entire paragraphs before or behind the cursor |

Editing text
The fourth group of hotkeys in Word is for text editing. There are few combinations, and they can also be used to work with non-editable fragments. Here is their list:
| Main key | Additional key | Description |
| Copies the selected text to the clipboard |
||
| Pastes text behind the cursor from the clipboard |
||
| Cuts the selected text (deletes it, but stores the fragment in the clipboard) |
||
| Z | Cancels 1 any completed action |
|
| Returns the action canceled by the previous hotkey |
||
| Opens the Find and Replace window with the Replace and Find tabs active, respectively |
||
| Deletes text behind the cursor. |
||
| Removes text in front of the cursor |
||
| Switches the mode of inserting and replacing text. When this button is enabled, all text behind the cursor will be replaced by the newly entered text. |

Formatting
The fifth use of keyboard shortcuts in Word is formatting. The list of documented commands is shown in the table below.
| Main key | Additional key | Description |
| Opening the Font Dialog Box |
||
| Makes text bold |
||
| Adds an italic effect to selected and subsequent text | ||
| Emphasizes text | ||
| Allows you to enter subscripts (lower indices) | ||
| Places the cursor or line to the left side of the worksheet | ||
| The same, but in the center of the sheet | ||
| The same, but to the right side of the sheet | ||
| "Stretches" the contents of the line to the width of the sheet | ||
| Inserting a page break (with a new page break) | ||
| Ctrl + Shift | Allows you to enter superscripts | |
| Copying finished formatting | ||
| Paste formatting | ||
| Enter | Inserting a line break (new line break) |
Unfortunately, other formatting tools are not connected to keyboard shortcuts in Word. To continue using the keyboard for formatting, you can add your own combinations or use alternative controls enabled by the Alt or F10 keys.
Symbols
Their library in the editor is quite large. It contains many of the symbols used in documents. For example, the diameter sign. In Word, the hotkey for it and other symbols looks like Alt + X, where X is the number of the desired character, which can be found at the bottom of the list window.

The table below shows the 10 symbols with their insertion codes.
Assigning individual hotkeys
As an example of using this feature, let's add the "Insert lines below" hotkey to Word, since it is not assigned by default. To do this, you need:

In this way, you can bind any tool present in Microsoft Word to keyboard shortcuts.
We guarantee you that if you read this material and use this information in your work, using hot keys will reduce your working time significantly!
To simplify working with a computer, basic and frequently repeated actions were duplicated by the developers into keyboard shortcuts. So, working in a certain program and pressing a combination of hot keys, you will get a certain result. This could be opening a menu, copying data, and much more. Please note that there are constant shortcuts that are the same for all programs - a prime example is Ctrl+C, which means copying active data. And keyboard shortcuts that only work in a specific program.
Today we will look at the basic hotkey combinations for Microsoft Word. In our work we will use the 2010 version of the editor.
Contents:
We control the program from the keyboard
For your convenience, all combinations considered will be divided into groups.
Pay attention to how the recording should be transcribed. The writing involves the designation of a separate key - a separate letter or control button. The "+" sign indicates that these buttons must be pressed together to get the result.
As an example, consider the following entry - closing the active window Alt+F4. This means that in order to close the currently active window, you should press the Alt and F4 keys on your keyboard.
General tasks
note. In the previous article, we discussed in detail how to convert pdf to word. You can use it for your own purposes.
We'll start by looking at the Word program's hotkeys, which are responsible for general management tasks.
- To create a non-breaking space use CTRL+SHIFT+SPACEBAR
- To add a non-breaking hyphen - CTRL+HYPHEN
- If you need to put bold style - CTRL+B
- In turn, italic style is set - CTRL+I
- Underline - CTRL+U
- If you change font parameters, then reduce to the previous size - CTRL+SHIFT+<
- Accordingly, increase to the next one - CTRL+SHIFT+>
- If you need to decrease the current font by 1 value - CTRL+[
- Enlarge - CTRL+]
- To remove element formatting - CTRL+SPACEBAR
- Copying the active object - CTRL+C
- Deleting the active object - CTRL+X
- And paste it - CTRL+V
- To use paste special, press - CTRL+ALT+V
- If you need to paste only formatting - CTRL+SHIFT+V
- To undo the last action - CTRL+Z
- And here is its repetition - CTRL+Y
- To open the "Statistics" window - CTRL+SHIFT+G
Documents and web pages
note. inserted using the built-in editor.
Let's get acquainted with the functions of creating documents, viewing them and saving them. The following word hotkeys will help us with this.
- If we have already worked with some document and want to create a new one of the same type - CTRL+N
- If you need to open a document - CTRL+O
- Closing a document - CTRL+W
- If you need to split the document window - ALT+CTRL+S
- To remove the created division, press - ALT+SHIFT+C
- Save the document by pressing - CTRL+S
Find and replace in a document
note. All kinds can be downloaded from our website.
Microsoft word hotkeys will allow us to search a document using specified criteria and, if necessary, replace characters, words and sentences.
- Finding information in a document - CTRL+F
- Repeat the search using previously specified criteria - ALT+CTRL+Y
- Replacement of characters is carried out using the keys - CTRL+H
- Go to document elements - CTRL+G
- To move between the last four places where changes were made, press - ALT+CTRL+Z
- To open a list of search options, press - ALT+CTRL+HOME
- If you need to move to the place of the previous change - CTRL+PAGE UP
- And if to the next one - CTRL+PAGE DOWN
Document viewing modes
Hotkeys for the Word program can help us set up document viewing modes.
- Activating markup mode - ALT+CTRL+P
- Enabling structure mode - ALT+CTRL+O
- Draft mode - ALT+CTRL+N
We work in the "Structure" mode
This mode makes it easier to work with a document that contains a large amount of information.
- If you need to move a paragraph to a higher level - ALT+SHIFT+LEFT ARROW
- In turn, to the lower one - ALT+SHIFT+RIGHT ARROW
- Make paragraph body text - CTRL+SHIFT+N
- Move selected paragraphs up - ALT+SHIFT+UP ARROW
- Down - ALT+SHIFT+DOWN ARROW
- If you need to expand the text located under the heading - ALT+SHIFT+PLUS SIGN
- To collapse it - ALT+SHIFT+MINUS SIGN
- Expand or collapse all headings, or all text - ALT+SHIFT+A
- Show/hide character formatting - Slash (/) on the numeric keypad
- If you need to display all the text, or the first line of the main text - ALT+SHIFT+L
- Show all headings that are formatted with the "Heading 1" style - ALT+SHIFT+1
- Tab character - CTRL+TAB
Preview, Print
Once we've created a Word document and edited it, we can use the preview to get an idea of how everything will look on paper. And then print it.
- Send document for printing - CTRL+P
- Close/open preview - ALT+CTRL+I
- If viewing at a larger scale, use the arrow keys to move around the page.
- If, when zooming out, you need to move to the previous or next page - PAGE UP or PAGE DOWN
- Go to first page - CTRL+HOME
- To the last one - CTRL+END
Document review
Microsoft Word allows you to review the current document.
- To insert a note, press - ALT+CTRL+M
- Enable/disable correction recording mode - CTRL+SHIFT+E
- Close scan area - ALT+SHIFT+C
Works with footnotes and links
- To mark a table of contents item, press - ALT+SHIFT+O
- Mark the link table element - ALT+SHIFT+I
- Mark the subject index - ALT+SHIFT+X
- Add a regular footnote to the document - ALT+CTRL+F
- Insert an endnote - ALT+CTRL+D
Video for the article:
Conclusion
Use hotkeys - they will help reduce operating time.
Instructions for users - .
Allows you to create document navigation.
Why look for information on other sites if everything is collected here?


