Home media server upnp dlna http. UPnP: what is it? Home media server UPnP DLNA
I recently realized that televisions are still in the last century. If mobile gadgets and computers are becoming more convenient, faster and simpler, then the only thing that changes on TVs is the screen size and resolution. There’s no point in talking about convenience yet.
A TV without a media server on your computer or a special device is practically a useless thing, unless you like to hang out. Therefore, I have selected the 5 best media servers for a computer that will upgrade your TV and make it much more functional.
Plex
PlexPlex is the most popular and perhaps convenient option. Having launched the server on your computer, you can manage it from a browser, set up a media library, add subtitles, etc. Plex downloads all the information about the movie automatically and does it perfectly in 9 cases out of 10. The TV sees the Plex server without any problems and plays everything perfectly. The only downside to Plex and other similar programs is that the TV does not see the subtitles built into the movie, but for most this does not matter.
Plex is free, but you'll need to buy a subscription for additional features.
Plex
I used this server for a very long time on an old TV. It works quite well and unlike Plex, HMS is a whole combine, the functionality of which knows no bounds. The only drawback will be the terrible interface of the program, but since it is needed to play movies on the TV, this will not be a big problem. The program is absolutely free and is only available in the Windows version.

Initially, PS3 Media Server was distributed as an add-on to the PlayStation 3, allowing you to play movies on your TV using the console. Then the program began to live a separate life. Like previous alternatives, it supports DLNA playback and requires no fiddling with setup.

Serviio is far from the most popular media server, but it also deserves a place in our top. The application is free, but for $25 you can buy the PRO version, which allows you to access your content from any network, not just your home one, and allows you to play content from the web (this function is provided as a preview in the free version). Serviio has Android apps, but they act as a secondary control panel for the backend on the computer.
Kodi (formerly XBMC)

XBMC was created to bring video playback functionality to the Xbox. Then the project split off and now Kodi is one of the most popular media centers, supporting almost all platforms due to its open source. Kodi has apps for iOS and Android that allow you to use your smartphone as a remote control. The service relies on donations and is absolutely free.
KodiFor me, Plex is a clear favorite. What do you use?
DLNA - allows compatible devices such as a computer, TV, laptop, phone, tablet to transmit, receive or play various media content files. The function provides enormous opportunities for playing media content. A video file downloaded to a PC can be watched on the TV, and music downloaded to the phone can be listened to on the audio system. It is very comfortable. You just need to create a DLNA network.
How to create a DLNA network
There are many programs for setting up a DLNA home network, but you can simply use Windows' own tools.
Installation on windows 7:
- Go to the Start menu and select Control Panel.
The “Start” menu is located in the lower left corner of the monitor, in it you need to select “Control Panel”
- On the “All Control Panel Items” tab there is a “Home Group” item, click on it.
On the “Control Panel” tab, select “HomeGroup”, it is indicated by a red arrow
- A new window will open, in it go to the “Change additional sharing settings” tab.
The "Change advanced sharing settings" option is located on the "Home Group" tab
- Check the connections of all positions.
All positions on the “Change additional sharing settings” tab must be in the active position
- Return to the “Home Group” window; at the bottom of it there is an item “Create a home group”; click on it.
The Create HomeGroup button is at the bottom of the HomeGroup window.
- In the next window, enter the name you came up with for the DLNA server and click OK.
In the Streaming Media Options window, enter a server name and click OK.
- Write down the password that appears in the window, you can print it (it will be needed when adding other devices to the home group), click “Done”.
The password that appears in the window must be written down or printed
- In the HomeGroup window, click on Select media streaming options.
In the HomeGroup window, select Select media streaming options.
- A media server window will appear, in which you need to mark the types of content for which public access will be opened.
In the media server window, you must select the types of content that will be available to the homegroup
- Click "Next".
The DLNA Windows 7 server is connected. A “Network” icon will appear on the “Computer” tab; by clicking on it, you can see all connected devices. Having selected the desired device, click on it. All available media content files will open in the media player window, they can be viewed and transferred to other devices.
On Windows 10 everything is simpler; there is no need to create a “Home Group”.
Installation on windows 10:
- In the Control Panel Search window, type Streaming media options and open it.
In the search box, type "Media streaming options"
- In the open tab, click “Enable media streaming.”
In the Streaming Media Options window, enable media streaming
- On the next tab, in the “Name of multimedia library” section, write the name of your DLNA server, click OK.
In the “Enable media streaming” window you need to enter the name of the future multimedia library
Write down the password you created and click the “Done” button.
After making the settings, you can access, view and play media content files contained in the folders on your computer from devices on your home network.
Equipment for building a home network with DLNA
To create a DLNA network, you will need a computer or laptop with a media server configured on it. Using a wired or wireless Wi-Fi connection, it connects to a router, which, in turn, distributes a signal to other devices.
DLNA network turns your home into a media center
Such devices can be: TVs, laptops, tablets, phones, stereo systems. If you don’t have a router, you can configure signal distribution directly from your computer, but in this case you will need a Wi-Fi adapter for your computer. The principle of building a DLNA home network is similar to the Internet.
In the end you will need:
- computer or laptop;
- Wi-Fi router or adapter;
- at least one other device that supports DLNA.
It is better to connect the TV to the computer via a cable connection. Wireless communication is convenient and modern, but when viewing powerful media content files, streaming data may be lost and, as a result, the TV may malfunction.
Connecting a DLNA-enabled TV to a wi-fi router
You can connect a TV to your DLNA home network; this step will make it possible to fully use the installed server. First of all, you need to connect the TV to your Wi-Fi router. You can do this in one of two ways.
Simply connect the TV and router with an Internet cable with LAN connectors:

The location of the LAN sockets on different TV models is different, but they are labeled everywhere and cannot be confused with outputs for other purposes.
You can connect your TV to your router via a wireless wi-fi network. New TV models, as a rule, already have a built-in adapter. If the model is older, you will have to use an external wi-fi adapter. It needs to be inserted into the USB connector of the TV, and the system itself will detect it and put it into operation.
The Wi-Fi adapter must be connected to the TV via a USB port
- Pick up the TV remote control and press the Menu key.
- In the menu that opens, click “Network”, then “Network Settings” and select “Wireless (General)”.
- In the list that opens, select yours and click “Next”.
- In the window that opens, enter the password for your home network.
- If everything is done correctly, the connection will be established.
Adding other DLNA-compatible devices to your home network
By setting up a DLNA server on your PC, you can connect other devices to your wi-fi router. Connecting to your home network, possibly via a wireless connection or via cable.
Laptop or other PC
To add a laptop to your home network, you need to configure its connection to the router. In the case of a wired connection, it is enough to connect the LAN connectors of it and the router. When connecting wirelessly, you need to pay attention to the bottom right corner of the monitor. There you will find an icon in the form of gray sticks of different heights.
The icon on the panel indicates that the laptop is currently disconnected from the Wi-Fi network
By clicking on it, you will go to the network connection settings menu; all networks with connection capabilities are displayed here. Select the desired network, click the mouse.
On the “Sharing Center” tab, connect the desired wi-fi network
If the network does not have a password, the connection will occur automatically. Otherwise, a window will pop up in which you must enter a password.
Enter your home network password and click “Done.”
Video: how to connect a laptop to a wi-fi network
Before you can transfer media content to other devices, you need to configure the media server.
To add a laptop to your home network you need:

Media player
To integrate a media player into your home network, simply connect it to your router. The player automatically connects found DLNA resources. It is enough to open shared access to folders for homegroup devices on the device acting as a media server.
Setting up DLNA on your TV
TVs connected to the home network automatically find the server and folders with content allowed for viewing. On LG TVs, folders of available media servers appear alongside pre-installed programs and features.
There are many alternative programs for creating a media server. The LG TV comes with a disk with a program called Smart Share, which can also be downloaded on the Internet. This program allows you to create a media server without using Windows tools. Just download it to your computer, click on its launch shortcut and wait for the installation to complete.
A folder with the Smart Share logo will appear in the TV's programs and connections panel. On your computer, in the program settings window, you can assign folders for playing content. You can view photos and videos located in these folders on your TV.
Smart Share is a good program for those who are too lazy to delve into the Windows settings. It loads the system quite heavily. Even with the TV turned off, on a weak computer, its presence can be felt. For some reason, it does not always update the folder with added files. Sometimes you have to do this manually. It is better to set up a normal server using Windows.
There is a universal program that allows you to connect any TV that supports DLNA to a computer. It's called Home Media Server.
Video: instructions for installing and configuring the Home Media Server program
Using DLNA on Android OS
To use your Android device, you first need to connect it to your router:
- To do this, go into the settings and switch the wi-fi connection slider to the “on” position.
When the wi-fi function is turned on, the slider is in the “on” position
- Next you need to go to the wi-fi settings.
- You will see a list of currently available networks.
In the Wi-Fi settings of your Android OS device, select the desired network
- Select the one you need and enter the network password.
- After some time the connection will occur.
In the wi-fi settings you can see information about the network to which the Android device is connected
Devices running Android OS have great functionality; with their help, you can not only view files with media content, but also allow you to transfer them to other devices. On the Play Market you can download a program that will significantly expand the capabilities of your smartphone or tablet. It's called DLNA server.
Download the program and install it on your phone, then follow these steps:
- Go to the program and click “Add > DLNA Server”, this way you create a DLNA server.
The program will help you create a server on an Android device
- On the next tab, you set the server name in the Server Name item; the port item remains the default.
In the Server Name item you need to specify a name for the server
- Go to the Roots tab, select and designate a folder with content intended for viewing.
By going to the TV menu you will find a new media server created on an Android device
Video slows down and other problems
Sometimes annoying interference and malfunctions interfere with watching your favorite movies and prevent you from appreciating all the benefits provided by using the DLNA network. See the table provided for possible problems and methods for solving them.
Table: errors that occur when playing media content and methods for eliminating them
| № | Errors and malfunctions. | Causes of errors and malfunctions. | Possible Solution. |
| 1 | Devices cannot discover the network. | The wi-fi router may have malfunctioned. | Try rebooting your wi-fi router. |
| 2 | Low data transfer speed on a wired connection. | The cable is damaged or poorly secured in the LAN connectors. | Check the integrity of the cable and the tightness of its fastening in the connectors. |
| 3 | The media server is unavailable. | Errors in the operation of the media server. | Reboot the media server. |
| 4 | Media device is not available. | Errors in the operation of the media device. | Reboot your media device. |
| 5 | The video is slow. | The data transfer speed is insufficient to watch the movie. | Temporarily stop watching the movie to download enough data to watch it. |
| 6 | The system stops watching movies and indicates the reason - insufficient disk space. | There is not enough space to store temporary files. | Choose lower quality videos with a smaller frame size. |
| 7 | A message appears - the movie format is not supported by the media device. | The media device does not support this movie format. | Find a movie in a supported format. |
Often the reason why the TV slows down when watching movies is easily eliminated small details. The main reason lies in the unstable operation of the media server. For normal operation, periodically optimize and clean the system. Don't overload your computer unnecessary programs.
Anyone can set up DLNA-enabled devices at home. It's not difficult at all. A TV connected to your home network gets a second wind. After spending half an hour connecting to the DLNA network, you can view any content from your devices on the big screen. Movies, photos, videos shot on your phone, now you can watch all this just by pressing a couple of buttons.
In this article, I want to once again talk about how to create on a computer (laptop, netbook) DLNA server. This will allow you to watch movies and photos on your TV, as well as listen to music that is on your computer.
You just need to connect the TV to your computer via a network cable, or simply to one network, start a DLNA server on your computer and start watching a movie or photo.
But, as it turned out, there are many problems with the Smart Share application. Either it does not start, then it produces various errors, or it closes on its own. You can read about this in the comments that visitors left on the article, the link to which is above.
There is a very good and absolutely free program “Home media server (UPnP, DLNA, HTTP)”, which is an excellent analogue of Smart Share from LG, or for example AllShare from Samsung.
“Home Media Server (UPnP, DLNA, HTTP)” is a universal program with which you can launch a DLNA server and connect to it from almost any TV that supports DLNA technology (and if your TV has Wi-Fi or a network connector, then it most likely supports this technology). In principle, a DLNA client can be not only a TV, but for example a game console.
This instruction is suitable for TVs from different manufacturers: LG, Samsung, Toshiba, Sony, etc. Compared to branded applications such as Smart Share, “Home Media Server (UPnP, DLNA, HTTP)” has a large number of settings.
We will not delve into all the nuances, but will only consider how to open shared access to the necessary folders or drives. How to create a server and how to start watching a movie using DLNA technology on your TV.
Connecting a TV to use DLNA technology
Before we start setting up the program, we need to connect the TV to a computer or laptop. If you already have everything connected, for example through a router, then you can move on to the next step.
We need to connect the laptop and TV to the network. If you have a router installed at home, then just connect your computer to this router, via cable or via Wi-Fi, it doesn’t matter. And you need to connect the TV to the same router. You can connect your TV the same way, or via Wi-Fi (see connection instructions ) .
Our task is to ensure that the TV and computer (in my case laptop), were connected to the same router. I have a TV connected to my router via Wi-Fi LG 32LN575U and laptop Asus K56CM. This instruction will be based on their example.
What to do if you don't have a router?
In this case, you can connect the computer to the TV via a network cable directly. Just take the required length of network cable (it can be crimped at almost any computer store), and connect the TV to the computer.
It looks something like this:

Connecting this way should work fine. But my TV refused to see the server created on the laptop. But, in the “Home Media Server (UPnP, DLNA, HTTP)” program, the TV was displayed and I could start viewing photos from the laptop itself, and the photo appeared on the TV.
She also has an idea on how to connect them without a cable and without a router. But I’m not sure what will work and this method is only suitable for TVs that have the ability to connect to Wi-Fi.
You can try to create a computer-to-computer connection on a laptop, which I wrote about in the article ““. Then, connect the TV to the created access point and try to access files on the computer.
I think we have sorted out the connection. Let's move on to setting up the server.
Setting up the “Home Media Server (UPnP, DLNA, HTTP)” program
First, we need to download and install the program itself. I recommend downloading from the official website: . There is always a new version and it is safer.

Save the archive to your computer. To install, simply run the setup.exe file, which is located in the archive. I will not describe the entire installation process, it is simple. Follow the instructions.
After installation, launch the program with a shortcut on the desktop.
Let's go straight to the program settings. We won't do anything special there. We will simply indicate local drives, flash drives, external hard drives, or folders whose contents we want to see on the TV. For example, you can open only a few folders with movies, photos and music.

A settings window will open. In the first category, Media resources, we need to indicate which drives or folders we want to see on the TV. By default, standard folders with photos, videos and music are open there.
The program is trying to sort everything. And in order not to get confused in all these folders on the TV, I advise you to open shared access to local drives. By default, if I'm not mistaken, access to them is already open. Check if the checkbox next to Local disks.

If installed, this means that you can open any file on your TV that is stored on these local drives (drives C, D, E, etc.).
You can also specify individual folders, or, for example, an external hard drive. To do this, click on the button on the right Add, and select the desired folder, flash drive, or hard drive in Explorer.

We can see which folders and drives we have opened access to. We can delete selected folders. These are the basic settings, if you look, there are a lot of settings there, I won’t go through them all. To save, click on the button Ok, and agree to scan media resources.

We wait while the program scans the folders and disk. Next, you can start the DLNA server itself. To do this, simply click on the “ Launch“.

We see a message stating that the server is running.
Now, just turn on the TV. If everything is connected correctly, it should appear in the “Home Media Server (UPnP, DLNA, HTTP)” program. To do this, go to the tab Playback devices (DMR), and on the right, click the button Update.

If our TV appears, then everything is fine. You can try to start viewing photos directly from the program.
If the TV does not appear in the program, and the server we created is also not visible on the TV, then first of all, check the connection. Is the TV connected to the network and is the laptop connected.
Then, completely disable antiviruses and firewalls. They can block access to the server.
To do this, in the main program window (above), select one of the tabs: movies, music, or photos.
In the left window, media content will appear that is located in those folders and drives to which we have opened access. Right-click on a photo, for example, and select “Play on“, then select our TV.

The photo should immediately appear on the TV screen.

In the same way, you can start playing video and music. This means that we can start playback on the TV screen from the “Home Media Server (UPnP, DLNA, HTTP)” program.
But this is not always convenient. It is much better to go through the TV and open the necessary files. To do this, leave the server running. You can hide the “Home Media Server (UPnP, DLNA, HTTP)” program. Click on the red cross (close the program), and it will hide in the notification panel.

At the same time, the server will work and you will be able to access your computer from the TV.
We start viewing files via DLNA from the TV
This means the server is running on the computer, files are open for viewing.
Now, on the TV, we need to go into the program that is responsible for working with DLNA technology. For example, in LG, this is Smart Share. On other TVs, this application may be called differently.
For example, to launch Smart Share in LG, go to Smart TV (blue button on the remote control) and select Smart Share. If your TV does not have Smart TV, but does have DLNA, the process may be different.


Open the folder My computer, and we see our local drives there, and other folders to which we have opened access.

Afterword
“Home Media Server (UPnP, DLNA, HTTP)” is actually a very cool program, with a lot of settings. We only considered opening file sharing and starting the server. When I started watching a movie through the Smart Share program, the laptop went into sleep mode and playback was interrupted. “Home Media Server (UPnP, DLNA, HTTP)” has a lock that prevents the computer from going to sleep when it is being used as a server.
I hope everything worked out for you and you are now watching your favorite movies on the big screen TV using DLNA technology.
If something doesn’t work out, write in the comments, we’ll try to figure it out.
Also on the site:
We configure the DLNA server using the “Home Media Server (UPnP, DLNA, HTTP)” program. View files from your computer on your TV updated: February 7, 2018 by: admin
In general, the Home Media Server program is conceived by the developers as a home media server. But most often HMS is used as a DLNA server. It is ideal for this purpose and has many useful settings, often functioning even better than official programs such as LG SmartShare PC SW and the standard method of setting up DLNA via Windows Media Player. The idea is to allow the TV to play movies, music, pictures and other content directly from your laptop or computer. At the same time, they must be connected to the same home network, for the organization of which a router or router is usually used. After that, all that remains is to configure the program, and it’s done. You can download it on the official website http://www.homemediaserver.ru by clicking on the “Download” button.
Installing Media Server is as easy as shelling pears: unpack the archive and run “setup.exe”, where we agree to all the conditions and click the “Next” button everywhere. After successful installation and launch of HMS, the main program window will appear. When you launch it for the first time, select your TV from the list of devices (for example, LG TV). You can add media resources to which your TV will have access in the next window or in the settings later. In the program data backup and recovery window, click “Run” and “Close”.
HMS as DLNA server
We immediately go to the program settings. Here we have to configure our home media server like DLNA. To do this, in the “Media Resources” category in the very first tab “Directory List”, using the “Add” button, indicate the paths to the folders on our computer where the media files that you would like to see on an LG TV or other are located. After adding all the folders, click “Scan”. Although we will set up auto-scanning of new media resources, new elements still sometimes do not appear automatically, and you need to scan using this button manually.
On the “Scanning” tab, it is important to enable automatic scanning of directories when they change and start the program, so that new media files are immediately displayed on the TV.
In order for Home Media Server to start when the computer boots, in the “Advanced” category you need to check the boxes “Start the program when you start a Windows session” and “Install the Windows Home Media Server service...”. Setting up HMS for the DLNA server is complete, click OK.
Next, select the “PC Connection” tab and click the “Next” button 3 times. Please note that in step 3 your home network is selected (wired or wireless, depending on how you connect the TV), otherwise select it.
In step 4 you should see your PC. If it's not there, restart the server, this usually helps. Next, select the device and go to the “Connected devices” item.
View Media
After the first connection, our device will be displayed in the last item of LG SmartShare – “Connected devices”. If it is not there, restart the server on your PC. For example, to watch movies you need to select the “Movies” folder, then “Media resource directories”.
Here you will see a list of folders added in HMS settings. Go to any folder and launch the movie. Sometimes the TV may write that “The file type is not supported.” Don’t despair, this is a glitch, try to run it again and everything will work out 2-3 times.
Features of HMS
The advantages of a home media server from Serviio are as follows:
- on the TV you can see a clear PC folder structure;
- the ability to start playing media files on TV from the program itself on a PC. To do this, you need to select a file from the list and click on the green Play button, which is present if the TV is turned on;
- relative stability of operation (after PC SW DLNA from LG it’s just a fairy tale);
- a large number of settings.

Flaws:
- some confusion for beginners;
- Sometimes automatic scanning of new files does not work;
- Periodically you have to restart the server for the device to appear on TV.
Despite these shortcomings, HMS is ideal as a home media server, including DLNA. Details on setting up the Home DLNA server are in the following video.
Other options
The capabilities of the Home Media server reviewed do not end with DLNA. HMS can provide access to computer media resources using UPnP (Universal Plug and Play) technology and the HTTP protocol. This is more relevant for smartphones and tablets.
But this server can do a lot more for DLNA. For example, you can give access not only to computer resources, but also to streams of Internet radio and IPTV television. It is also possible to broadcast so-called podcasts from various online cinemas, such as hdserials.ru, hdkinoklub.ru and hundreds of others. There are also possibilities for transcoding media files of a format that is not supported on TV. How do you like this? All this will be discussed in the following articles, subscribe to our newsletter, as well as VKontakte and Twitter.
In the modern world, it is difficult to imagine our life without the use of high technology. So, probably, many have heard about such a thing as UPnP. We’ll try to figure out what UPnP and DLNA support are. Plus, there will be some basic tips for setting up equipment, since this is not always done completely automatically.
UPnP. What is UPnP?
From the point of view of modern computer, mobile and media systems, UPnP represents the universal connection of multiple devices when combined into one system. This is the so-called Universal Plug&Play standard. In other words, this technology can be called universal device connection with its automatic initialization.
In fact, it is this approach that allows you to create a single home UPnP server based on an existing one. In this case, information stored on one of the connected devices will be available on any other. Most often, computers, laptops, mobile devices, video or music players act as a source, and media content is played on a TV. But! In most cases, such devices should support the DLNA standard.
What is DLNA?
DLNA is a universal set of standards used when connecting equipment to transmit media data. A regular home local network is used as a data transmission medium based on the automatic assignment of IP addresses to connected devices.

In this case, the external user address does not change. IP is assigned exclusively within one local network. The main component that uses DLNA (UPnP media server) is the router, which is responsible for automating the assignment of appropriate IP addresses to devices. Most often this is a (A)DSL modem or router, although gradually obsolete connections using
Device connection options
Let's start with the fact that in this case the main step is to create a connection between the router and the TV. Today you can find three main options:
- connection using cables (Ethernet);
- connection using an internal or external Wi-Fi adapter;
- connection via the electrical network without any use of cables at all.
However, here you need to clearly understand that automatically combining devices into a single whole will not get by. You need to create a virtual UPnP DLNA server (if one already exists, say, in a TV like Smart TV, that’s generally great). The corresponding software is responsible for this, which will be discussed a little later.
Benefits of a Home Media Server
If we consider the list of basic capabilities using UPnP (DLNA) transceiver technologies, they are quite diverse, although they are used only for working with media content.
For example, when creating a home media server, you can easily view photos and videos on your computer or laptop, smartphone or tablet on a large TV screen. But the matter is not limited to this.

Few untrained users know that with the help of such technologies it is possible to broadcast online television or watch videos on the same YouTube hosting not on a computer (if you have the appropriate software or a regular Internet browser), but on a television panel. And this, in turn, makes it a universal tool for watching programs, clips or films, listening to music, etc.
Now a few words about the main points regarding setting up a home media server. Understanding UPnP technologies alone is not enough here. What is UPnP, we have already figured out a little. Let's see how such knowledge can be applied in practice.

First, you will initially need to enable the use of these protocols on your router and on your TV (or, if you have one, a cable or satellite TV set-top box). On a router, as a rule, such settings are enabled by default, but to be completely sure, you should go to the appropriate section and make sure that the UPnP parameter is in the Enable state.

But that is not all. In the OS, if this service is not enabled, it also needs to be activated. To do this, you need to go to the Programs and Features section in the Control Panel (in older systems, the Add/Remove Programs menu), where you can view the installed and used Windows components.

In network services, you need to enable the discovery (management) client service and also enable UPnP. What is a PNP client in this case? A universal bridge that can automatically recognize any media devices, even without installing the appropriate drivers. To make it clearer, in a local wireless network when connecting a smartphone or any other mobile gadget, they are simply not needed.
Programs used
At this stage, let's move directly to the software that allows you to create, use and manage a home media server. Today you can find quite a lot of such packages. But they may have completely different capabilities.

For example, if you install a server based on the Samsung All Share application, you can only select music, videos or photos stored in the devices' shared folders on your TV. There is no talk of any broadcasting of TV programs from a computer here.
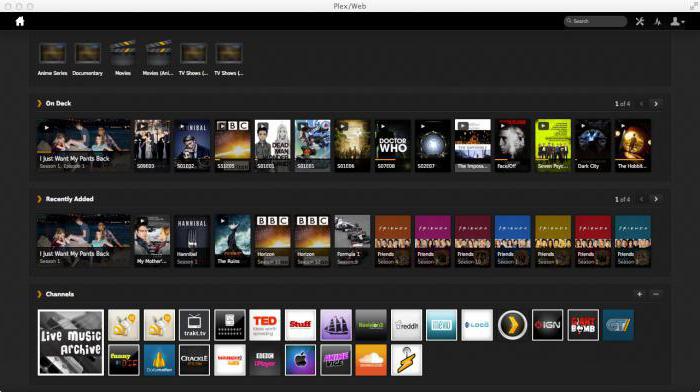
It is much more convenient to install a more serious package like Plex Media Server, which has such an impressive list of features that few programs can compare with it. In addition, the software itself is released in Russian and is distributed completely free of charge.
As for mobile systems, such as Android, for such devices it is appropriate to use a small applet called MediaHouse or Bubble UPnP. Both applications can be easily found in the Play Market service and installed on your device absolutely free. The advantage of such programs is that when installing the appropriate computer client, DLNA settings are not required at all. It is enough that the smartphone, tablet and computer (laptop) are connected to the same private virtual network. After launching the application from the computer terminal, a list of all available devices will automatically be displayed. To be sure, in the computer version you can “expand” the necessary folders (create shared access). That's all.
Conclusion
I would like to hope that this brief information will give many novice users an idea of UPnP/DLNA technologies. In general, even when setting up a home media server, there shouldn’t be any particular difficulties, except perhaps enabling UPnP support on the router, TV and in the operating system itself. But, as practice shows, on all modern devices and in the latest versions of Windows, all these services are enabled by default. The only thing left to the user is to solve the problem by choosing the software that best suits his requirements.


